Export-Webex-Teams-users
Post in Webex Teams space(s) the user list to help Admins/IT track user onboarding
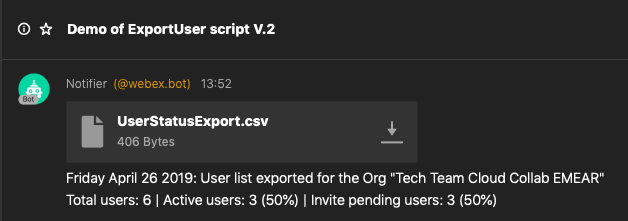
This script allows the admin(s) of a Webex Teams Org to export the list of users belonging to the org with the 'Status' information and to have the report automatically posted in one or more Webex Teams spaces via a BOT.
The 'Status' property of users, as shown in Control Hub, has two values (as shown in the example):
- Active: the user has logged into Webex Teams at least once.
- Invite Pending: the user hasn't yet signed into Webex Teams.

(Example from Control Hub)
The script provides an easy way to collect the info about either all the users or just the active ones or the pending ones by having a report collected and automatically posted in Webex Teams.
The report is provided in the form of a .CSV file with the following fields:
- First name
- Last name
- Display name
- Invite pending (status): TRUE/FALSE
Requirements
- WebexTeamsSDK - available here: https://github.com/CiscoDevNet/webexteamssdk
- Python 3 - tested with Python 3.7.3 on MacOS 10.14.4
Files
- ListUsers_v2.0.py - the script
How to use
After having installed the WebexTeamsSDK library you're ready to execute the script with Python3 in a Terminal window:
- $python3 ListUsers_v2.0.py
The settings for the script are managed via a configuration file (ListUsers_config.ini) that gets created automatically at the very first execution of the script. Customize the .ini file and re-run the script.
The configuration file requires the following settings:
-
- Org ID
The ID of the Webex Teams Org under consideration. The ID can be obtained from https://developer.webex.com/. After login run the List Room API (https://developer.webex.com/docs/api/v1/rooms/list-rooms). In the response take the "id" field.
-
- Admin Access Token
The access token of the admin account for the Webex Teams Org. The token can as well be obtained from the developer portal, after login, clicking on the bearer in the header of any API call. Note: for security reasons the access token expires after 12 hours from login so please make sure you get a fresh token for the configuration file.
-
- Search mode
The script allows to export all the users (option A, default), the active users only (option C) or pending users only (option P).
-
- Post to Teams
This setting [yes/no] control how the export file is returned. Selecting "yes" the .CSV file is posted in all the spaces where a BOT (defined in the next setting) has been added into. The .CSV file is also stored in the local folder where the script is located.
If "no" is selected (default) the export file gets saved on the computer's desktop.
-
- BOT access token
The token associated to the Webex Teams BOT that will be used to post the message in the spaces where the BOT has been invited to.
The BOT must be created from this page: https://developer.webex.com/my-apps/new. Two parameters should be noted: the username (name@webex.bot) and the access token. Given the security of the BOT framework, the access token does not expire quickly so can be added into the .ini file just once. However, remember to add the BOT to all the spaces where you want the report to get posted. With this done, the script will automatically retrieve the list of spaces where the BOT belongs to and will post the report together with date & summary in all of them.
After having properly set the .ini file according to what just described you can re-run the script. In case of invalid or missing parameters an error message will be generated in the terminal.
Notes
The Webex APIs implement rate-limiting; for more than 5k users the script may hit the rate-limiting that however is fully managed by the WebexTeamsSdk library; it can take about 2 mins for the script to complete, just wait! :-)
Code Exchange Community
Get help, share code, and collaborate with other developers in the Code Exchange community.View CommunityCisco provides Code Exchange for convenience and informational purposes only, with no support of any kind. This page contains information and links from third-party websites that are governed by their own separate terms. Reference to a project or contributor on this page does not imply any affiliation with or endorsement by Cisco.