meraki-l3-fw-rules-compliance
Meraki Template L3 Firewall Compliance
The purpose of this project is to showcase how you can use GitLab CI to ensure your Meraki Template Firewall rules are always compliant with your baseline template. It will be particuarly useful for organizations who use multiple MX Hub concentrators with different templates. This saves network administrators the headache of configuration drift and an inconsistent security policy as it will run on schedule and update.
After completion of the below, you should have a scheduled pipeline which will run every hour to update your destined templates from your source template, ensuring your firewall rules are always compliant with the source template.
Deployment guide
Requirements
1. Installed and working GitLab instance (Either Self Hosted/SaaS)
2. CI Runner setup with Python 3.8+ installed and appropriate tags and connected to GitLab
3. Meraki Organization with Read/Write access.
4. Meraki Templates configured within Organization
5. Linux workstation with Git installed.
Configuration and deployment
1. Login to your GitLab instance and create a new blank project.
- Ensure that you uncheck the 'Initialize repository with a README' box.
2. Clone the repository to your local workstation and open the folder into which the repository was cloned.
git clone https://github.com/VMB-Devnet/meraki-l3-fw-rules-compliance.git
cd meraki-l3-fw-rules-compliance
3. Add new git remote, pointing to your new blank project. You can find the project URL from the following:
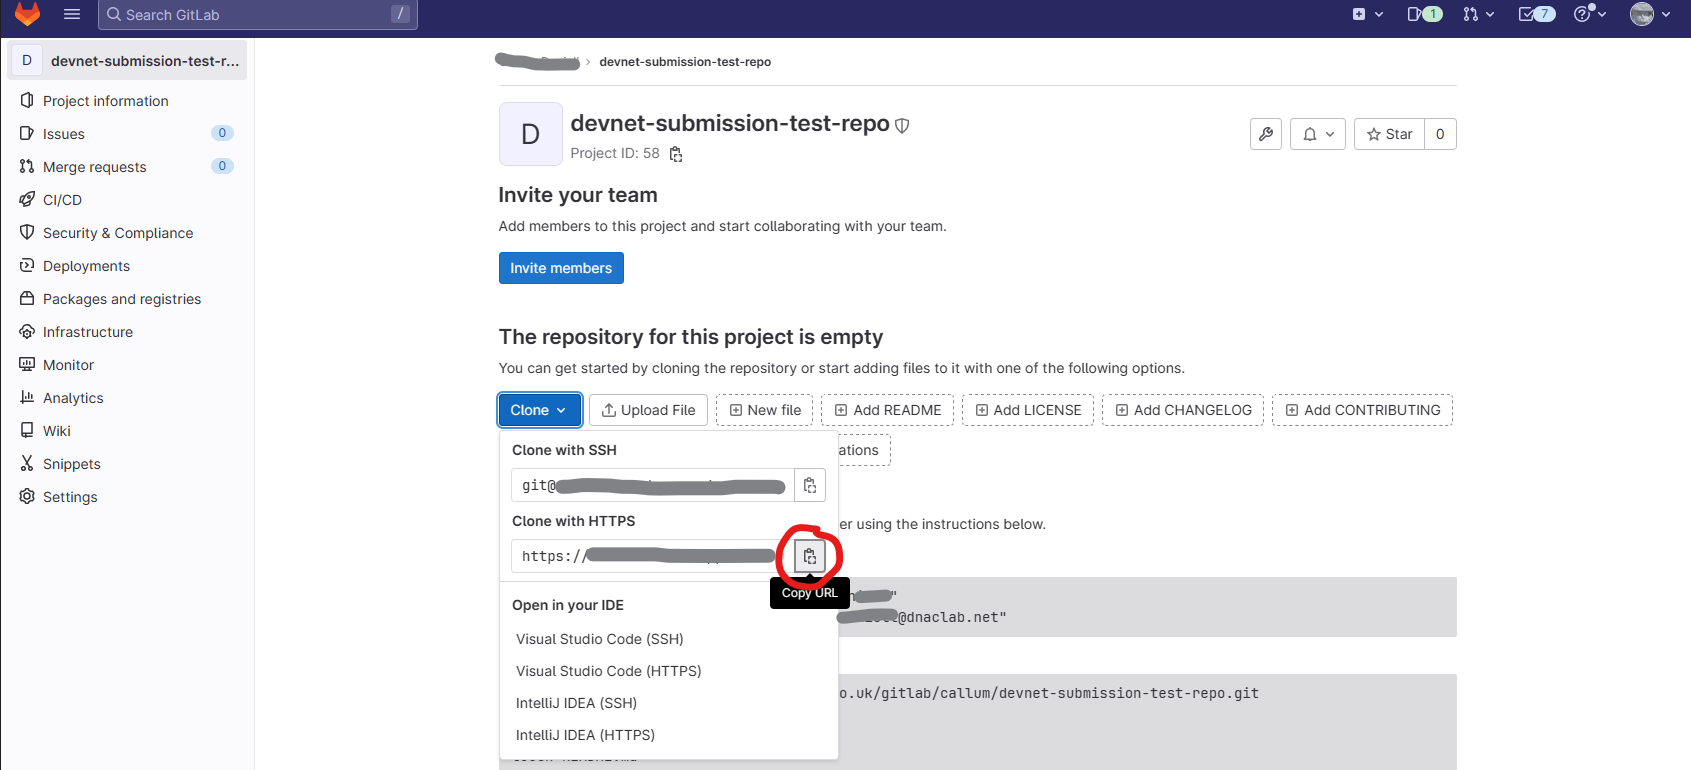
git remote remove origin
git remote add origin <gitlab-project-url>
4. Push to new blank project repository. You will be prompted to authenticate.
git push origin main
- It should look something like the following:
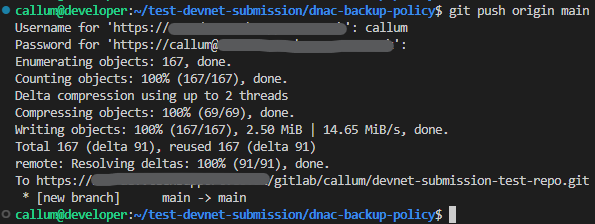
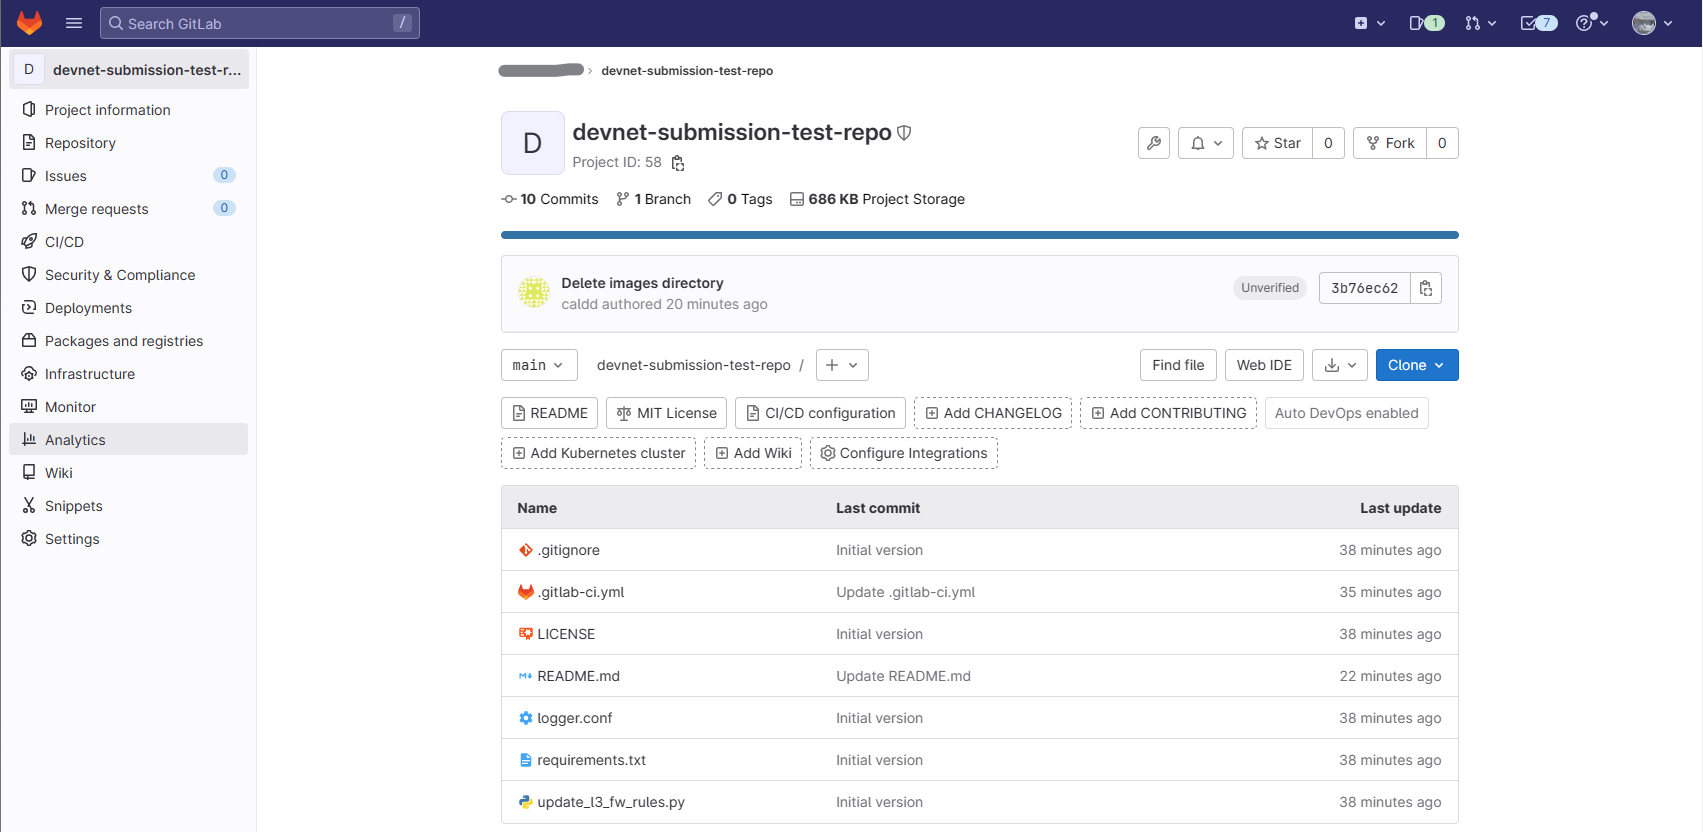
5. Confirm that the files have been pushed to the repository. It should look like the following:
6. Login to Meraki Dashboard and create an API Key.
- Ensure API Key Access is enabled for the Organization
- Organization > Configure > Settings
- Dashboard API access > Enable access to the Cisco Meraki Dashboard API.
- Save Changes
- Generate API Key

- API access > Generate new API Key
- Store the key safely.
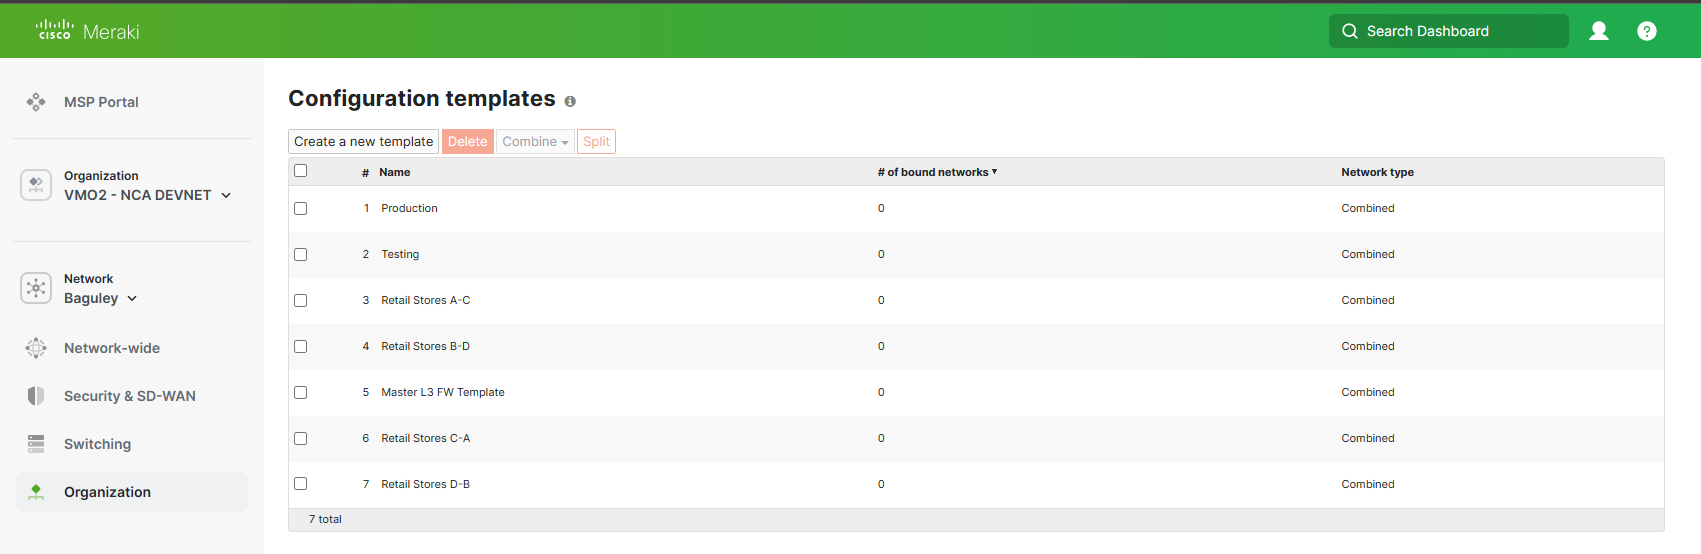
7. Copy the names of the baseline FW Template & Templates you wish to become compliant. These can be found under Organization > Configure > Configuration Templates
8. Setup GitLab CI Variables:
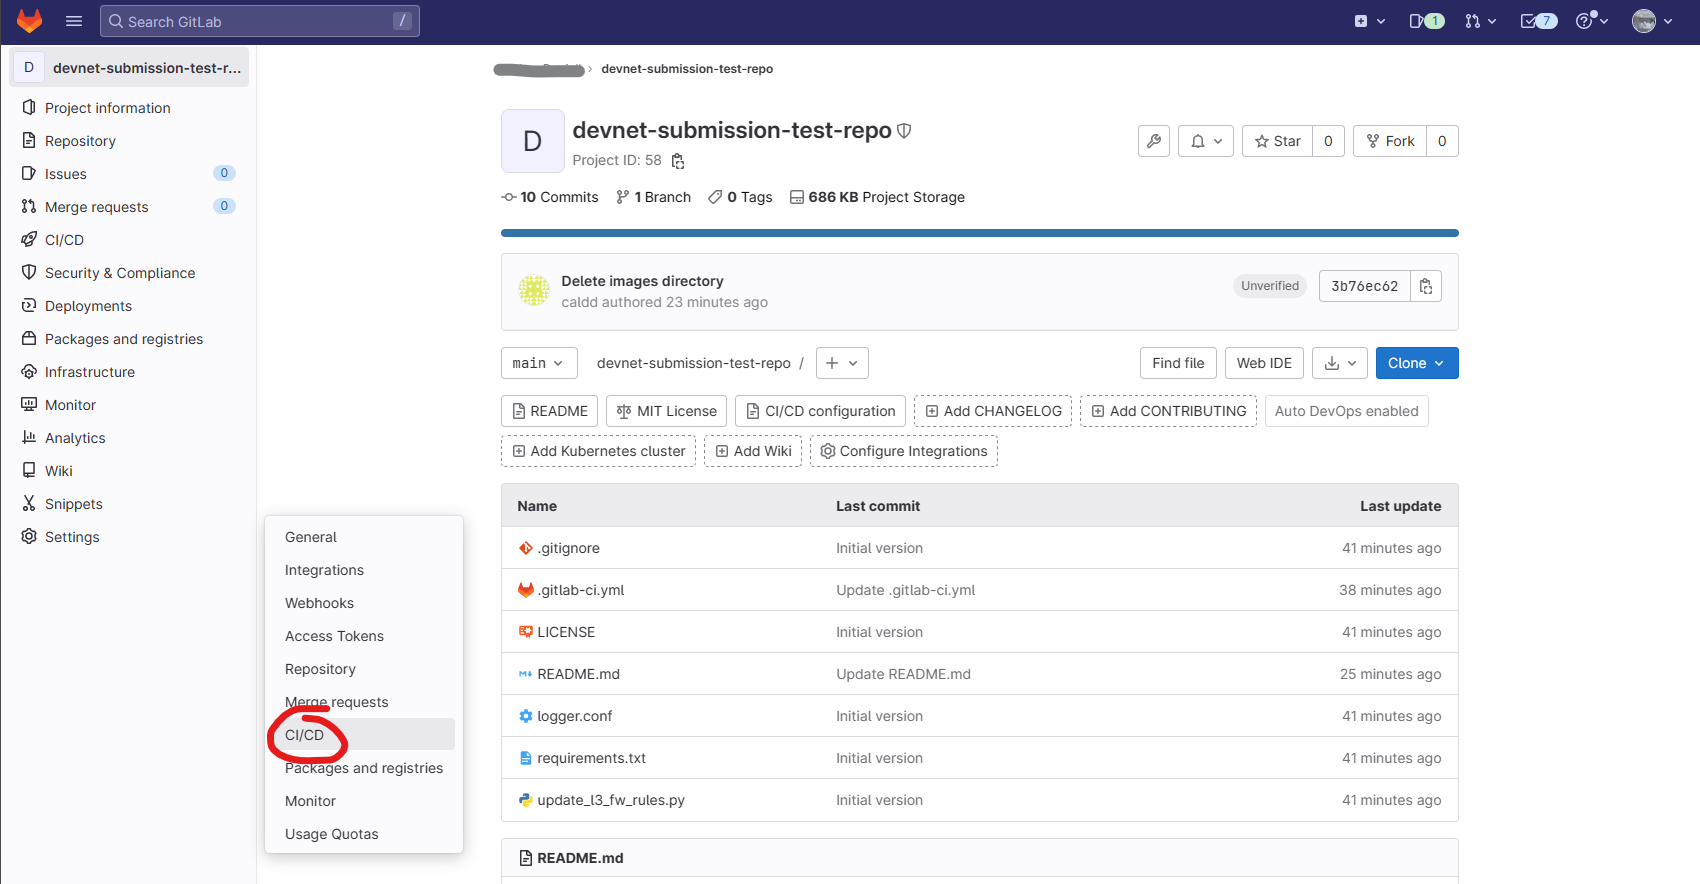
- Browse to the new repository
- Navigate to Settings > CI/CD
- Expand the Variables section
- Here we will need to add 4 variables, these are:
| VARIABLE | DESCRIPTION |
|---|---|
| MERAKI_ORG_NAME | Meraki Organization Name you have configured within the Dashboard |
| MERAKI_API_KEY | Meraki API Key generated earlier in step 6 |
| COMPLIANT_TEMPLATE | Name of the baseline template to configure from. This will become your source configuration template. |
| TEMPLATE_TO_CONFIGURE | Comma separated string of templates to configure |
- An example is shown below:

9. Update the .gitlab-ci file with your runners tag:
- You can find the available runners in your repository under CI/CD > Runners. Tags are the words highlighted in blue.
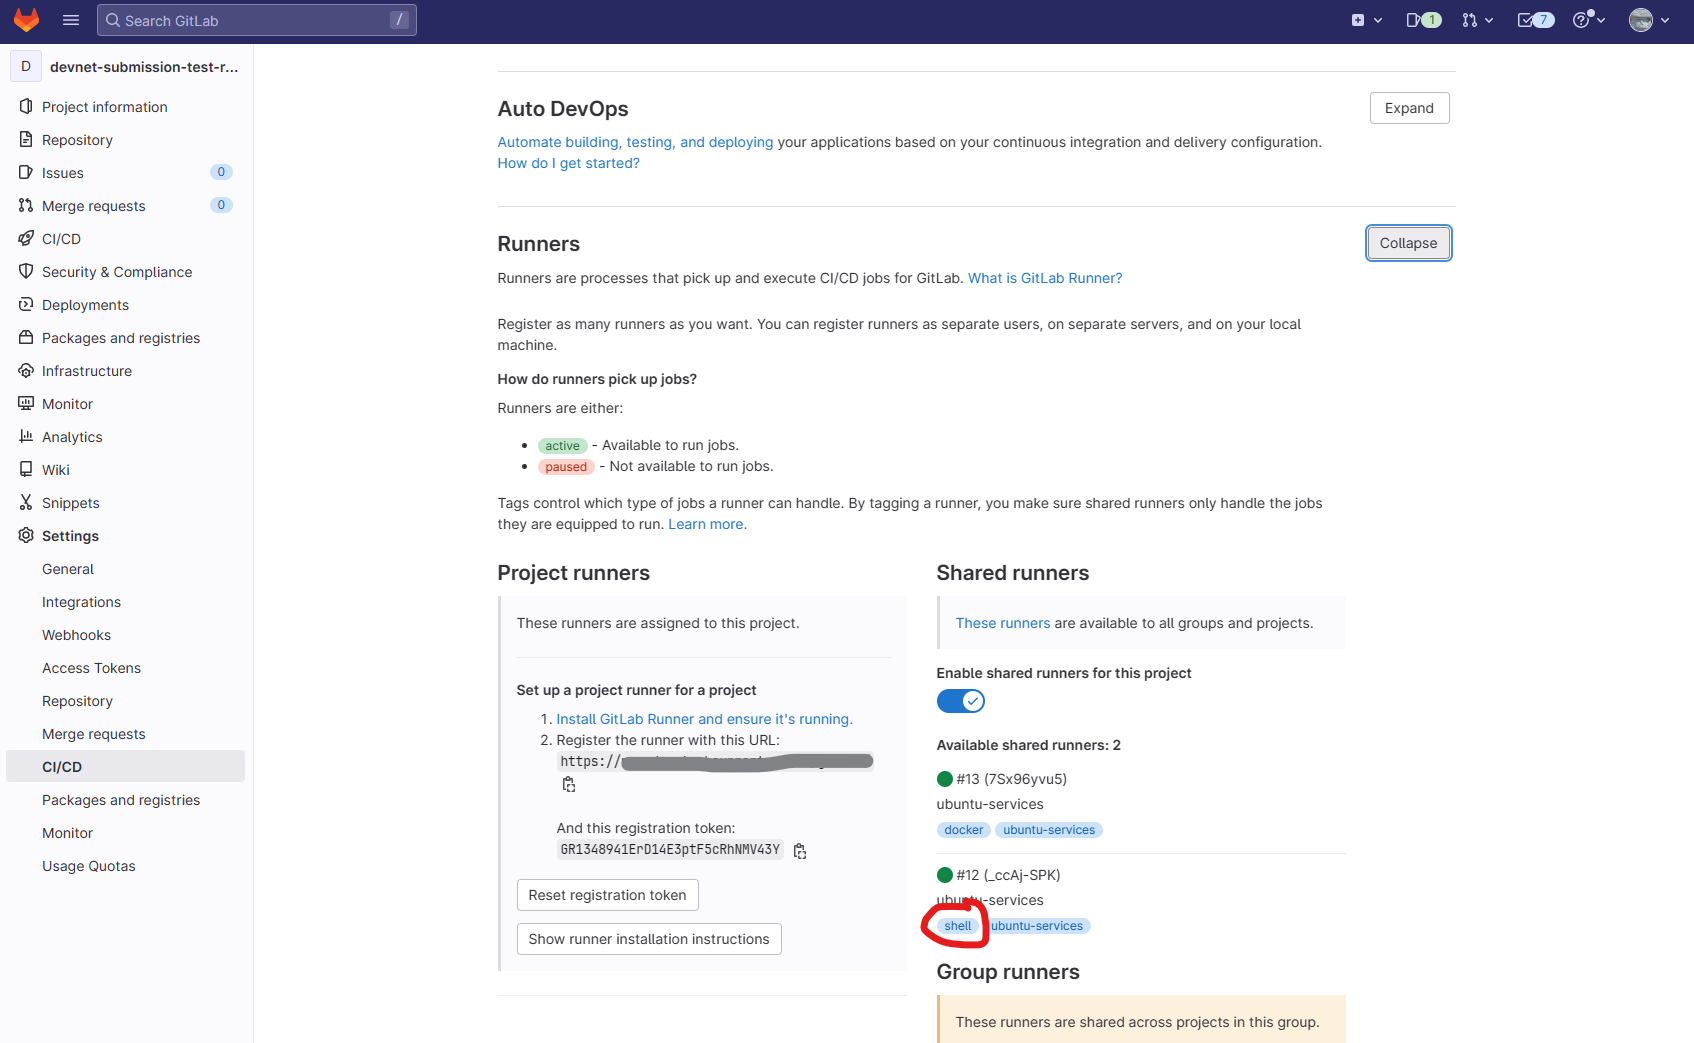
- Edit the 'tags' under the 'update_rules' section of the yaml file and replace 'shell' with your runners tag.
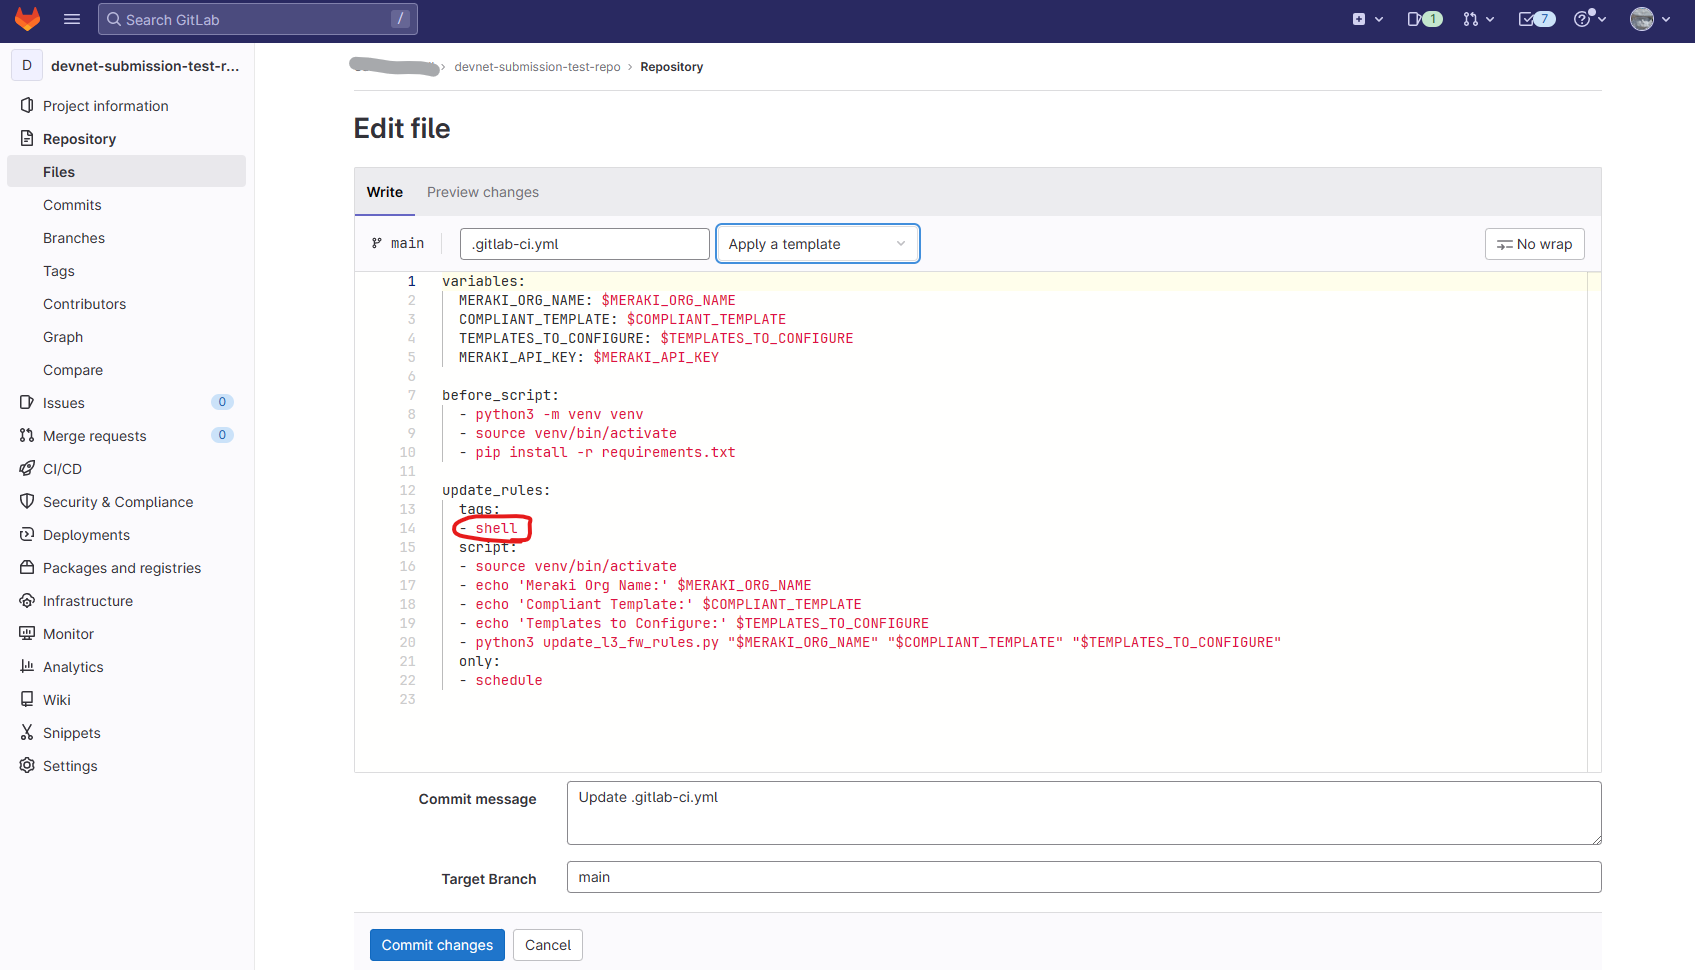
- Commit the changes.
10. Setup CI/CD Schedule to run on hourly rate.
- Browse to the repository
- CI/CD > Schedules > New Schedule
- The schedule is set in cron syntax. I used the Custom setting with '0 * * * *' which will run every hour.
- Save pipeline schedule
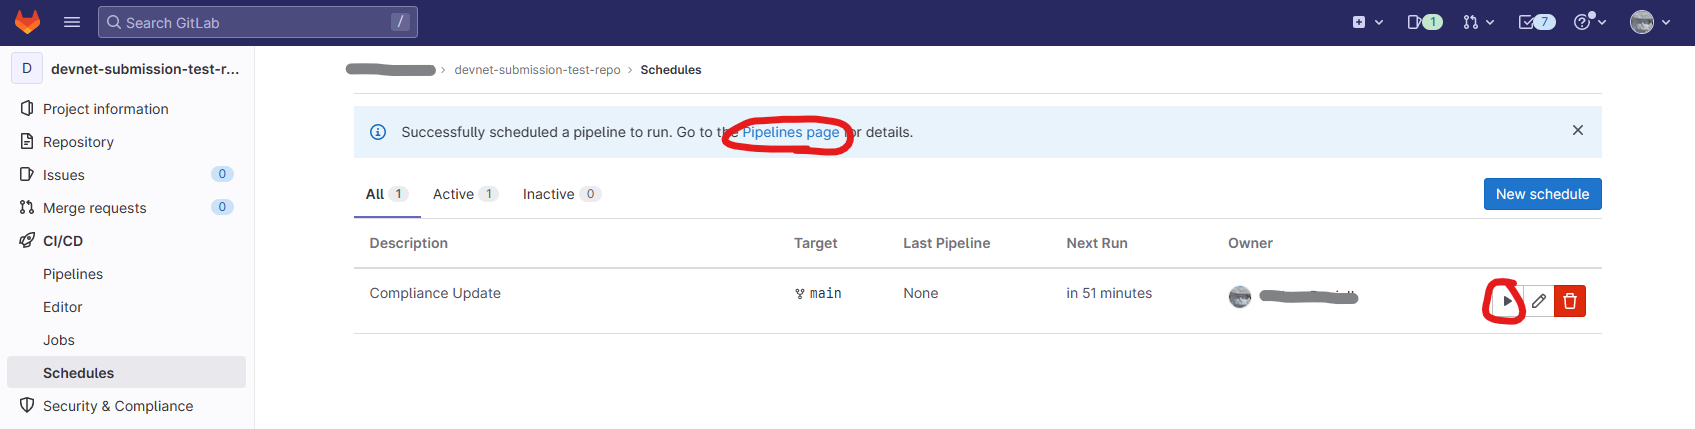
11. Test the schedule pipeline
- Click on the play button within the schedules menu which will trigger the pipeline.
- Click on the 'Pipelines page' button which appears after you press play. This can also be found under CI/CD > Pipelines
- Click on the Green Tick and select 'updated-rules'. If there is a red cross, something has gone wrong with your CI/CD run. If it is blue, this means the pipeline is still running.

- You will now see the Bash output from your runner. This should look something like below if it has updated your template rules:
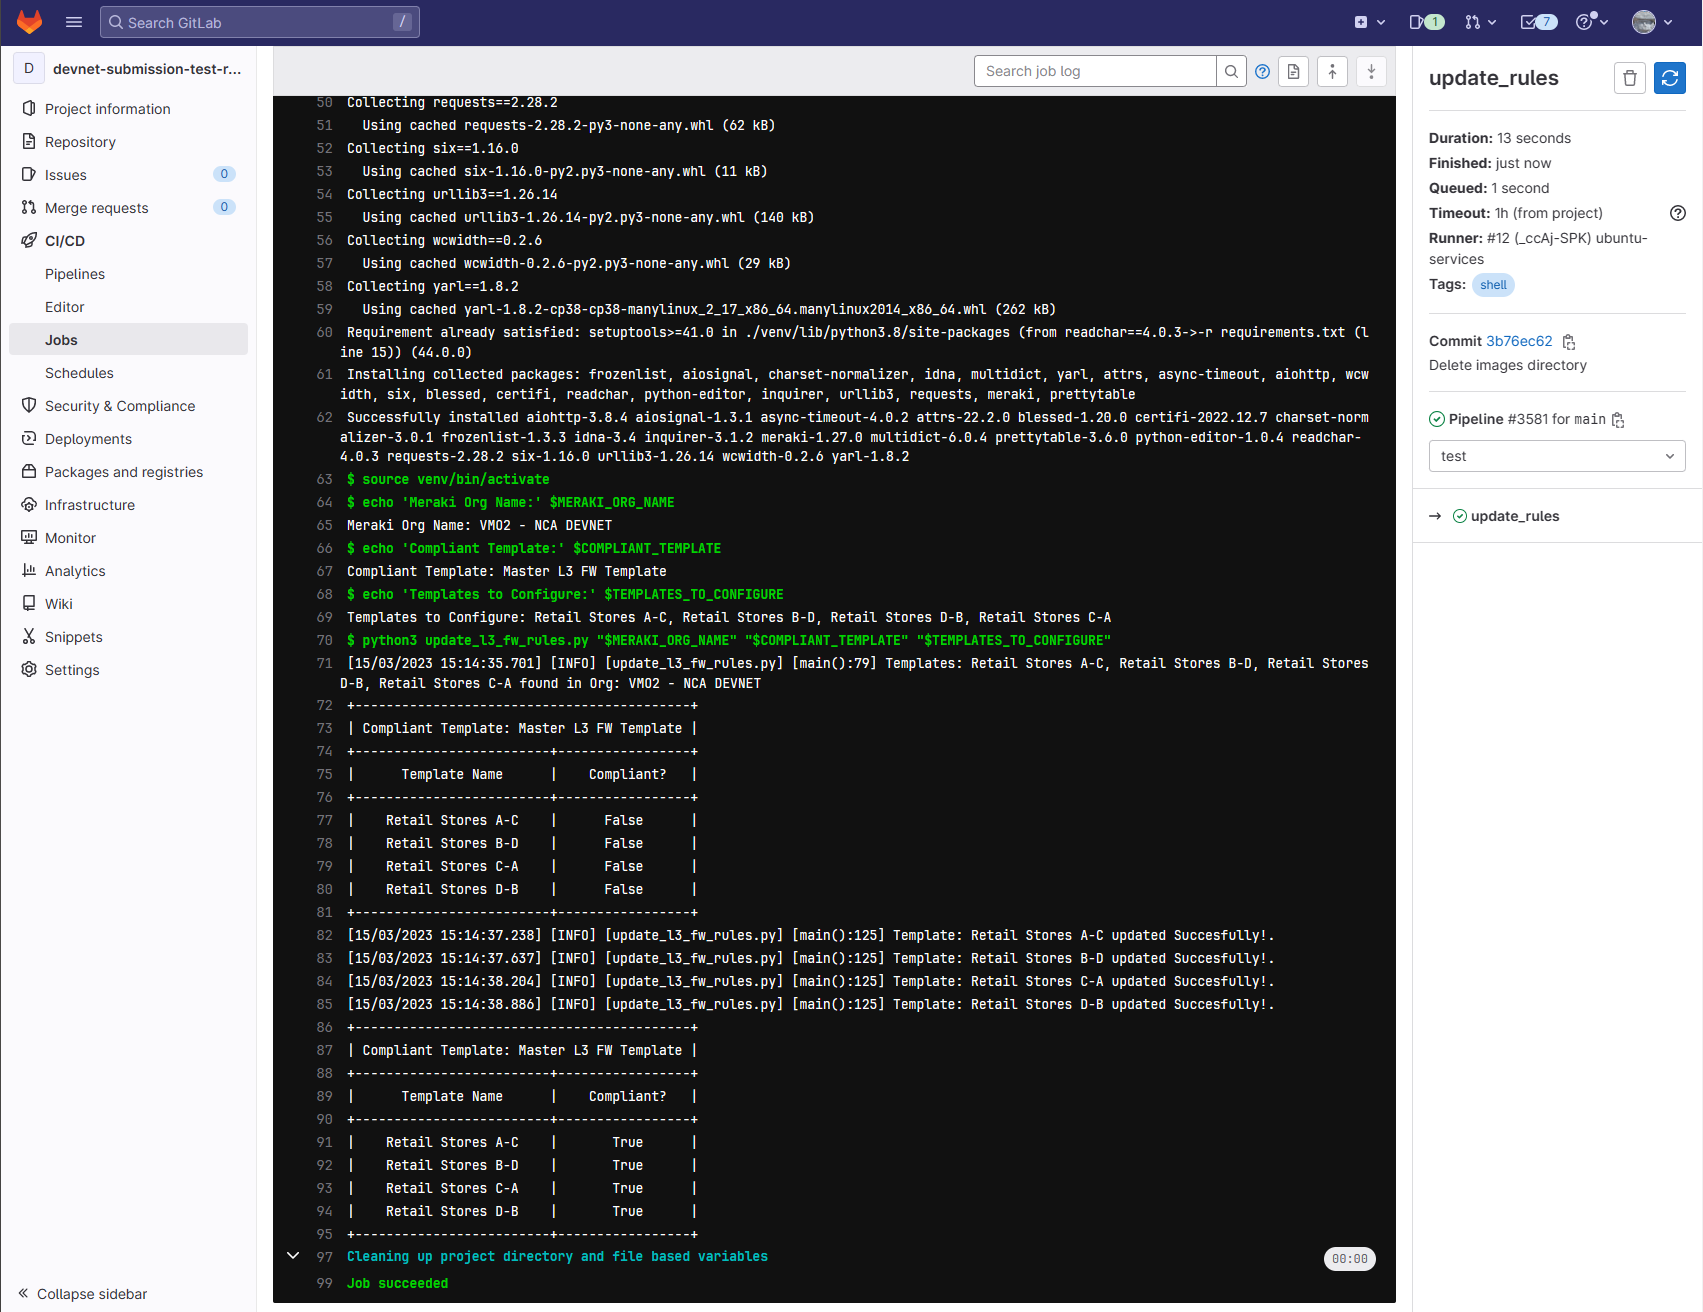
Congratulations! You have now setup your scheduled pipeline so its runs every hour and will ensure your templates are compliant with your master template.
Owner
Contributors
Github contributorCategories
NetworkingSecurityProducts
MerakiProgramming Languages
PythonLicense
MIT License
Code Exchange Community
Get help, share code, and collaborate with other developers in the Code Exchange community.View CommunityCisco provides Code Exchange for convenience and informational purposes only, with no support of any kind. This page contains information and links from third-party websites that are governed by their own separate terms. Reference to a project or contributor on this page does not imply any affiliation with or endorsement by Cisco.