investigo-spark-bot
Investigo
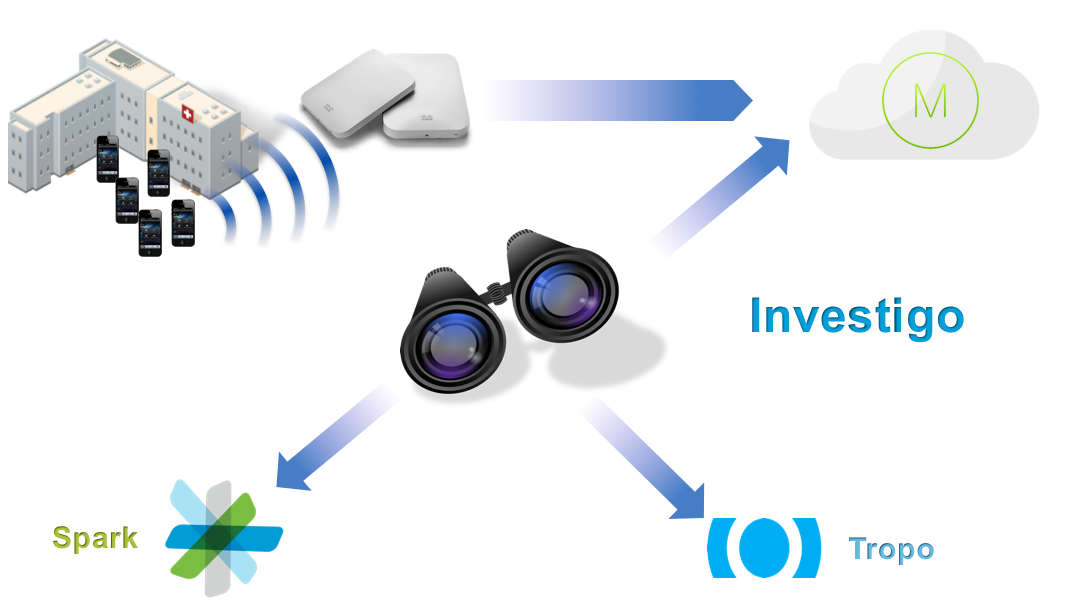
Investigo is Latin for track or trace out, investigate. Investigo is a bot for Spark, Cisco's unified communications service, which enables customers to use wireless infrastructure to locate Wi-Fi capable assets. The Investigo is a mash-up bot that uses several solutions: Spark, Tropo and Meraki wireless access points, spanning from the enterprise to the Internet of Things world.
- This project utilizes data provided by http://live-map.meraki.com, which shows anonymized location information of Meraki employees in the HQ of the company.
- There's a server running this project on https://investigo-prod.herokuapp.com/
- Here's a demo of the bot: https://www.youtube.com/watch?v=5tSRDfU75w0
Features
- Track a specific wireless device using its name;
Quick Usage
- Find the bot on Spark using its email: investigo@sparkbot.io
- Start a 1:1 conversation with Investigo on Cisco Spark and use the available commands.
- There might be a delay on the first command you run (the server needs to be woken up)
Available commands on Spark:
- list assets (provides a list of registered assets)
- find asset name of the asset (locates the asset on the map)
- find MAC Address (find a wireless device using its MAC address)
- fix name of the asset (updates the MAC address of the asset to an address that is currently being seen on the network)
- open (gives a link to the web console of the app)
Developer Mode
If you want to use it on your Meraki network, here are the steps:
-
Spin up the server that will receive the location information from Meraki Dashboard. Follow the guide: https://github.com/meraki/scanning-api-app
-
Download the code available at: https://github.com/rafael-carvalho/investigo-meraki
-
Configure your server settings:
- Install all libraries described on requirements.txt.
- Make sure you have a PostgreSQL server running.
- Make sure you change all environmental variables on the .env file:
ADMIN_NAME=admin's name on Spark
APP_SETTINGS=config.DevelopmentConfig
DATABASE_URL=postgres://...
NOTIFICATION_SMS_PHONE_NUMBER=+12345678900
SECRET_KEY=changethis
SHOW_WEB_LINK=True
SPARK_TOKEN=get your token from https://developer.ciscospark.com
-
Run your server:
python run.py -
This server needs to be accessible from the Internet. If you don't have a public IP:
- You can use http://ngrok.com for to expose your localhost to the Internet.
- Alternatively, you can host your app on Heroku. ProcFile provided on the github repository
-
Go to your code and change
web/externalapis/meraki/__init__.pyto point to the server you created on step 1. -
Add a JSON file describing your location to the same folder as app/static/server_config/meraki/meraki-hq-san-francisco.json and change the file path on the same file of the previous step. Don't worry about the id's on this file.
-
Setup the server:
- Use a browser to go to your server's homepage:
https://public-ip.com - Click settings on the top menu
- Select cloud as your deployment mode
- Add a cloud server
- Use demo network
- Use a browser to go to your server's homepage:
-
Create a Spark webhook and point all messages to your public IP:
- You can use Spark's API documentation for that: https://developer.ciscospark.com/endpoint-webhooks-post.html
- Or you can use the helper script: https://github.com/rafael-carvalho/update-spark-webhook
WARNING:
This solution is meant for educational/proof of concept purposes only. Any use of this tool is at your own risk. There is no guarantee that they have been thorough testing in a comparable environment and we are not responsible for any damage or data loss incurred with their use.
Owner
Contributors
Github contributorCategories
Products
Cisco MerakiProgramming Languages
HTMLLicense
Apache License 2.0
Code Exchange Community
Get help, share code, and collaborate with other developers in the Code Exchange community.View CommunityCisco provides Code Exchange for convenience and informational purposes only, with no support of any kind. This page contains information and links from third-party websites that are governed by their own separate terms. Reference to a project or contributor on this page does not imply any affiliation with or endorsement by Cisco.