Welcome to Red Hat Summit Ansible Fest 2024!
Thank you for choosing this lab as part of your learning journey at this year's Red Hat Summit! In this lab you will configure a Continuous Integration/Continuous Deployment (CI/CD) pipeline for infrastructure automation using the following components:
- GitLab for version control and CI/CD functionality
- Ansible for configuration management
- Cisco pyATS for taking operational snapshots of infrastructure
- Cisco CML for simulating a networking test environment
- Cisco Open NX-OS virtual switches acting as test infrastructure
By the end of this lab you will have a fully functional CI/CD pipeline that can be used to configure OSPF interfaces on Nexus 9000v virtual switches in an automated and controlled fashion. Selecting OSPF configuration and Cisco Nexus virtual switches is done for demo purposes, you can expand this pipeline to perform complete device configurations including other routing protocols and device features as well as other virtual and physical devices from Cisco or other third party vendors. The purpose of this lab is to showcase how you can combine different tools and technologies to build a CI/CD pipeline that can help you on your infrastructure automation journey.
CI/CD pipelines are flexible by nature and there are several options of version control, configuration management, test environments that you can use to build your own pipelines. The technologies and tools presented in this lab are by no means exclusive or exhaustive. Other tools and solutions such as Jenkins, drone.io, Travis CI, GitHub Actions, bitbucket, Terraform, etc. are also available and can be used to build CI/CD pipelines with.
Lab environment
Before we get started, let's familiarize ourselves with the lab environment. All the components needed for the lab are running in a Cisco DevNet sandbox that is accessible over an Open VPN connection. The VPN endpoint that you will connect to in order to access your dedicated lab environment and the associated credentials will be provided to you by the presenter of this lab session.
In this sandbox environment we have two virtual machines:
- a CentOS 7 virtual machine on which there are a GitLab and GitLab runner Docker containers already installed and running. Once the VPN connection is established, this virtual machine is reachable over SSH at the following IPv4 address:
10.10.20.50with username:developerand password:C1sco12345 - a Linux based virtual machine running Cisco CML 2.7 that runs a simulated virtual network comprised of two Cisco Nexus 9000v virtual switches. You can reach this virtual machine over HTTPS at the following IPv4 address: https://10.10.20.161 with username:
developerand password:C1sco12345. The virtual switches that are part of the CML simulation can be reached over SSH at the following IPv4 addresses:10.10.20.177and10.10.20.178with username:ciscoand password:cisco
GitLab is running and is available at the following link: http://10.10.20.50 with username: developer and password: C1sco12345.
VPN Connection
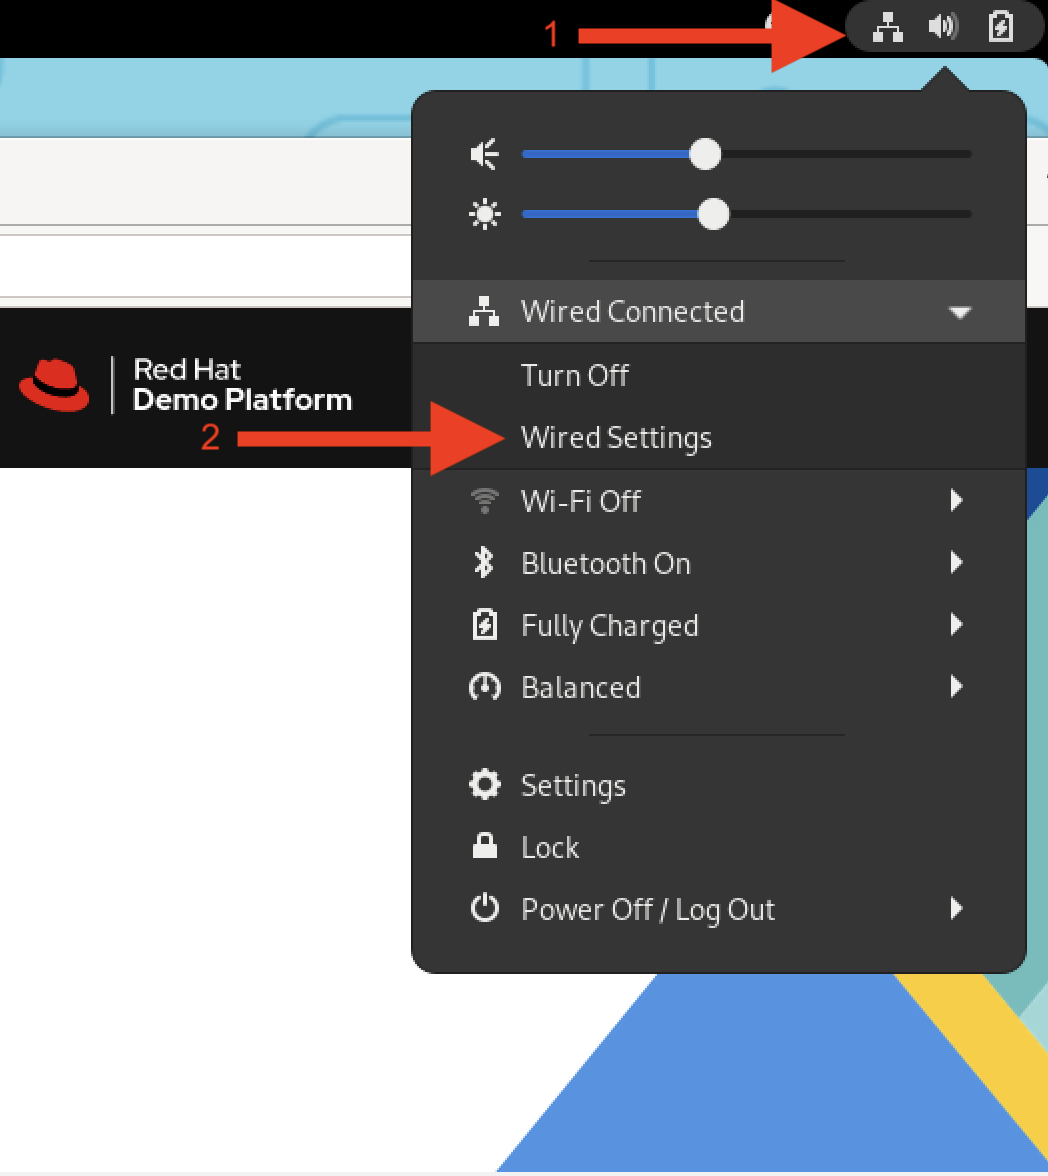
Next, let's establish the VPN connection to the DevNet Sandbox where the lab environment is located. In the top right corner of the desktop, select Network Settings and under Wired Connected select Wired Settings.
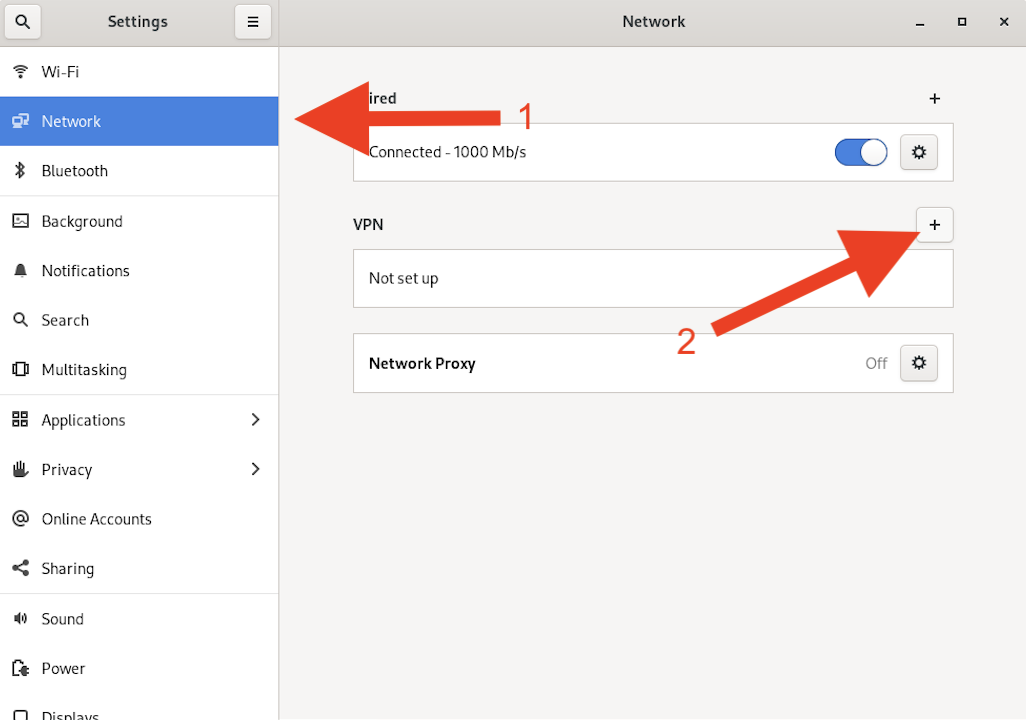
In the window that pops up, select Network and then click the + sign next to the VPN section. This will create a new VPN connection.
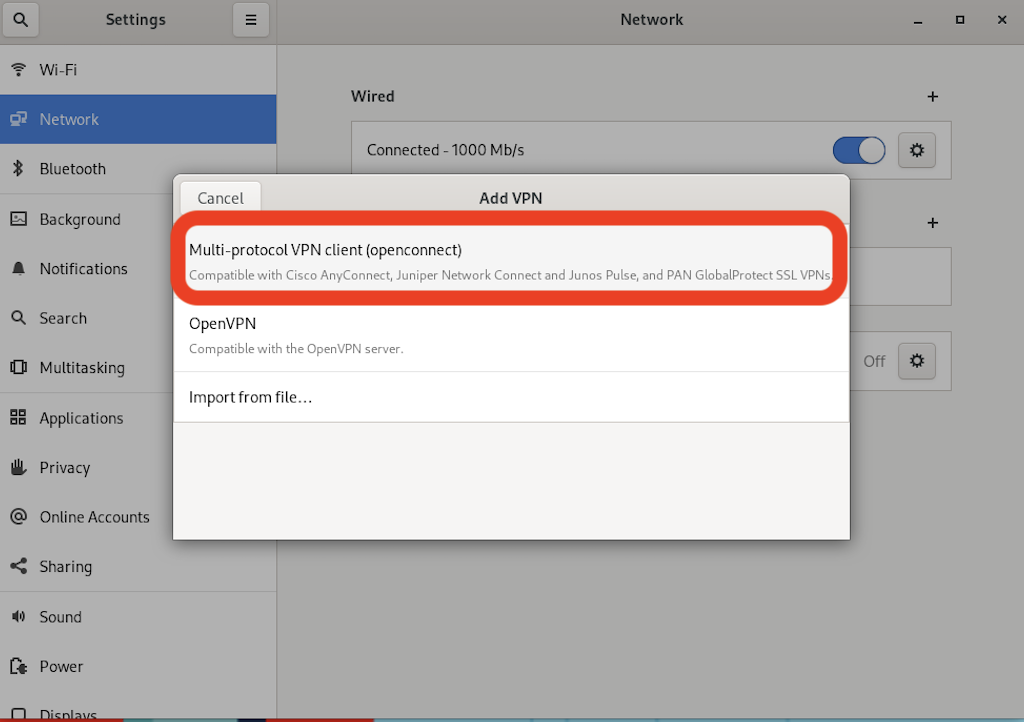
In the new Add VPN window select the first option, Multi-protocol VPN client (openconnect).
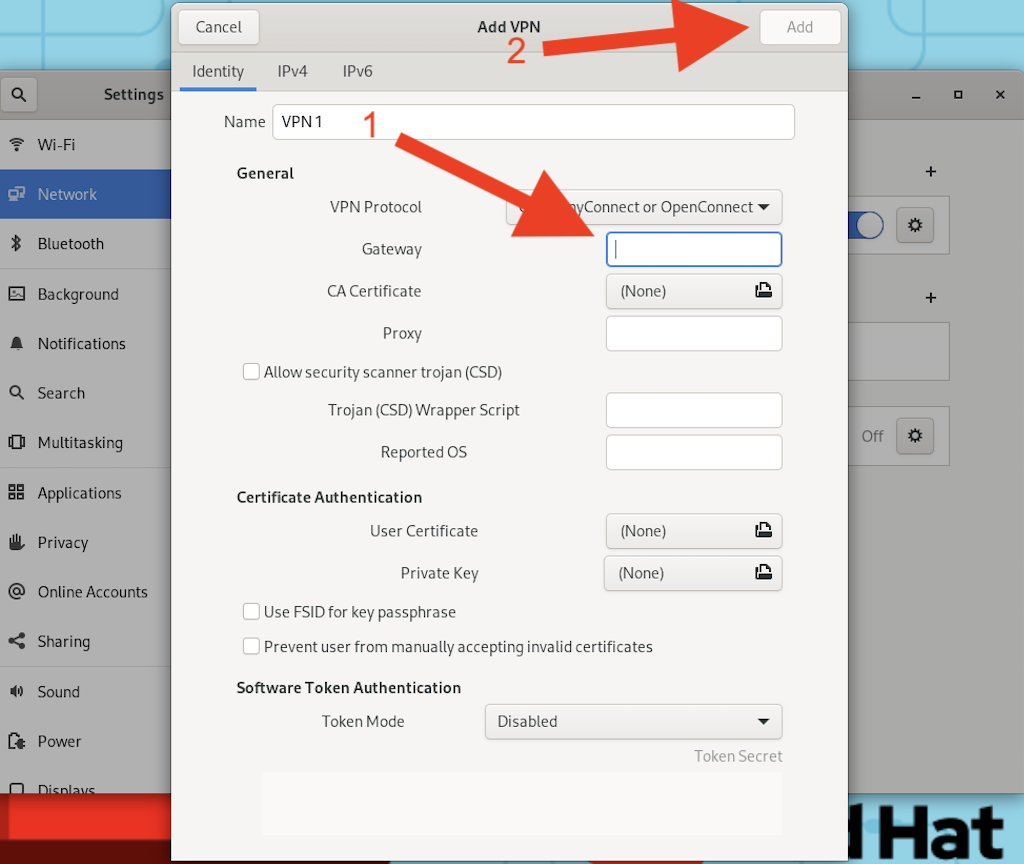
In this new window, populate the Gateway portion with the VPN gateway information that you can find on the paper next to your laptop. The VPN gateway should be similar to devnetsandbox-usw1-reservation.cisco.com:20xxx. After you populate the Gateway section, click on the Add button at the top right corner of the window to save the VPN connection.
After having saved the VPN gateway information, you are back to the previous Network window. In this window toggle to enabled the newly added VPN connection.
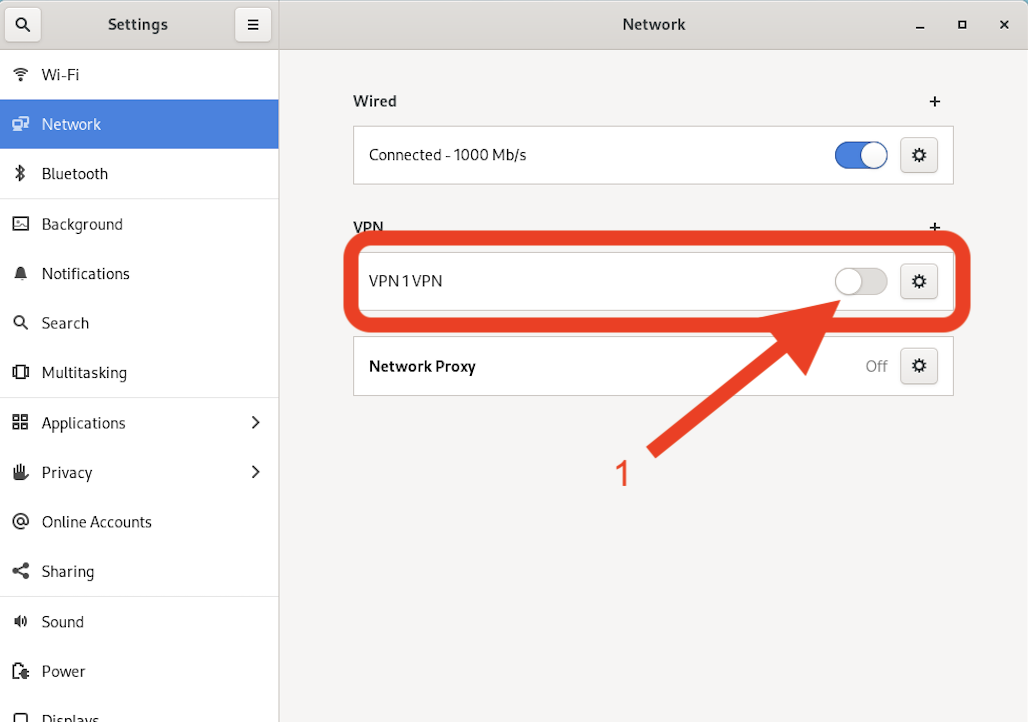
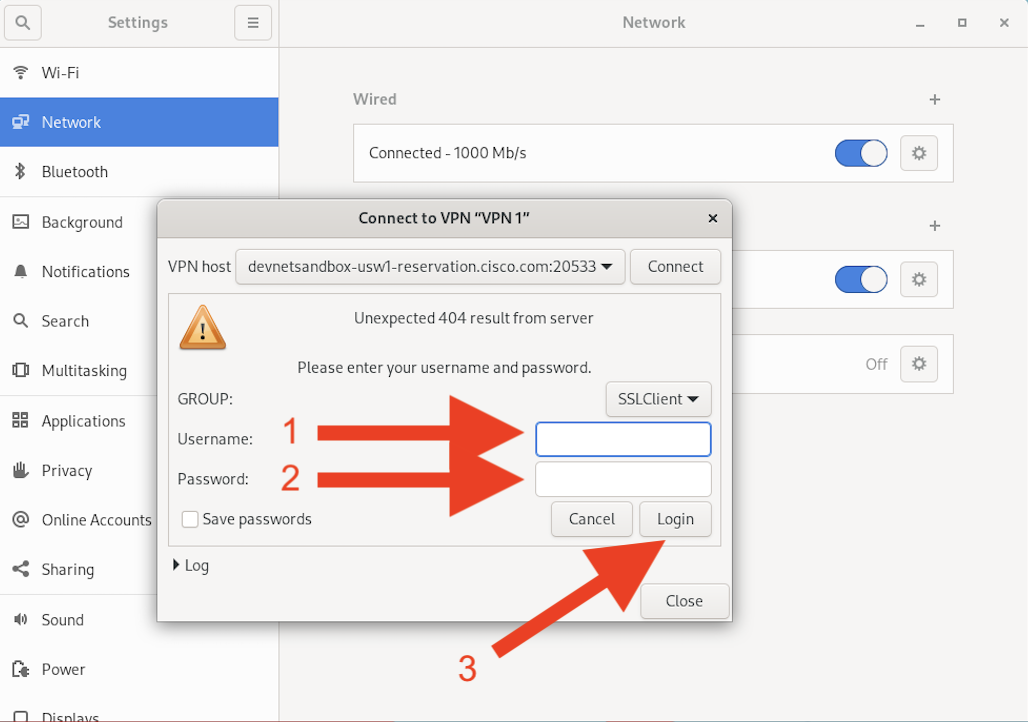
A new window similar to the following one will pop up. Under username enter ansible and password is opensource. After that click on Login and you should be now connected to the your own dedicated sandbox environment.
Visual Studio Code
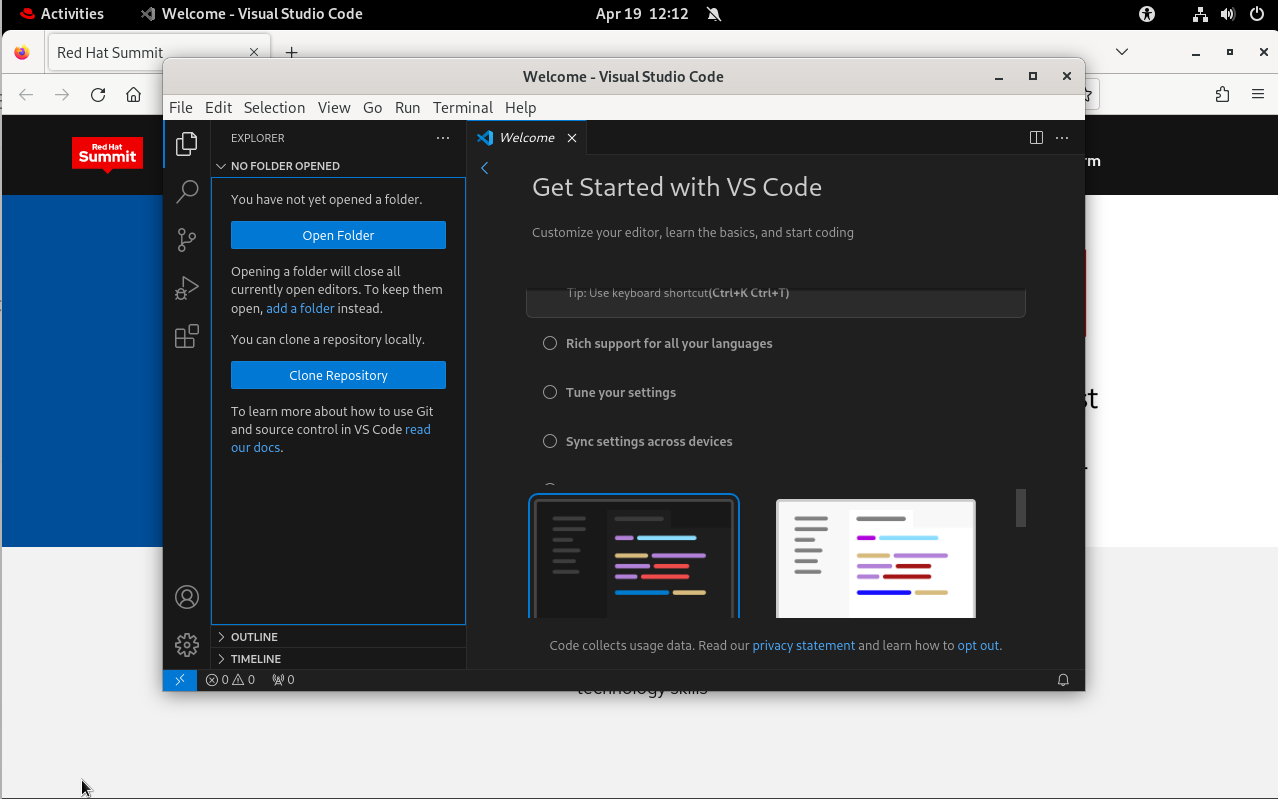
Visual Studio Code will be used to connect remotely to the CentOS VM and work through all the steps of this lab. Login into the workstation with user2 and password user2. Open the terminal application and type code:
code
You should have a window similar to the following one started on your desktop:
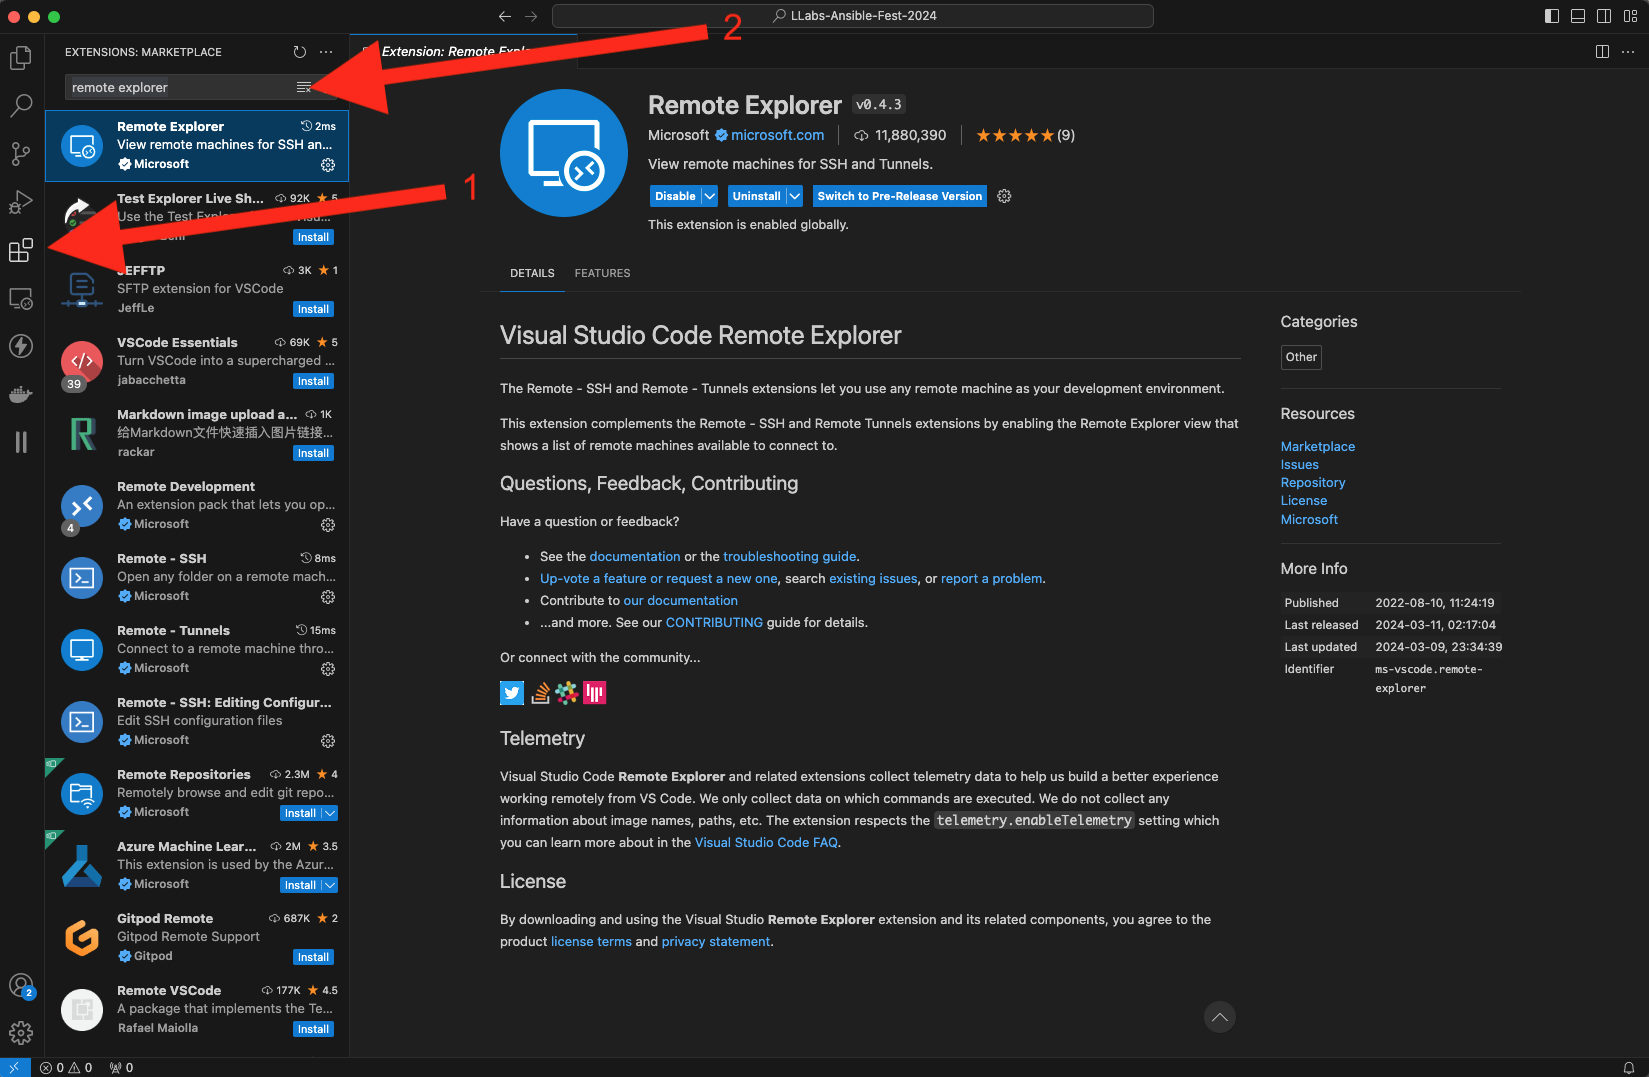
Once you have Visual Studio Code installed and started, select Extensions from the left hand navigation panel, search for Remote Explorer and install that extension.
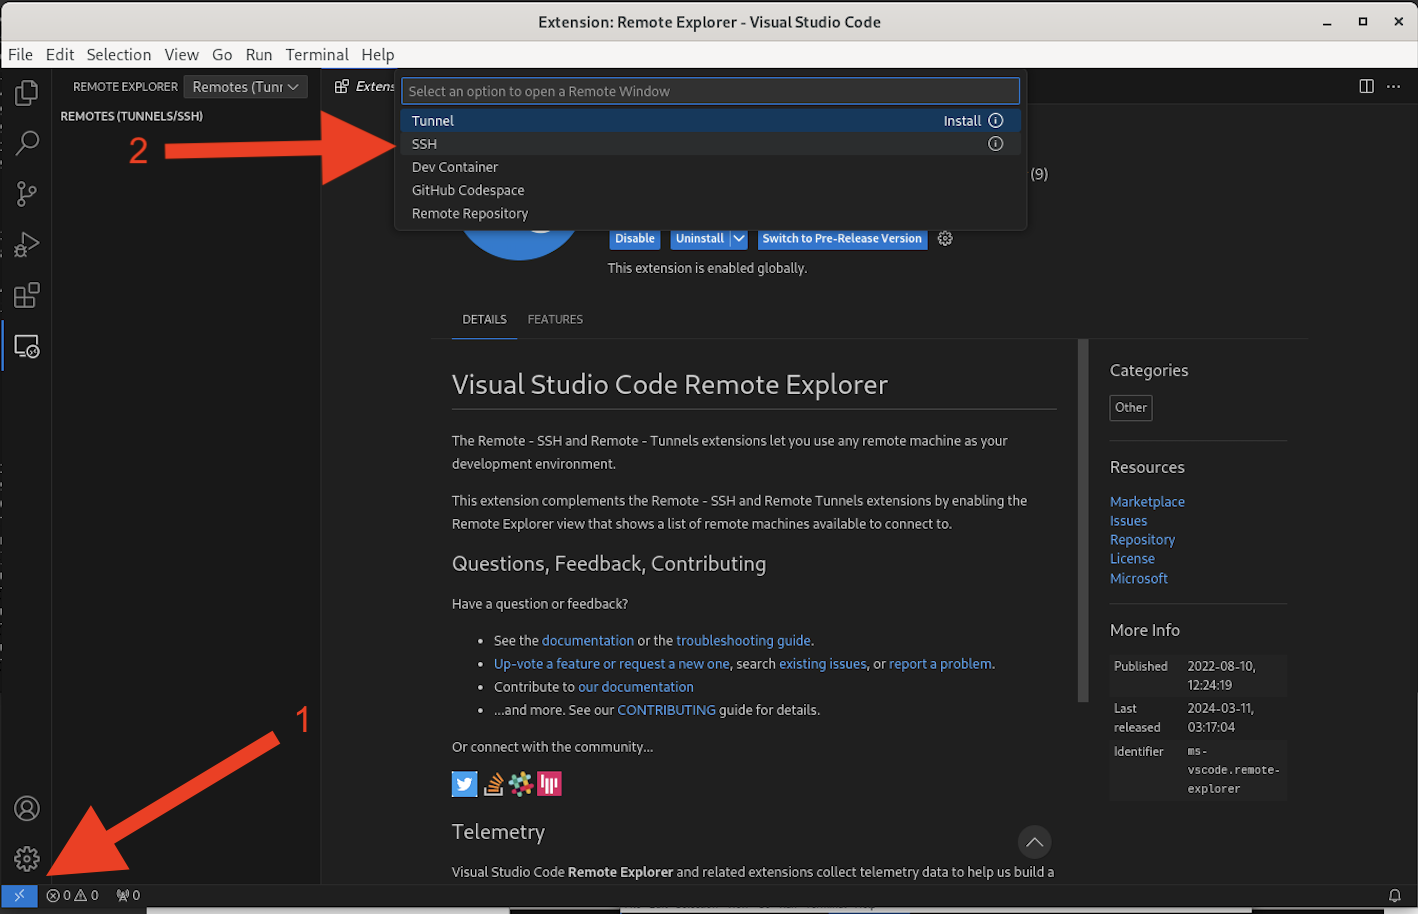
In order to be able to create SSH connections, navigate to the bottom left section of the screen and click on ><. In the window that pops up, select SSH to install the SSH extension for Remote Explorer.
You will use the Remote Explorer extension to create a new SSH connection and connect remotely to the CentOS virtual machine. Click on the + sign to create a new connection and issue the following command: ssh developer@10.10.20.50 in the window that appeared. Press Enter and specify the C1sco12345 password when asked.

If a message stating that you are about to connect to an OS version that is unsupported by Visual Studio Code pops up, just click on allow to proceed with the connection.
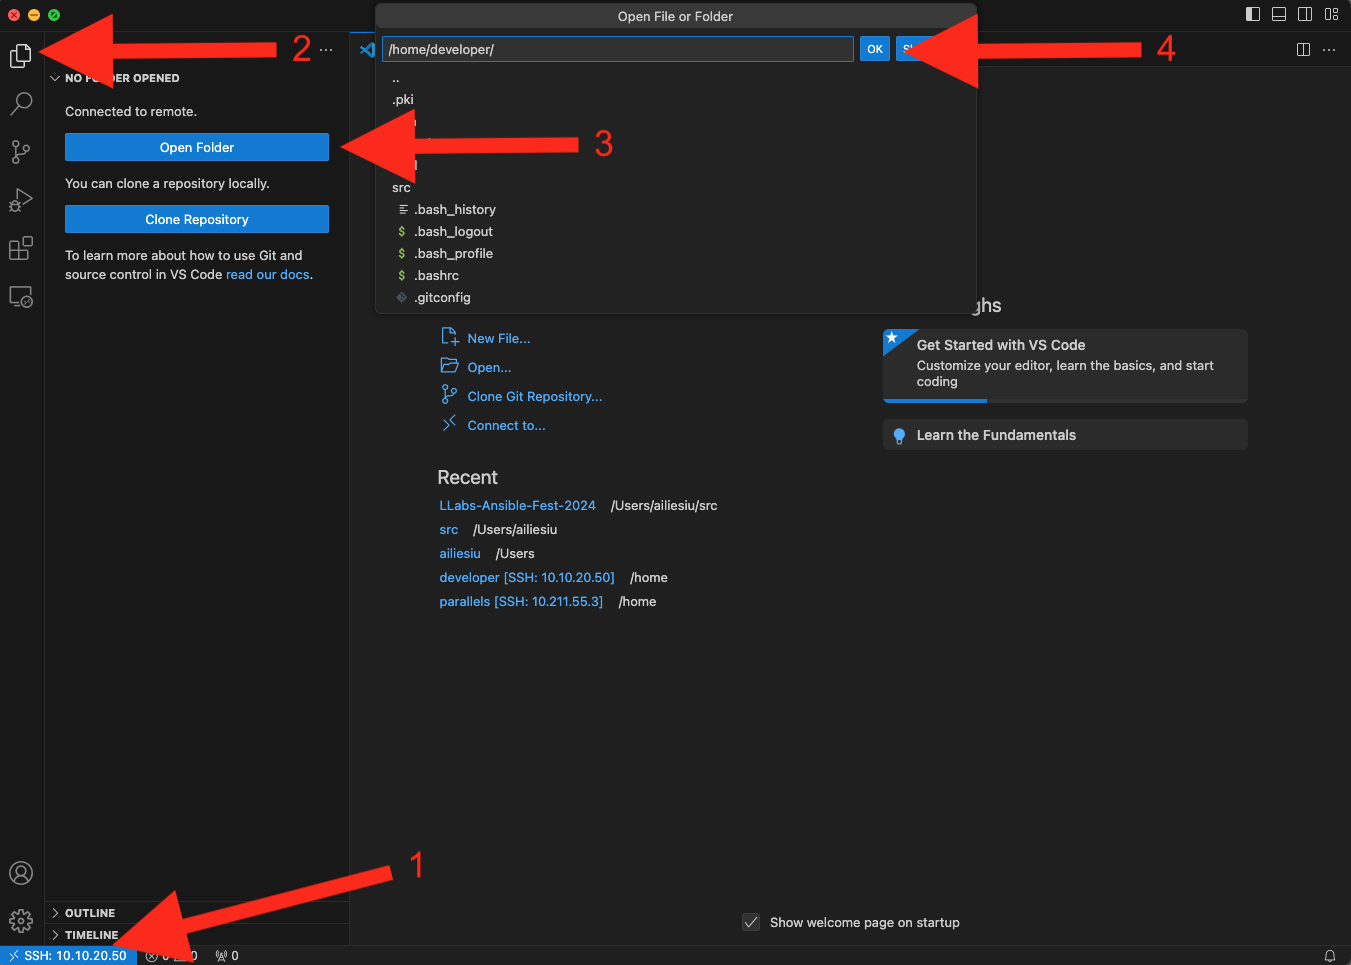
Once you are connected to the remote CentOS virtual machine (double check in the lower left hand corner that SSH: 10.10.20.50 is displayed), select Explorer from the left side menu, then Open Folder and accept the default /home/developer/ folder by clicking the Ok button.
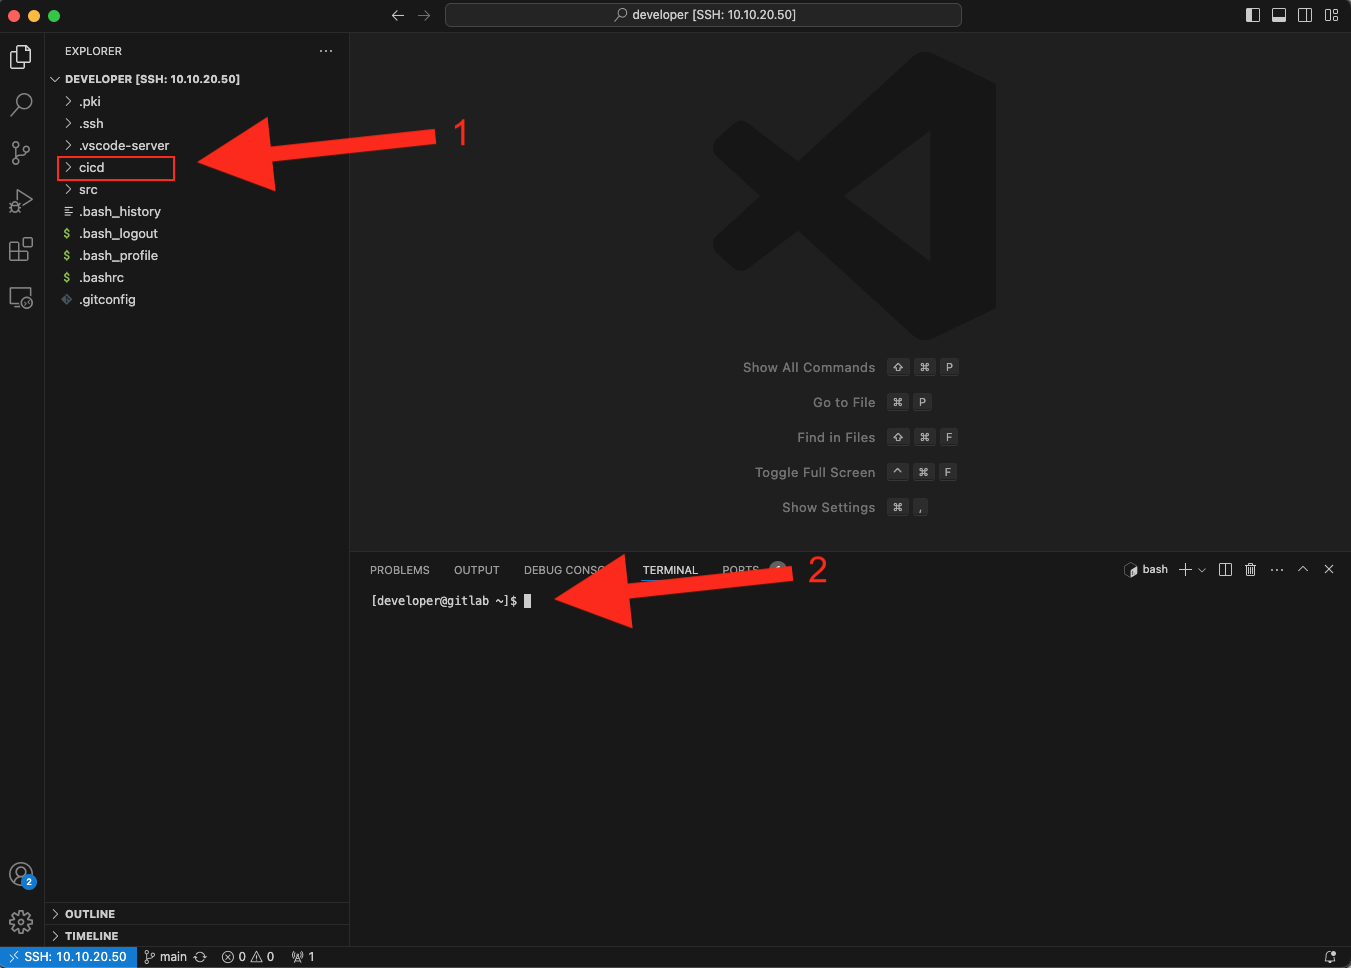
This will display the contents of the /home/developer/ folder from the CentOS VM locally in Visual Studio Code. From the View menu of Visual Studio Code select Terminal and a terminal connection to the remote machine is displayed at the bottom of the window. The cicd folder will act as the working folder for the rest of this lab. This folder is the cicd cloned repo from GitLab and represents the starting point for the CI/CD build. It already contains the Cisco pyATS folder, basic ansible.cfg configuration file, .gitlab-ci.yml file and a generic README.md file. The .gitlab-ci.yml file has a special role in GitLab as we will see later in this lab.
Next, let's go ahead and configure Ansible.