GitLab CI/CD
CI/CD is a continuous method of software development, where you continuously build, test, deploy, and monitor iterative code changes.
This iterative process helps reduce the chance that you develop new code based on buggy or failed previous versions. GitLab CI/CD can catch bugs early in the development cycle, and help ensure that all the code deployed to production complies with established code standards.
To use GitLab CI/CD, you start with a .gitlab-ci.yml file at the root of your project which contains the configuration for your CI/CD pipeline. This file follows the YAML format and has its own syntax. You can find the keywords for this syntax at this link: https://docs.gitlab.com/ee/ci/yaml/index.html
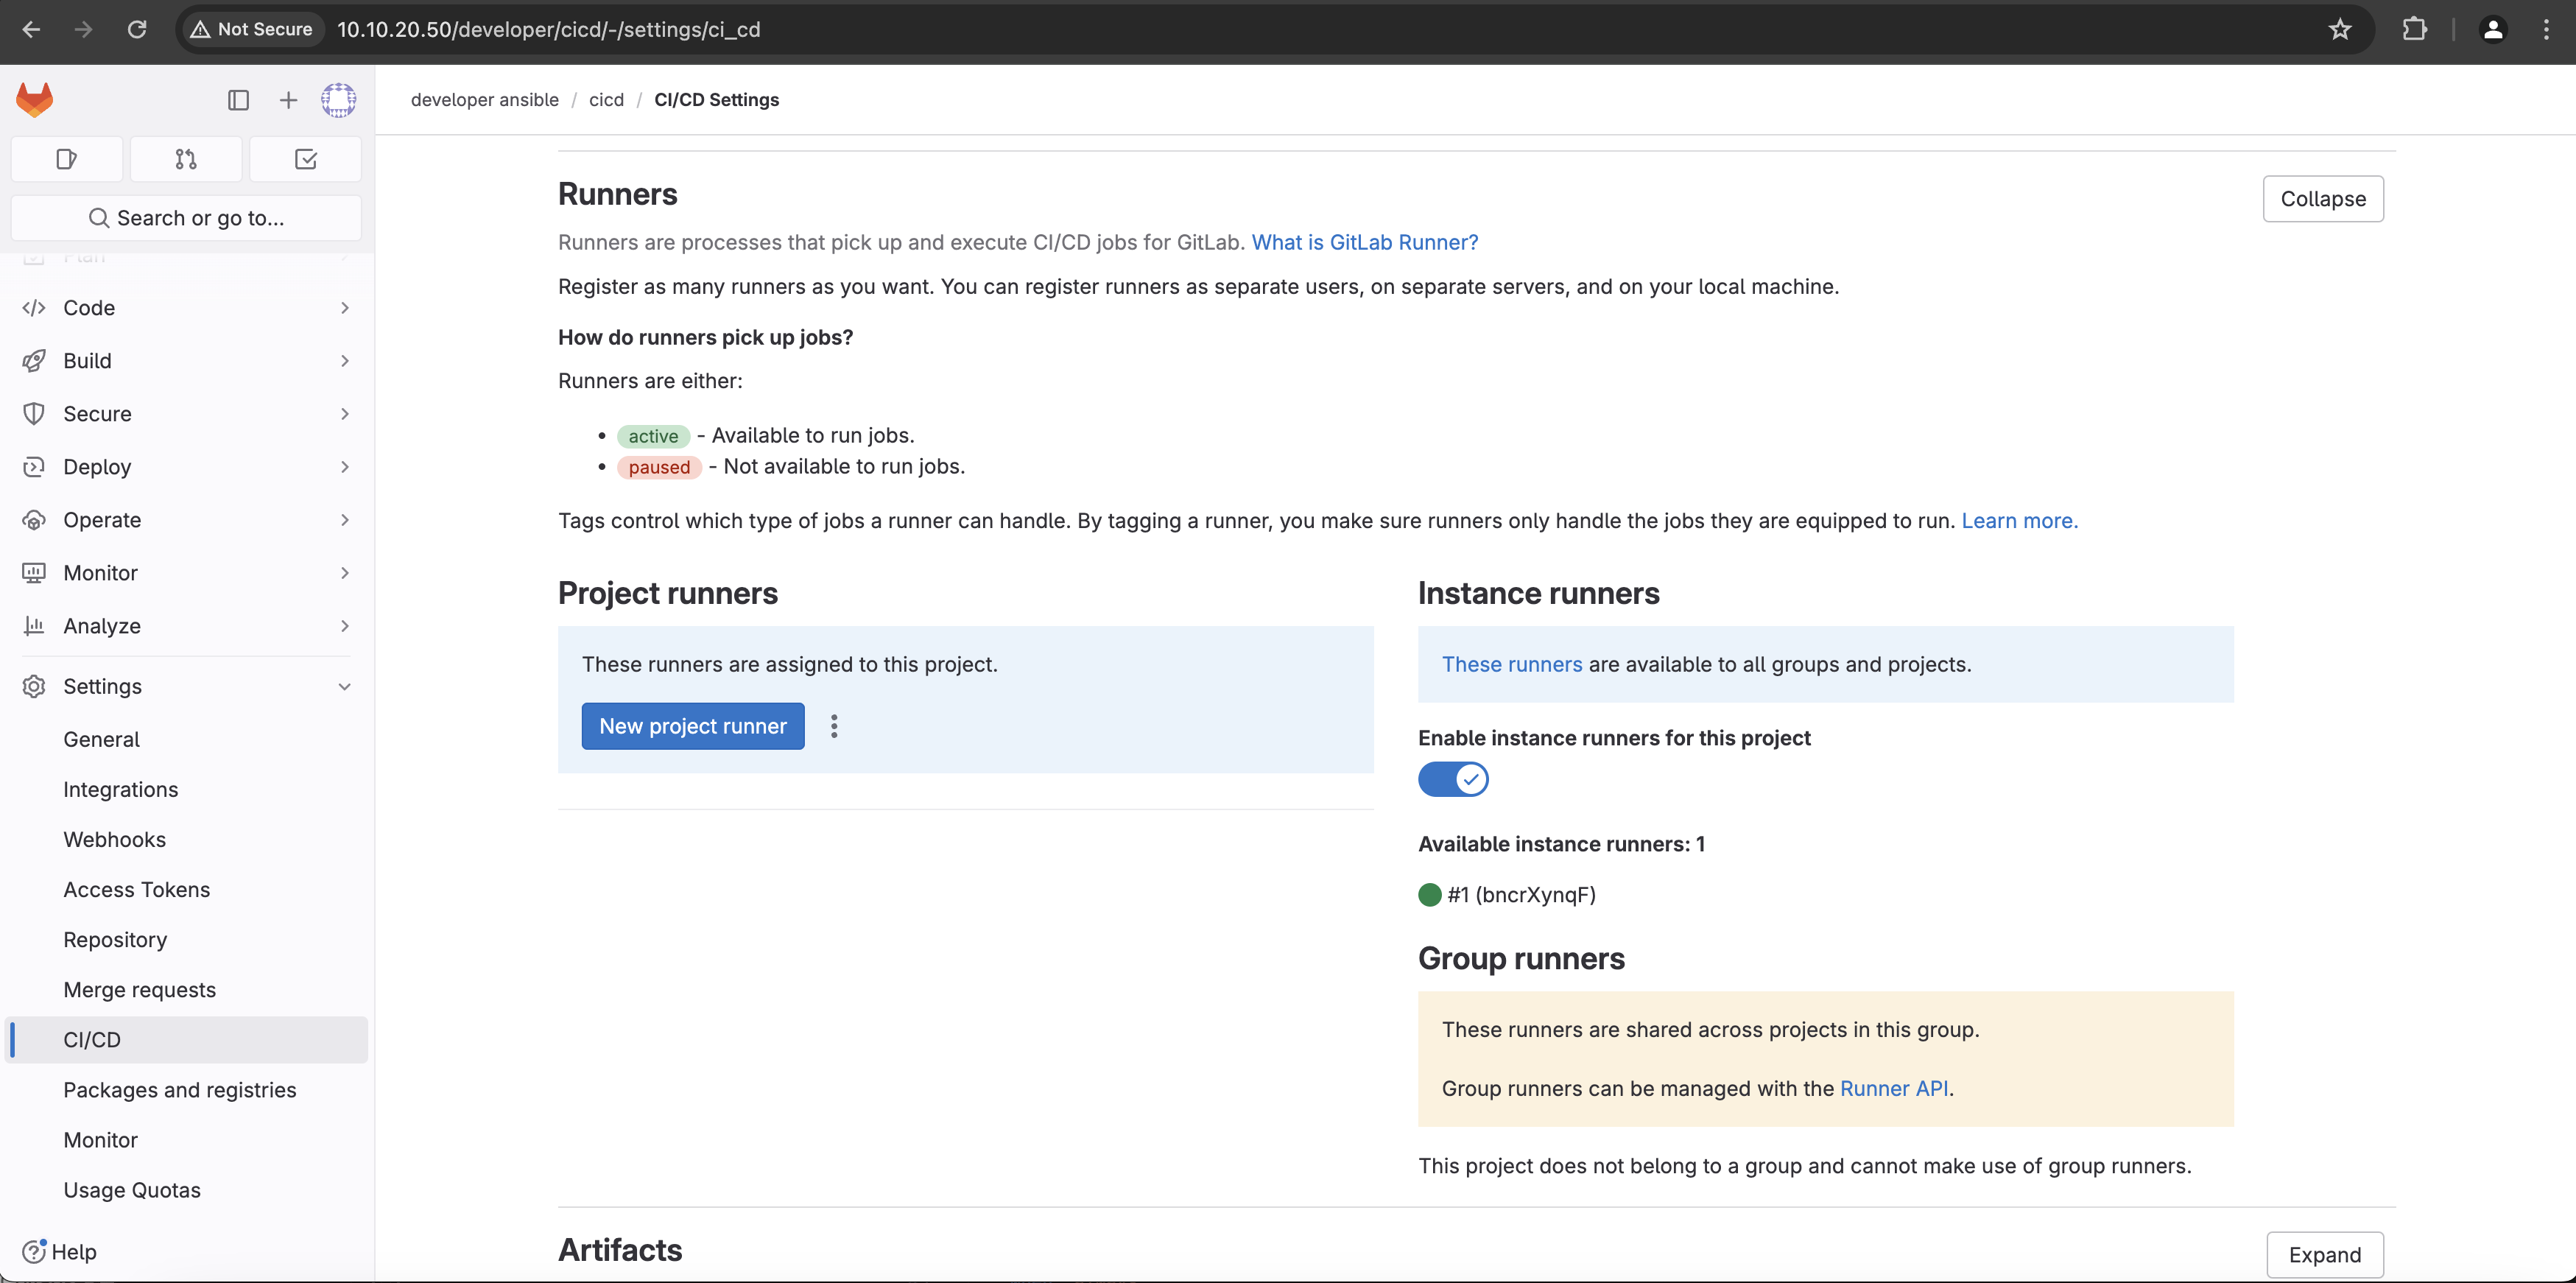
GitLab Runner is an application that works with GitLab CI/CD to run jobs in the pipeline. A GitLab runner has already been installed and registered with your installation of GitLab. You can check the status of the instance runner that is registered with GitLab by navigating to Settings -> CI/CD -> Runners section or by following this link: http://10.10.20.50/developer/cicd/-/settings/ci_cd
When a runner is registered, an executor must be chosen. An executor determines the environment each job runs in.
GitLab Runners provide the following executors:
- SSH
- Shell
- Parallels
- VirtualBox
- Docker
- Docker Autoscaler
- Docker Machine (auto-scaling)
- Kubernetes
- Instance
- Custom
The executor chosen depends on the pipeline and the jobs it is running:
- If the CI/CD job runs PowerShell commands, you might install GitLab Runner on a Windows server and then register a runner that uses the shell executor.
- If the CI/CD job runs commands in a custom Docker container, you might install GitLab Runner on a Linux server and register a runner that uses the Docker executor.
- You can also install GitLab Runner on a virtual machine and have it use another virtual machine as an executor.
These are only a few of the possible configurations as you see there are a large variety and combination of executors and environments where those executors can run.
In the example of our pipeline the GitLab Runner is running in a Docker container and the Docker executor was chosen to run the jobs. This is referred to as a “Docker-in-Docker” configuration. A Docker image has already been created and uploaded to Docker Hub. This Docker image has all the software and tools needed to successfully run the CI/CD pipeline, namely: Python, Ansible, Paramiko, cisco.nxos Ansible collection and pyATS.
The Dockerfile definition for the image is this:
FROM python:3.8
RUN apt-get update
RUN pip install ansible==2.9.13
RUN pip install paramiko==2.7.2
RUN ansible-galaxy collection install cisco.nxos
RUN pip install 'pyats[full]'
You now have all the components needed to define the CI/CD pipeline. Open .gitlab-ci.yml file in Visual Studio Code and populate it with the following data:
default:
  before_script:
    - export ANSIBLE_HOST_KEY_CHECKING=False

image: 'adrianii/cicd-en:0.1.0'

stages:
  - pyats-pre-snapshot
  - deploy-OSPF
  - pyats-post-snapshot

pyats-pre-snapshot:
  stage: pyats-pre-snapshot
  script: cd pyats && pyats run job job.py --testbed-file devnet_sandbox.yaml --trigger-datafile pre_trigger_datafile.yaml --html-logs pre_snapshots
  artifacts:
    paths:
      - pyats/pre_snapshots/pre_ospf_dist-sw01.json
      - pyats/pre_snapshots/pre_ospf_dist-sw02.json
    when: always

deploy-OSPF:
  stage: deploy-OSPF
  script:
      - ansible-playbook -i hosts actions/configure-ospf/configure-ospf.yml
      - sleep 30

pyats-post-snapshot:
  stage: pyats-post-snapshot
  script:
    - cd pyats && pyats run job job.py --testbed-file devnet_sandbox.yaml --trigger-datafile post_trigger_datafile.yaml --html-logs post_snapshots
    - pyats diff pre_snapshots/pre_ospf_dist-sw01.json post_snapshots/post_ospf_dist-sw01.json --output ospfdiff/
    - pyats diff pre_snapshots/pre_ospf_dist-sw02.json post_snapshots/post_ospf_dist-sw02.json --output ospfdiff/
    - cat ospfdiff/diff_pre_ospf_dist-sw01.json
    - cat ospfdiff/diff_pre_ospf_dist-sw02.json

  artifacts:
    paths:
      - pyats/ospfdiff/diff_pre_ospf_dist-sw01.json
      - pyats/ospfdiff/diff_pre_ospf_dist-sw02.json
    when: always
ANSIBLE_HOST_KEY_CHECKING is passed as an environment variable into the pipeline. By setting it to “False” you are telling the underlying tools that Ansible uses to connect to the hosts, namely paramiko in this case, not to check the host keys.
Next you specify the Docker image that the executor will use to run the pipeline in. This is the image that was created with the Dockerfile mentioned before and uploaded to Docker Hub. It has Ansible, pyATS, paramiko, cisco.nxos collection and Python already installed.
Then you define the three stages of the pipeline:
- pyats-pre-snapshot
- deploy-OSPF
- pyats-post-snapshot
And in the next line you start defining the pyats-pre-snapshot stage. In this stage you are running the pyATS job that takes an operational snapshot of the infrastructure and saves the artifacts in the pre_snapshots folder. The terminal command to accomplish this is: cd pyats && pyats run job job.py --testbed-file devnet_sandbox.yaml --trigger-datafile pre_trigger_datafile.yaml --html-logs pre_snapshots
The second stage of the pipeline is called deploy-OSPF and it runs the Ansible playbook that configures OSPF on the interfaces specified in the YAML files from the host_vars folder.
The third stage of the pipeline take a post Ansible configuration operational snapshot. It uses again pyATS to run a job that uses the post_trigger_datafile.yaml as a trigger datafile. The artifacts are saved in the post_snapshots folder. A diff between the pre and post snapshots saved by pyATS is also done at this stage.
After you finish editing the .gitlab-ci.yml file make sure you save it.
In Visual Studio Code in the terminal window check the git status of the folder.
[developer@gitlab cicd]$ git status
# On branch main
# Changes not staged for commit:
#   (use "git add <file>..." to update what will be committed)
#   (use "git checkout -- <file>..." to discard changes in working directory)
#
#       modified:   .gitlab-ci.yml
#
no changes added to commit (use "git add" and/or "git commit -a")
You can see that git picked up on the changes you just performed on the .gitlab-ci.yml file. As before, add the file for version tracking with git add and check status again.
[developer@gitlab cicd]$ git add .
[developer@gitlab cicd]$ git status
# On branch main
# Changes to be committed:
#   (use "git reset HEAD <file>..." to unstage)
#
#       modified:   .gitlab-ci.yml
#
Commit the changes using the git commit -m "added .gitlab-ci.yml" command.
developer@gitlab cicd]$ git commit -m "added .gitlab-ci.yml"
[main 80af723] added .gitlab-ci.yml
 1 file changed, 38 insertions(+)
The file that contains the CI/CD pipeline definition can be now uploaded to GitLab server. Issue the git push command and enter the username and password when prompted. Once the file is uploaded, the CI/CD pipeline will be triggered automatically!
[developer@gitlab cicd]$ git push
Counting objects: 5, done.
Delta compression using up to 2 threads.
Compressing objects: 100% (3/3), done.
Writing objects: 100% (3/3), 315 bytes | 0 bytes/s, done.
Total 3 (delta 2), reused 0 (delta 0)
To http://10.10.20.50/developer/cicd.git
   80af723..ad9a6cb  main -> main
Switch to a browser window and navigate to http://10.10.20.50/developer/cicd/-/pipelines/1. If asked for a credentials login with username: developer and password: C1sco12345. If everything went well and the pipeline run completed successfully you should see a status like the one below:
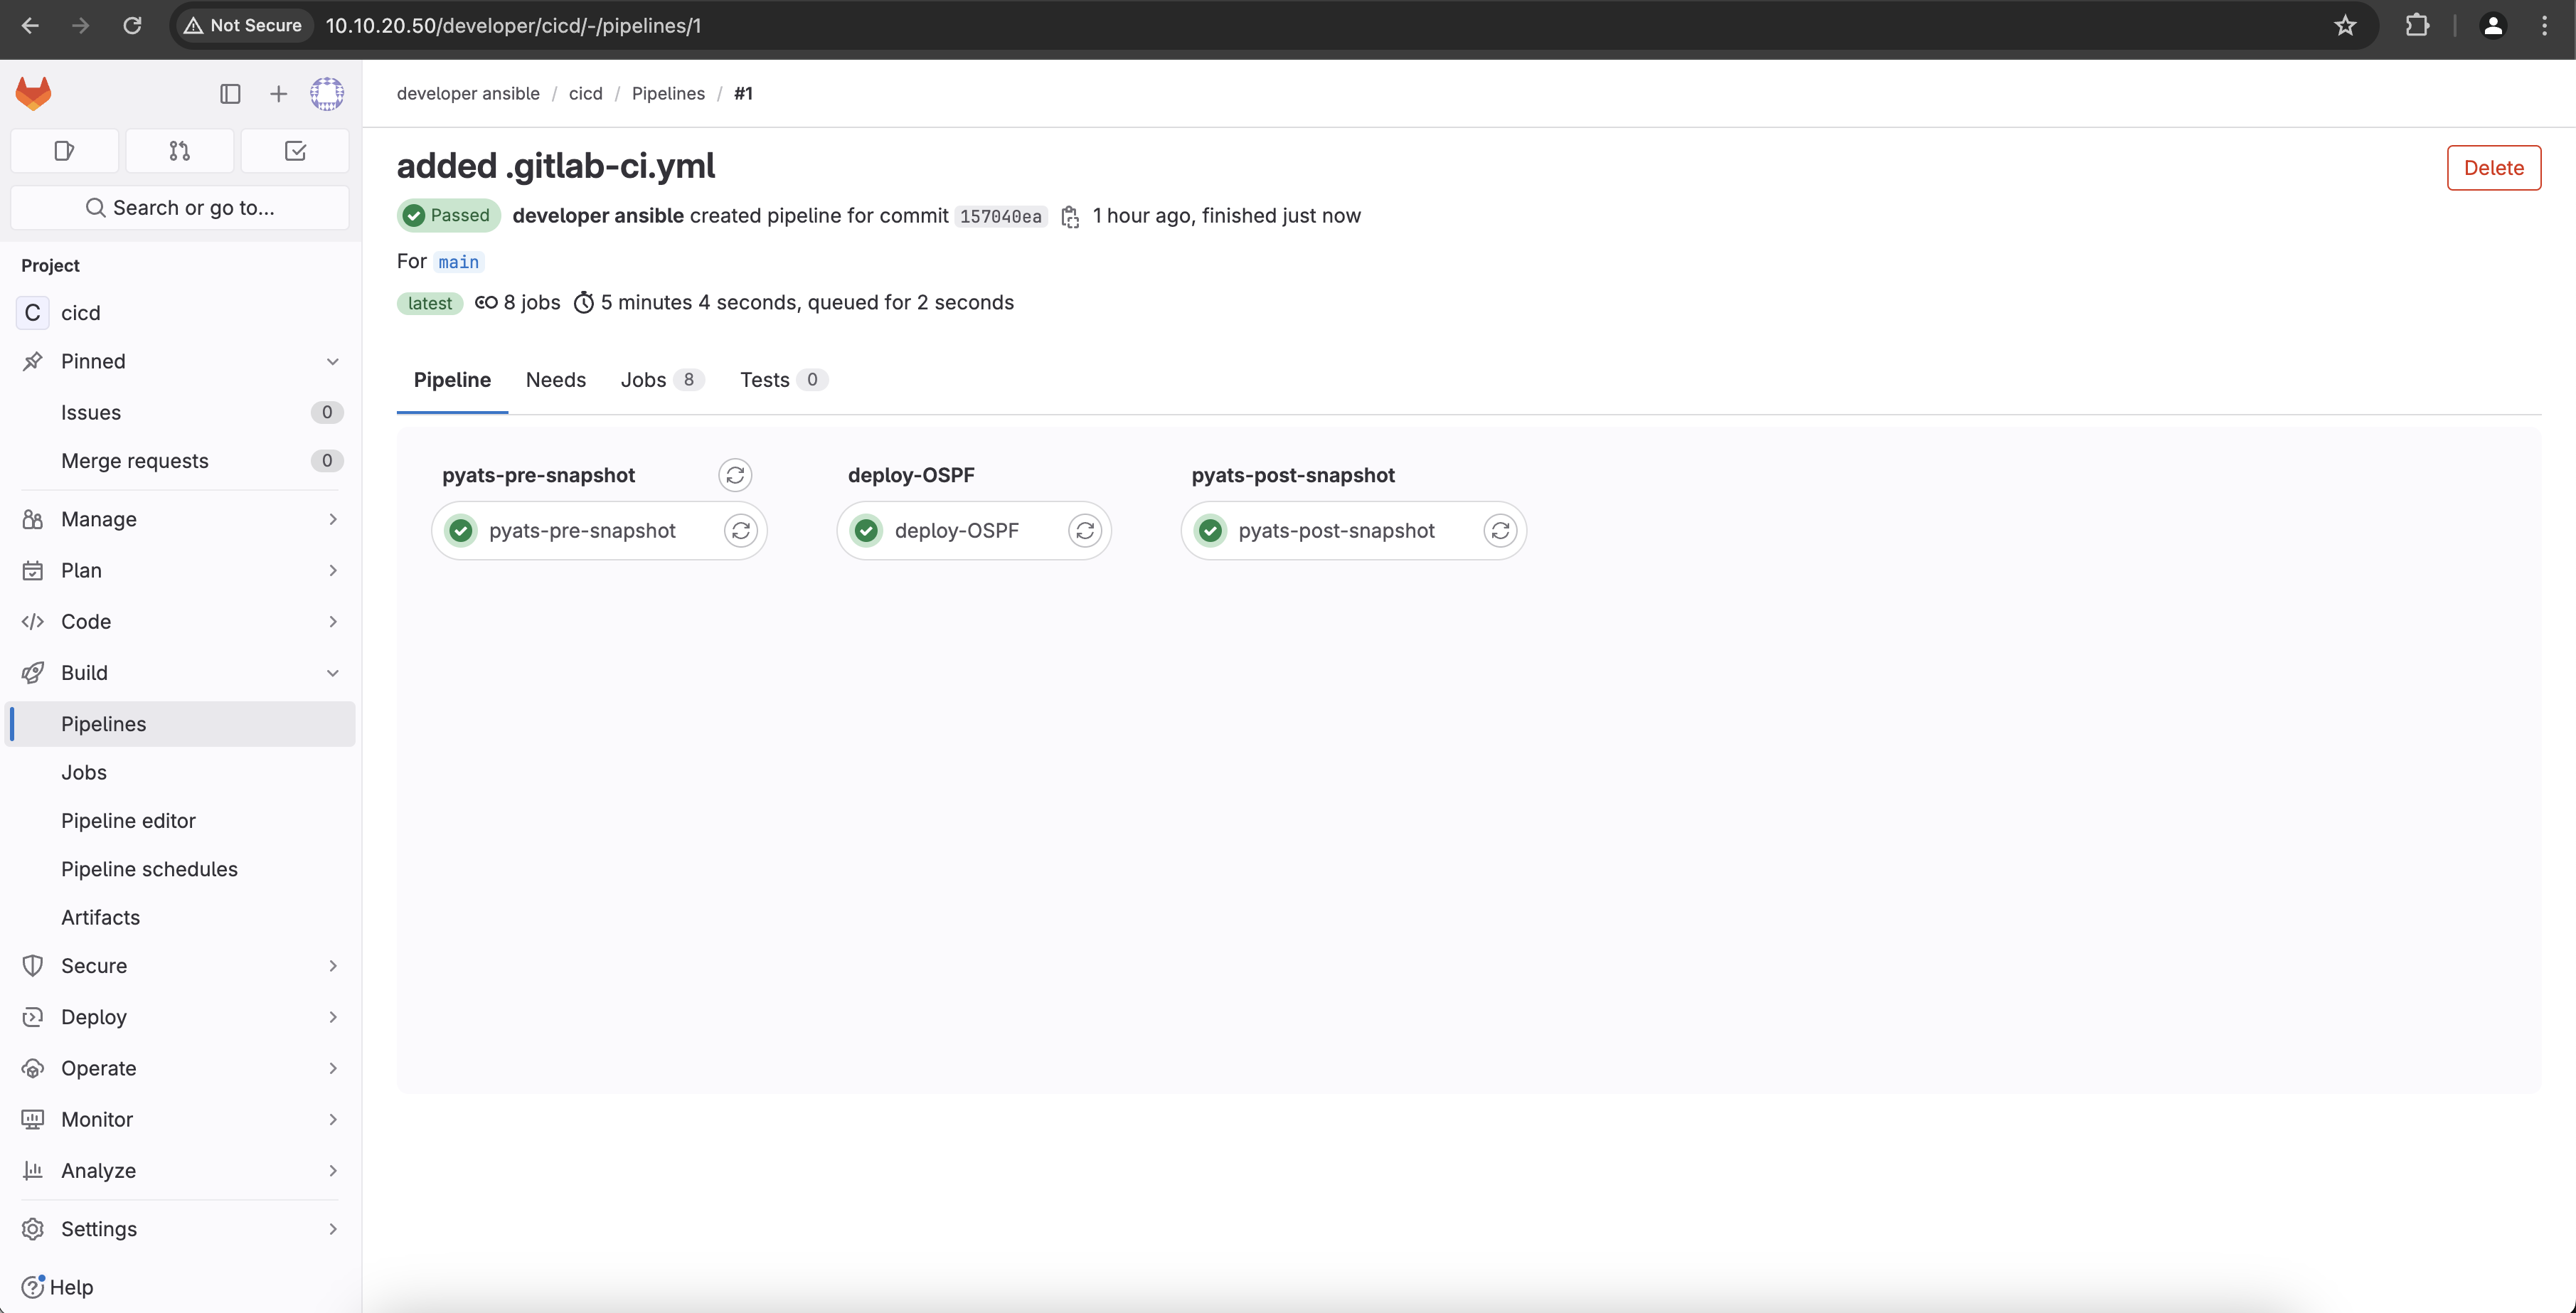
Next, you will configure a new interface on both virtual switches using the pipeline.