Incidents and Investigations (Conure) API Docs
The Incidents and Investigations (Conure v2) API allows developers to obtain information about their incidents and investigations in Cisco XDR.
Note: In Cisco XDR, some Private Intelligence functions (e.g. creating and managing of CTIM objects like Judgements and Indicators) are controlled by the legacy
CTIA/Private-Intel API.
Note: In Cisco XDR, performing Incident searching and Investigations are performed by the newer
Incidents and Investigations API. The creation of Incidents in Cisco XDR is done with theIROH/Private-Intel API.
Note: In Cisco XDR you can use different formats for the ID of objects. You can use the "GUID" (e.g.
64322795-2xx5-49bd-8d0b-106680ae434a), the "short-ID" (e.g.incident-64322795-2xx5-49bd-8d0b-106680ae434a) and even full "CTIA URL" (legacy) is supported for backward compatibility. This has to do with that the APIs are evolving.
Use Cases
- Search for XDR incidents and its related entities.
- Create new Investigations for automated threat hunting.
- Link Investigations to Incidents.
How to use the API Docs
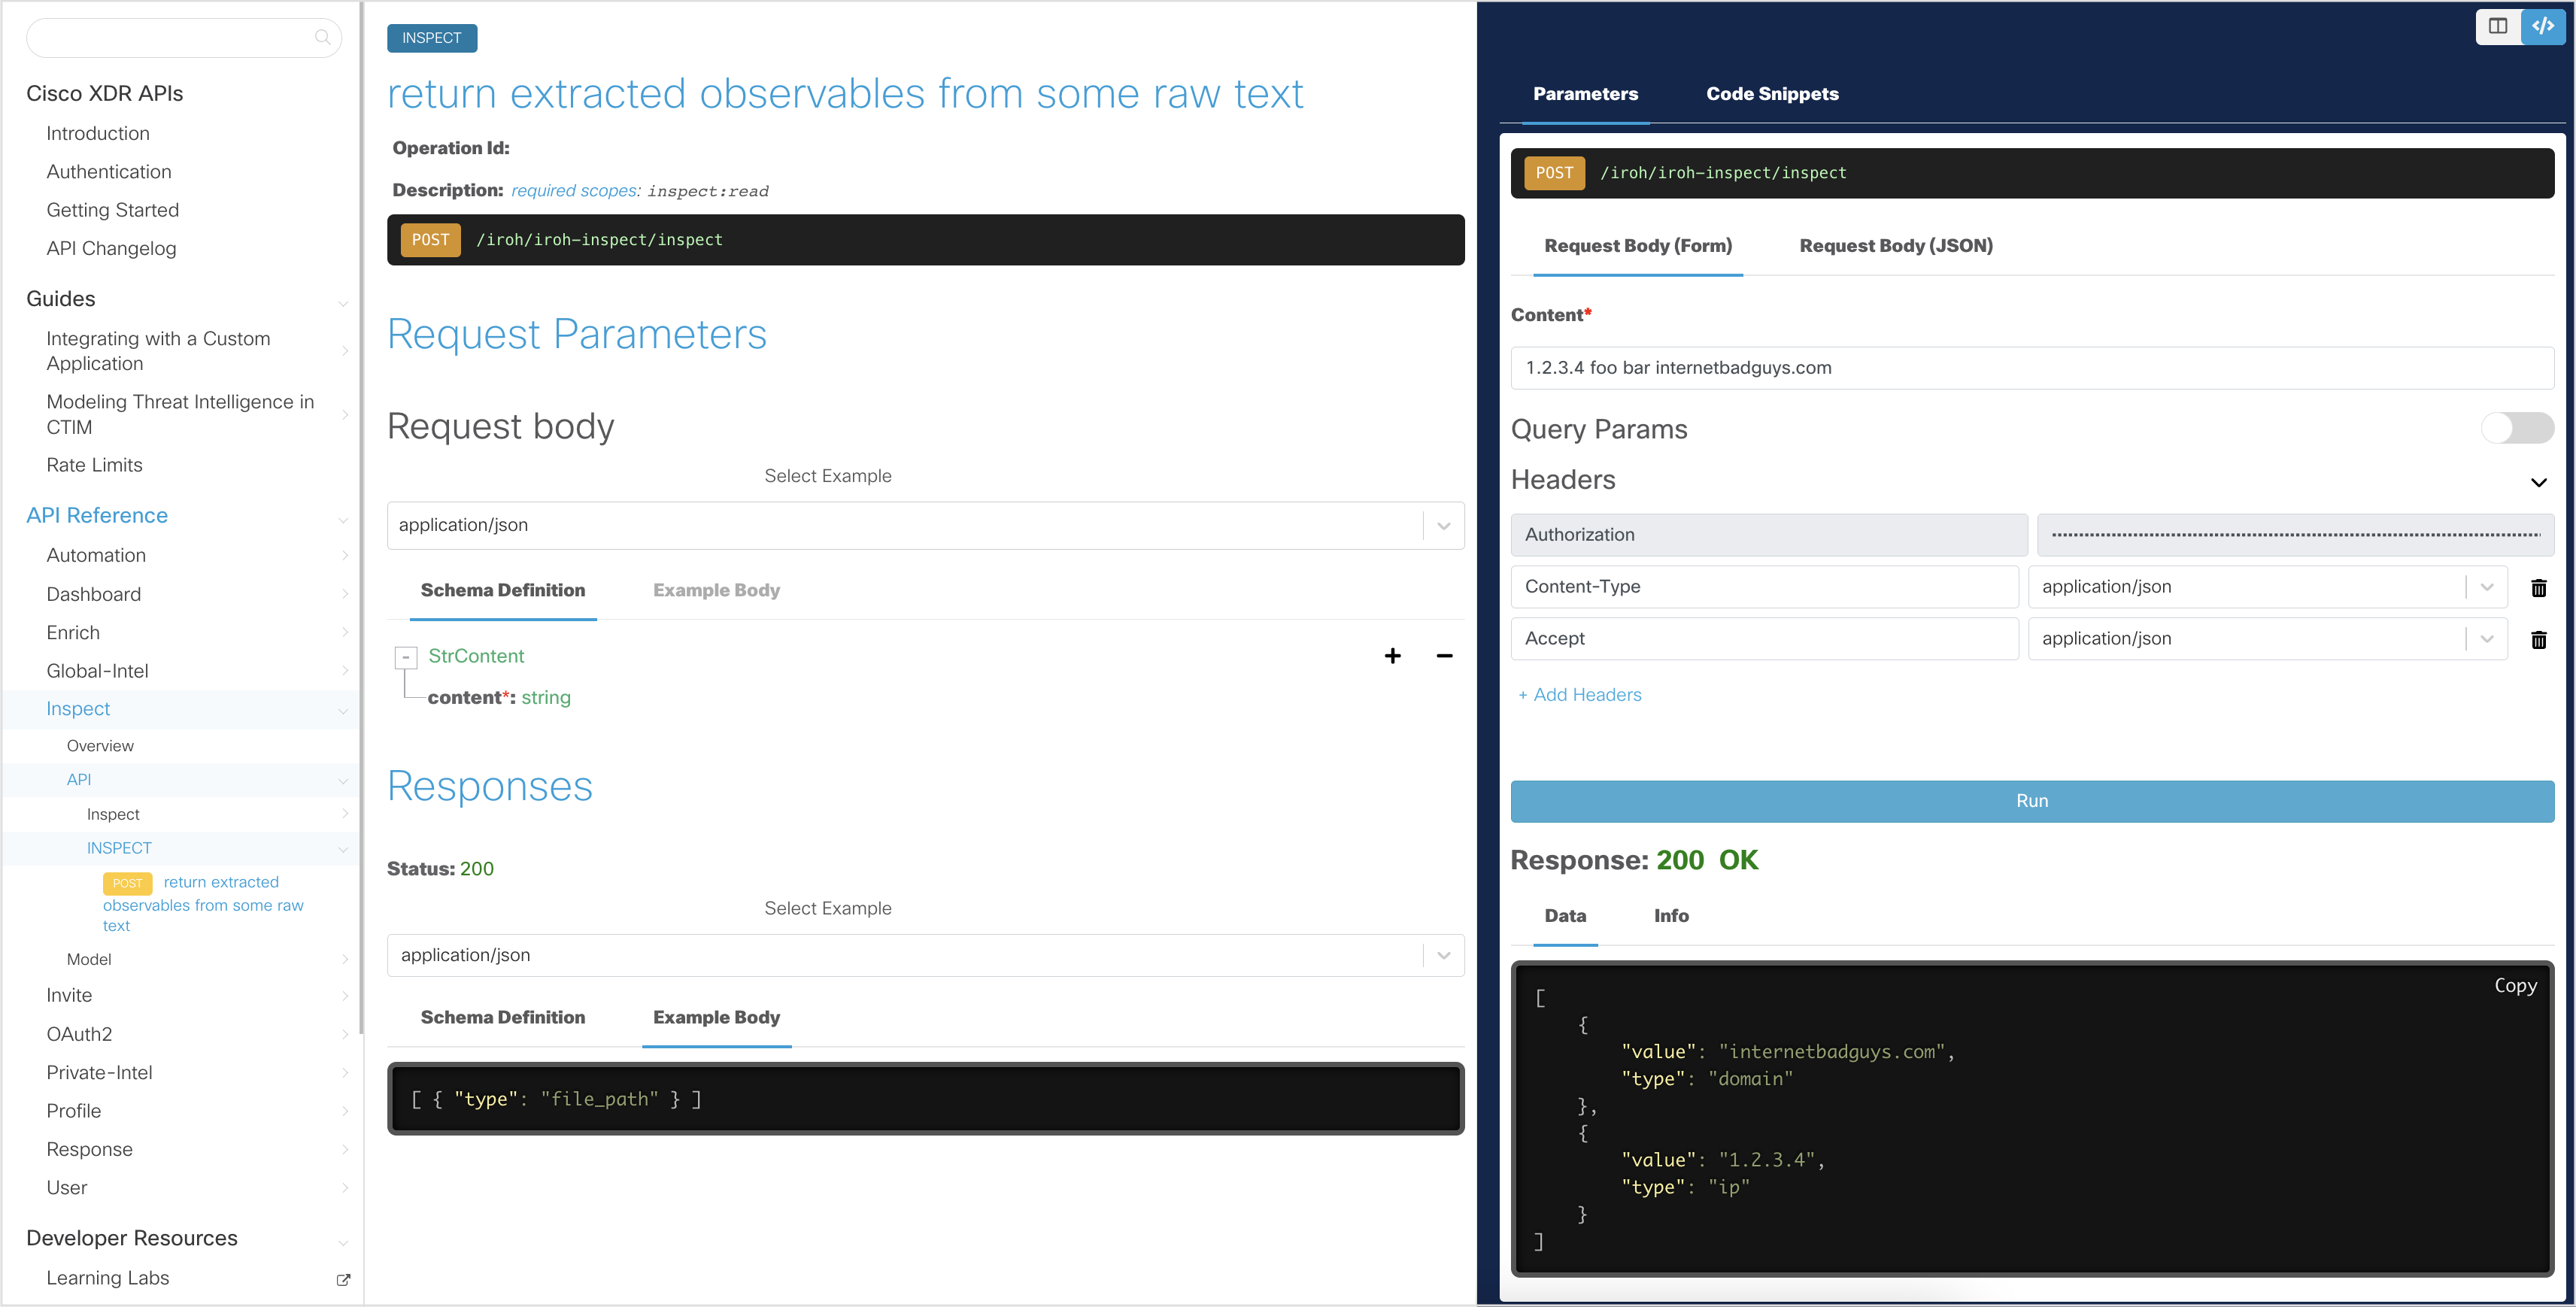
Use the interactive documentation to explore the Conure v2 API endpoints. Each request will have a complete description of all the required parameters and it also allows you to instantly try it out in the online console. Code templates are also provided for you to quickly build scripts.
In the interactive explorer, the Client ID and Client Secret has been pre-filled and will allow you to make read-only API requests. These credentials will allow you to get an Access Token with a few simple button clicks, which will be stored for subsequent API requests until the token expires.
Note: The interactive documentation uses read-only credentials and the try it out feature will only work with
GETand selectedPOSTrequests.To try other
Conure v2API requests, go to https://conure.us.security.cisco.com/index.html
Generate an Access Token
In the interactive API explorer, the Access Token is automatically generated using the pre-filled Client ID and Client Secret so you do not need to generate it yourself.
If you want to understand how the Access Token is generated from the Client ID and Client Secret credentials, take a look at the Authentication page.
For detailed instructions on how to use the interactive API documentation (or your own Python script), see the Getting Started page.
Download the Conure v2 OpenAPI Specification
Download the Conure v2 OpenAPI specification (OAS) file here.
Sample Code
Below is an example of how to use the Conure v2 API, without the Python SDK. Please check the Getting Started for instructions using the SDK.
import json
import requests

# create headers for API request (See the OAuth2 overview page for sample code to generate an access token)
access_token = 'eyJhbGciO....bPito5n5Q' # truncated example, generate JWT token separately
bearer_token = 'Bearer ' + access_token

# count the amount of incidents that are assigned to a name
assignee_name = 'Christopher van der Made'
url = 'https://conure.us.security.cisco.com/v2/incident/search/count?sort_order=asc&assignees=' + assignee_name

headers = {
            'Authorization': bearer_token,
            'Content-Type':'application/json',
            'Accept':'application/json'
}

response = requests.get(url, headers=headers)
print(response.text)

if response.status_code == 200:
    # convert the response to a dict object
    number_of_incidents = json.loads(response.text)

print(f"{assignee_name} has {number_of_incidents} assigned!")Contact: Cisco Security Business Group -- Advanced Threat
License: All Rights Reserved