Authentication
The Secure Access API provides a standard REST interface and supports the OAuth 2.0 Client Credentials Flow. To get started, sign in to Secure Access and create your Secure Access API keys.
Note: API keys, passwords, secrets, and tokens allow access to your private customer data. Never share your credentials with another user or organization.
API key use cases
You can use your Secure Access API keys in client programs that interact with the Secure Access platform. Create KeyAdmin keys to manage your Secure Access API keys.
| Key Type | Description | Use Cases | Manage |
|---|---|---|---|
| Secure Access API key | Secure, intent-based API key with configured key scopes and permissions and expiration date | View and manage your network connections, users, policies, and reports | Manage Secure Access API Keys |
| Secure Access KeyAdmin API key | Secure API key with configured permissions and expiration date | Create and manage the Secure Access API keys in your organization | Manage KeyAdmin API Keys |
Walkthrough: Secure Access API authentication
Best practices: Secure Access API authentication
Prerequisites
- You must have a Cisco Secure Access user account with the Full Admin user role.
- You must have a Cisco Security Cloud Single Sign-On (SCSO) account to sign in to Secure Access.
For more information, see Cisco Secure Access Help.
Sign in to Secure Access
Sign in to Secure Access at:
Enter the email address for your Secure Access account.
Select SIGN IN.
Manage API keys
Create and manage Secure Access API keys.
- Review API key status
- Create an API key
- Refresh a Secure Access API key
- Update a Secure Access API key
- Delete a Secure Access API key
Review API key status
Use the API Keys tile to review the API keys in your organization. The tile shows the total number of API keys, how many have expired, and how many expire soon.
Select the API Keys tile to switch to the API key list, locate a key, and manage it.

Create an API key
Create an API key and secret.
Note: You have only one opportunity to copy your API secret. Secure Access does not save your API secret and you cannot retrieve the secret after its initial creation.
Navigate to Admin > API Keys.
If the API Keys tile is not already selected, select it. Then select Add.
Enter a name and description for the key. A name must contain fewer than 256 characters. The key description is optional.
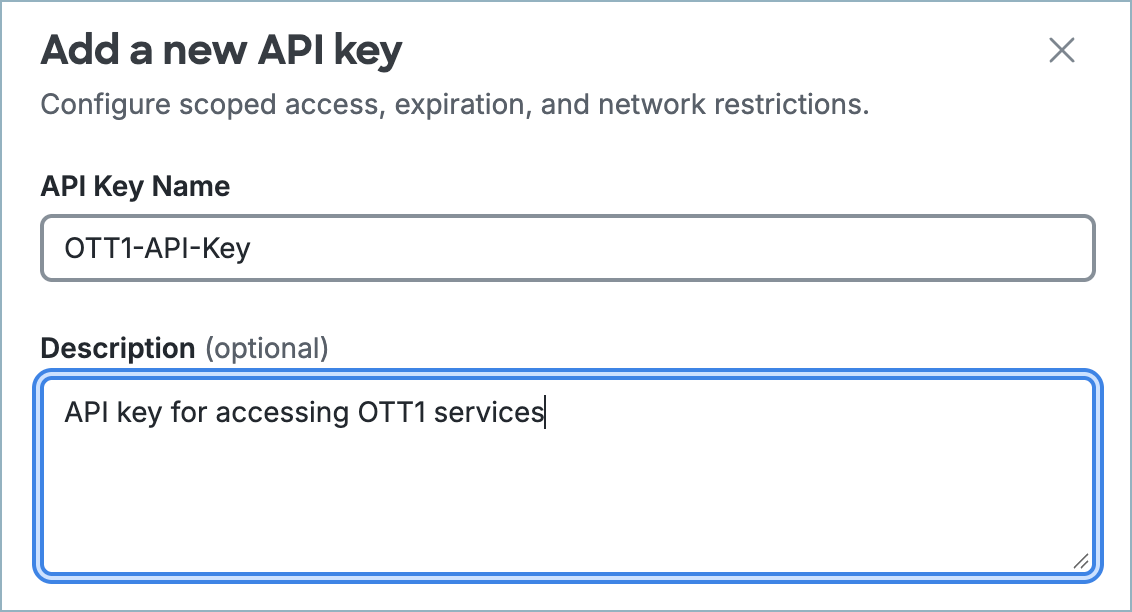
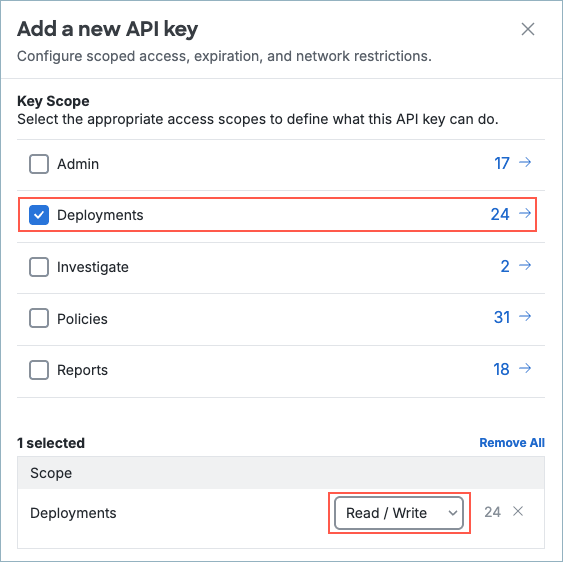
Expand each key scope and select the categories that provide access to the API endpoints you need. For each selected scope and resource, choose Read Only or Read / Write. For details about available scopes, see OAuth 2.0 Scopes.
For Expiry Date, choose the expiration date for the key, or choose Never expire.

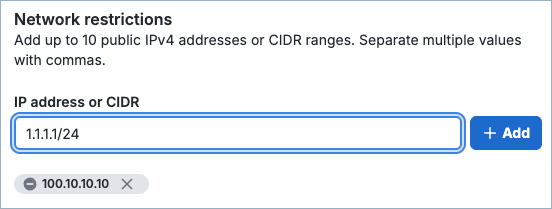
(Optional) For Network restrictions, enter a comma-separated list of public IP addresses or CIDRs, then select Add. To remove a network address, select x beside it.
Note: You can add up to ten networks to your API key. You can only use your API key to authenticate requests for clients on the selected networks.
Select CREATE KEY.
Copy and save your API Key and Secret Key.
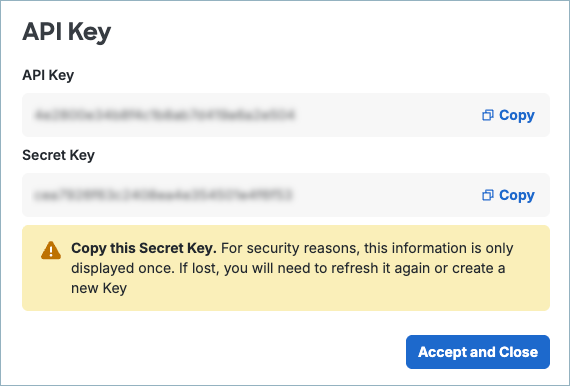
Note: If you do not save your API secret, you cannot retrieve it later. To get a new secret, refresh the API key, then copy and save the new API Key and Secret Key.
Select Accept and Close.
Refresh a Secure Access API key
Refresh an API key if it has expired or if you did not save its secret when you created it. Secure Access displays the new secret only once, so copy and save it before closing the dialog.
Navigate to Admin > API Keys.
If the API Keys tile is not already selected, select it. Then expand the API key you want to refresh.
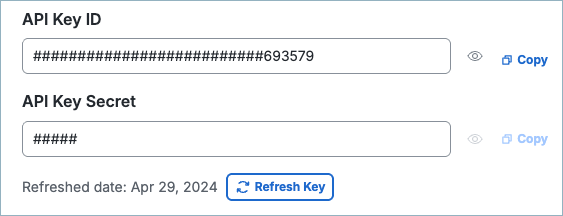
Scroll to the API Key ID and API Key Secret fields, then select Refresh Key.
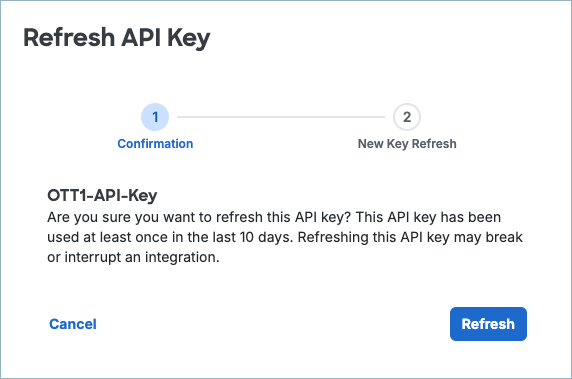
Select Refresh.
Copy and save your API Key and Secret Key.
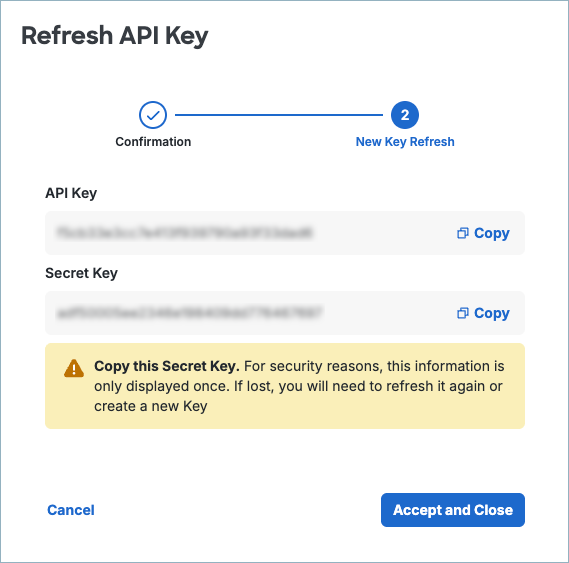
Note: You have only one opportunity to copy your API secret. Secure Access does not save your API secret and you cannot retrieve the secret after its initial creation.
Select Accept and Close.
Update a Secure Access API key
Update a Secure Access API key.
Navigate to Admin > API Keys.
If the API Keys tile is not already selected, select it. Then expand the API key you want to update.
You can modify the API Key Name, Description, selected scopes in Key Scope, and Expiry Date.
For Network restrictions, update the list of IP addresses and CIDRs. To remove a network address, select x beside it.
Select Save.
Delete a Secure Access API key
Delete a Secure Access API key.
- Navigate to Admin > API Keys.
- If the API Keys tile is not already selected, select it.
- In the API Keys table, find the key you want to delete. To filter the list, enter an API name, key, or creator in the Search by API Name, Key or Creator field. Select the checkbox beside the key.
- In the action bar, select Delete.
- In the confirmation dialog, verify that the correct key is listed, then select Delete. Deleted keys cannot be recovered.
Manage KeyAdmin API keys
Create and manage Secure Access KeyAdmin API keys.
- Review KeyAdmin API key status
- Create KeyAdmin key
- Refresh KeyAdmin key
- Update KeyAdmin key
- Delete KeyAdmin key
Review KeyAdmin API key status
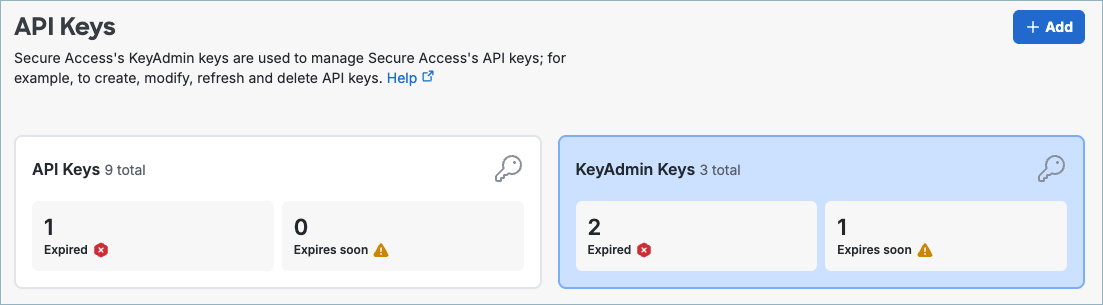
Use the KeyAdmin Keys tile to review the KeyAdmin API keys in your organization. The tile shows the total number of keys, how many have expired, and how many expire soon.
Select the KeyAdmin Keys tile to switch to the KeyAdmin API key list, locate a key, and manage it.
Create KeyAdmin key
Create a KeyAdmin API key and secret.
Note: You have only one opportunity to copy your API secret. Secure Access does not save your API secret and you cannot retrieve the secret after its initial creation.
Navigate to Admin > API Keys.
If the KeyAdmin Keys tile is not already selected, select it. Then select Add.
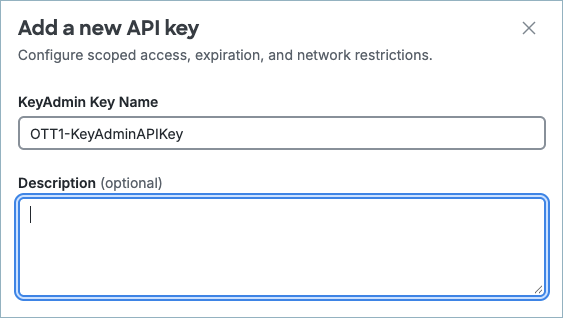
Enter a name and optional description for the key. The name must contain fewer than 256 characters.
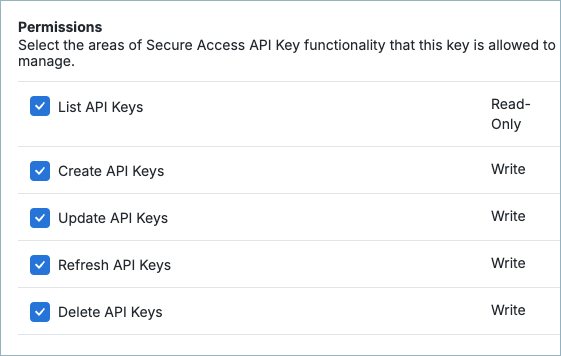
Select the permissions the key needs. List API Keys grants read-only access. Create API Keys, Update API Keys, Refresh API Keys, and Delete API Keys grant write access for those actions.
For Expiry Date, choose the expiration date for the key, or choose Never expire.

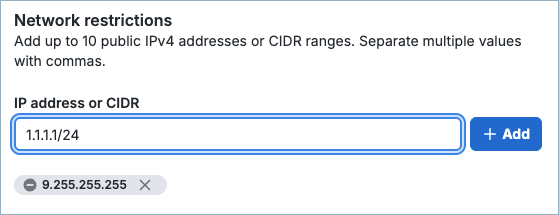
(Optional) For Network restrictions, add up to ten public IPv4 addresses or CIDR ranges, separating multiple values with commas. Select Add after each entry. To remove an address, select x beside it.
Note: You can use the KeyAdmin API key to authenticate requests only from clients on the selected networks.
Select CREATE KEY.
Copy and save your KeyAdmin Key and Secret Key.
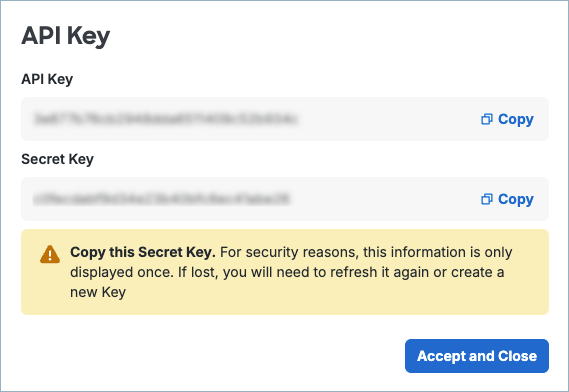
Note: If you do not save the secret, you cannot retrieve it later. To get a new one, refresh the KeyAdmin API key, then copy and save the new key and secret.
Select Accept and Close.
Refresh KeyAdmin key
Refresh a KeyAdmin API key if it has expired or if you did not save its secret when you created it. Secure Access displays the new secret only once, so copy and save it before closing the dialog.
Navigate to Admin > API Keys.
If the KeyAdmin Keys tile is not already selected, select it. Then expand the KeyAdmin API key you want to refresh.
Scroll down to the Generated credentials section and select Refresh Key.
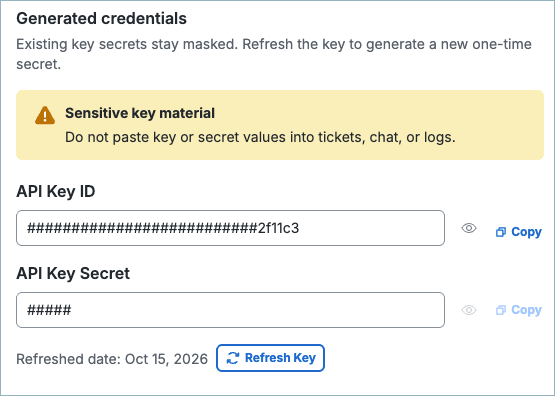
In the confirmation dialog, select Refresh.
Copy and save your KeyAdmin Key and Secret Key.
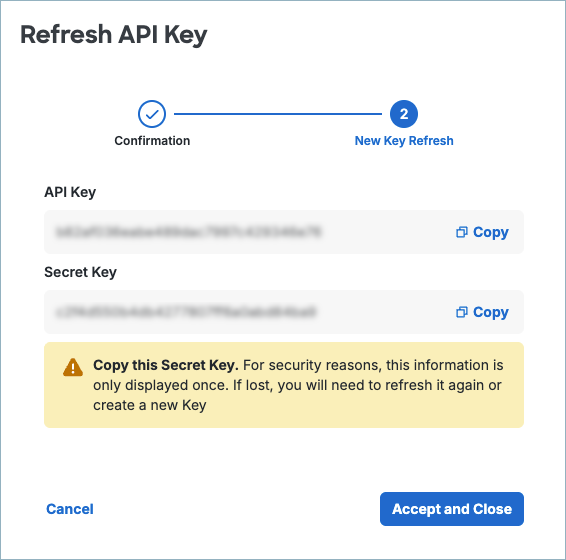
Note: If you do not save the new secret, repeat this procedure to generate another one.
Select Accept and Close.
Update KeyAdmin key
Update a KeyAdmin API key.
Navigate to Admin > API Keys.
If the KeyAdmin Keys tile is not already selected, select it. Then select the KeyAdmin API key you want to update.
You can modify the KeyAdmin Key Name, Description, Permissions, and Expiry Date.
For Network restrictions, update the list of public IPv4 addresses or CIDR ranges. To remove an address, select x beside it.
Select Save.
Delete KeyAdmin key
Delete a KeyAdmin API key.
- Navigate to Admin > API Keys.
- If the KeyAdmin Keys tile is not already selected, select it.
- In the KeyAdmin Keys table, find the key you want to delete. If needed, search by permission, key, or creator. Select the checkbox beside that key.
- In the action bar, select Delete.
- In the confirmation dialog, verify that the selected key is listed, then select Delete. Deleted keys cannot be recovered.