API Quickstart
The goal of the Cisco DNA Center platform is to deliver world-class integration capabilities and a development environment that will drive greater partner innovations, provide seamless integration with the partner eco-system, and result in greater customer satisfaction.
Cisco DNA Center Platform API Overview
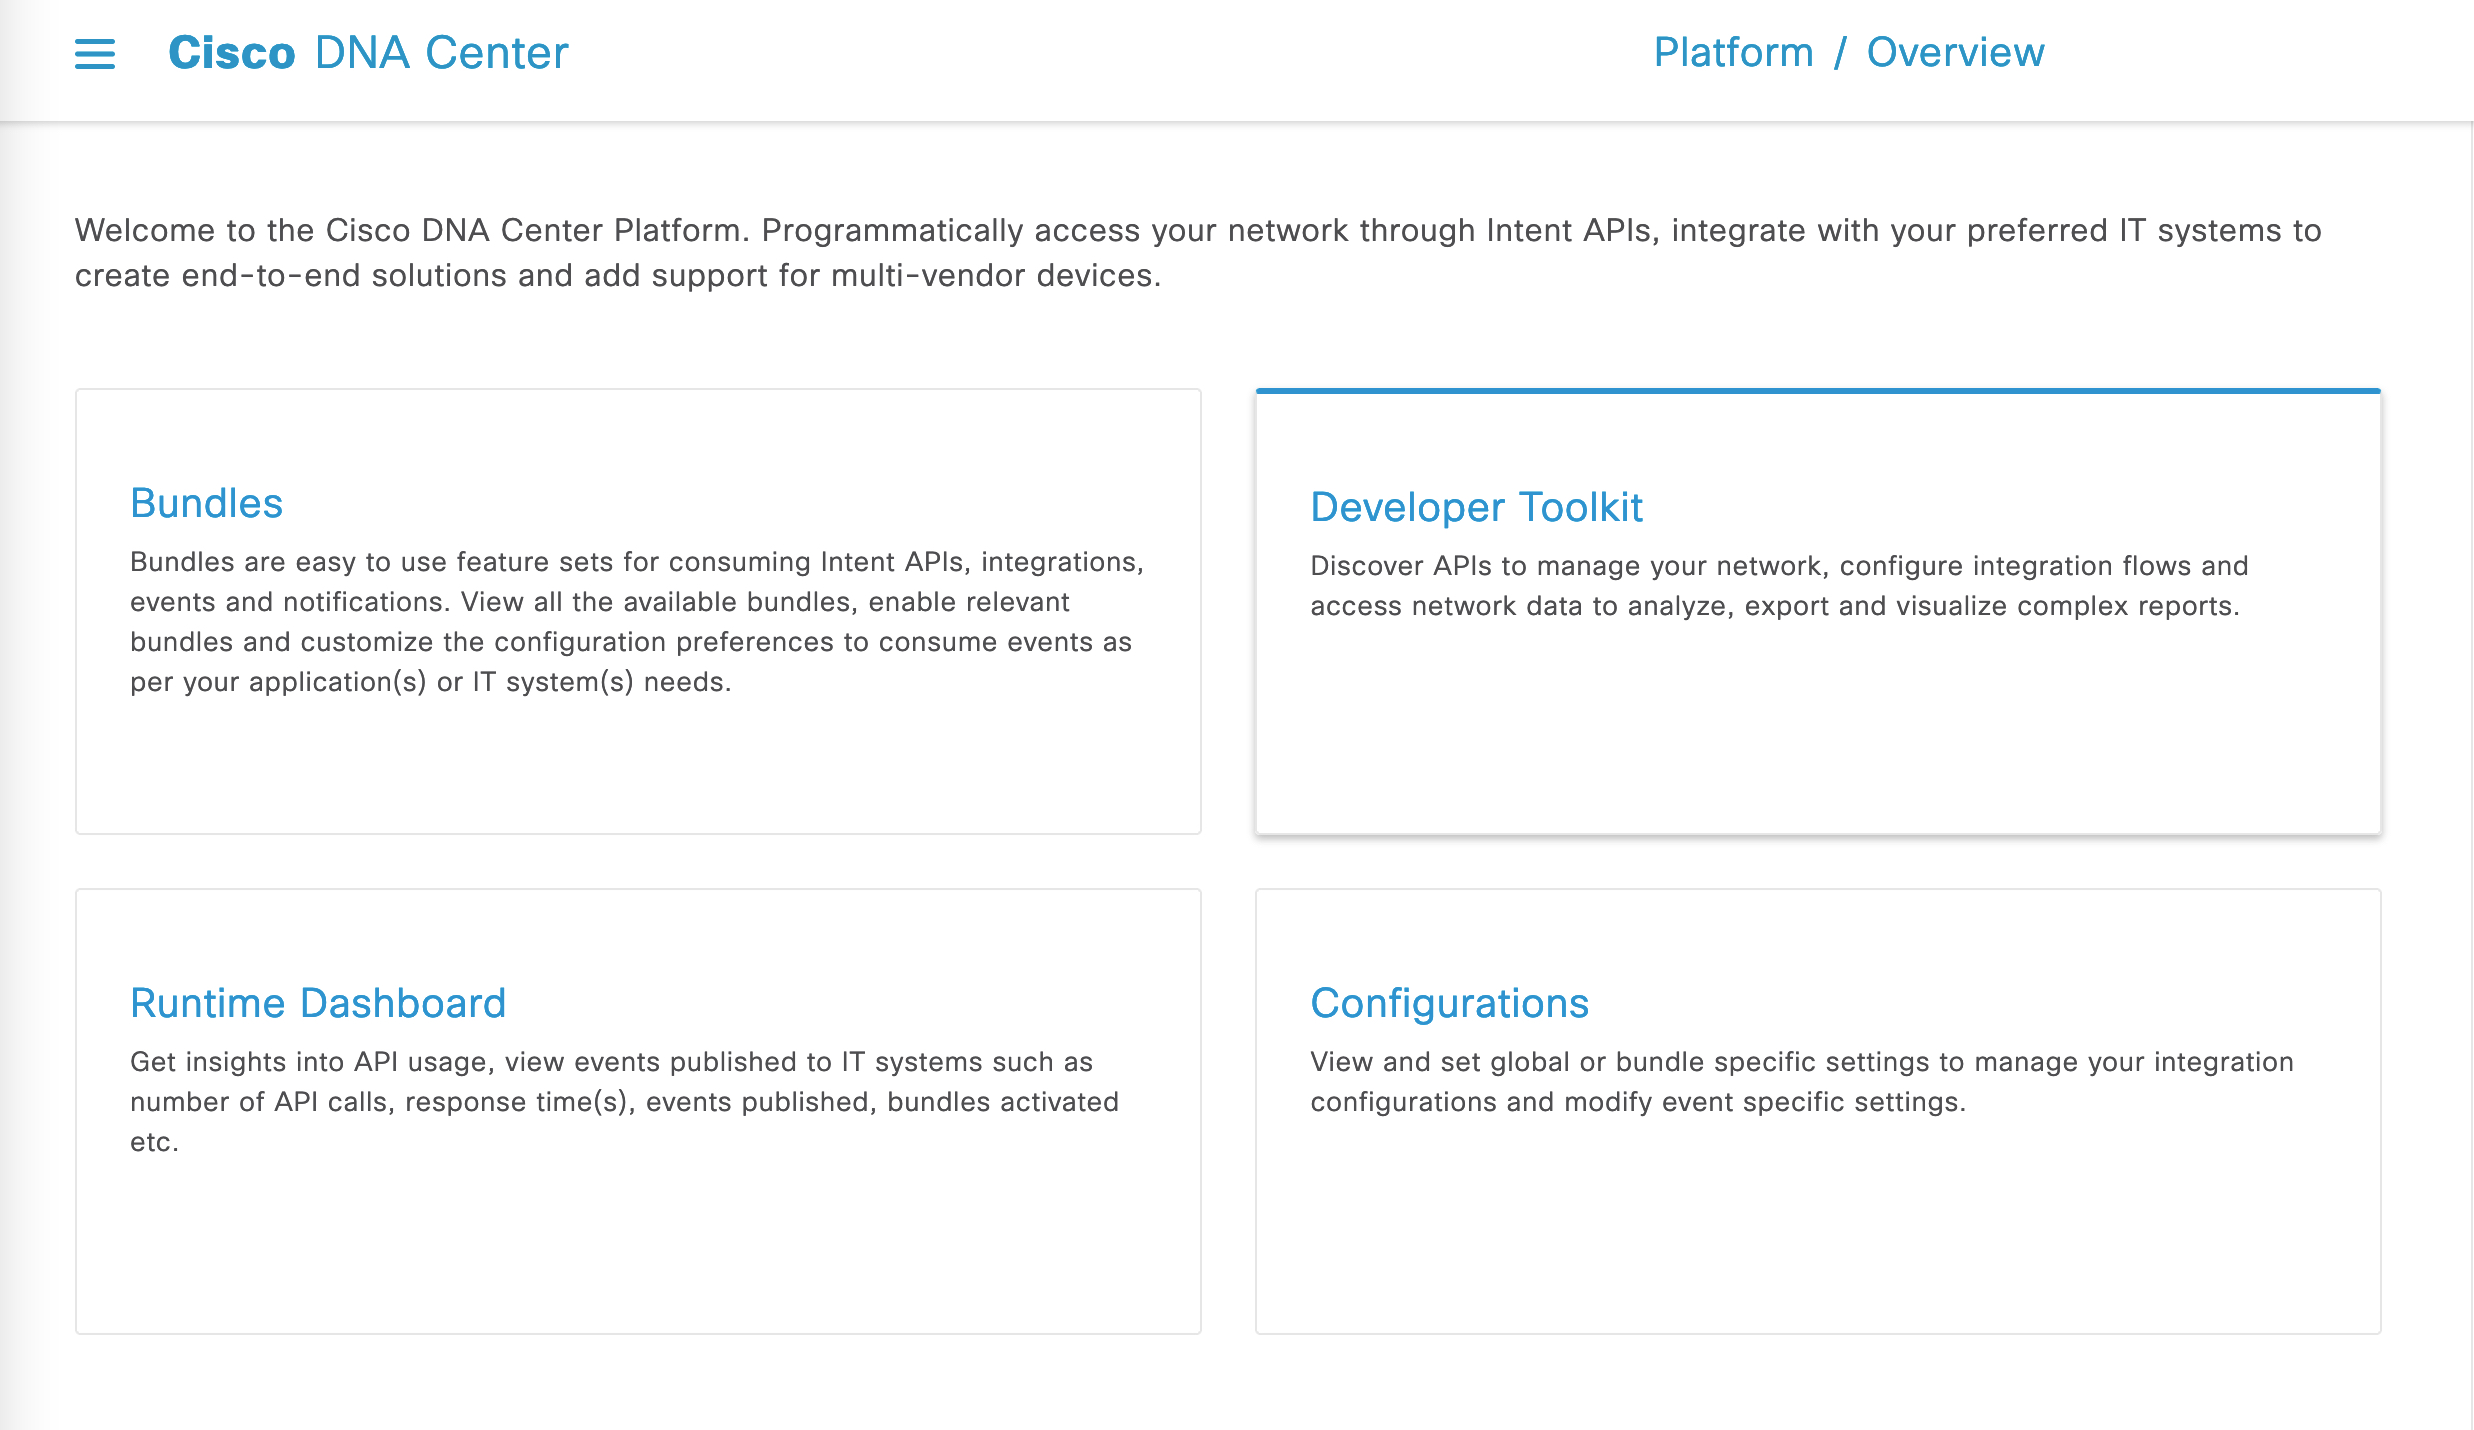
To view Cisco DNA Center API documentation through the Developer Toolkit in the Platform Portal (Figure 2). To view APIs, click Platform>Developer Toolkit.
If the Platform tab is not available, a user with super-admin permissions must install the Cisco DNA Center Platform application on your Cisco DNA Center instance. For more information, see "Deploy Cisco DNA Center Platform" in the Cisco DNA Center Platform User Guide for your release version.
Figure: Developer Toolkit on the Cisco DNA Center Platform tab

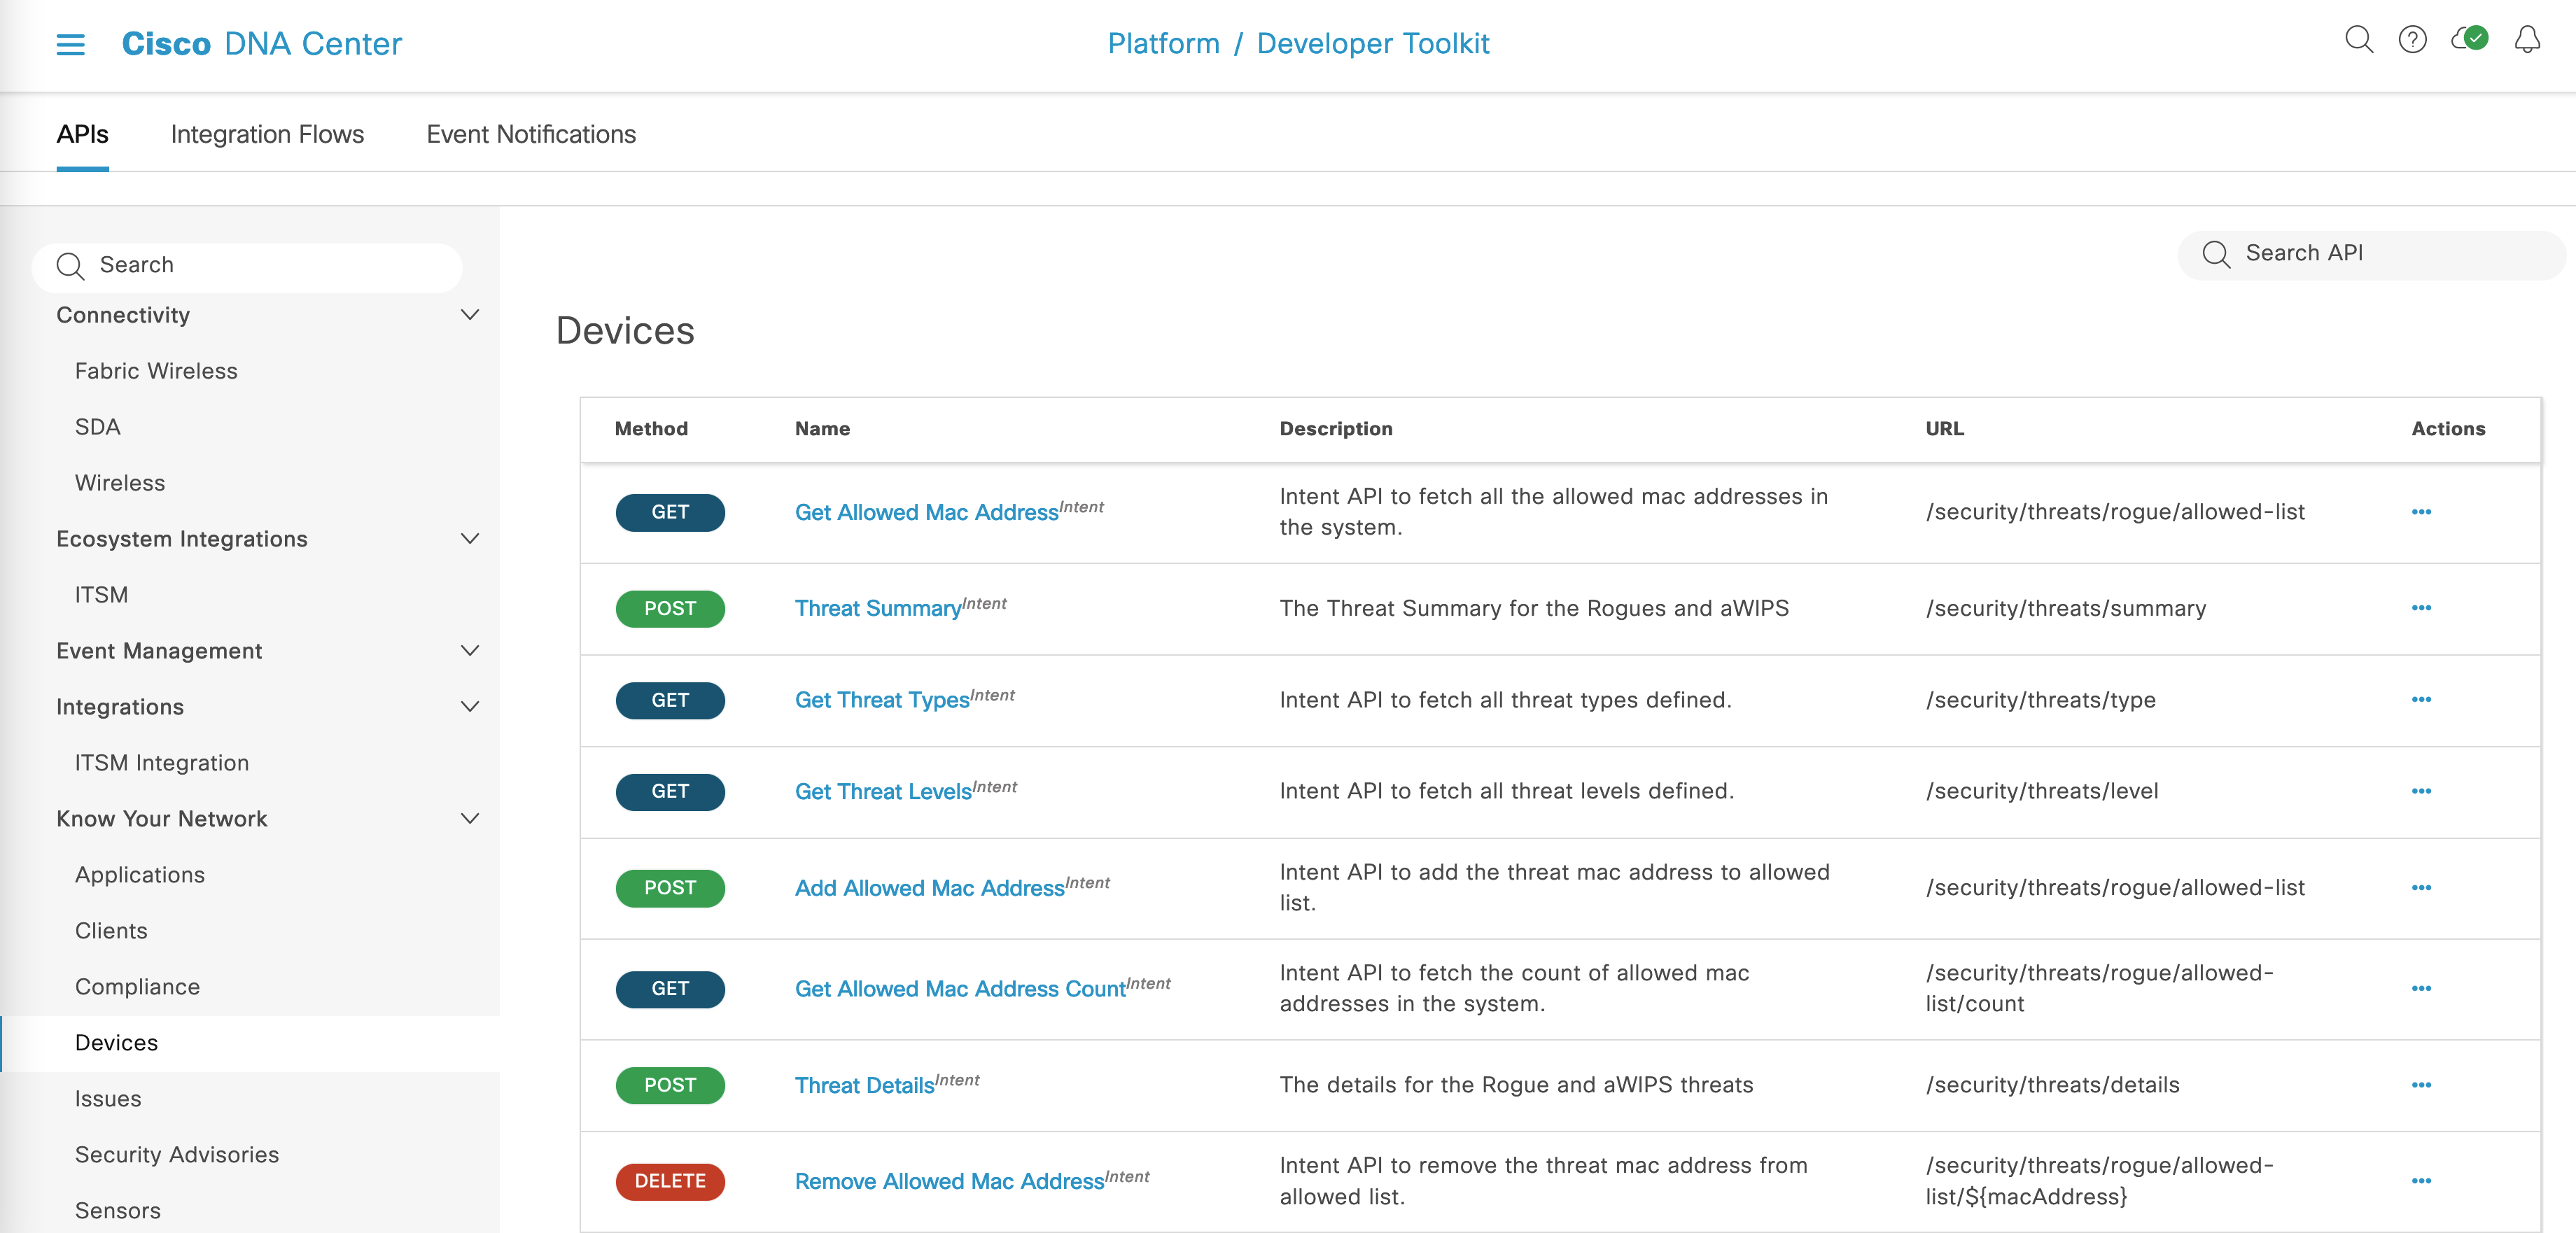
The Developer Toolkit provides documentation about each API call, organized according to functional areas of the Intent API.
Figure: Cisco DNA Center APIs in the Developer Toolkit

If the Developer Toolkit is not available, a user with super-admin permissions must install and enable the Cisco DNA Center REST API bundle on your Cisco DNA Center instance. For more information, see "Configure Bundles" in the Cisco DNA Center Platform User Guide for your release version.
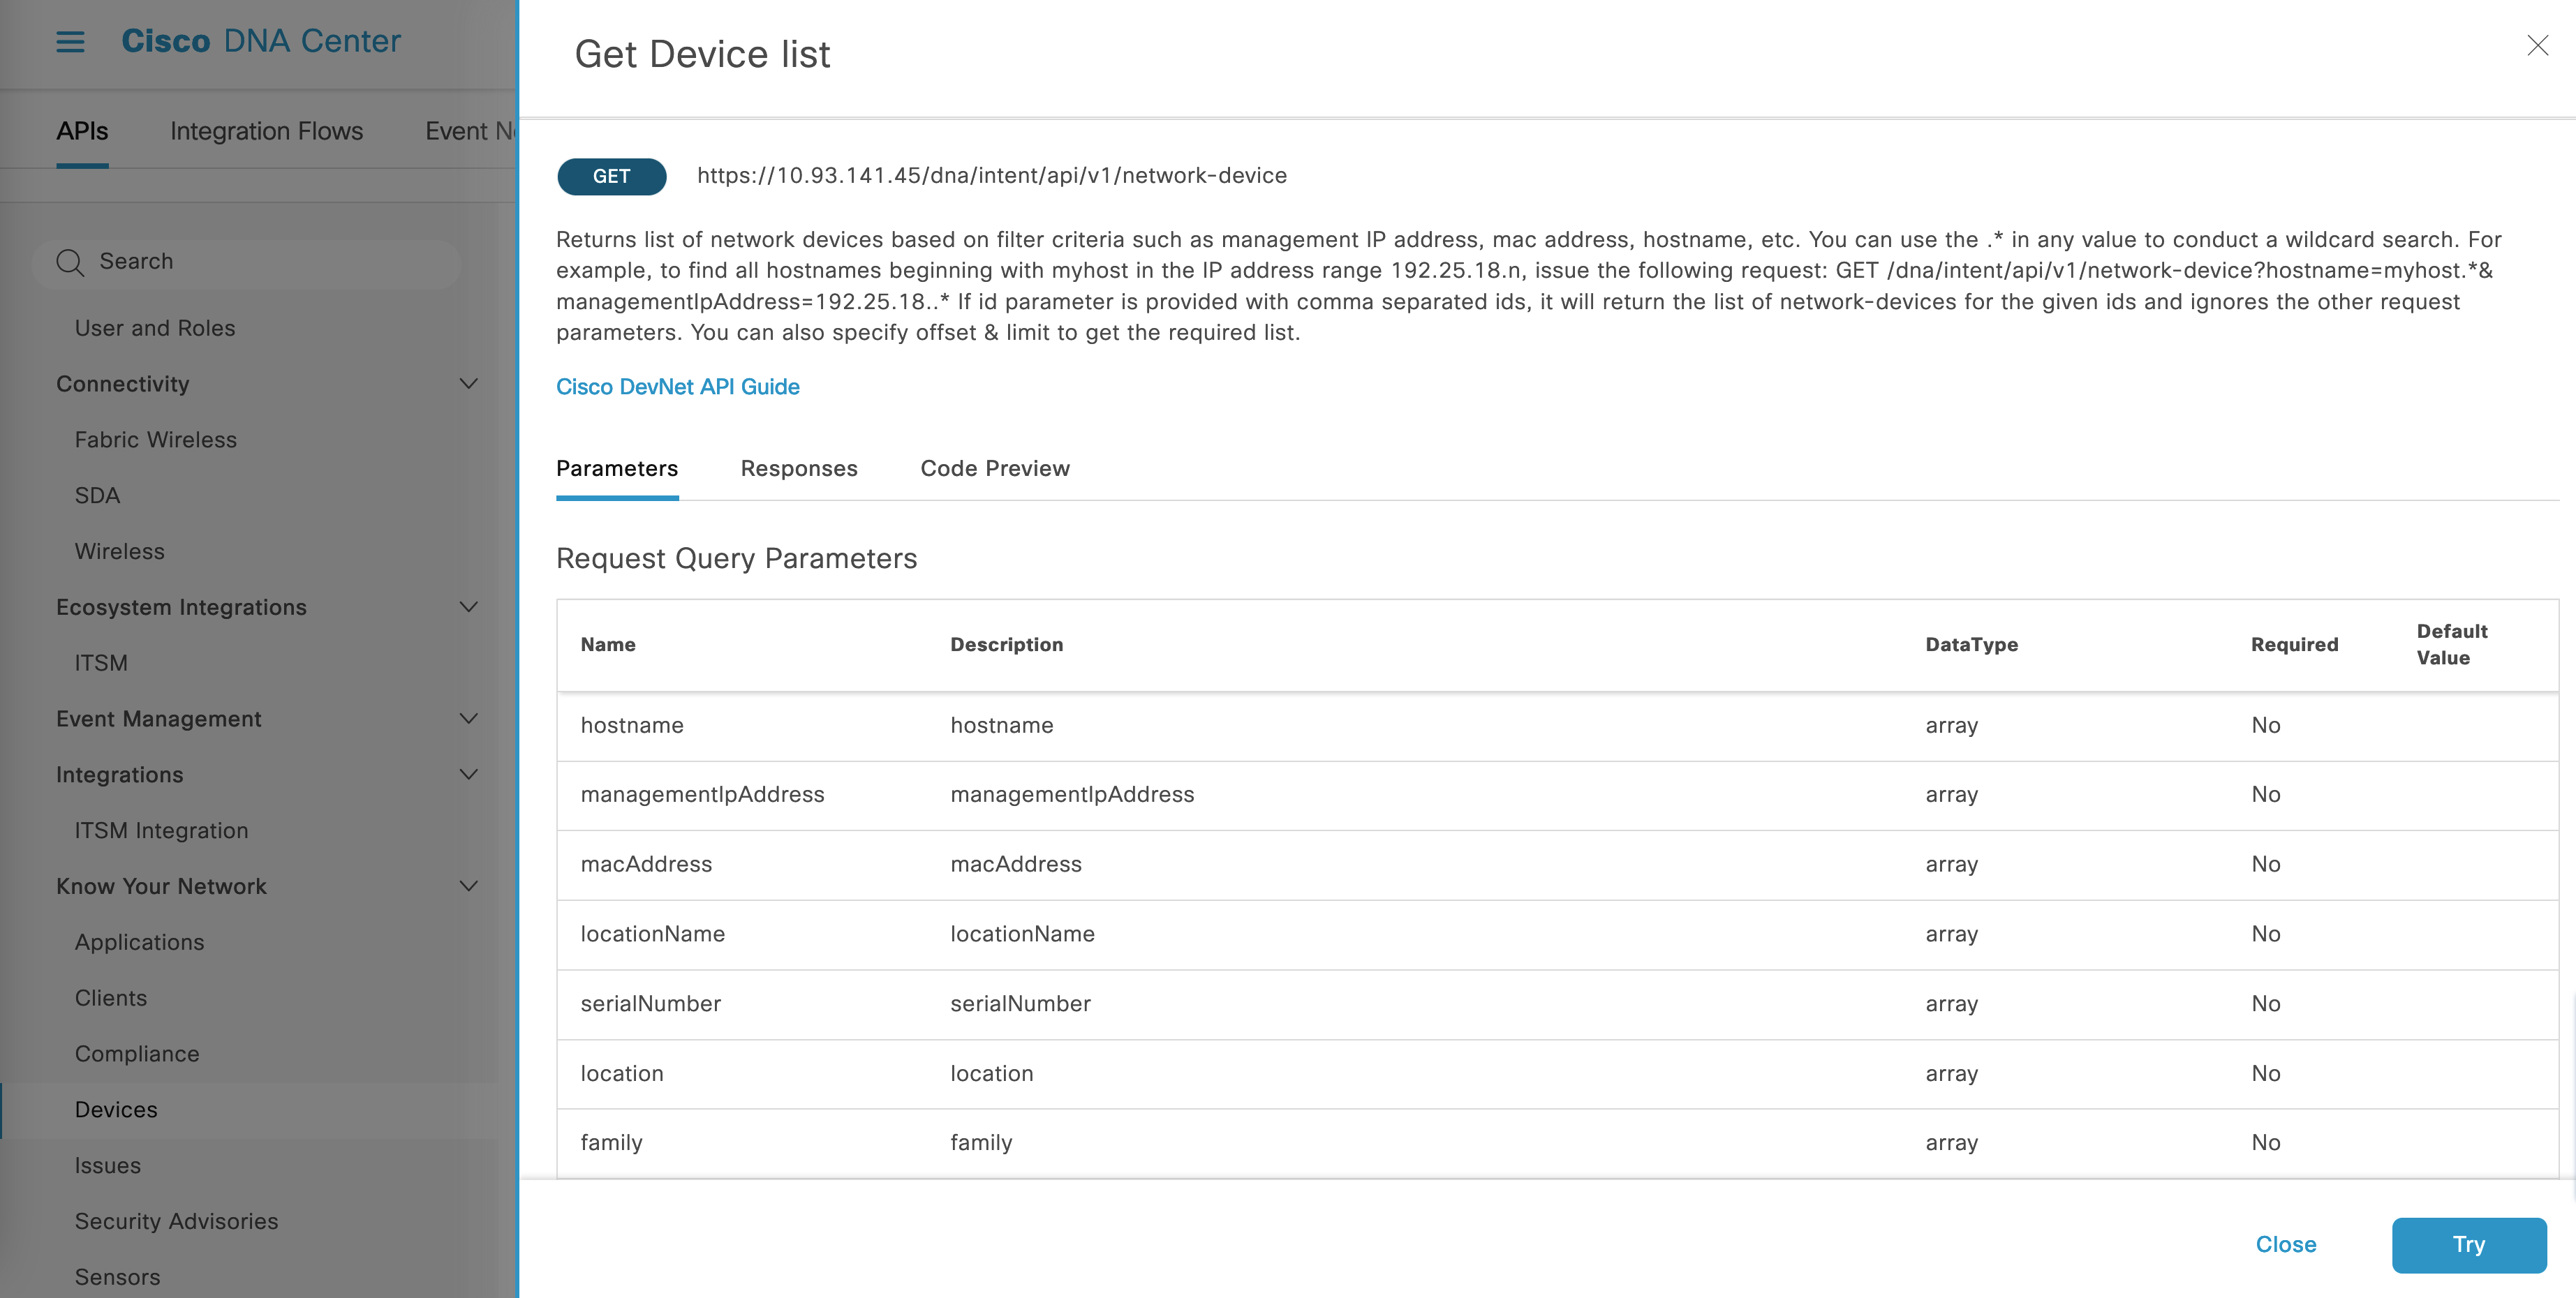
Click a request name to get detailed information, including the request method and URL, query parameters, request header parameters, responses, and schema, along with ways to preview or test the request.

Prerequisites
In order to run the code examples featured here, you must have Python 3.6 with the requests library installed. Use pip to install the requests library as shown below:
pip install requests
You must also import HTTPBasicAuth from requests.auth.
Authentication
The Cisco DNA Center APIs use token-based authentication. Run the following Python script to log in:
def get_token():
    token = requests.post(
       ‘https://<cluster IP>/dna/system/api/v1/auth/token’,
       auth=HTTPBasicAuth(
           username=<username>,
           password=<password>
       ),
       headers={'content-type': 'application/json'},
       verify=False,
    )
    data = token.json()
    return data[‘Token’]
Responses and Error Codes
Responses
The Cisco DNA Center APIs use a task-based response architecture so that multiple requests and responses can be sent concurrently.
Therefore, all PUT, POST, and DELETE requests have a task-based response (pictured below). To view more details about the response, send a GET request to the task URL (either from a script or as a URL).
API responses for GET requests are in JSON format, as shown in the examples that follow.
Error Codes
The error codes for Cisco DNA Center APIs follow the standard HTTP status codes.
Occasionally error codes will contain more specific information about the request. For example, the request has the following response when the input request is not valid:
{
    ‘response’: {
        ‘errorCode’: ‘Bad request’,
        ‘message’: ‘Invalid input request’,
        ‘detail’: ‘There was an error processing the input arguments.’
    },
    ‘version’: ‘1.0’
}
Examples
View Details About a Specific Network Device in Cisco DNA Center
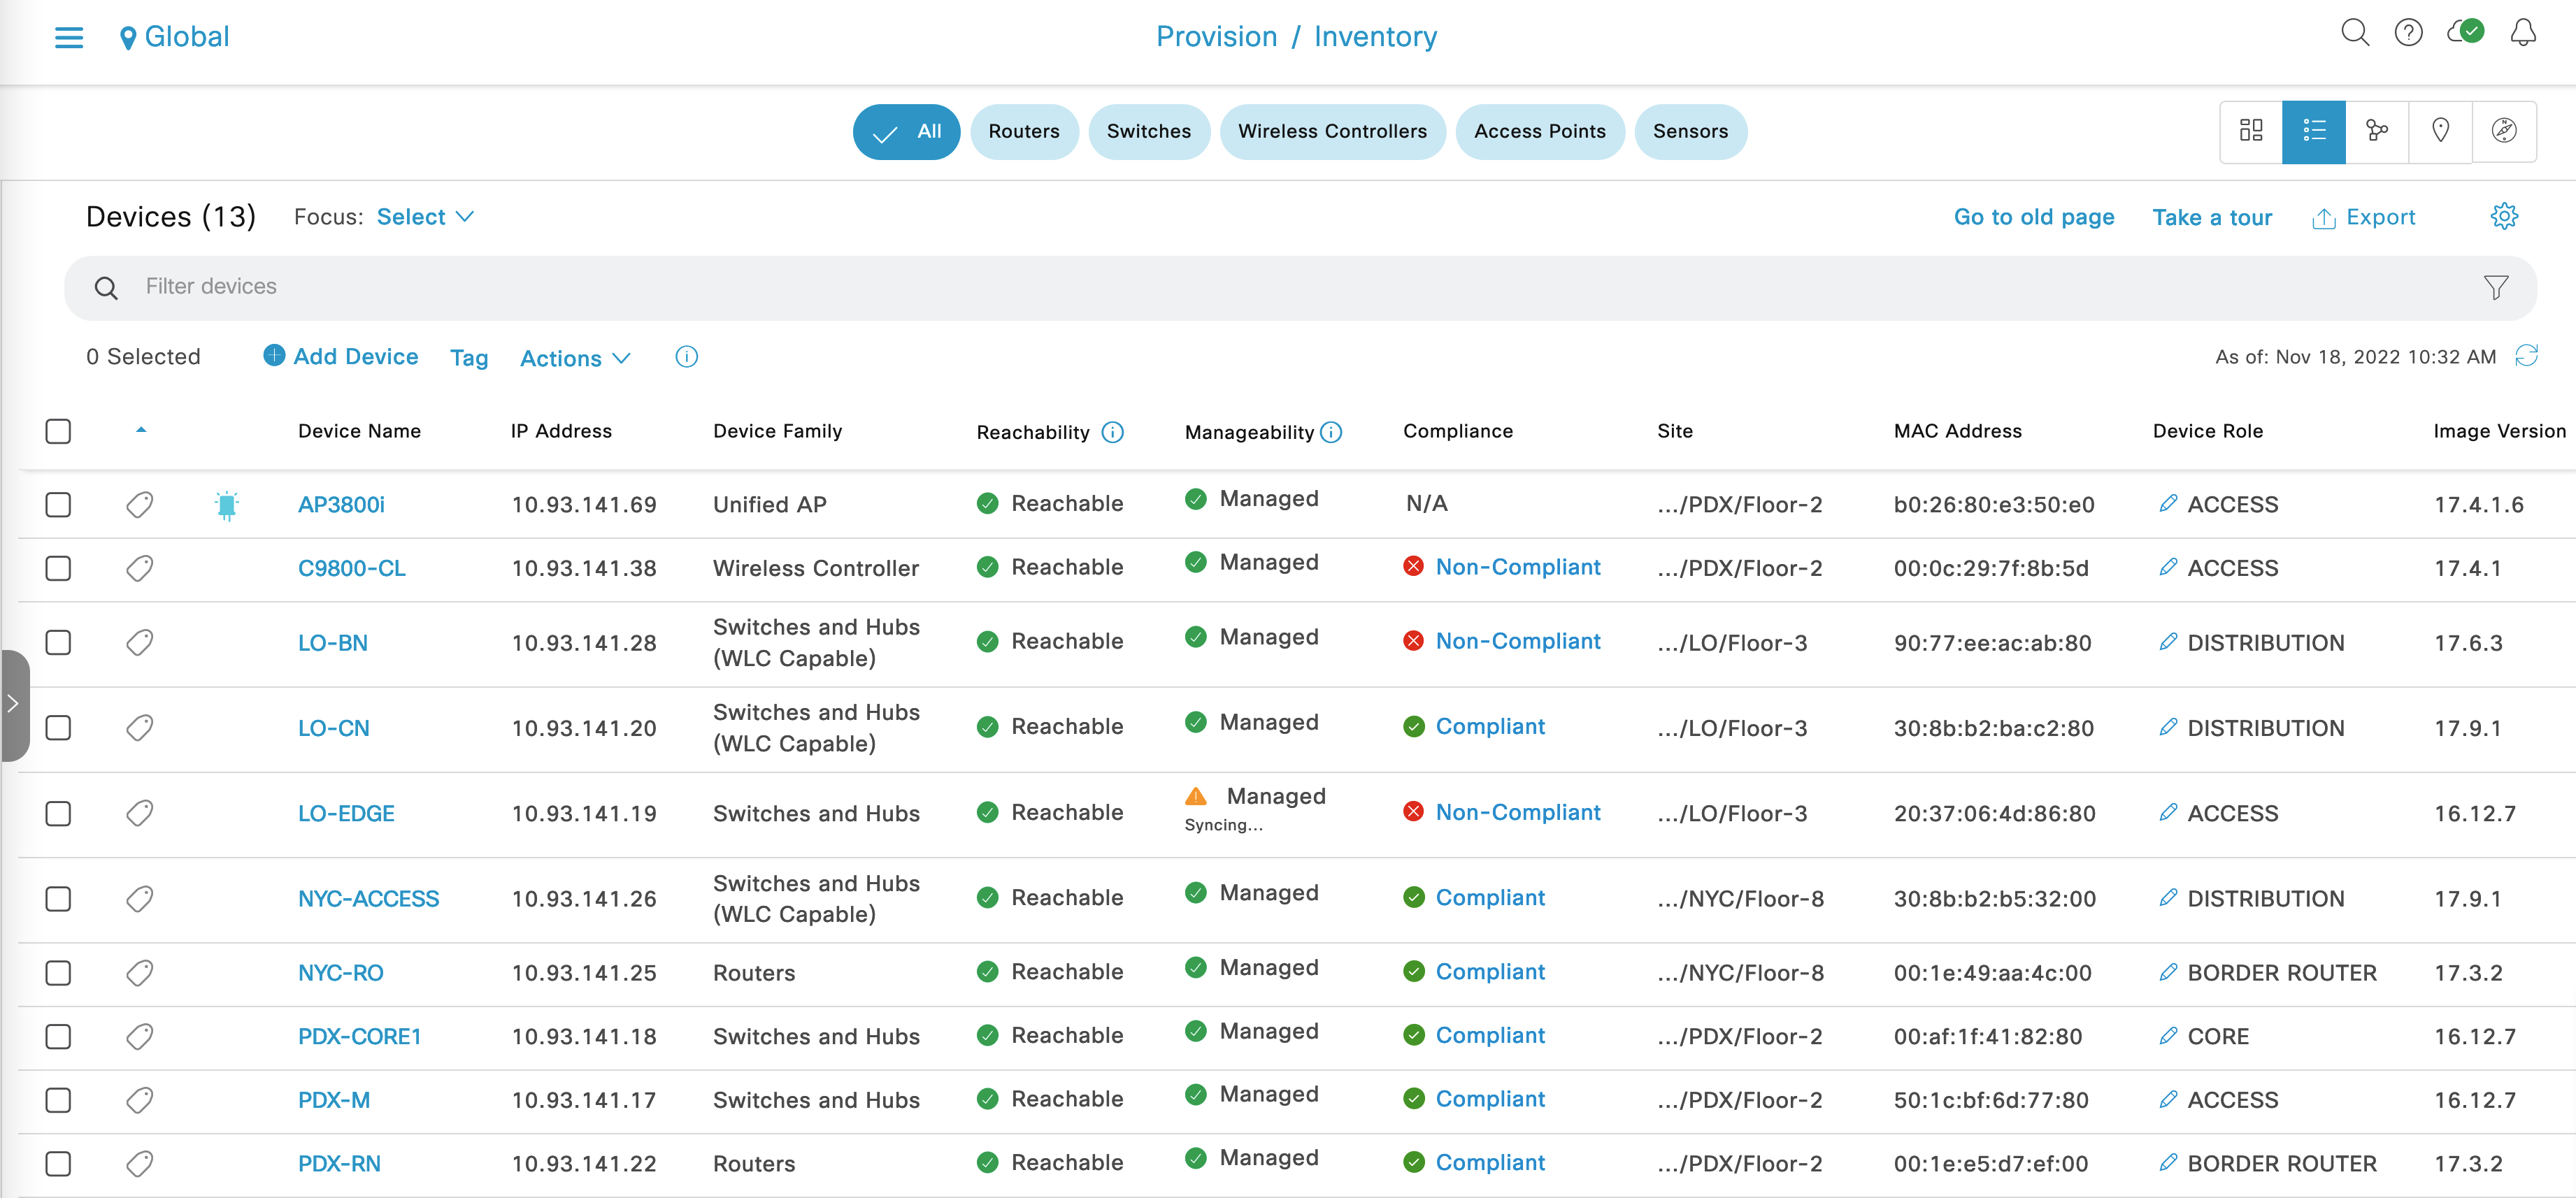
In the Device Inventory in Cisco DNA Center you can view information about the devices in Cisco DNA Center. In the figure below, you can see that there is a wireless controller with the management IP address 10.93.141.38.

To get more information about this WLC in a JSON format, run the following script:
def get_device_from_dnac(device_ip):
    response = requests.get(
        ‘https://<cluster ip>/dna/intent/api/v1/network-device/ip-address/{}’.format(device_ip),
        headers={
            ‘X-Auth-Token’: ‘{}’.format(token),
            ‘Content-type’: ‘application/json’,
        },
        verify=False
    )
    return response.json()
A sample response looks like this:
{
    "response": [
        {
            "family": "Wireless Controller",
            "lastUpdateTime": 1668796235340,
            "macAddress": "00:0c:29:7f:8b:5d",
            "deviceSupportLevel": "Supported",
            "softwareType": "IOS-XE",
            "softwareVersion": "17.4.1",
            "serialNumber": "9L2L5LZBF76",
            "inventoryStatusDetail": "<status><general code=\"SUCCESS\"/></status>",
            "collectionInterval": "Global Default",
            "managementState": "Managed",
            "upTime": "127 days, 21:14:25.02",
            "lastUpdated": "2022-11-18 18:30:35",
            "roleSource": "AUTO",
            "apManagerInterfaceIp": "",
            "bootDateTime": "2022-07-13 21:16:35",
            "collectionStatus": "Managed",
            "hostname": "C9800-CL",
            "locationName": null,
            "managementIpAddress": "10.93.141.38",
            "platformId": "C9800-CL-K9",
            "reachabilityFailureReason": "",
            "reachabilityStatus": "Reachable",
            "series": "Cisco Catalyst 9800 Wireless Controllers for Cloud",
            "snmpContact": "",
            "snmpLocation": "",
            "associatedWlcIp": "",
            "apEthernetMacAddress": null,
            "errorCode": null,
            "errorDescription": null,
            "interfaceCount": "0",
            "lineCardCount": "0",
            "lineCardId": "",
            "managedAtleastOnce": true,
            "memorySize": "NA",
            "tagCount": "0",
            "tunnelUdpPort": null,
            "uptimeSeconds": 11049529,
            "waasDeviceMode": null,
            "type": "Cisco Catalyst 9800-CL Wireless Controller for Cloud",
            "description": "Cisco IOS Software [Bengaluru], C9800-CL Software (C9800-CL-K9_IOSXE), Version 17.4.1, RELEASE SOFTWARE (fc5) Technical Support: http://www.cisco.com/techsupport Copyright (c) 1986-2020 by Cisco Systems, Inc. Compiled Thu 26-Nov-20 23:36 by mcpre netconf enabled",
            "location": null,
            "role": "ACCESS",
            "instanceUuid": "e5facea9-6097-45b7-9c1f-1c8c7224e812",
            "instanceTenantId": "5f7f7b4e22689d00c4c923e7",
            "id": "e5facea9-6097-45b7-9c1f-1c8c7224e812"
        }
    ],
    "version": "1.0"
}
Add a Device to Cisco DNA Center
Right now there is only one WLC in Cisco DNA Center. To add a switch, run the following Python script:
def add_device_to_dnac(dnac_ip, device_ip, snmp_version,
    snmp_ro_community, snmp_rw_community,
    snmp_retry, snmp_timeout,
    cli_transport, username, password, enable_password):

    device_object = {
        ‘ipAddress’: [
            device_ip
        ],
        ‘type’: ‘NETWORK_DEVICE’,
        ‘computeDevice’: False,
        ‘snmpVersion’: snmp_version,
        ‘snmpROCommunity’: snmp_ro_community,
        ‘snmpRWCommunity’: snmp_rw_community,
        ‘snmpRetry’: snmp_retry,
        ‘snmpTimeout’: snmp_timeout,
        ‘cliTransport’: cli_transport,
        ‘userName’: username,
        ‘password’: password,
        ‘enablePassword’: enable_password
    }

    response = requests.post(
        'https://{}/dna/intent/api/v1/network-device'.format(dnac_ip),
        data=json.dumps(device_object),
        headers={
            ‘X-Auth-Token’: ‘{}’.format(token),
            ‘Content-type’: ‘application/json’
        },
        verify=False
    )
    return response.json()
Once you run the script, you will get a response like the following:
{
    'response': {
        'taskId': '6f5a724b-f922-4cec-96c3-dc5f52693934',
        'url': '/api/v1/task/6f5a724b-f922-4cec-96c3-dc5f52693934'
    },
    'version': '1.0'
}
In the URL bar, go to http://<cluster ip>/api/v1/task/<task id>, where you will see more details about the response, including whether or not the request was successful (as indicated by the isError field).
    {
    ‘response’: {
        ‘version’:1525295288734,
        ‘startTime’:1525295288734,
        ‘endTime’:1525295288777,
        ‘isError’:false,
        ‘progress’:’’,
        ‘rootId’:’6f5a724b-f922-4cec-96c3-dc5f52693934’,
        ‘serviceType’:’Inventory service’,
        ‘id’:’6f5a724b-f922-4cec-96c3-dc5f52693934’
    },
    ‘version’:’1.0’
    }
Additional Resources
Click here for additional developer resources.
Click here for more information on Cisco DNA Center, including release notes, licensing information, and installation guides.