IE Device Configuration and Initiating Connection to OD (17.14.1)
Configuring Devices Managed by CLI/Local Manager
IMPORTANT: When you manage an IE3x00 device, you are responsible for having the configuration needed for the DNS resolution of the IoT OD URL that is configured in the CLI. Use either the IP name server or the static IP host config. This feature will not work unless the DNS resolution works. Invoke the required CLI command for IoT OD Services configuration on the IE3x00 device.
Prerequisite
- Ensure that the switch has a minimum version of IOS XE 17.14.1 installed.
Note: For IE3100 switches, SEA is not supported on IOS XE 17.16 and 17.17
- Add a single externally-managed device in IoT OD Application Manager using the UI. For details see section, Add a single externally managed device.
- Ensure that the management VLAN has working Internet access for initial deployment.
Routing configuration for OD cloud reachability
To enable reliable communication with the OD cloud, configure the routing as follows:
Recommended method: Configure a default route:
ip route 0.0.0.0 0.0.0.0 <gateway-ip>This ensures that the IDA process can correctly reach the OD cloud.
Alternative method: If you use the
ip default-gatewaycommand instead, you must also configure the HTTP client source interface:ip http client source-interface <interface-name>
Note: A system reboot is required after setting the default route for the changes to take effect.
Steps
A. Prepare the Device.
- Attach the required networking cables.
- Insert a SD card if one has not been inserted already.
- Power up the device.
B. Configure SD card and enable IOx.
IOx is a container hosting platform that runs on Cisco IOS XE, and it is used to install and execute a number of services that Cisco IoT Operations Dashboard can deliver such as Edge Intelligence (EI), Secure Equipment Access (SEA) or third party applications packaged as IOx Apps. As a first step, we will now configure and enable IOx.
To work with IOx applications, the IE3x00 must have an SD card. Cisco ships every IE switch with IOS on the system flash. The SD card that is ordered as part of the shipment will be in FAT32 format.
To enable Application Management for IoT OD services, the SD card should be formatted/re-partitioned to have an IOx partition. Once this is done, the IOx partition can be used for Application Management only. Application-related data is stored on the IOx partition in the SD card.
Configuration and IOS images are stored on the system flash or the FAT32 partition in the SD card depending on the configuration.
If the SD card is pre-formatted in FAT32 format, you can save configuration files and IOS image files on the SD card, but you cannot use IOx. If you format the SD card in ext4, you cannot use it to store configuration or IOS image files. The card will be entirely reserved for Application Management functions.
If you partition the SD card to have an IOx partition along with the FAT32 partition, the FAT32 partition can be used for storing configuration or IOS image files, while the IOx partition can be used for Application Management.
IMPORTANT: Before reformatting/partitioning the SD card, verify that all the necessary IOS image and configuration files from the SD card are copied to the eMMC (system flash) and other necessary files are backed up. Reformatting/partitioning the SD card wipes all information on the SD card.
- Format/partition the SD card to create the required IOx partition in the card, if not already done. This action erases all data on the card and format/partitions the card.
! If the complete SD card is being reserved for IOx, use the following command to format the SD card
format sdflash: ext4
! Example:
IE-3400#format sdflash: ext4
Format operation may take a while. Continue? [confirm]
Format operation will destroy all data in "sdflash:".  Continue? [confirm]
Format operation reloads, if partitions are there. Continue? [confirm]
format completed with no errors
! If you want to partition the SD card to have both an IOx partition and FAT32 partition, use the following command
partition sdflash: iox
- Configure AppGigabitEthernet1/1 in trunk mode. Cisco recommends that you configure this trunk with a native VLAN that is not likely to be used anywhere in the switch. It is also possible, but not required, to allow on this trunk only the VLANs needed for communication from the applications and the internet or other VLANs. If using a native VLAN number greater than 1004 like the example below, make sure the switch is configured for "vtp mode transparent" to allow for the creation of this VLAN. With this configuration, applications will be deployed in any desired VLAN you wish the application traffic to follow.
conf t
vlan 4094
name app-man-native-vlan
interface AppGigabitEthernet1/1
switchport trunk native vlan 4094
switchport mode trunk
end
Note: Before you format the SD card, backup or move any required files/data from the SD card to the boot flash.
Enable IOx.
conf t
iox
end
Verify that IOx is running correctly.
show iox-service
! Example 1 : IOx is up and running
IE-3400#show iox-service
IOx Infrastructure Summary:
---------------------------
IOx service (CAF)              : Running
IOx service (HA)               : Not Supported
IOx service (IOxman)           : Running
IOx service (Sec storage)      : Running
Libvirtd                       : Running
Dockerd                        : Running
C. Configure the IE3x00 Device to Connect to IoT OD.
We are now going to execute a set of IOS commands on the device's CLI to establish a connection to the IoT OD.
The Device Profile in the IoT Operations Dashboard is associated with devices such as switches, with a set of username / password for managing them. To manage the IOx Apps, the Cisco IoT Operations Dashboard requires valid level 15 user credentials in IOS XE. If such a user is currently not present on the device, the following configuration should be applied to create a privilege 15 user.
The credentials should match the values configured in the Device Profile in the Cisco IoT Operations Dashboard. If the device does not already have a privilege 15 user that can be used by IoTOD, create one:
conf t
username  privilege 15 algorithm-type scrypt secret
end
Configure the authentication-related settings and WSMA settings.
IMPORTANT: Usage of the WSMA service relies on http, therefore "ip http server" is required to be enabled in the configuration. To deploy applications securely, add “ip http secure-server” as well. Note: Please review running-config on the device first. Some related configurations might be available out of the box.
conf t
aaa new-model
aaa authentication login default local
aaa authorization exec default local
ip http server
ip http authentication local
ip http secure-server
wsma agent exec
profile exec
wsma profile listener exec
transport http path /wsma/exec
cgna gzip
end
Configure the IDA transport profile for your Cisco IoT Operations Dashboard cluster (EU or US). This configuration will enable a secure TLS connection using WebSocket to Cisco IoT Operations Dashboard and will initiate an outgoing connecting to the cluster using TLS with port TCP 443. This connection is used as a transport for the rest of the Cisco IoT Operations Dashboard functions and APIs.
! For US Cluster:
conf t
ida transport-profile wst
callhome-url wss://device-us.ciscoiot.com/wst/cgna
active
end
! For EU Cluster:
conf t
ida transport-profile wst
callhome-url wss://device-eu.ciscoiot.com/wst/cgna
active
end
Now that we have configured a secure connection, we need to configure the CGNA registration profile. This will initiate a switch registration to the Cisco IoT Operations Dashboard cloud, leveraging the previously configured transport profile.
conf t
cgna profile cg-nms-register
transport-profile wst
add-command show version | format flash:/managed/odm/cg-nms.odm
add-command show inventory | format flash:/managed/odm/cg-nms.odm
interval 3
active
url https://localhost/cgna/ios/registration
gzip
end
Once the configuration is completed, the device will establish a connection with the IoT OD and initiate the onboarding process.
(Optional) Enable DNS on the switch, if it is not already acquired through DHCP server.
Note: This is important if the switch is configured with static IP and the static default gateway and not explicitly given a DNS server to use. In this example, we use a Cisco DNS. You can use any DNS server. To verify, execute the following commands:
 switch#ping us.ciscoiot.com
 Type escape sequence to abort.
 Sending 5, 100-byte ICMP Echos to 35.84.105.79, timeout is 2 seconds:
 .....
 Success rate is 0 percent (0/5)
 switch#
Ping will fail and that is expected, however it is important to validate that the hostname has been resolved to an ip address. The configured DNS server can be checked with "show ip dns view".
If the DHCP server does not provide DNS, a DNS must be explicitly configured in the device. An example is provided below:
 conf t
 ip name-server 208.67.222.222 208.67.220.220
 end
D. Verify the configuration on the device.
Ensure that the configuration steps are complete and the template from CLI / Catalyst Center is pushed to the switch. Use the following commands to verify that the device is configured correctly to connect to IoT OD.
- Show ida transport-profile-state name wst
   ! Verify that IDA status is connected
   ! Notice the line "IDA Status: Connected" in the show command out below.
   ! Example:
   Switch#show ida transport-profile-state all
   Profile Name: wst
   Activated at: Tue Mar 12 15:12:19 2024
   Reconnect Interval: 30 seconds
   keepalive timer Interval: 50 seconds
   Source interface: [not configured]
   callhome-url: wss://device-us.ciscoiot.com/wst/cgna
   Local TrustPoint: CISCO_IDEVID_SUDI
   Remote TrustPoint: [not configured]
   Execution-url: http://localhost:80
   Proxy-Addr: [not configured]
   IDA Status: Connected
   State: Wait for activation
   Last successful response at Tue Mar 12 15:13:19 2024
   Last failed response at Tue Mar 12 15:12:15 2024
   Last failed reason: Gracefully disconnected
- Show cgna profile name cg-nms-register
  ! Example:
  #show cgna profile-state name cg-nms-register
  Profile 1:
  Profile Name: cg-nms-register
  Activated at: Thu Feb 29 13:17:53 2024
  URL: https:///localhost/cgna/ios/registration
  Transport-profile: wst
  Payload content type: xml
  Interval: 3 minutes
  Transfer count: 5797
  gzip: activated
  Profile command:
  show version | format flash:/managed/odm/cg-nms.odm
  show inventory | format flash:/managed/odm/cg-nms.odm
  State: Wait for timer for next action
  Timer started at Tue Mar 12 15:18:31 2024
  Next update will be sent in 1 minute 43 seconds
  Last successful response not found
  Last failed response not found
E. Using proxy server to connect to IoT OD.
If you are required to use proxy server to connect to IoT OD, apply the following proxy-addr CLI in your IDA config.
Replace the ipv4:port with your proxy server’s IP address and port number.
       ! For US Cluster:
       conf t
       ida transport-profile wst
       callhome-url wss://device-us.ciscoiot.com/wst/cgna
       proxy-addr <ipv4:port>
       active
       end
       ! For EU Cluster:
       conf t
       ida transport-profile wst
       callhome-url wss://device-eu.ciscoiot.com/wst/cgna
       proxy-addr <ipv4:port>
       active
       end
F. Verifying the Device Status in the IoT OD.
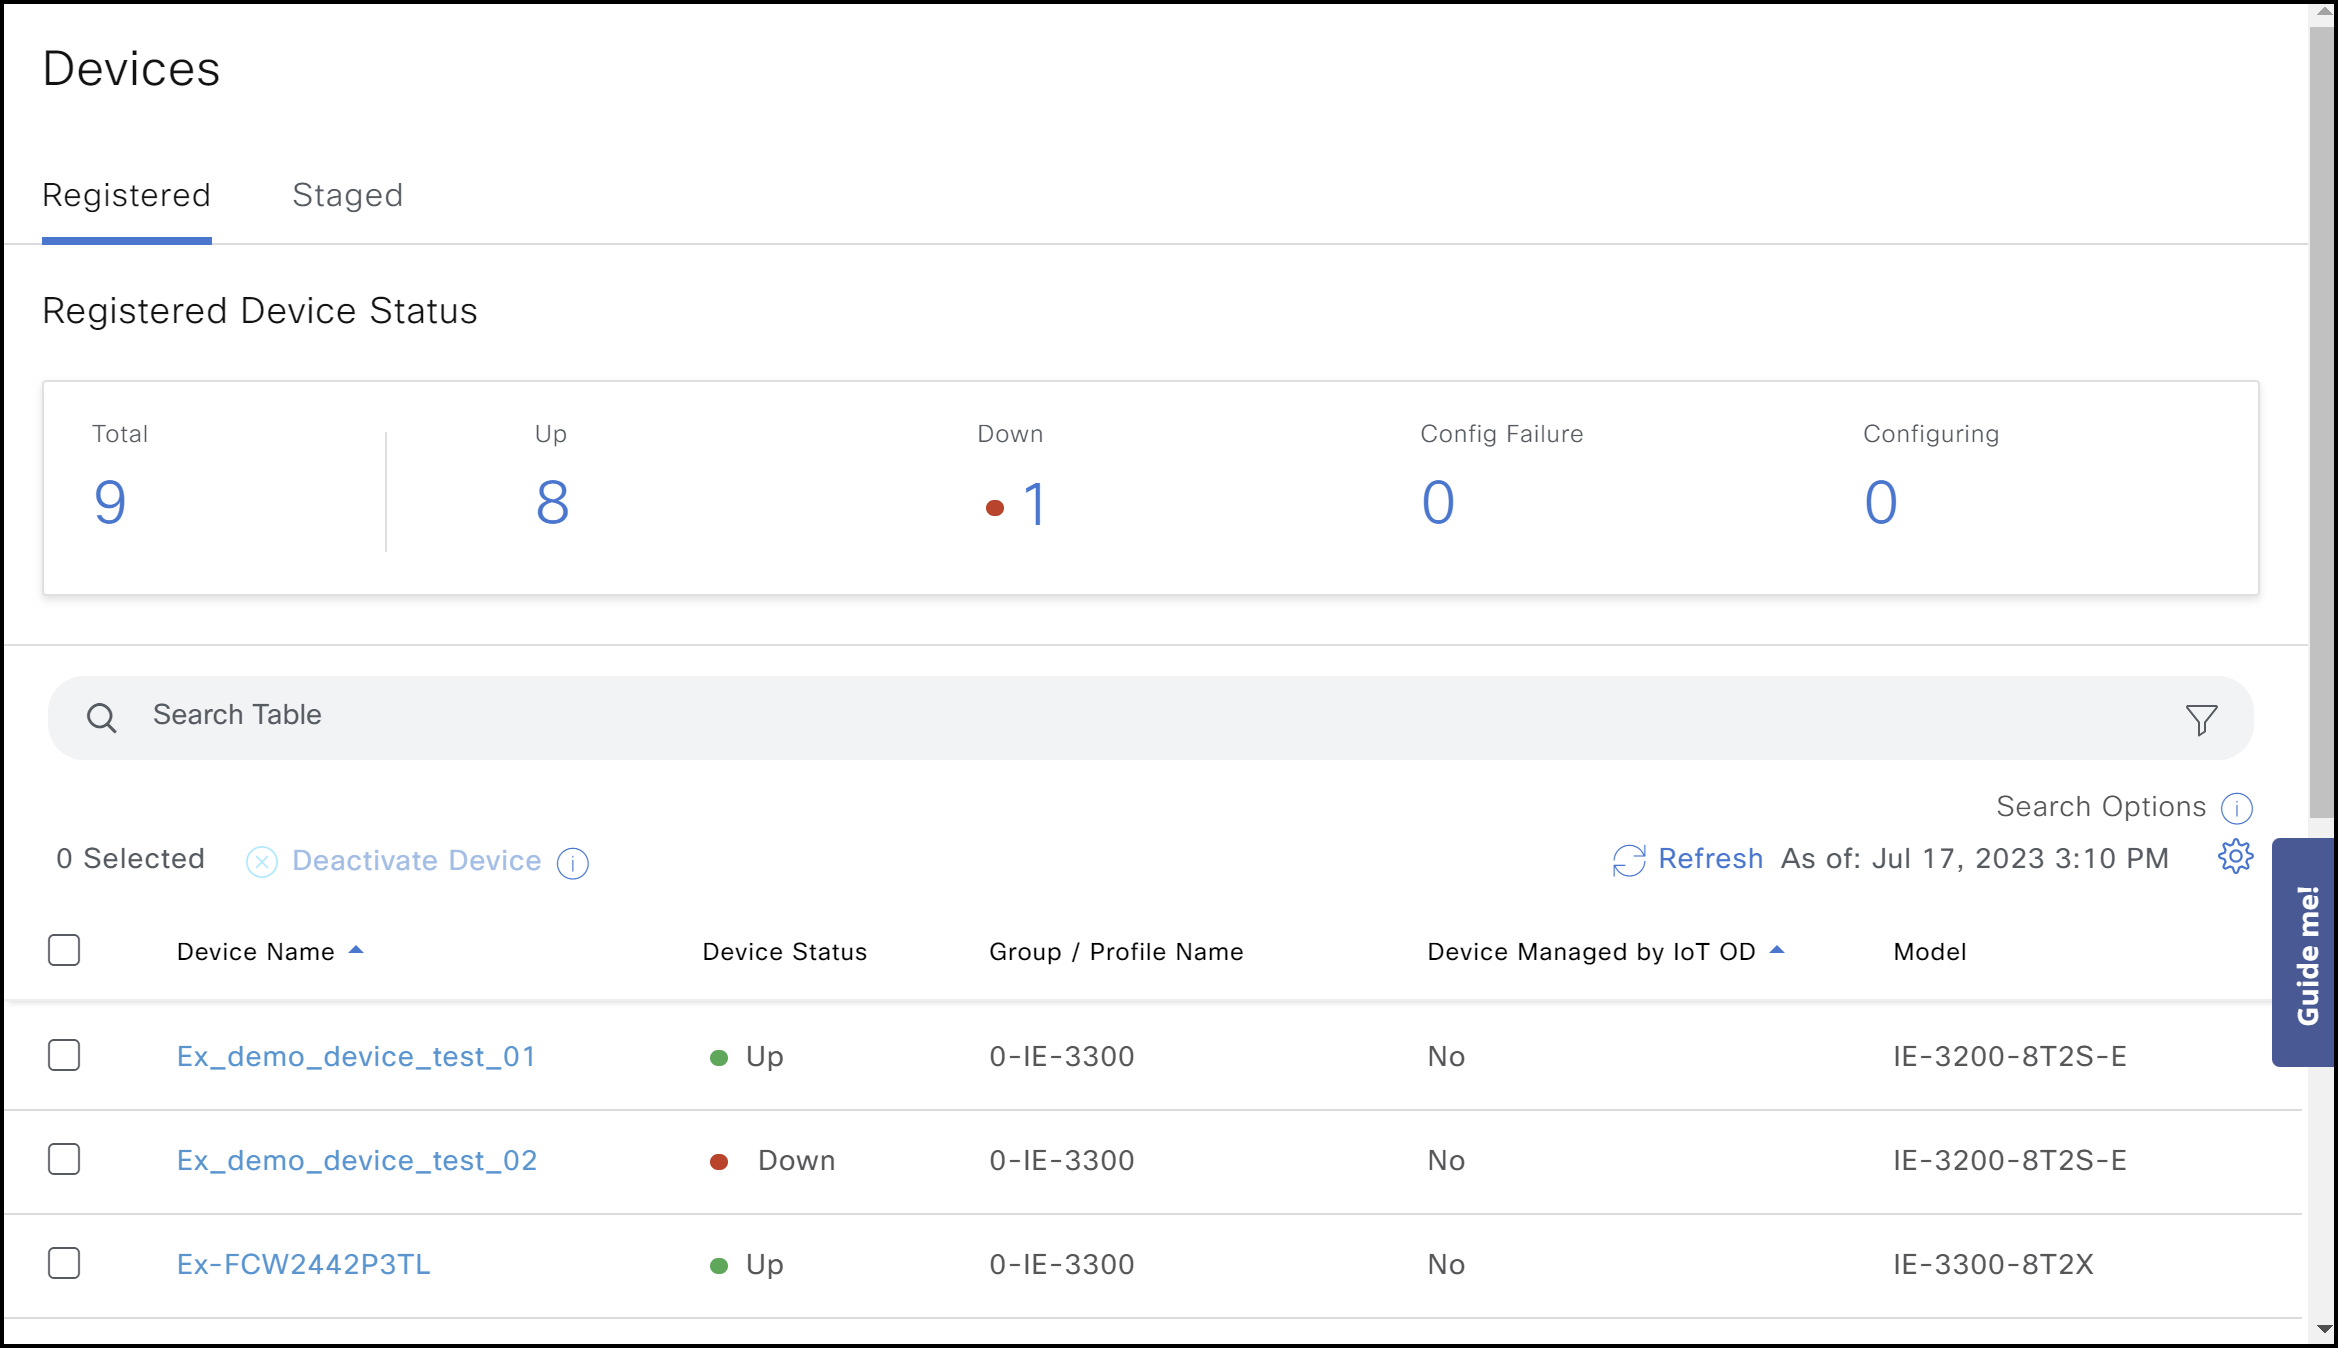
If IoT OD didn't receive any registration attempt, the IE3x00 device will stay in the Devices > Staged list. Check the following on the device:
Verify that the device has connectivity to the appropriate IoT OD cluster (US/EU) by using the telnet command.
  ! Verify that opening a telnet session to the cluster is successful. The output should have "Open"

  Example:
  #telnet us.ciscoiot.com 443
  Trying us.ciscoiot.com (10.105.58.227, 443)... Open
Once a device connects with a registration request, the device configuration is recognized and validated by IoT OD, and the device automatically moves from Devices > Staged status to Registered status in your IoT OD Organization.
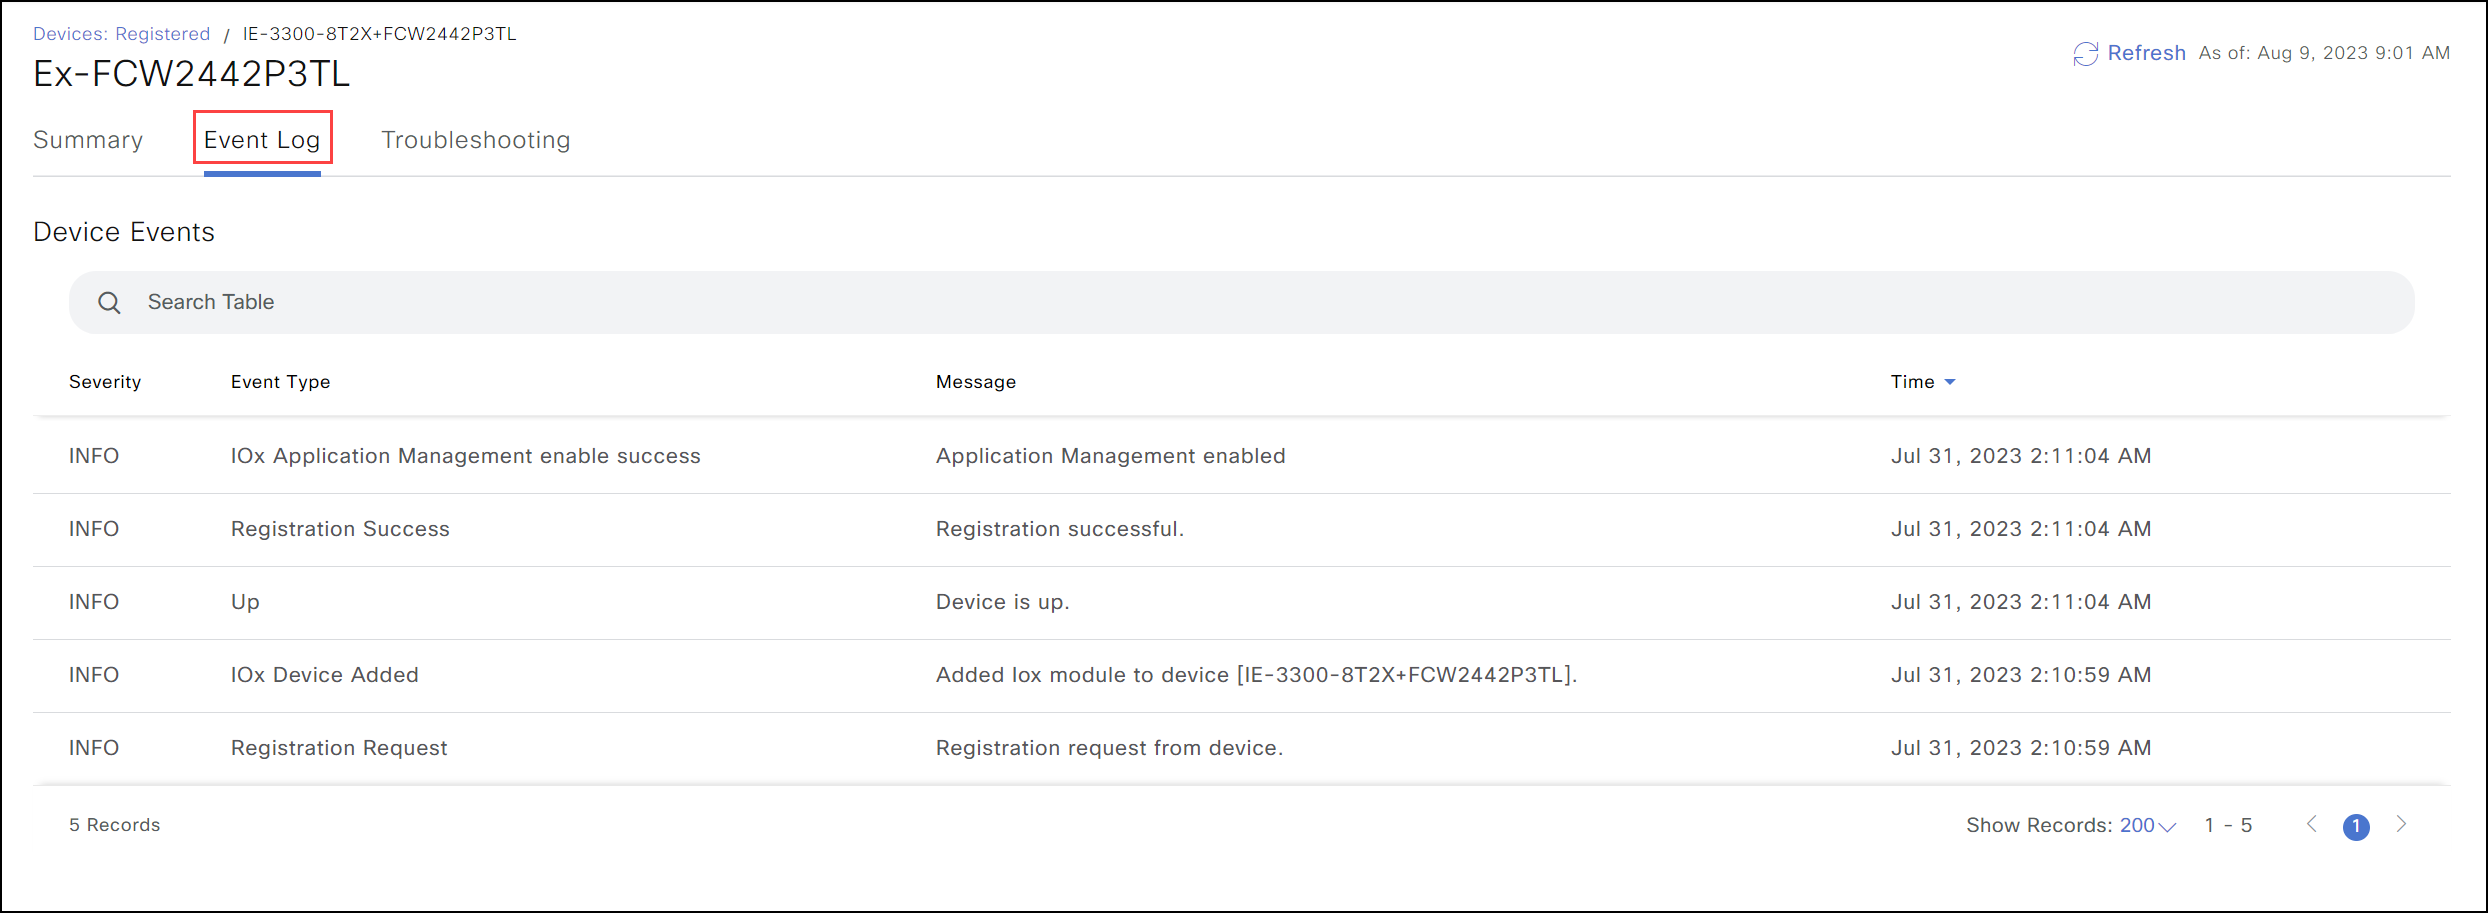
The IE3x00 device will move to Devices > Registered with an Up status indicator when the device registration process is completed successfully. You will see the following sequence of events in the event log for such cases.


If IoT OD received a registration attempt but had some issues, (e.g., incorrect credentials), the IE3x00 device will move to Devices > Registered with Config Failure status.
If you encounter problems, use the Event Log page on the device level to see the connectivity and Application Manager-related events. Use troubleshooting tools on the device's Troubleshooting page for debugging.
Note: The Troubleshooting page allows Ping IP, Traceroute IP, and IOS Show Commands execution on the device. To use these Troubleshooting tools:
- The device needs to establish websocket tunnel and should have the correct IoT OD configuration.
- Refer to step 2 in Configure the IE3x00 Device to Connect to IoT OD section above.
- It is critical to configure wsma listeners because wsma exec part might not be available by default on the IE3x00 device.
- If the device moves from Staged to Registered, but the device status shows as Registering, and the Event Logs indicate timeout messages as shown below, the likely cause is a connectivity issue between the device and IoT OD. endnote%}

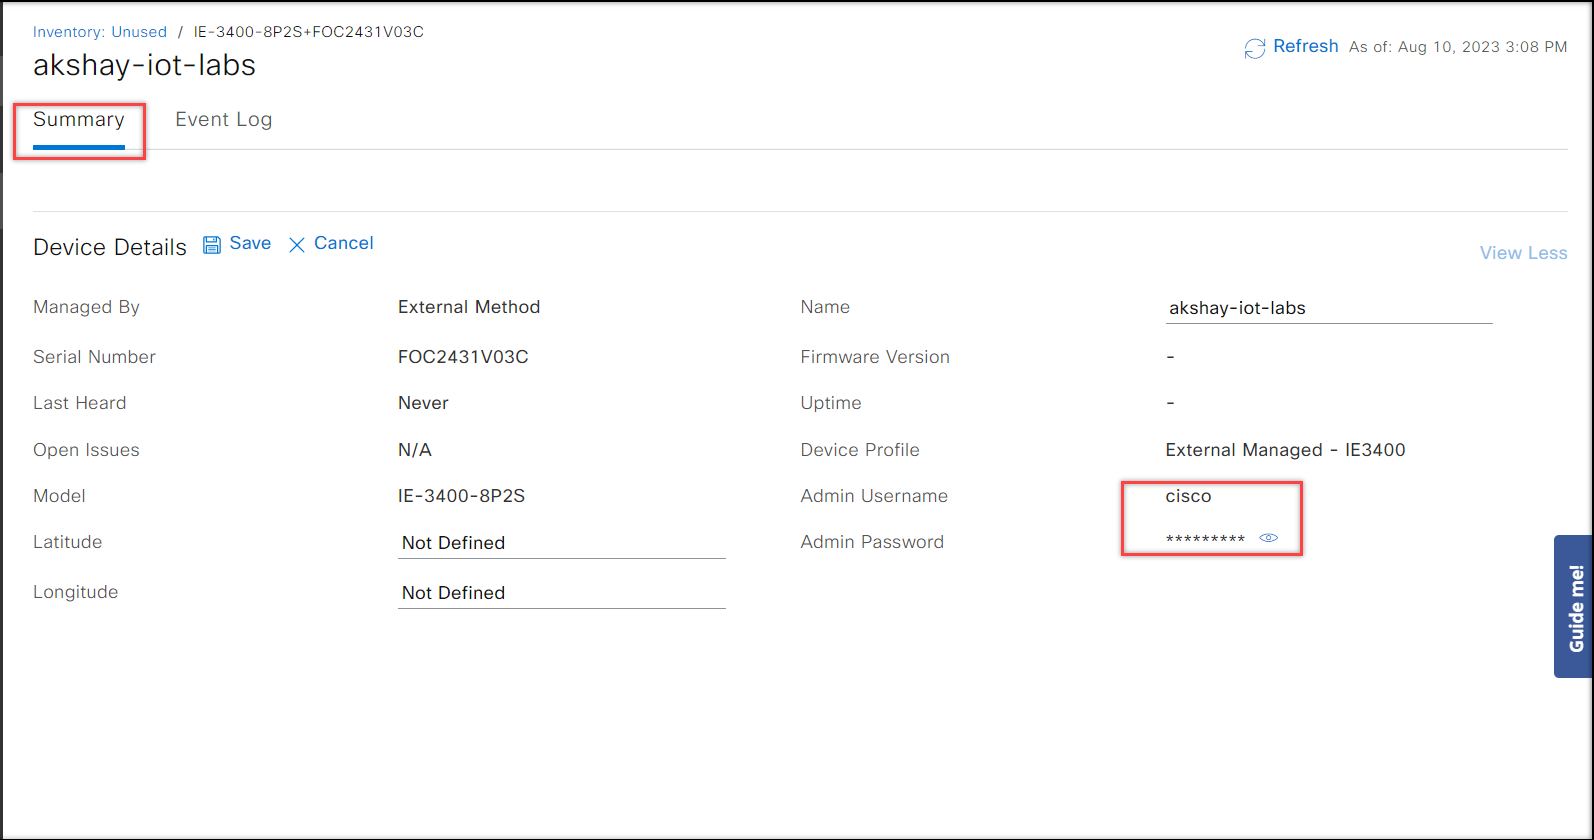
If the credentials do not match, the event logs will show an authentication failure. If that occurs, run the user creation command again, using the correct username and password. To find the correct credentials, go to the Summary page, click on View More in the right corner, and a slider will appear with the username and password.

Once the IE3x00 device appears with the status Up in the Devices > Registered tab, click on the device name, and check the Applications tab on the device to verify that the Application Management is enabled successfully. In case of successful discovery, the details will appear similar to the image below.

In case the value of IOx status field is not up and the field Last Error on the device indicates any connectivity issue, try executing the Refresh IOx action. If the issue is still unresolved, check the error message and see the Application Management troubleshooting section for further debugging.
For more details on possible errors and corresponding solutions see Troubleshooting Tips.
Configuring Devices managed by Catalyst Center
Steps for configuring an IE3x00 device managed by Catalyst Center are very similar to those outlined above for a CLI-managed device. Enter the CLI required in the Catalyst Center template and push it to the device from Catalyst Center instead of entering it directly in the CLI. This section will focus on the differences from the CLI method.
A. Prepare the device.
- Equip the IE3x00 device with an SD card and set it up.
- Attach the required networking cables.
- Power up the device.
- Create the Catalyst Center template in preparation for managing the switch (or modify the existing template accordingly).
B. Configure and enable IOx via Template (Optional).
To host the SEA Agent software, the IE switch must have a 4GB SDFlash card installed. The card can be formatted either manually using CLI or using a template that can be applied via Catalyst Center. If the SD Flash is already formatted for IOx, this section can be skipped and need not be re-applied.
- The configuration CLI needed for the interface towards IOx is the same as outlined above for a CLI-managed switch. Add that config to the Catalyst Center template.
- Enable IOx. If IOx, has not been enabled manually, use the method outlined in Step 4 below (using a small applet script) within a Catalyst Center template.
- Format SD card on the IE3x00 and enable IOx on the switch.
- Use this small applet script in the Catalyst Center template to handle responses from the CLI when the SD card is formatted, and IOx is enabled.
#MODE_ENABLE #INTERACTIVE format sdflash: ext4
Continue Continue Continue terminal shell sleep 15 terminal no shell #ENDS_INTERACTIVE #MODE_END_ENABLE iox
C. Configure the device to connect to IoT OD via Template.
The template below contains the configuration required to enable an IE switch to connect to IoTOD for the purpose of enabling Secure Equipment Access (SEA) functionalities.
The template can be combined with other CLI configurations as long as it does not impact the SEA requirements.
The configuration used here is identical to the configuration using CLI, with the following exception:
- Specify http authentication: "ip http authentication local".
- Catalyst Center creates a "aaa group" and relies on external authentication. However, we want to rely on local authentication for the ‘IoTOD Device Profile User'. Add the code below in the Catalyst Center template. This code relies on a "aaa group" for http authentication and authorization. In addition to using the groups created by the Catalyst Center, it prioritizes local authentication as the first option, allowing the OD to use local authentication. This configuration will not conflict with Catalyst Center and will still allow the user to opt for external "aaa" authentication to connect and authenticate to the switch’s WebUI, should they choose.
!
aaa new-model
!
!
aaa authentication login default local
aaa authorization exec default local
!
username [IoTOD Device Profile username] privilege 15 password [IoTOD Device Profile password]
!
vtp mode transparent
!
vlan 4094
  name app-man-native-vlan
interface AppGigabitEthernet1/1
 switchport trunk native vlan 4094
 switchport mode trunk
!
ip http server
ip http authentication local
ip http secure-server
!
line vty 0 4
 transport input all
 exec-timeout 60 0
!
wsma agent exec
 profile exec
!
wsma profile listener exec
 transport http path /wsma/exec
!
!
cgna gzip
!
!
cgna profile cg-nms-register
 add-command show version | format flash:/managed/odm/cg-nms.odm
 add-command show inventory | format flash:/managed/odm/cg-nms.odm
 interval 3
 url https://localhost:443/cgna/ios/registration
 transport-profile wst
 gzip
 active
!
iox
!
ida transport-profile wst
 callhome-url wss://device-us.ciscoiot.com:443/wst/cgna
! use the URL below for EU
! callhome-url wss://device-eu.ciscoiot.com:443/wst/cgna
 active
!
end