SEA: HTTP(S) proxy support
This feature allows for customer-controlled proxy sessions that provides more flexibility while maintaining the strict security capabilities used by SEA.
Note:
- The HTTP(S) proxy feature is specifically for customers installing IE3x00 switches.
- The proxy configuration is specifically for the SEA application.
- IDA version 17.14.1 or above is required for device communication through the proxy.
Configure SEA Agent for proxy support
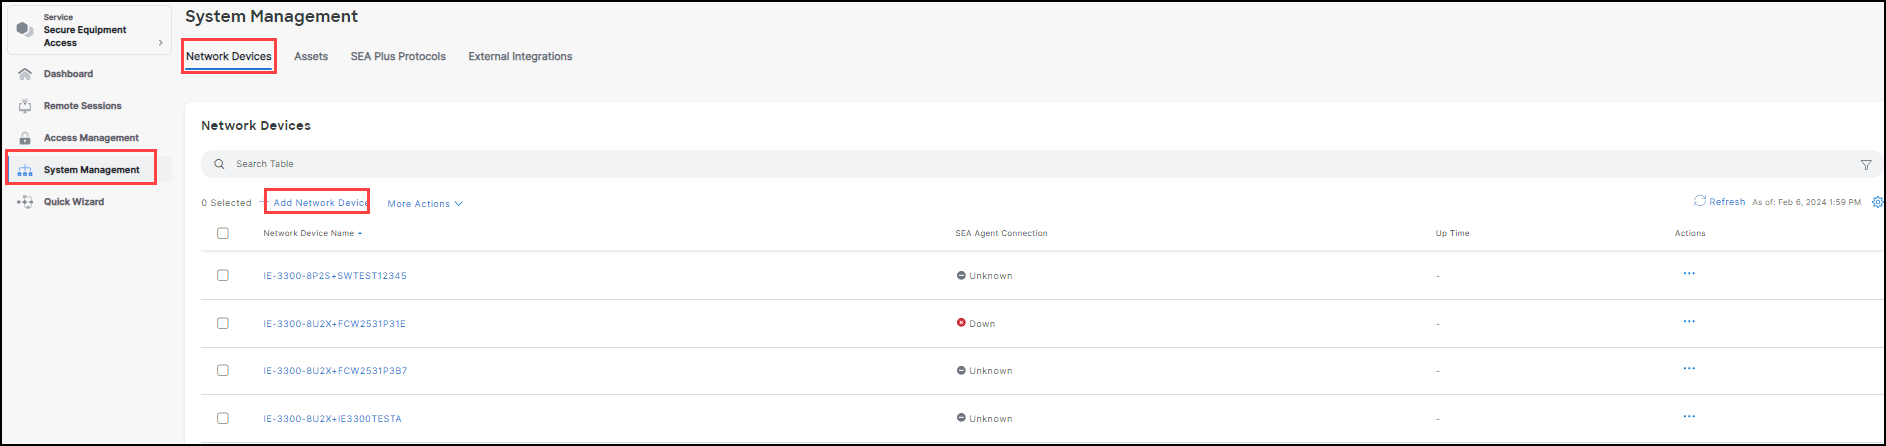
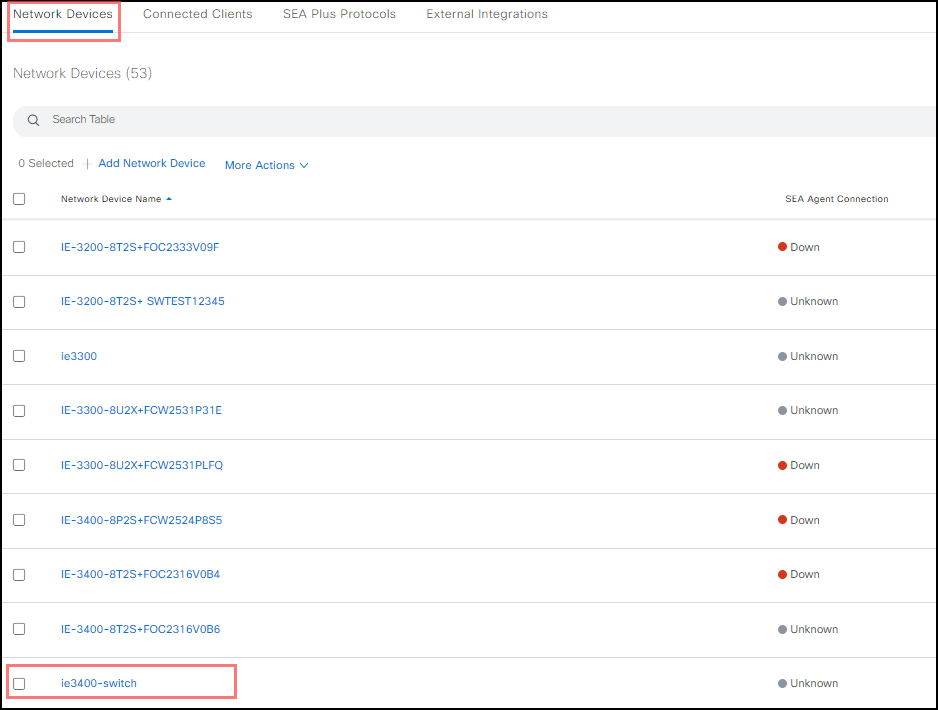
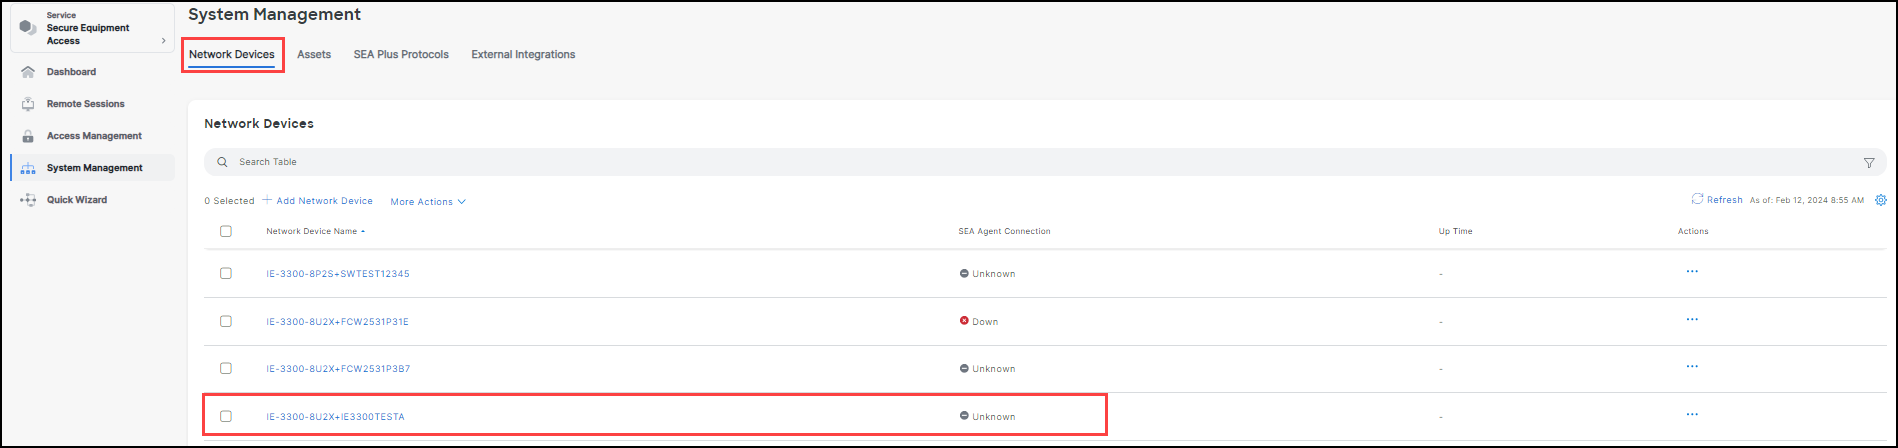
In Secure Equipment Access, choose System Management > Network Devices.
Click Add Network Device.
Use the Select from list (recommended) option and choose the Network Device that you want to add.
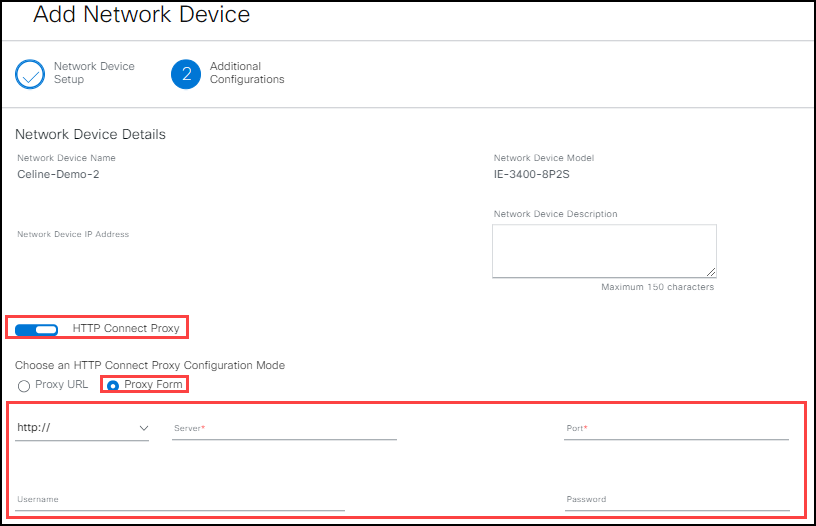
- Click Next to open the Network Device Details screen.
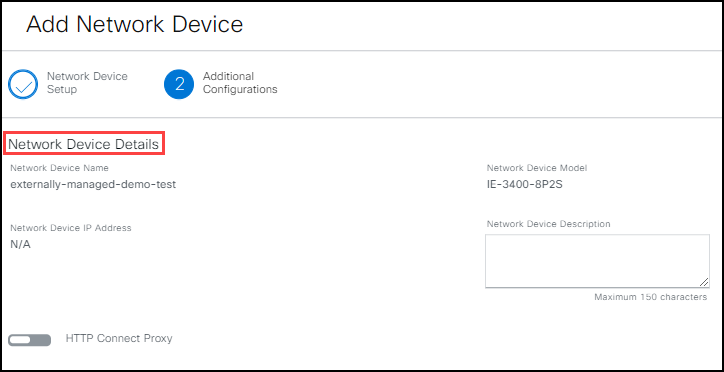
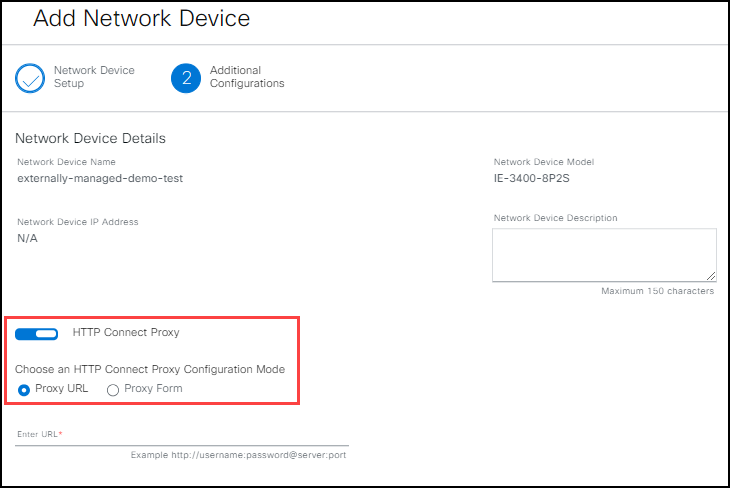
- Enable the HTTP Connect Proxy switch to open proxy settings.
- Choose either Proxy URL (default setting) or Proxy Form and enter the proxy configuration. Choose the option and enter the information that fits your needs.
Note: Proxy Form and Proxy URL have the exact same purpose, they provide different ways of the entering the same information and you can pick the one that is most convenient for you.
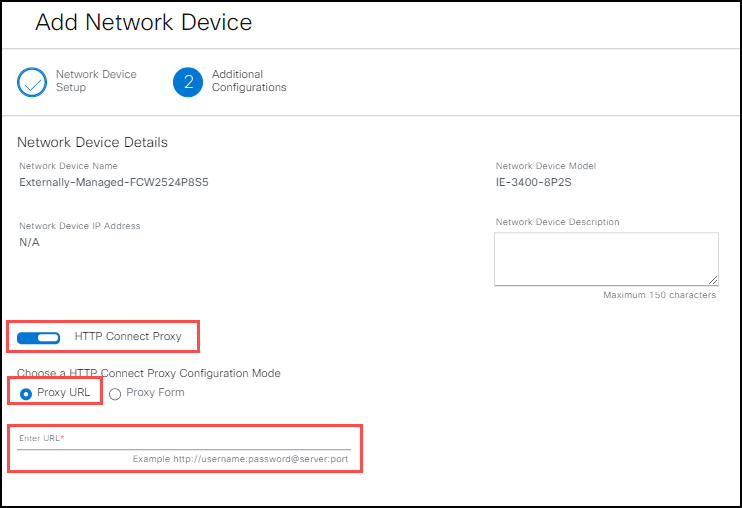
Configure a network device for proxy URL
- Enter the URL for the device using this format: http(s)://username:password@server:port.
- Click Add Network Device located in the bottom right corner of the screen. You are notified that the device is successfully added.
Note: If the configuration fails, the reason is posted on a banner at the top of the screen.
Configure a network device for Proxy Form (HTTP Proxy support)
- Depending on your requirements, choose either http:// or https:// from the drop-down list.
- Enter the Server IP address.
- Enter the Port number.
- (Optional) Enter the Username and Password.
- Click Add Network Device located in the bottom right corner of the screen. You are notified that the device is successfully added.
Note: If the configuration fails, the reason is posted on a banner at the top of the screen.
Modify an existing network device proxy setting
- In Secure Equipment Access, choose System Management.
- Click Network Devices.
- Choose the Device name to be modified.
- In the Network Device Details screen, click View Details to modify the proxy information.

- In the Additional Configuration panel, click Edit Configuration.
Note: Clicking SHOW, shows the configuration information as text, clicking HIDE masks the information behind asterisks.
- Edit the appropriate information for the network device.
Note: To disable a HTTP proxy configuration, click the HTTP Connect Proxy switch. Then continue to Step 7.
- Click Apply and Reinstall.
- Click Reinstall in the reinstall app confirmation prompt. Depending on the network, the reinstallation process can take several minutes.
Modify an existing network device with no proxy configuration
- In SEA Service, choose Secure Equipment Access > System Management > Network Devices.
- Choose the Device name that does not have a configured proxy setting.
- In the Additional Configuration section of the Network Device details screen, click Edit.
Note: If the network device does have an existing proxy, follow the steps in: To modify an existing network device proxy setting.

- Click the HTTP Connect Proxy switch.
- Depending on your network requirements, enter either the information for configuring a Proxy URL or Proxy Form.
- After you have entered all the information, click Apply and Reinstall.
- Click Reinstall in the reinstall app confirmation prompt. Depending on the network, the reinstallation process can take several minutes.