SEA: Multi-VLAN and Static IP support
This feature helps to implement secure equipment access with requirements for network segmentation. This is especially useful in environments with multiple VLANs for different OT Assets. The feature doesn't make any device configuration. Instead, it requires all necessary configurations for VLANs to be done on the device upfront. The feature creates a necessary mapping for the SEA Agent to the existing device configuration, effectively allowing SEA to gain access to various VLANs without having to implement L2NAT or other techniques.
Note: Installing the SEA agent application on a customer-managed IE3x00 is identical to installing the SEA agent on an IoT OD-managed IR1101 or IR1800 (see Secure Equipment Access–Overview) with one exception. For the IE Switch, specify the VLAN where the SEA agent ethernet interface will be placed. The chosen VLAN should provide the following functionalities:
- DHCP services to assign SEA agent interface to an IP address.
- Default route for SEA agent to reach the internet and IoT OD cloud.
- DNS IP address resolution to resolve the host names of IoT OD and any other hosts the SEA agent will be configured to connect.
- Mutli-VLAN and static IP are only supported on IE switches, not on IR routers.
VLAN configuration for SEA
Note:
- The VLAN configuration feature for the SEA agent doesn't configure the IE3x00 device. Required VLAN must be configured on the device upfront through CLI or DNAC template. IoT OD will direct the deployment of the SEA agent into the required VLAN.
- For dynamic IP address allocation (DHCP), ensure that the VLAN has a DHCP service available and the SEA agent is able to acquire an IP address using this DHCP service in the VLAN. If there is no DHCP server then the IP address can be statically configured as explained below.
- If you are using the SEA Plus Access Method to connect to a IE3x00 switch through SEA, refer to the above notes.
For service-specific configuration for SEA or SEA Plus, please refer to Secure Equipment Access: Overview
Note:
- You must first configure the VLANs on the IE3x00 as the Operational Dashboard (OD) doesn't perform any configuration on the IE switch.
- If DHCP is used, there is no need to configure static IP addresses.
Configure a new SEA network device for VLAN support with dynamic IP addresses
- From the Services panel, choose Secure Equipment Access > System Management > Network Devices.
- Click Add Network Device.
- Choose the Select from list (recommended) option and choose the Network Device that you want to add and install the SEA Agent.
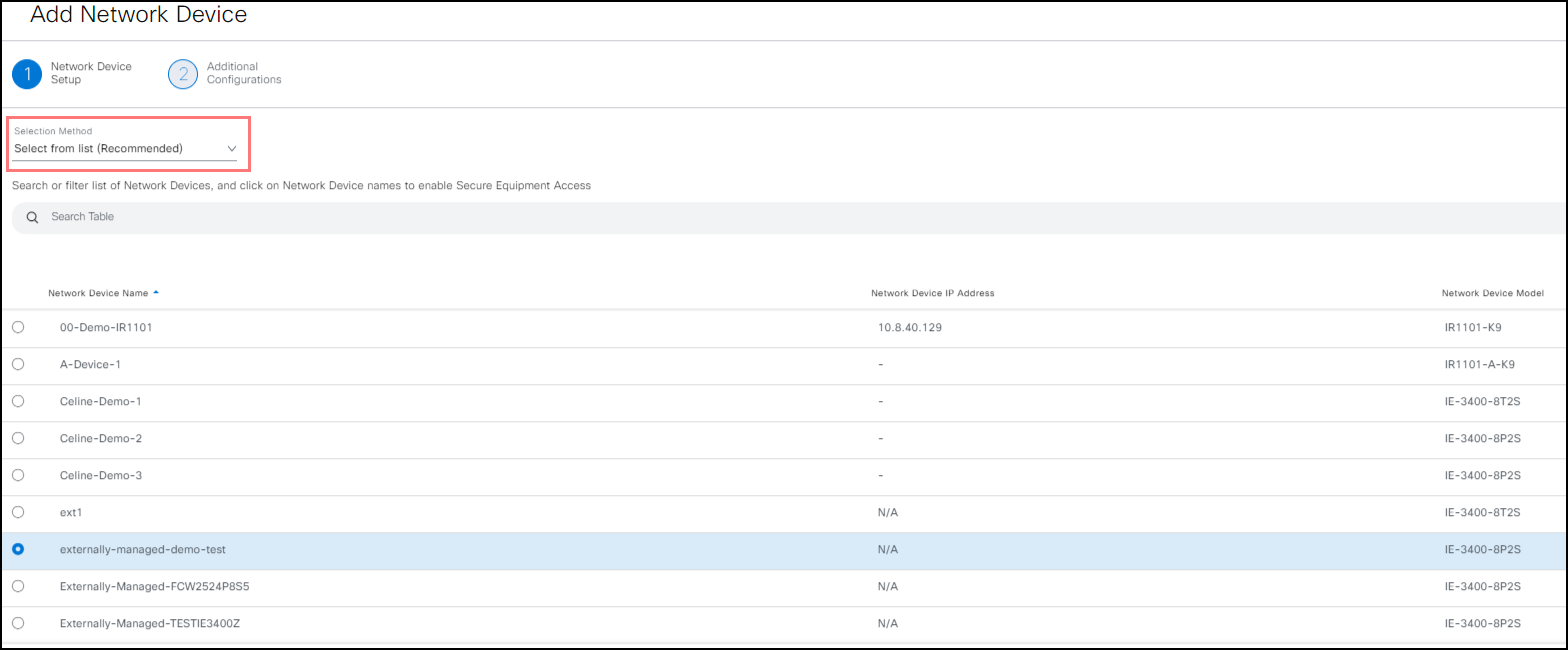
- Click Next to open the Network Device Details screen.
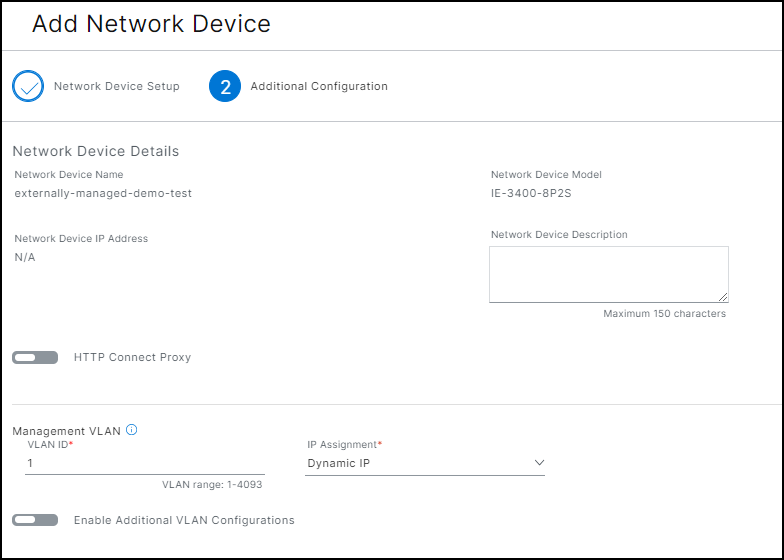
Configure the Management VLAN (Dynamic IP Assignment)
To configure the Management VLAN with a Dynamic IP assignment:
- In the Management VLAN field, enter the VLAN ID or leave it at the Default (1).
Note: The default value for the Management VLAN is ID=1 with IP Assignment = Dynamic IP. Check your network topology to set the proper VLAN ID for your needs. (The VLAN ID range is 1-4093).
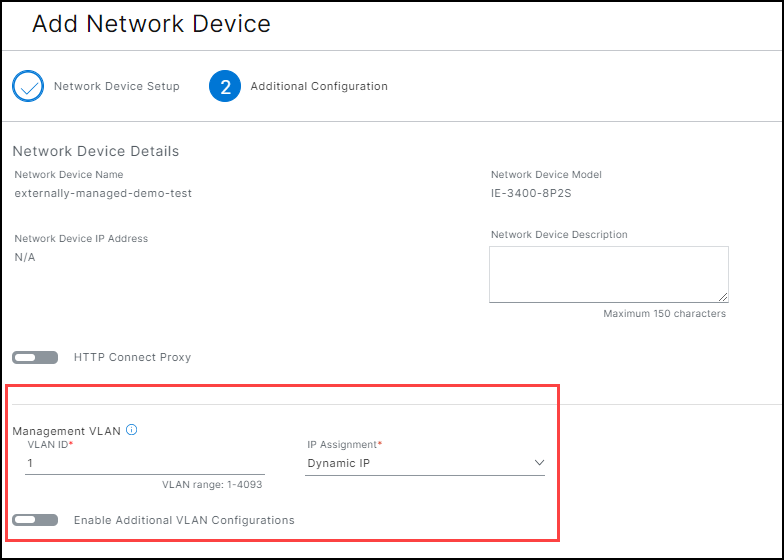
- Choose Dynamic IP for the IP Assignment. (The default setting for the IP Assignment is Dynamic IP.)
Configure the Management VLAN (Static IP Assignment)
To configure the Management VLAN with a Static IP assignment:
- From the IP Address drop-down list, choose Static IP as the IP assignment.
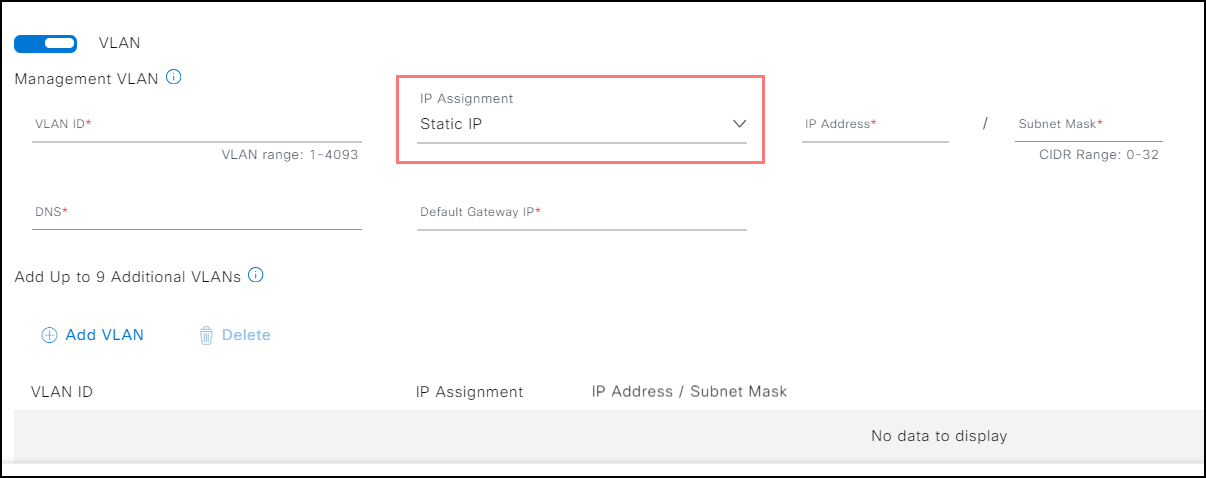
- Enter the following required parameters:
- IP Address
- Subnet Mask (Classless Inter-Domain Routing range 0-32): Format: / Prefix
- DNS
- Default Gateway IP
Add additional VLAN IDs and IP Assignments
Note:
- You can add up to nine additional VLANs for a maximum of 10 VLANs.
- You can add both Dynamic IPs and Static IPs when adding VLANs for a device.
- Click Enable Additional VLAN Configurations.
- Follow the steps for adding either a VLAN with a Dynamic IP Address or Static IP Address.
- Finish the VLAN configuration by clicking Add Network Device (not shown) in the bottom right corner.
Modify an existing network device VLAN configuration
From the Services menu, choose SEA Service > System Management > Network Devices.
Choose the Device name to be modified.
In the Additional Configuration section of the Network Device Details screen, click View Details. The Additional Configuration panel opens.
In the Edit Additional Configuration screen, either:
- Click VLAN, to add a new VLAN(s) if none are configured.
- Add, modify, or delete appropriate VLAN parameters.
Click Apply and Reinstall.
Click Reinstall in the reinstall app confirmation prompt. Depending on the network, the reinstallation process can take several minutes.