SEA: Quick Wizard
Note: Quick Wizard is only available to SEA System Admin users.
The Secure Equipment Access (SEA) Quick Wizard provides a simplified process to configure remote client access. Quick Wizard includes the following two process options:
- Install an SEA Agent
- Connect to an Asset
Each procedure can be used independently.
Note: You can access the SEA documentation by clicking the link at the top left corner of the screen.

Install and configure an SEA Agent for a device
- Click Quick Wizard.
- Select Install SEA Agent, click Start Configuration.

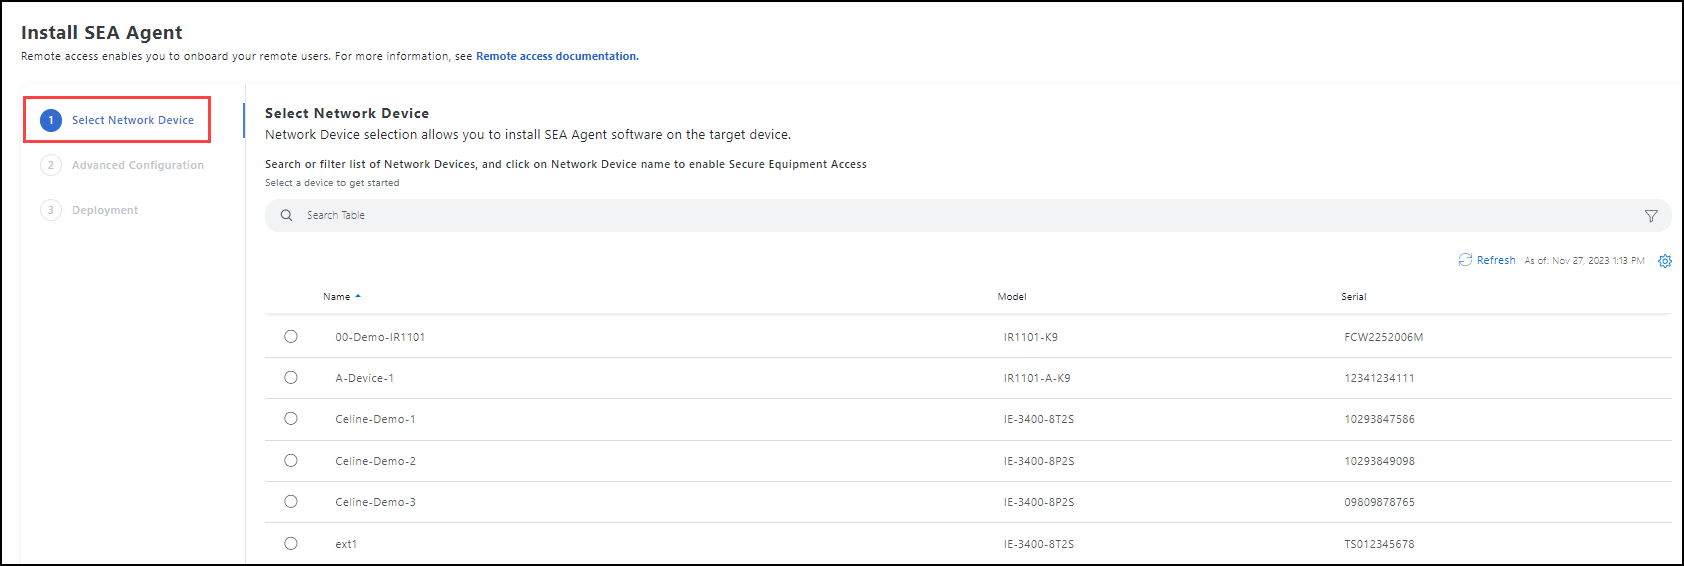
- In the Install SEA Agent screen, select an existing Network Device from the list. Click Next. The Advanced Configuration screen opens.
- The Advanced Configuration screen opens. The Advanced Configuration screen differs according to the device that is selected (router or switch).
Note: For information on router or switch configuration, see SEA: HTTP(S) proxy support or SEA: Multi-VLAN and Static IP support.
Advanced Configuration Screen
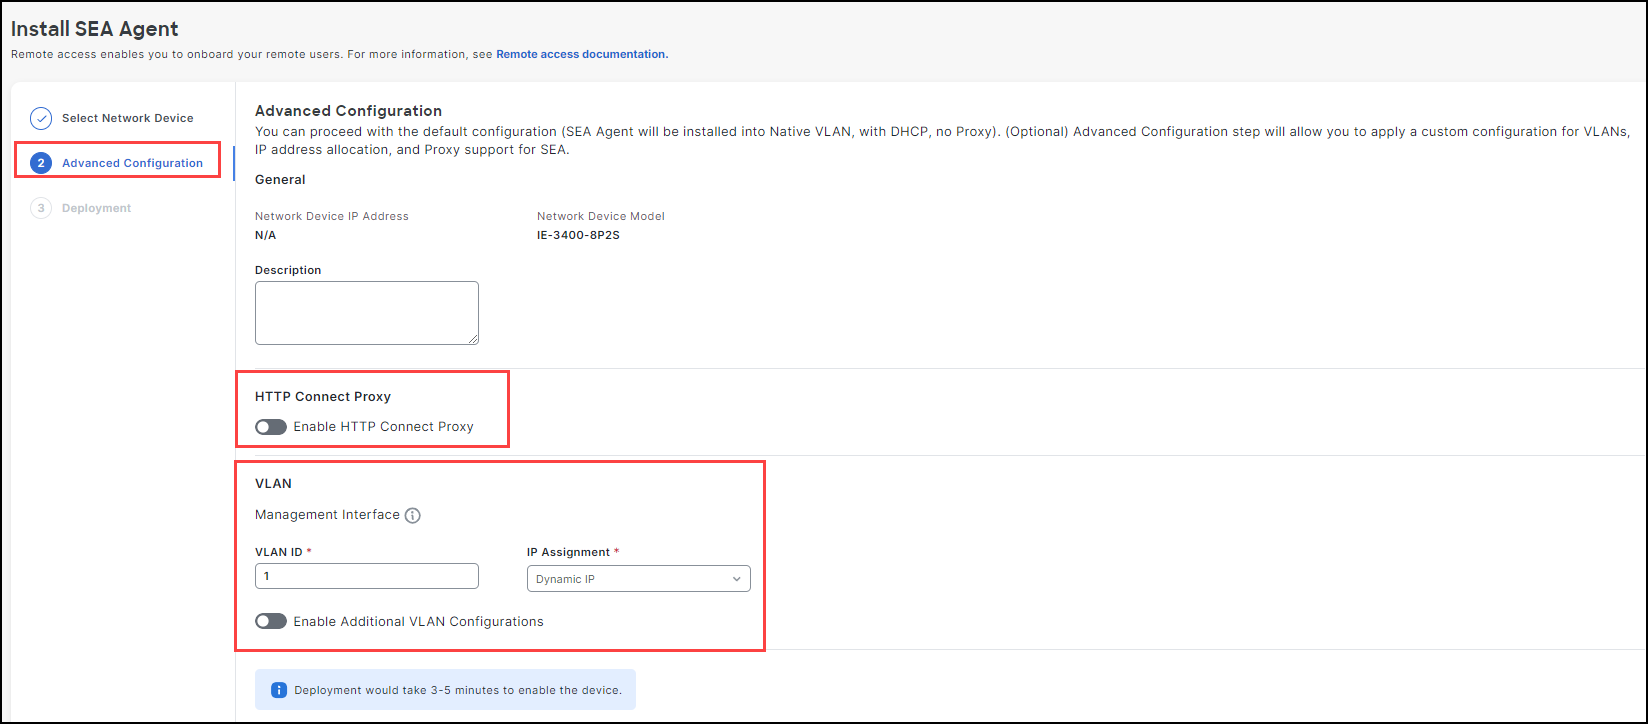
- When you have configured the network device, click Deploy. It can take 3-5 minutes to enable the device.
Note: If the installation fails, a Deployment Failed screen opens with the reason.
Connect to a remote asset
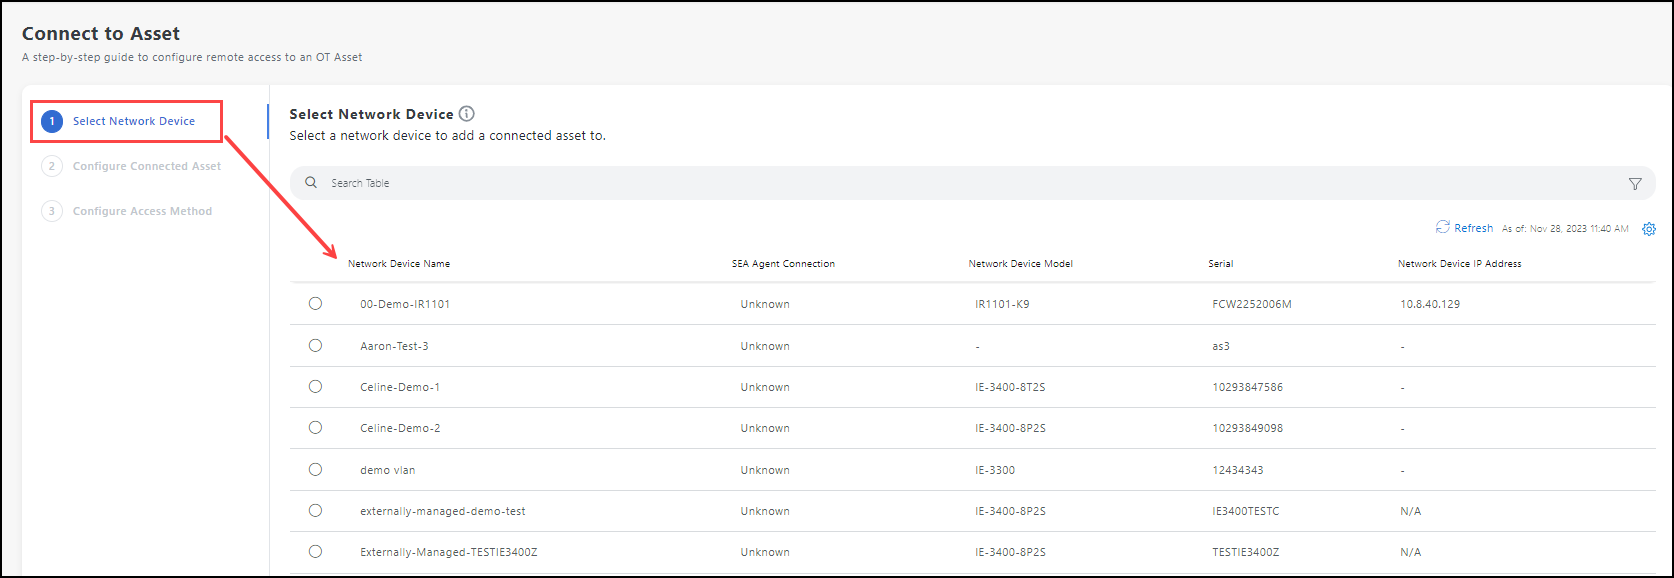
- From the Quick Wizard, click Connect to Asset.

- Select the Network Device.
- In the Connect to Asset screen, enter the Asset Name and the IP Address.

- In the Configure Access Method screen, enter the Access Method for the Connected Asset.
Note: All access methods are available Except SEA Plus. Click here for more information on using SEA Plus as an access method.
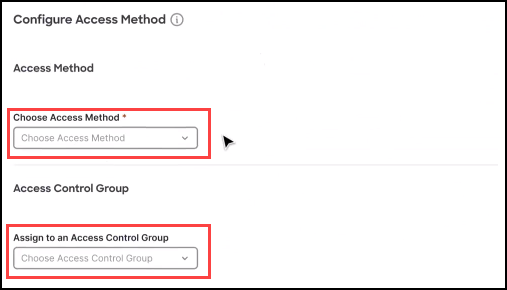
- Enter the information for that Access Method. For information on each access method, see Access Methods.
- (Optional) Choose an existing group in the Assign to an Access Control Group field.
Note: To assign an Access Control Group from this screen, the access group must already be created. Click here to manage and schedule groups.
- When finished, click Next test the configuration.
- Click Validate Test Method to launch the remote session to the Connected Asset.

- Click Complete. The newly added network device a listed in the network device table in System Management.