Secure file transfer
Note: This feature is available for all user roles, including SEA User roles.
Secure file transfer allows you to securely transfer files between SEA and remote assets.
You can upload files to a staging area on SEA, where each file is scanned for malware before being made available for transfer during remote sessions. Files containing malware are automatically deleted and cannot be transferred to remote assets. However, file names for deleted malicious files will still be displayed in the Staging Files section.
Secure file transfer guidelines
- Secure file transfer is available exclusively for RDP sessions.
- File transfer functionality must be enabled when configuring the RDP access method.
- The maximum allowed size for each uploaded file is 1 GB.
Upload files
Purpose
Add local files to the Secure File Transfer staging area for later transfer to assets.
Context
Use this task to transfer files to or from the staging area and your assets
Before you begin:
- Ensure you have access to SEA.
- Verify you have the required files located on your local system.
Follow these steps to upload files to SEA:
- Navigate to Secure Equipment Access > Secure File Transfer.
- On the Secure File Transfer page, click Upload File, and browse your local system to find and select the file you wish to upload.
- After selecting the file, click Open to confirm your choice. The file transfer will begin.
Result
After you initiate the upload, the file is automatically scanned for malware. If a file is malicious, it cannot be transferred or downloaded because the physical file is not stored; only its entry is added to the Staging Files list with the status "Malware Found."
Transfer files to assets
Purpose
Move uploaded files from the SEA staging area to assets during a remote session.
Context
Use this task to transfer files to or from remote assets after uploading them to the staging area.
Before you begin:
- Ensure a file is available in the staging area.
- Verify that an RDP remote session is available.
Follow these steps to transfer files between SEA and remote assets:
- Navigate to Secure Equipment Access > Remote Sessions.
- On the Remote Sessions page, click Connect to the RDP session you want to connect to.
- Once you are connected, click File Transfer that is located at the bottom of the page.
- Use the Secure File Transfer window to move files between the Staging Files and Asset Files sections.
- To move files from Staging Files to Asset Files, select files from the Staging Files section and click the left arrow (<) to move them to the Asset Files section.
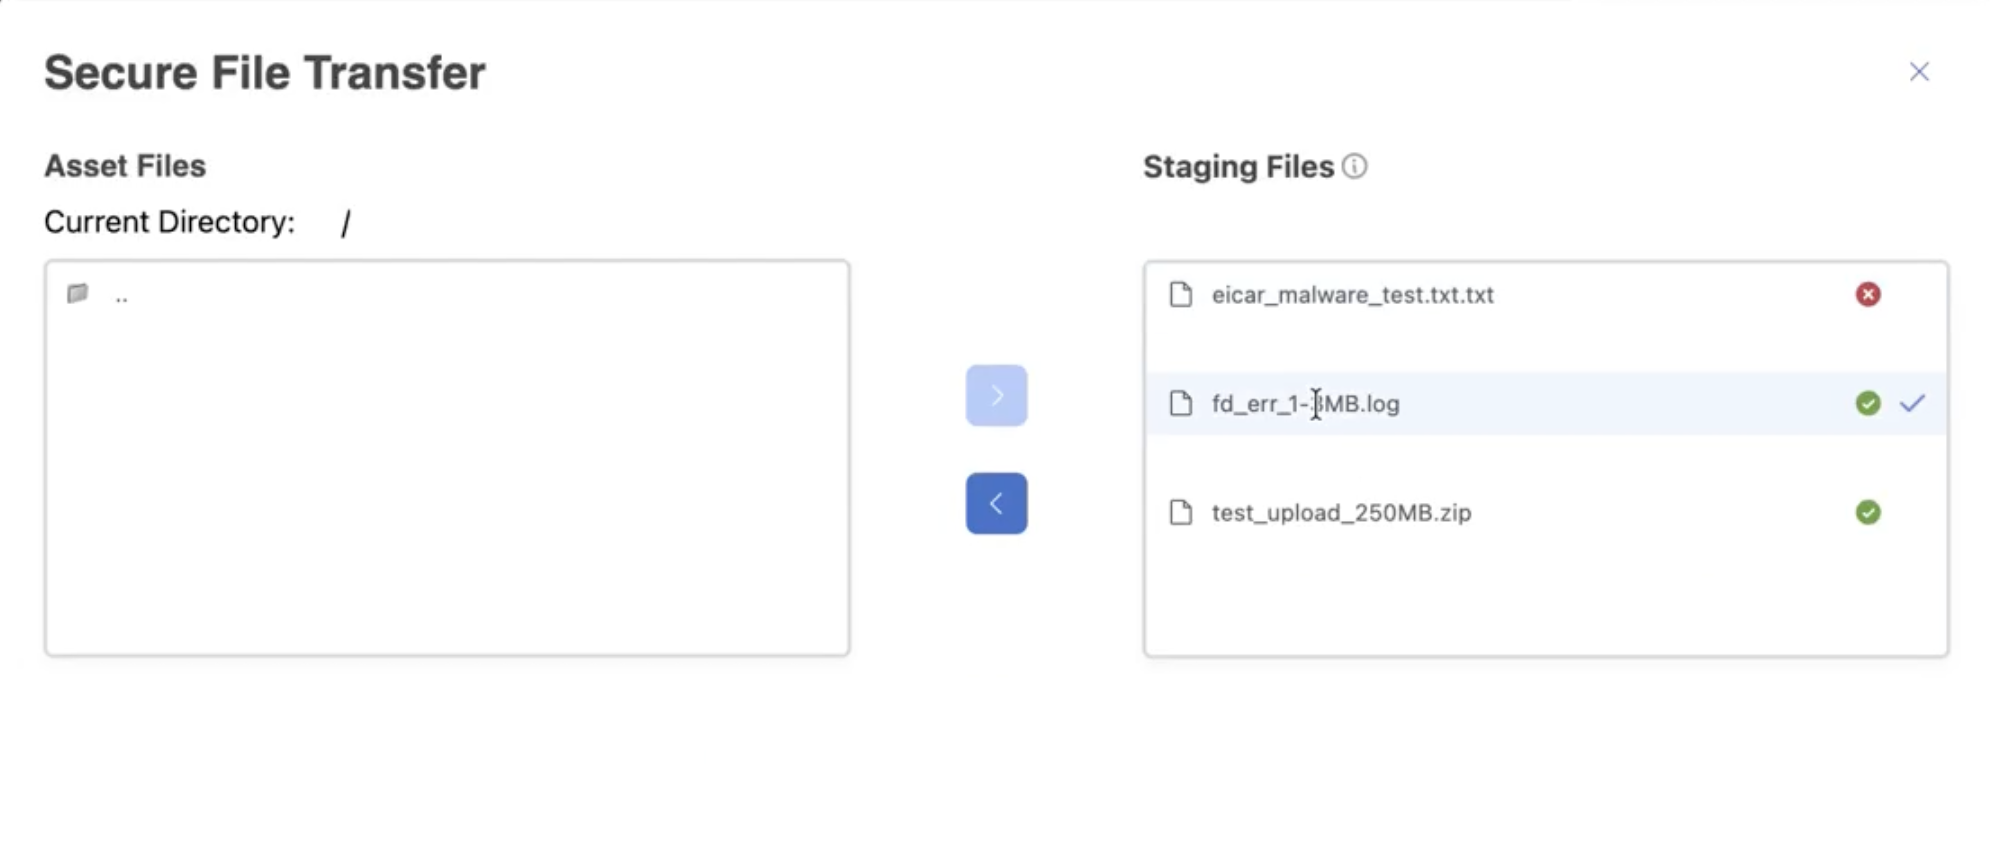 Note: When you move files from the Asset Files section to the Staging Files section, the files will be automatically scanned for malware before they are available in the Staging Files section.
Result
Upon successful transfer, files sent from SEA to remote assets are located in the SEA Drive on IoTOD network drive, and files sent from remote assets to SEA are in the Staging Files section.