Captive Portal with Firebase DB
Build a Meraki Captive Portal with Google Firebase. Easily host your site and store the user data for free!
Overview
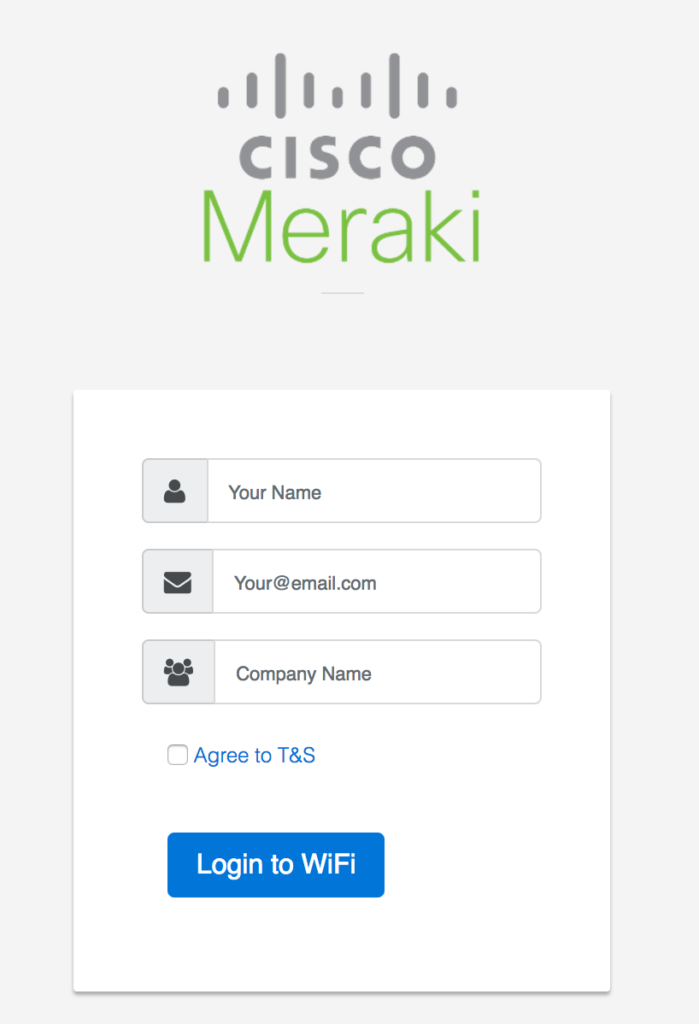
Cisco Meraki provides cloud managed WiFi with the ability to host your own “Splash Page”, which is a captive portal service for authenticating users to join the network. This concept is called an External Captive Portal (ExCaP).
Meraki provides two splash page modes, click-through and sign-on. This application will use the click-through method.
Environment
- Firebase Hosting and Database
- JavaScript
Sample URL received from Meraki to this page.
You can use this URL to test your application without an access point
http://YourAppName.firebaseapp.com/?base_grant_url=https%3A%2F%2Fn143.network-auth.com%2Fsplash%2Fgrant&user_continue_url=http%3A%2F%2Fspeedof.me%2F&node_id=149624922840090&node_mac=88:15:44:60:1c:1a&gateway_id=149624922840090&client_ip=10.255.60.208&client_mac=f4:5c:89:9b:17:67
Installation
- Clone this repo and change into the directory
$ git clone https://github.com/dexterlabora/MerakiCaptivePortal-firebaseDB.git
- Update your Firebase Config settings in
./js/MerakiFirebase.js. This information is found in your Google Firebase Console.
// Initialize Firebase -- UPDATE THIS
var config = {
    apiKey: "YourAPIKey",
    authDomain: "YourAppName.firebaseapp.com",
    databaseURL: "https://YourAppName.firebaseio.com",
    projectId: "YourProjectID",
    storageBucket: "YourAppName.appspot.com",
    messagingSenderId: "YourSenderId"
};
- Install and configure Google Firebase Hosting
NodeJS must be installed for the npm command to work
$ npm install -g firebase-tools
$ firebase init    # Generate a firebase.json (REQUIRED)
$ firebase serve   # Start development server
$ firebase deploy  # Push changes to Firebase Hosting
- Configure the Meraki wireless SSID with a Click-Through splash page authentication
- Meraki Dashboard –> Configure –> Splash Page: Click-through
- Add the domain address of the webserver to the “Walled Garden”
- Meraki Dashboard –> Configure –> Access Control –> SSID:yourSSID –> Walled Garden.
- Note: You will need to use the IP address instead of the domain name or contact Meraki Support to enable Walled Garden Domain Names
- Point the Meraki Splash page “Customer URL” to the HTML file.
https://yourserver/- Meraki Dashboard –> Configure –> Splash Page –> Custom URL:
https://yourserver.com/index.html
- Meraki Dashboard –> Configure –> Splash Page –> Custom URL:
Sample string
https://yourserver/splash.html?base_grant_url=https%3A%2F%2Fn143.network-auth.com%2Fsplash%2Fgrant&user_continue_url=http%3A%2F%2Fask.com%2F&node_id=149624921787028&node_mac=88:15:44:50:0a:94&gateway_id=149624921787028&client_ip=10.110.154.195&client_mac=60:e3:ac:f7:48:08:22
Success!
Additional Resources