Installation
The ServiceGraph Connector for Meraki provides a guided setup once you install it from the Service Now Store.
We suggest that you install this in a sandbox or developer instance first to test the solution. Once the functionality and data has been verified, you can then feel confident installing in your production instance.
Guided Setup (Screenshot)
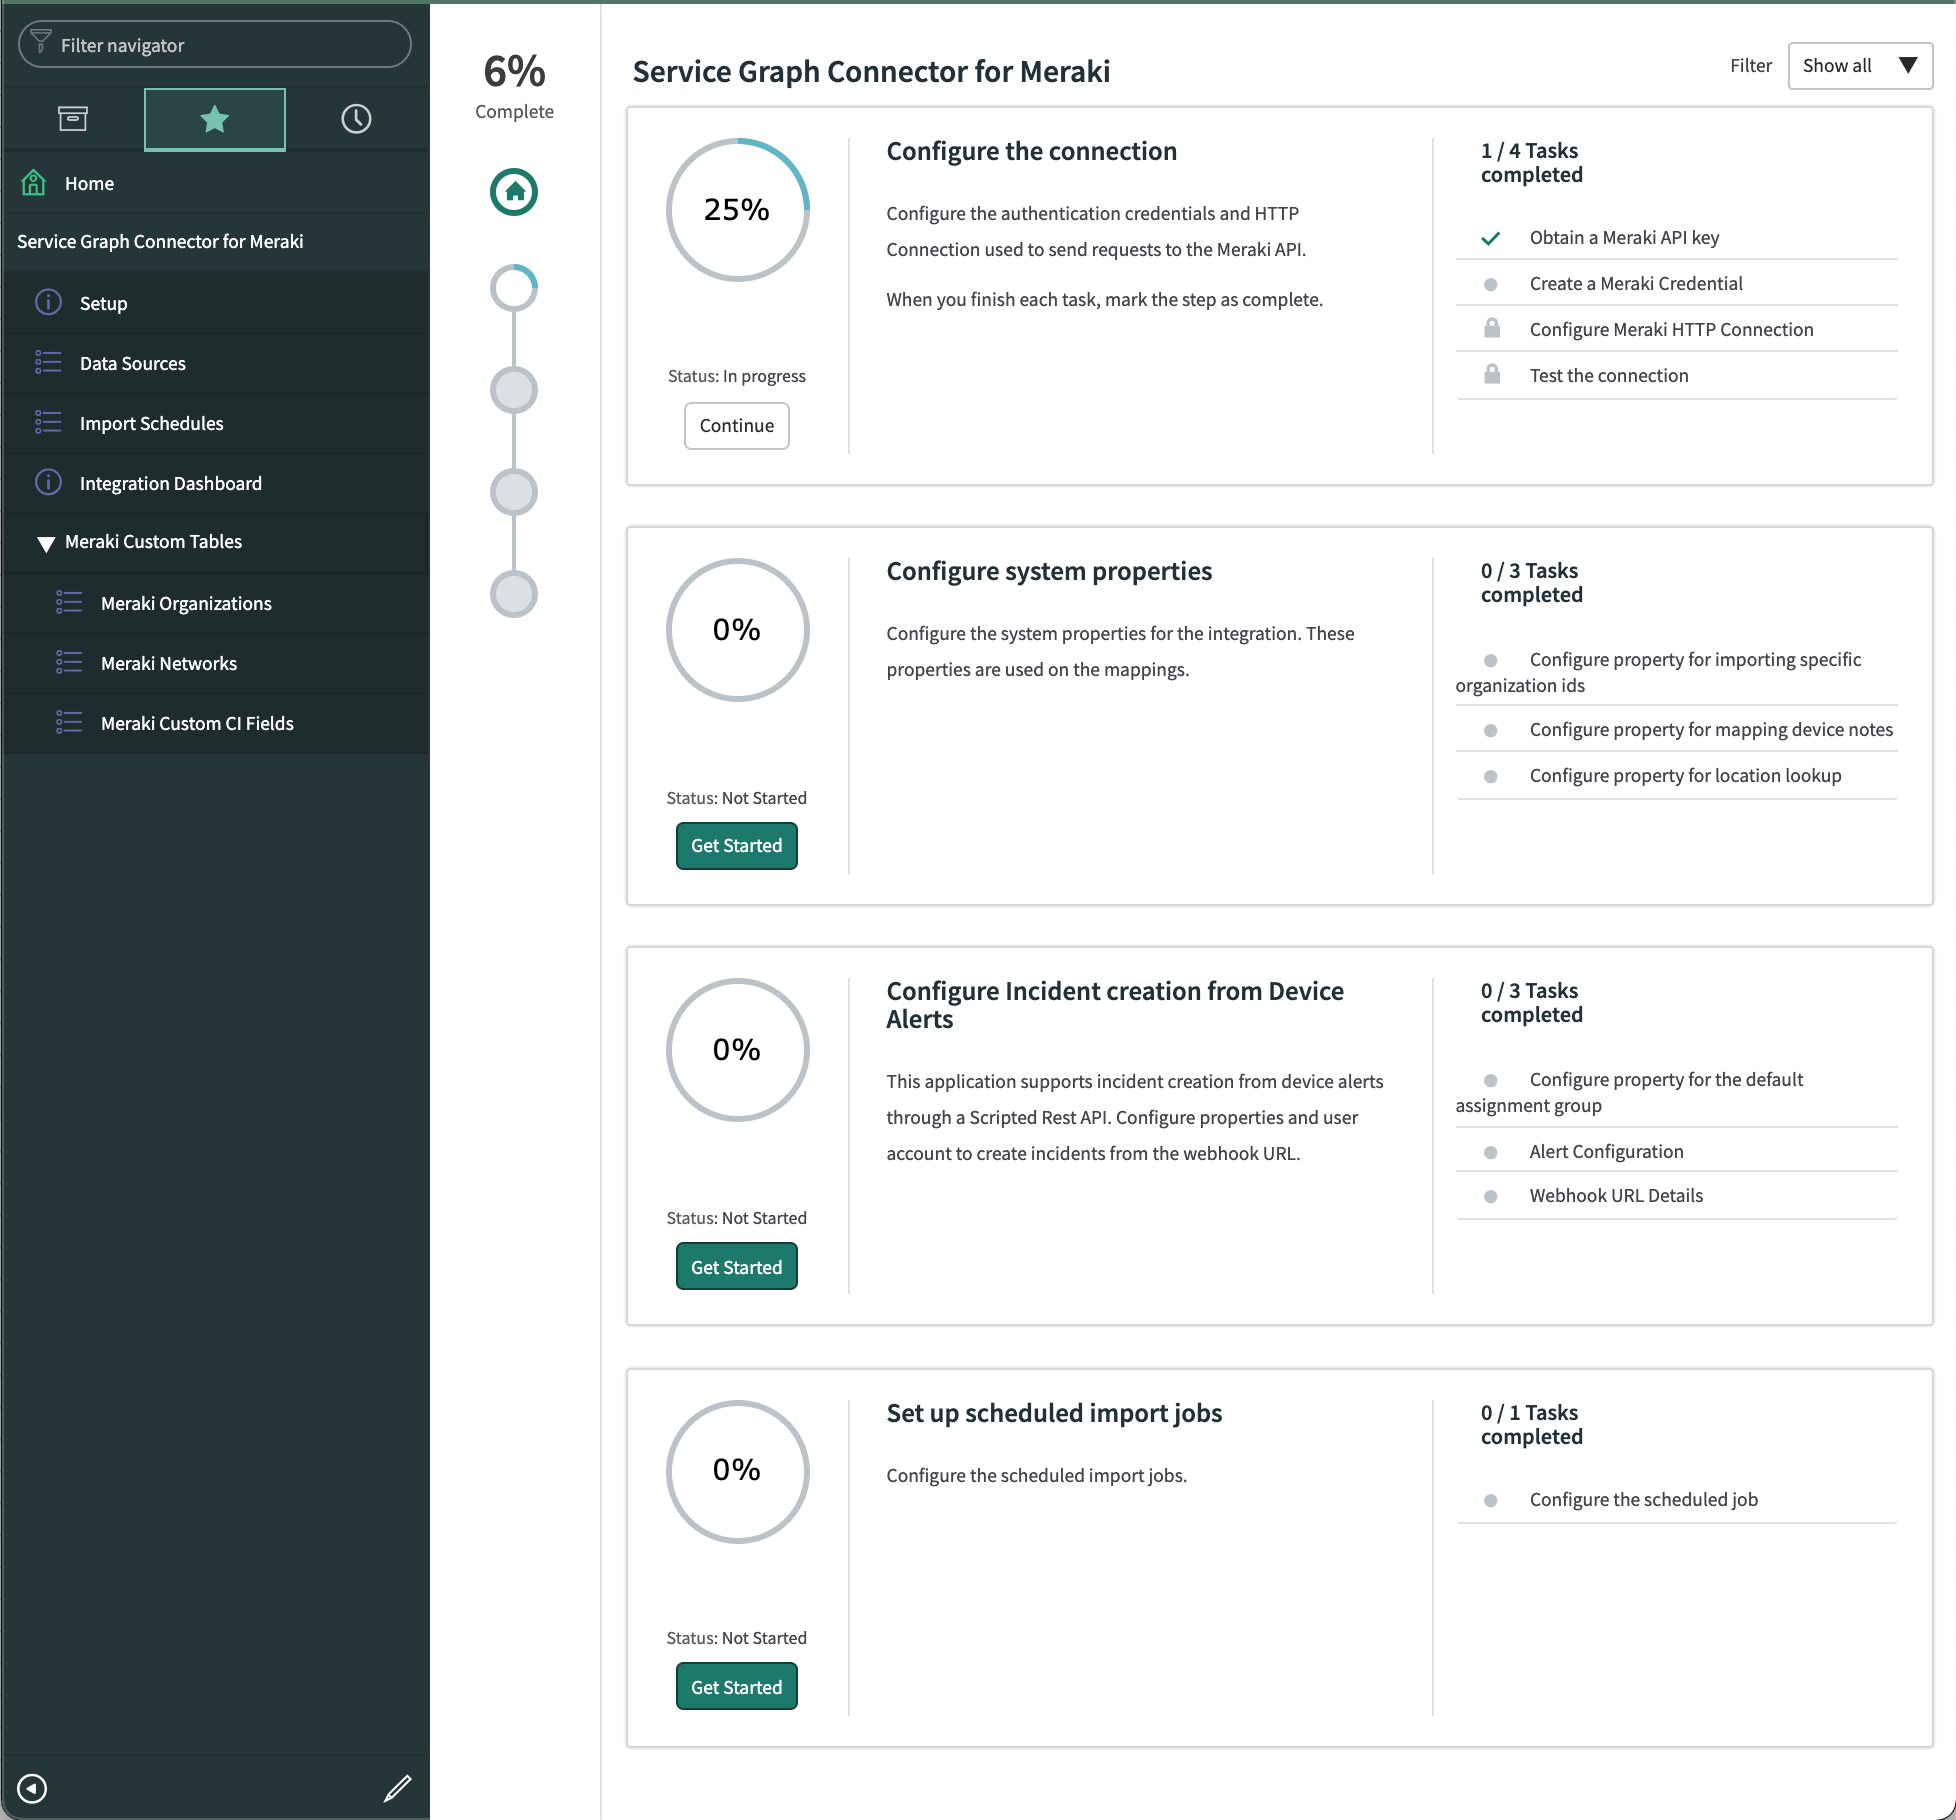
Guided Setup Instructions
complete these steps within the application's guided setup
Configure the Connection
Configure the authentication credentials and HTTP Connection used to send requests to the Meraki API.
When you finish each task, mark the step as complete.
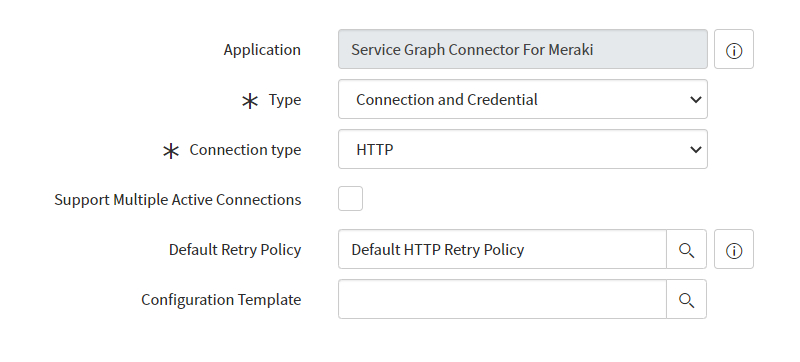
1. Configure Meraki Connection & Credential Aliases
Click Configure and update the connection details as needed.
2. Obtain a Meraki API key
The minimum role is read-only access to the Meraki Organization.
3. Create a Meraki Credential

Adding Multiple Meraki API keys to the application
Note: Multiple API key configurations feature is only available for Meraki Service Graph connector v1.4 & above
You can now add Multiple Meraki API keys and API URIs for multiple Meraki dashboard regions (e.g .com, .cn, .in, .com) to the Meraki Service Graph connector to import Network data associated with the respective API keys into the ServiceNow CMDB.
Perform the same step as shown above to add a another API key credential.
4. Configure Meraki HTTP Connection

For every new Meraki API key credential added to this application, a corresponding new Meraki HTTP Connection has to be configured.
The Credential value will be the name of the Meraki API key submitted in the previous step.
In order to add another API URI for a different Meraki dashboard region, perform the same steps to create a new Meraki HTTP connection with the appropriate API key as its Credential value.
Note: Make sure that the
Connection aliasvalue is same for every new connection. In the case of this application it isx_caci_sg_meraki.MerakiConnectionAlias
5. Test the Connection
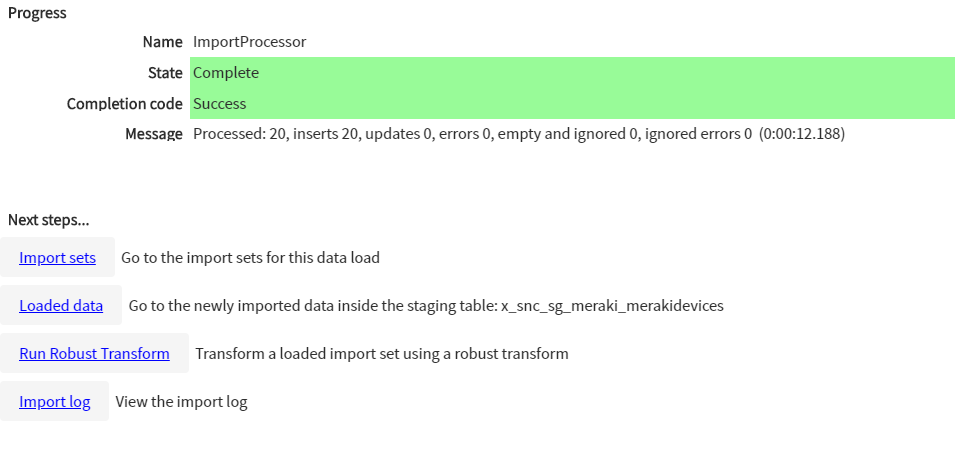
Test the connection by clicking on the 'Test Load 20 records' link under the Related links of the data source. If you are able to load the test data, this means that your connection is setup correctly.
Configure System Properties
1. Configure the Organizations to Import
This property controls which organization Ids to import. If the value is empty, the application will not import any data. Please make sure to specify atleast one organization Id in the format of <orgId1,orgId2,orgId3,....>
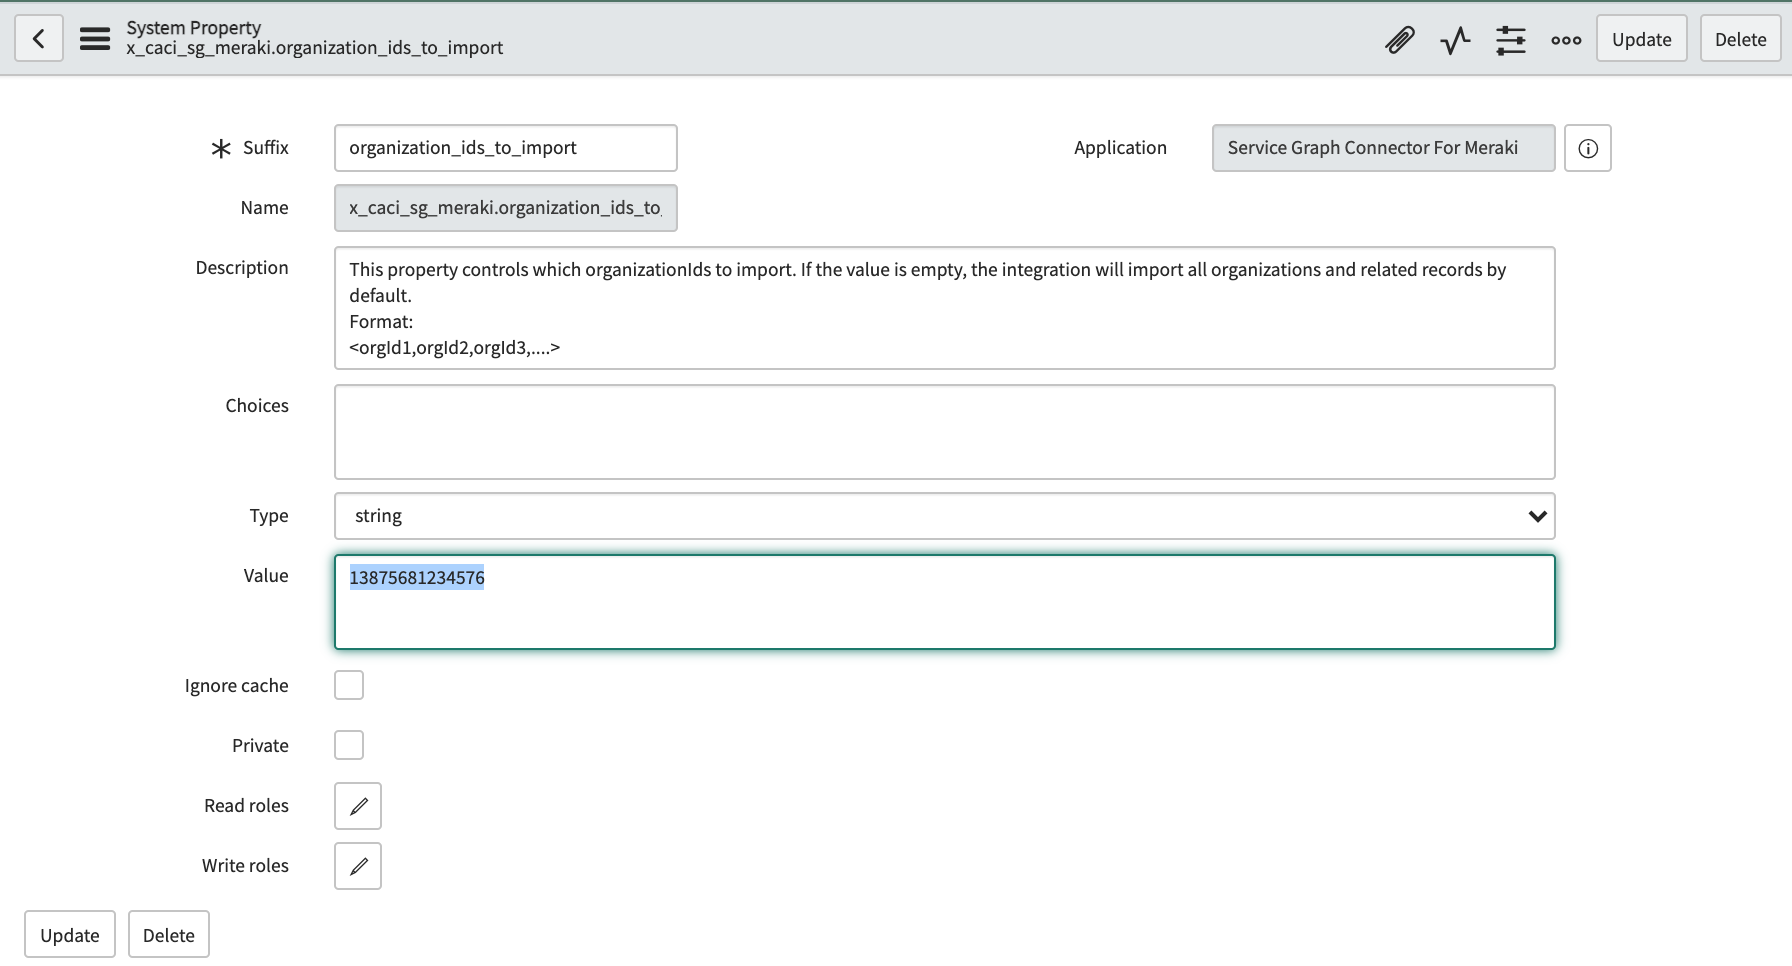
Note: You can find your organization ID by first logging into the Meraki Dashboard, then open the following link to get the IDs for each org your account has access to.
2. Configure property for mapping device notes
By default, device notes are being mapped to the Comments field of the configuration items. If you need to turn this off, click Configure and set the value to false. If not, you may skip this step.
3. Configure property for location lookup
Location in the cmn_location table is being looked up based on the following attributes:
- address
- lat
- lng
If an exact address is found on the existing locations, this will be returned and mapped to the location field of the CI.
If an exact address is not found, but lat and lng are found on a record, this location record will be mapped to the location field of the CI.
If the criteria above failed, the application will try to lookup the closest location based on the given lat and lng. By default, the threshold is set to 1 mile. Click on 'Configure' and update the value of the property. If the default value looks right to you, you can skip this step.
Configure Incident Creation
This application supports incident creation from device alerts through a Scripted Rest API. Configure properties and user account to create incidents from the webhook URL.
1. Configure property for the default assignment group
Set the default assignment group of the incidents that are created from the Device Alerts. Copy the sys_id of the group record and update the system property with this value.
2. Alert Configuration
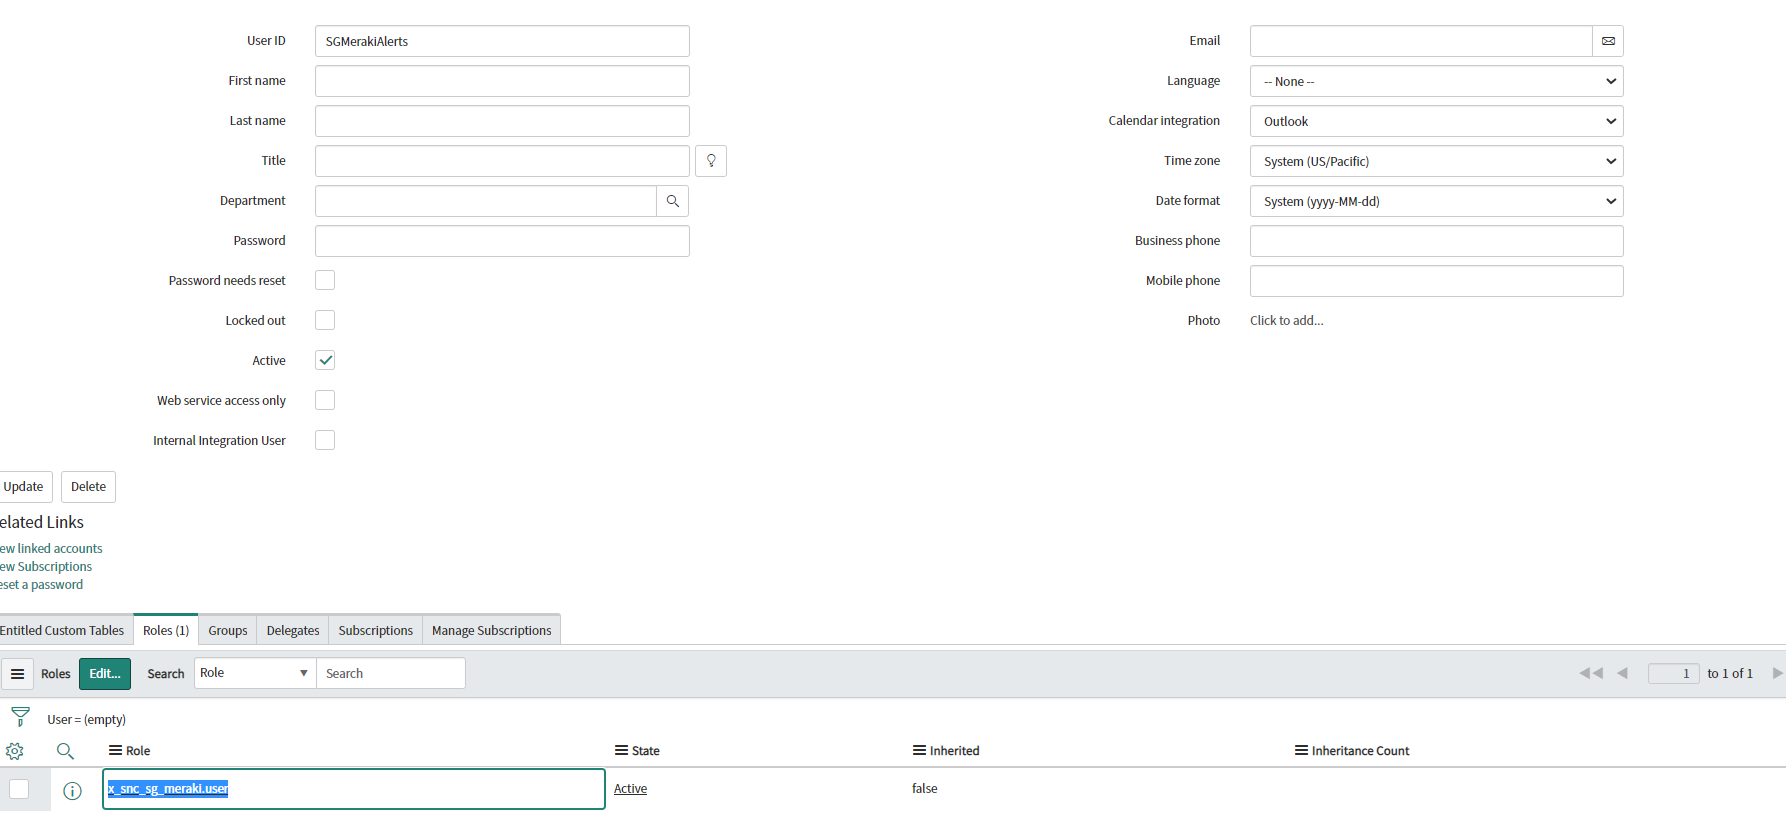
Alert configuration requires a user record created containing a role of x_caci_sg_meraki.user. The incident description will contain the body of the alert. Below is an example of the user account setup:
3. Webhook URL Details
In the Meraki Dashboard, navigate to Organization > API & Webhooks > Webhooks > Receivers. Add a new receiver with the following details:
- name: Any name that you want to give to your webhook receiver
- httpServer URL: https://venXXXX.service-now.com/api/x_caci_sg_meraki/sgmeraki_device_alerts (Replace venXXXX with your ServiceNow instance)
- sharedSecret: username:password (This is your user ID & password created for the user in ServiceNow for alert configuration. Refer to the setup in the ServiceNow app for more details)
- Template: select the included template for ServiceNow
Click Save, and then click "send Test" to ensure the setup is right. You should see a "webhook test was successful!" message
Note: ServiceNow versions prior to the San Diego release could use this URL and no shared secret or template.
https://UserID:Password@yourinstance.service-now.com/api/x_caci_ciscomeraki/meraki_device_alerts


Set up scheduled import jobs
Configure the scheduled import jobs.
- Configure the scheduled job
By default, the Meraki scheduled job is disabled.
On the Scheduled Data Import form:
Select Active to activate the scheduled job. Select Periodically for how often the job will run.
Verify
Once installed, you can follow these steps to validate everything works as expected.
Validate Organization records are created in ServiceNow
a. Navigate to Service Graph Connector for Meraki > Meraki Custom Tables > Meraki Organizations
b. Confirm that records are created on the table. Please note that depending on the amount of data being imported, it might take a while before all records are created in the table."
Result
Records are created in the Organizations table with attributes such as:
- Organization ID
- Name
- URL

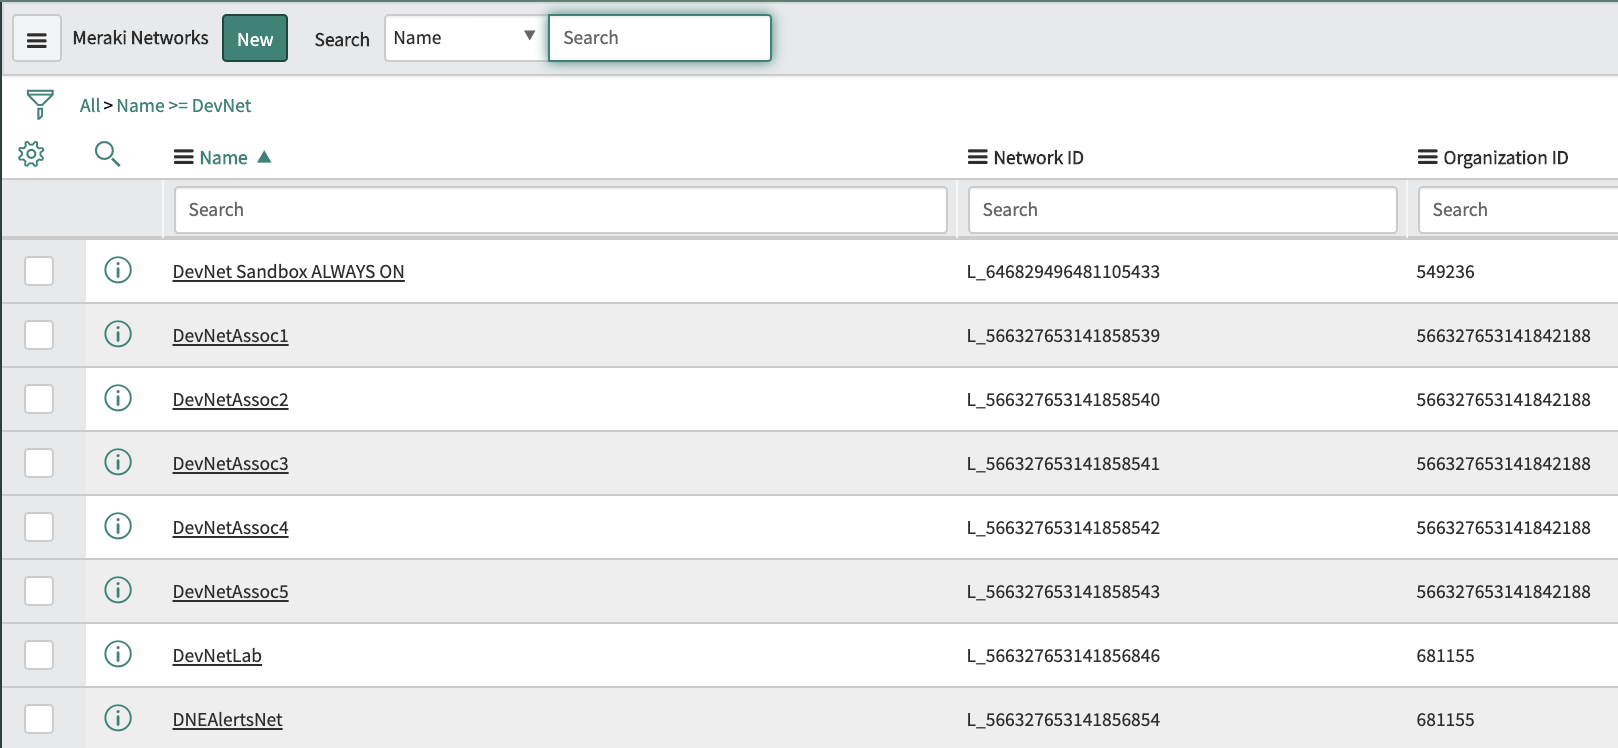
Validate Network records are created in ServiceNow
a. Navigate to Service Graph Connector for Meraki > Meraki Custom Tables > Meraki Networks
b. Confirm that records are created on the table. Please note that depending on the amount of data being imported, it might take a while before all records are created in the table.
Result
Records are created in the Networks table with attributes such as:
- Network ID
- Name
- Organization ID
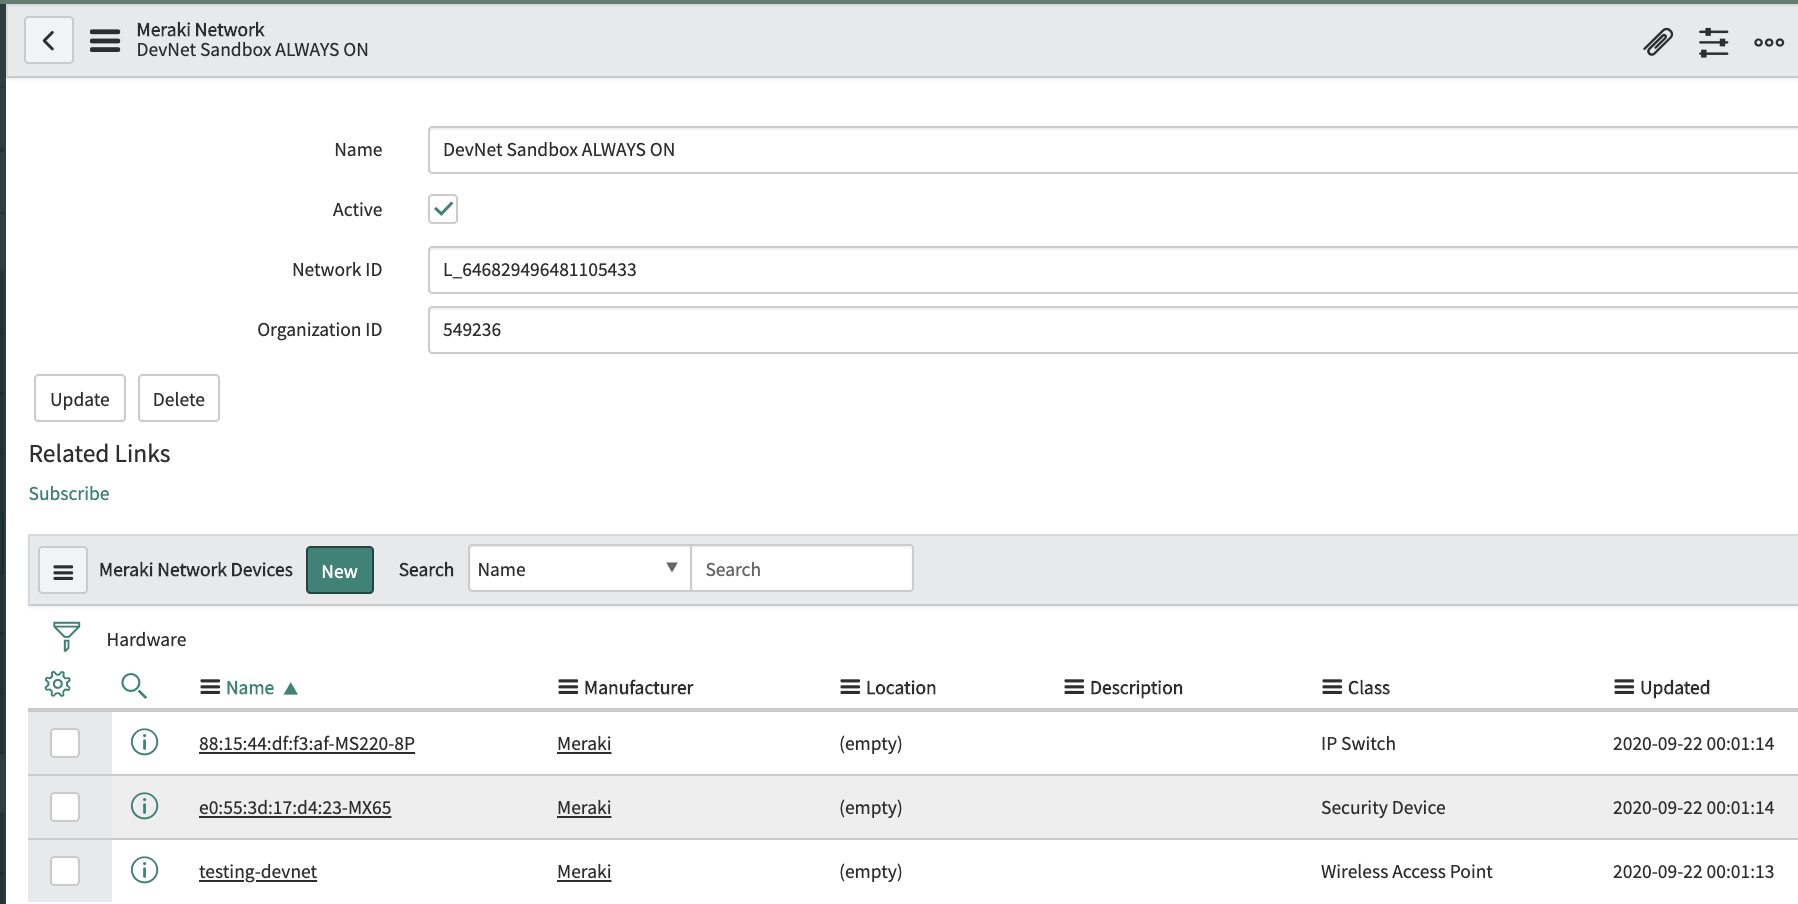
Validate Device records are created in ServiceNow
a. Navigate https://[instance_name].service-now.com/cmdb_ci_list.do?sysparm_query=&sysparm_view=
b. Sort by ‘Updated’ (descending) or filter on CIs created/updated today.
c. Confirm that records are created on the tables. Please note that depending on the amount of data being imported, it might take a while before all records are created in the table.
Result
Records are created in the Hardware table and child tables (i.e. IP Address, IP Camera, IP Switch, Network Adapter, Security Device, Wireless, Netgear, Meraki Network, Meraki Organizations depending on the model) with attributes such as:
- Name
- Comments
- Mac Address
- Serial
- IP Address
- Model
- Firmware version
- Location
- Tags
- Device Type
- Manufacturer
- Checked in
Please note that not all these fields are required or filled so some attributes may be empty for some records.
Validate Relationships are created on the CIs
a. Navigate to https://[instance_name].service-now.com/cmdb_rel_ci_list.do
Result
Confirm relationships are created
Validate Meraki Custom CI fields records are created. Since we can’t add custom fields on the Out of the box CMDB classes, the custom fields are stored on this table.
a. Navigate to Navigate to Service Graph Connector for Meraki > Meraki Custom Tables > Meraki Custom CI fields
Result
Confirm records are created with the following attributes:
- URL
- Configuration item
- Address
- ID
- Latitude
- Tags
- Longitude
- Network ID
- Organization ID
- Status

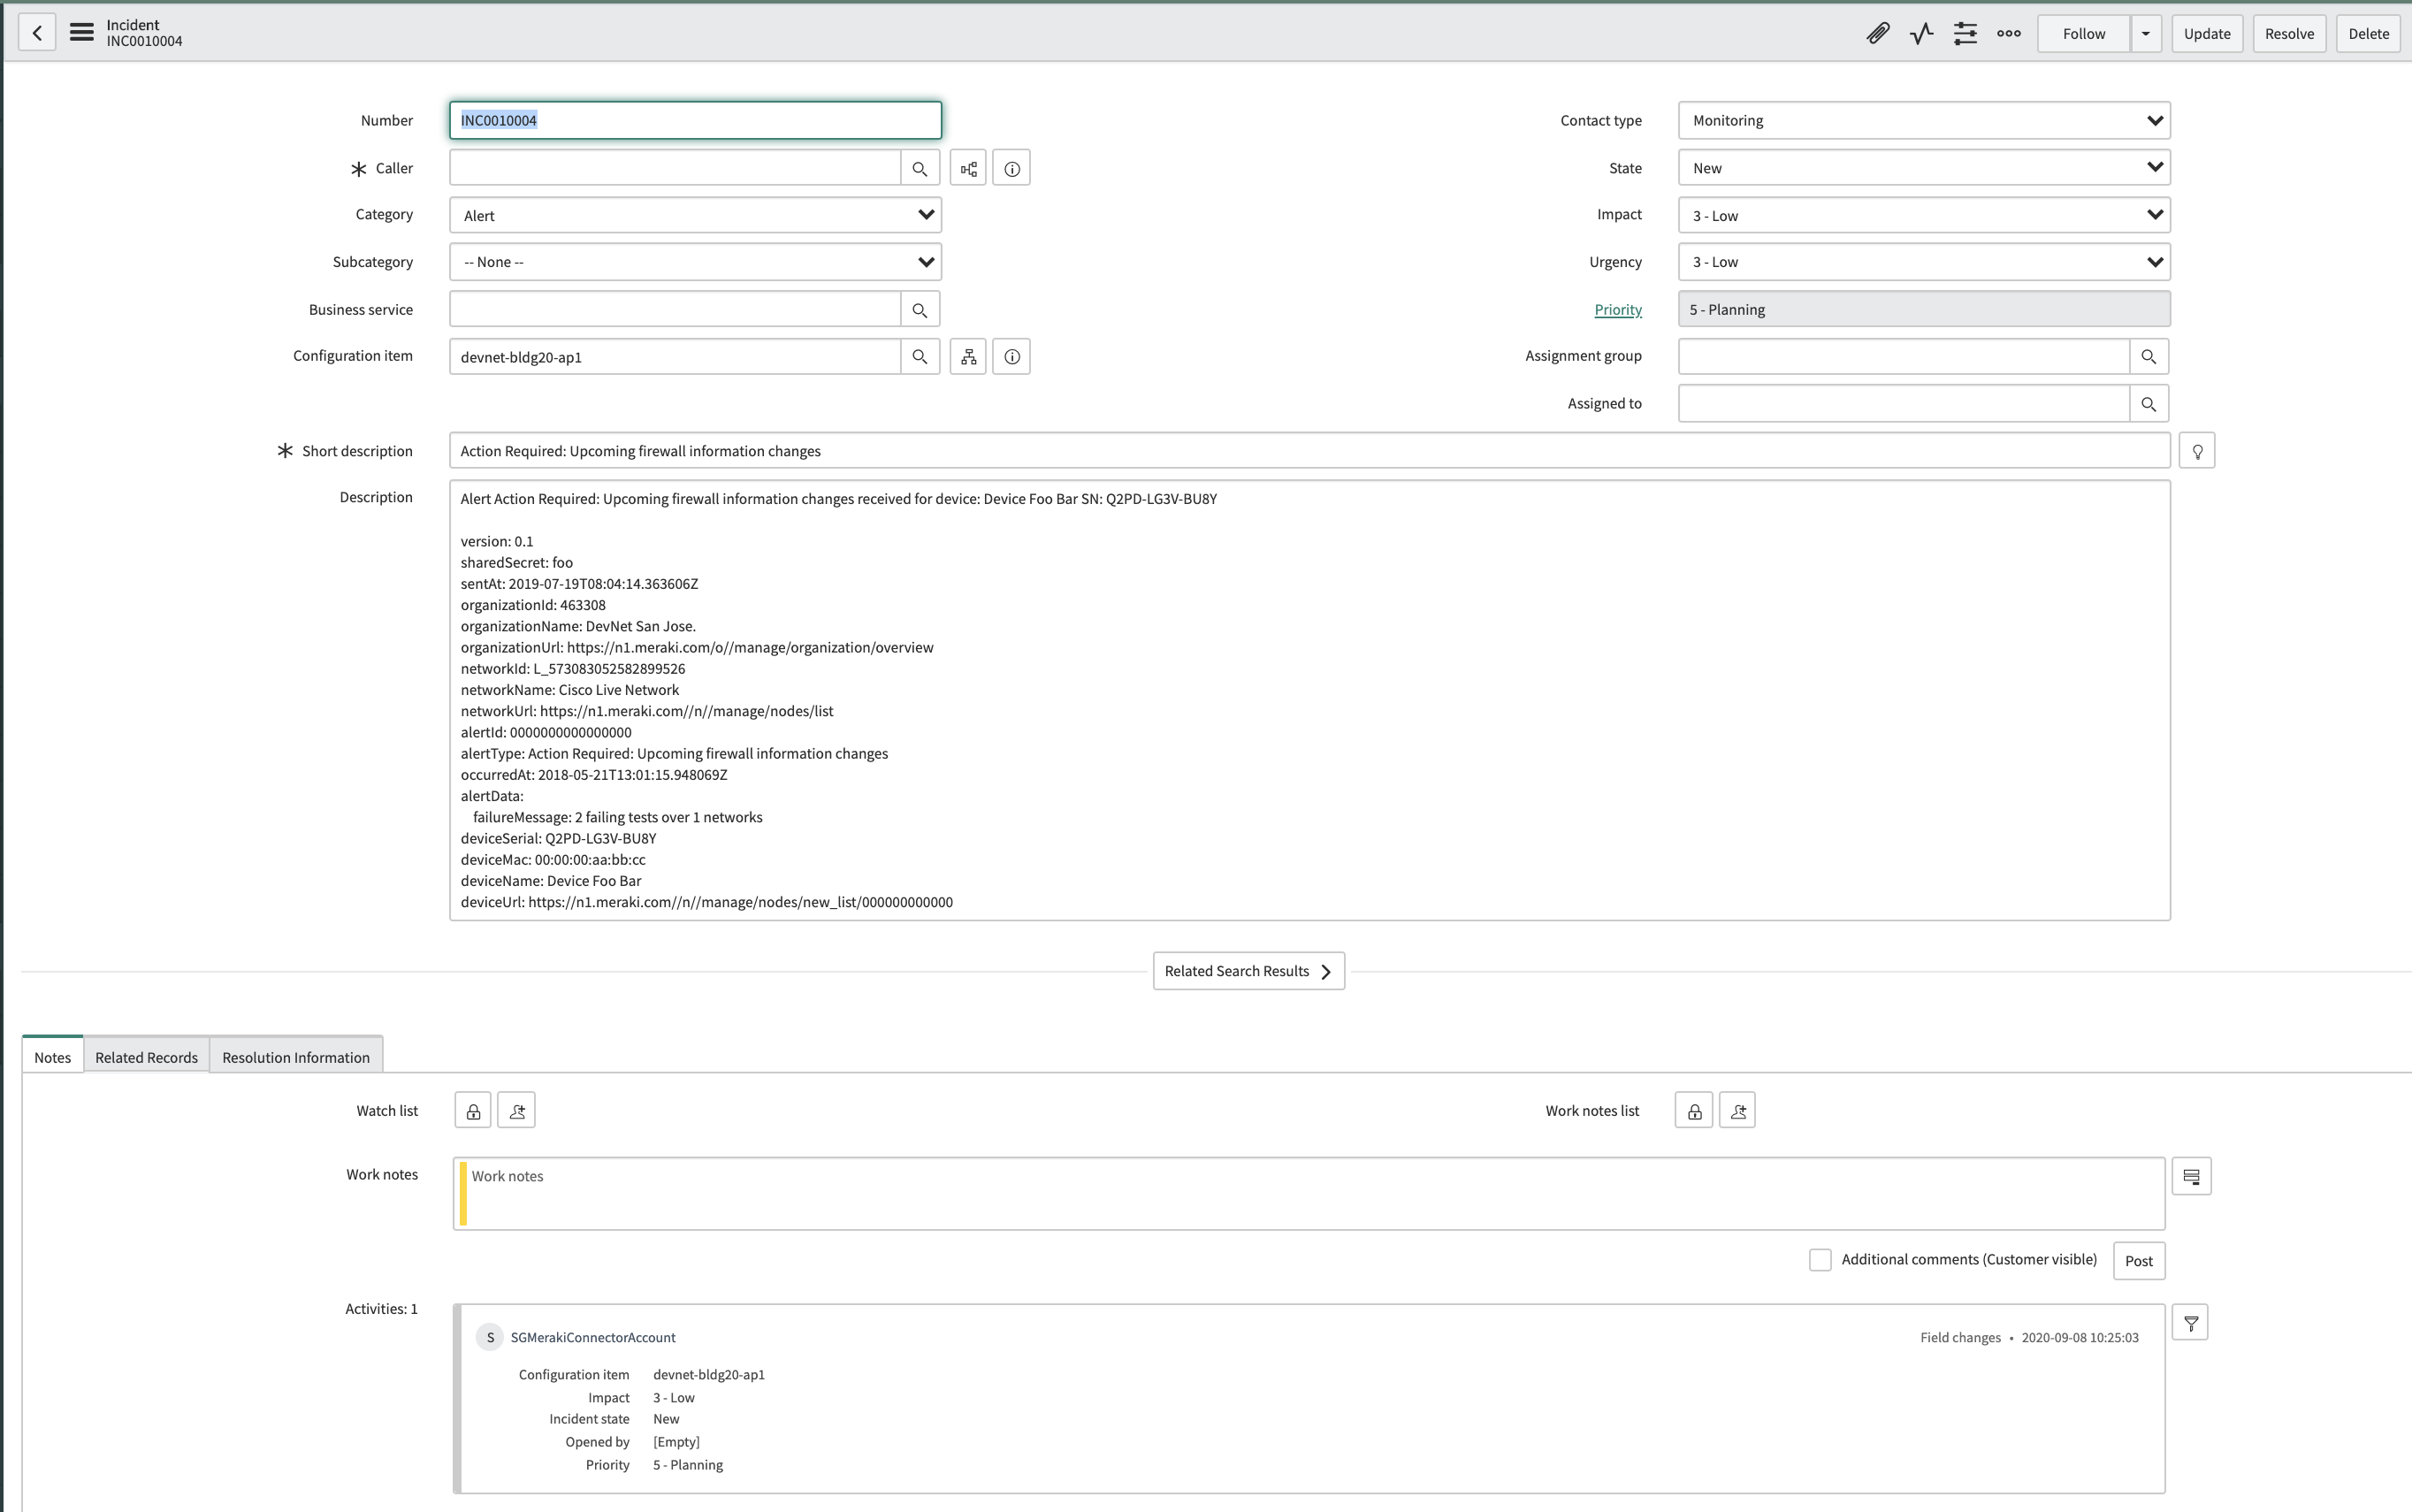
Validate incidents are created from device alerts.
This needs to be configured on the Meraki instance.
Meraki Dashboard --> Network-wide settings --> Alerts
Create a new HTTP server using the URL provided in the setup guide.
To quickly test all available Meraki alert types, use this Postman Collection to send a POST with the body of the webhook data. You should update the sample payload with a device serial number that has been imported into the CMDB.
Results
Search for Incidents and open the Incidents under Service Desk

Click on a record to see the details and CI relationships.
Success !
You now have imported Meraki devices and can capture related alerts. From here, you can start building business solutions with this data or extend the capabilities to suit your needs.