Linux OpenConnect VPN Client
Almost all reservation Sandboxes require a private VPN connection to the environment using our supported platform AnyConnect. While this is easily supported for Windows and Mac, our Linux users may feel the desire to leverage the popular open source VPN client OpenConnect. This short guide explains how to leverage OpenConnect to establish a VPN with the Sandbox.
Please Note: While this works well in most cases, we don't officially support the OpenConnect method at this time. Please use at your own risk.
Installing OpenConnect
At the writing of this Guide I was using Ubuntu 16.04 LTS - these instructions may need to be adapted to work with other distributions of Linux.
There's no need to build OpenConnect on your own - a list of current packages can be found on OpenConnect's website. In this guide, I'll be using the package for Ubuntu 16.04 listed on their page.
SSH or login to the GUI of your Linux machine
Install the open connect package. Be sure to use the correct apt-get/yum/rpm for your distro.
sudo apt-get install openconnectRun openconnect, and pass in the remote network you'd like to connect too.
sudo openconnect [remote network]The remote network for your lab is provided in the "Lab Ready" email or in the "Output Window" shown below: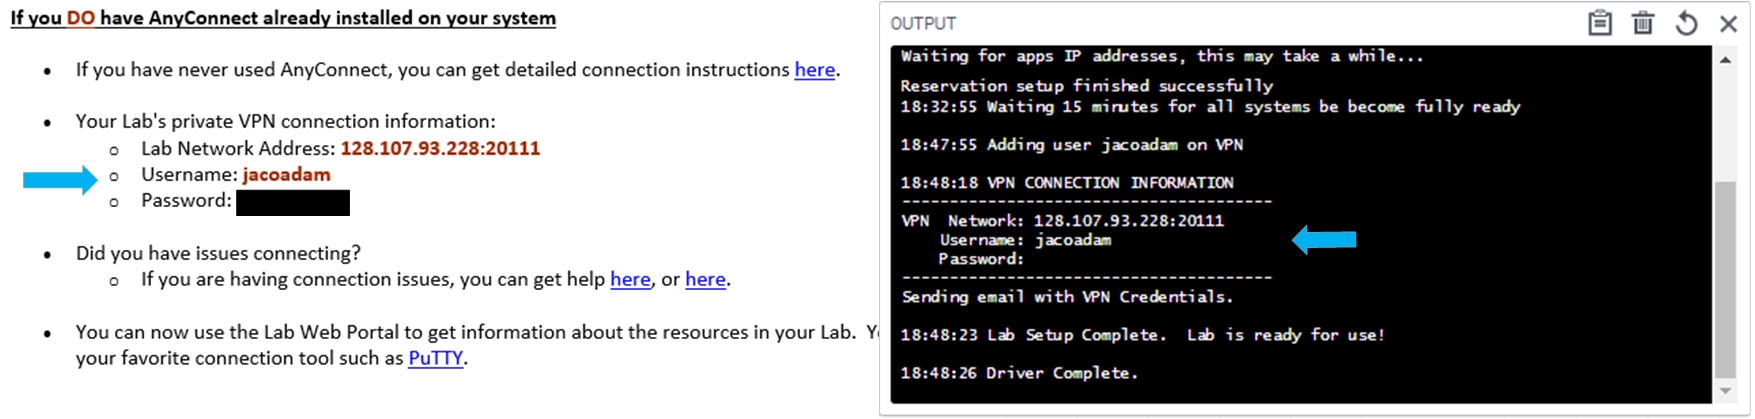
Not sure about where to find the Output Window or VPN Credentials? View the First Reservation Guide or FAQ.
If prompted about a self-signed SSL certificate, enter 'yes'
When prompted, enter the user name and password provided with the your Sandbox reservation
Look for the "Connected" message to confirm the connection is complete. You will need to leave this session open. The simplest way to verify connectivity is to ping one of the resources provided in the Sandbox.

Having trouble or questions?
Check out our FAQ, or ask a question on our Developer Forum.