Cisco XDR Automation
Cisco XDR is a cloud-based solution, designed to simplify security operations and empower security teams to detect, prioritize, and respond to the most sophisticated threats. The solution brings the entire environment together by connecting third-party and Cisco offerings with the underlying threat intelligence from Talos to enrich incidents with added context and asset insights. It reduces false positives and enhances threat detection, response, and forensic capabilities through clear prioritization of alerts and providing the shortest path from detection to response.
With Cisco XDR, you can:
Use the network as a sensor to detect malicious behavior on the network and correlate that information across multiple telemetry sources with both historical and real-time data.
Analyze the correlated events to determine end-to-end incidents and promotion of incident only where relevant awareness and action is needed by analysts.
Prioritize incidents based on risk and impact to focus analysts on what needs to be addressed with urgency.
Take suggested courses of action through the guided response that are relevant to the incident being investigated.
Integrate curated and commercially supported integrations with third-party security solutions.
Contextualize assets, whether that asset is a device, user, piece of data, workload, and so on.
Customize asset value and labels, allowing your organizations and partners to provide the needed context for impact analysis by Cisco XDR and the needed awareness for SOC analysts.
Documentation for Cisco XDR Automation Webhooks
Getting Started
This guide describes how to trigger one or more Automation Workflows with an Automation Rule in Cisco XDR.
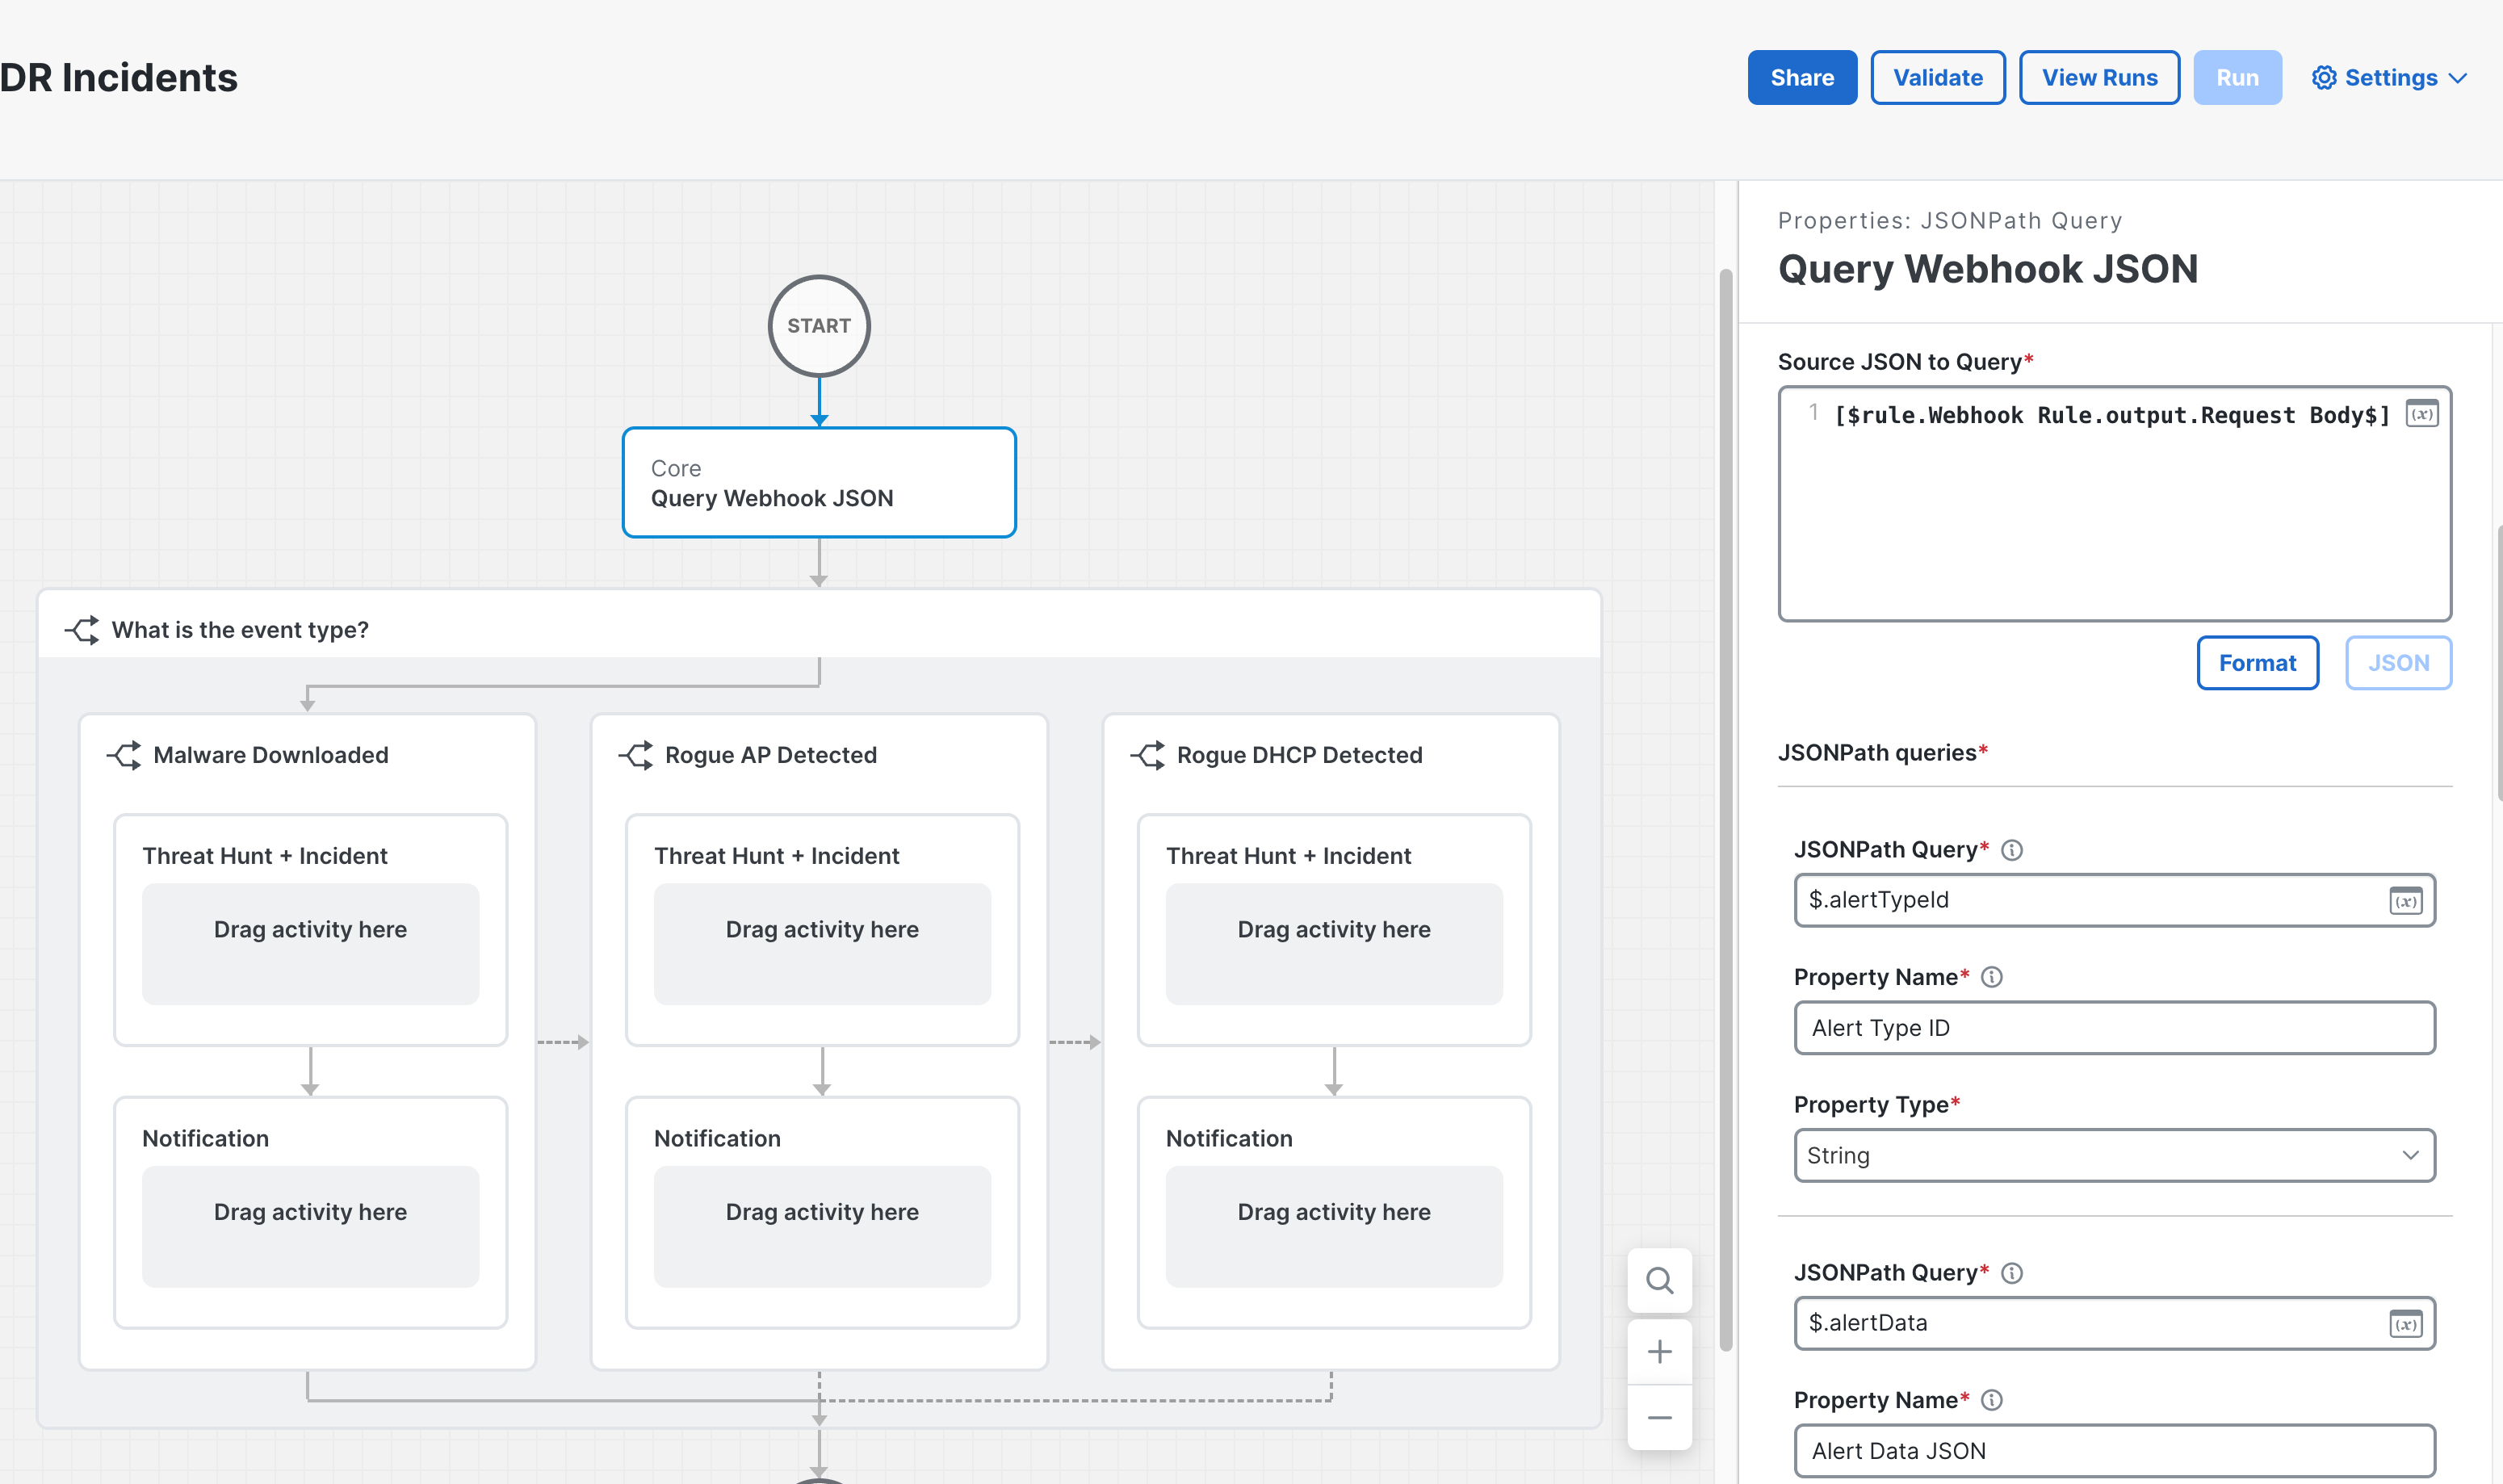
To use webhooks in Cisco XDR Automation, you must create the Webhook, create an Automation Rule with it, associate one or more Workflows, and add an Activity to the Workflow that executes when it's triggered. The incoming Meraki webhook will cause the Automation Rule to trigger the Workflow. This Workflow can then use the body of the Meraki Alert to do any desired outcomes.
Note: An external event can trigger a workflow 5 times within 1 minute. This threshold is set for each trigger individually. When this limit is reached, any unprocessed events will roll over to be processed in the next minute.
Create a Webhook in Cisco XDR Automation
When you create a webhook, you will be given an HTTP endpoint where you can push events from the source product:
- In the Cisco XDR UI, choose Automate > Triggers in the navigation menu.
- Click the Webhooks tab and then click New Webhook.
- In the General section, enter the following information:
- Display Name - A unique meaningful name for the webhook (e.g. "Meraki Webhook").
- Description - Text that describes the webhook, such as what the incoming data will trigger.
- Request Content Type - Click the drop-down list and choose the following Content-Type for your payload (incoming webhook):
application/json.
- Click Submit to create the webhook. The newly created webhook is displayed at the top of the list on the Webhooks tab.
- In the Display name column on the Webhooks tab, click the webhook to view the generated Webhook ID, AO API Key, and Webhook URL. Copy paste this URL, as you need it in the Meraki Dashboard later.
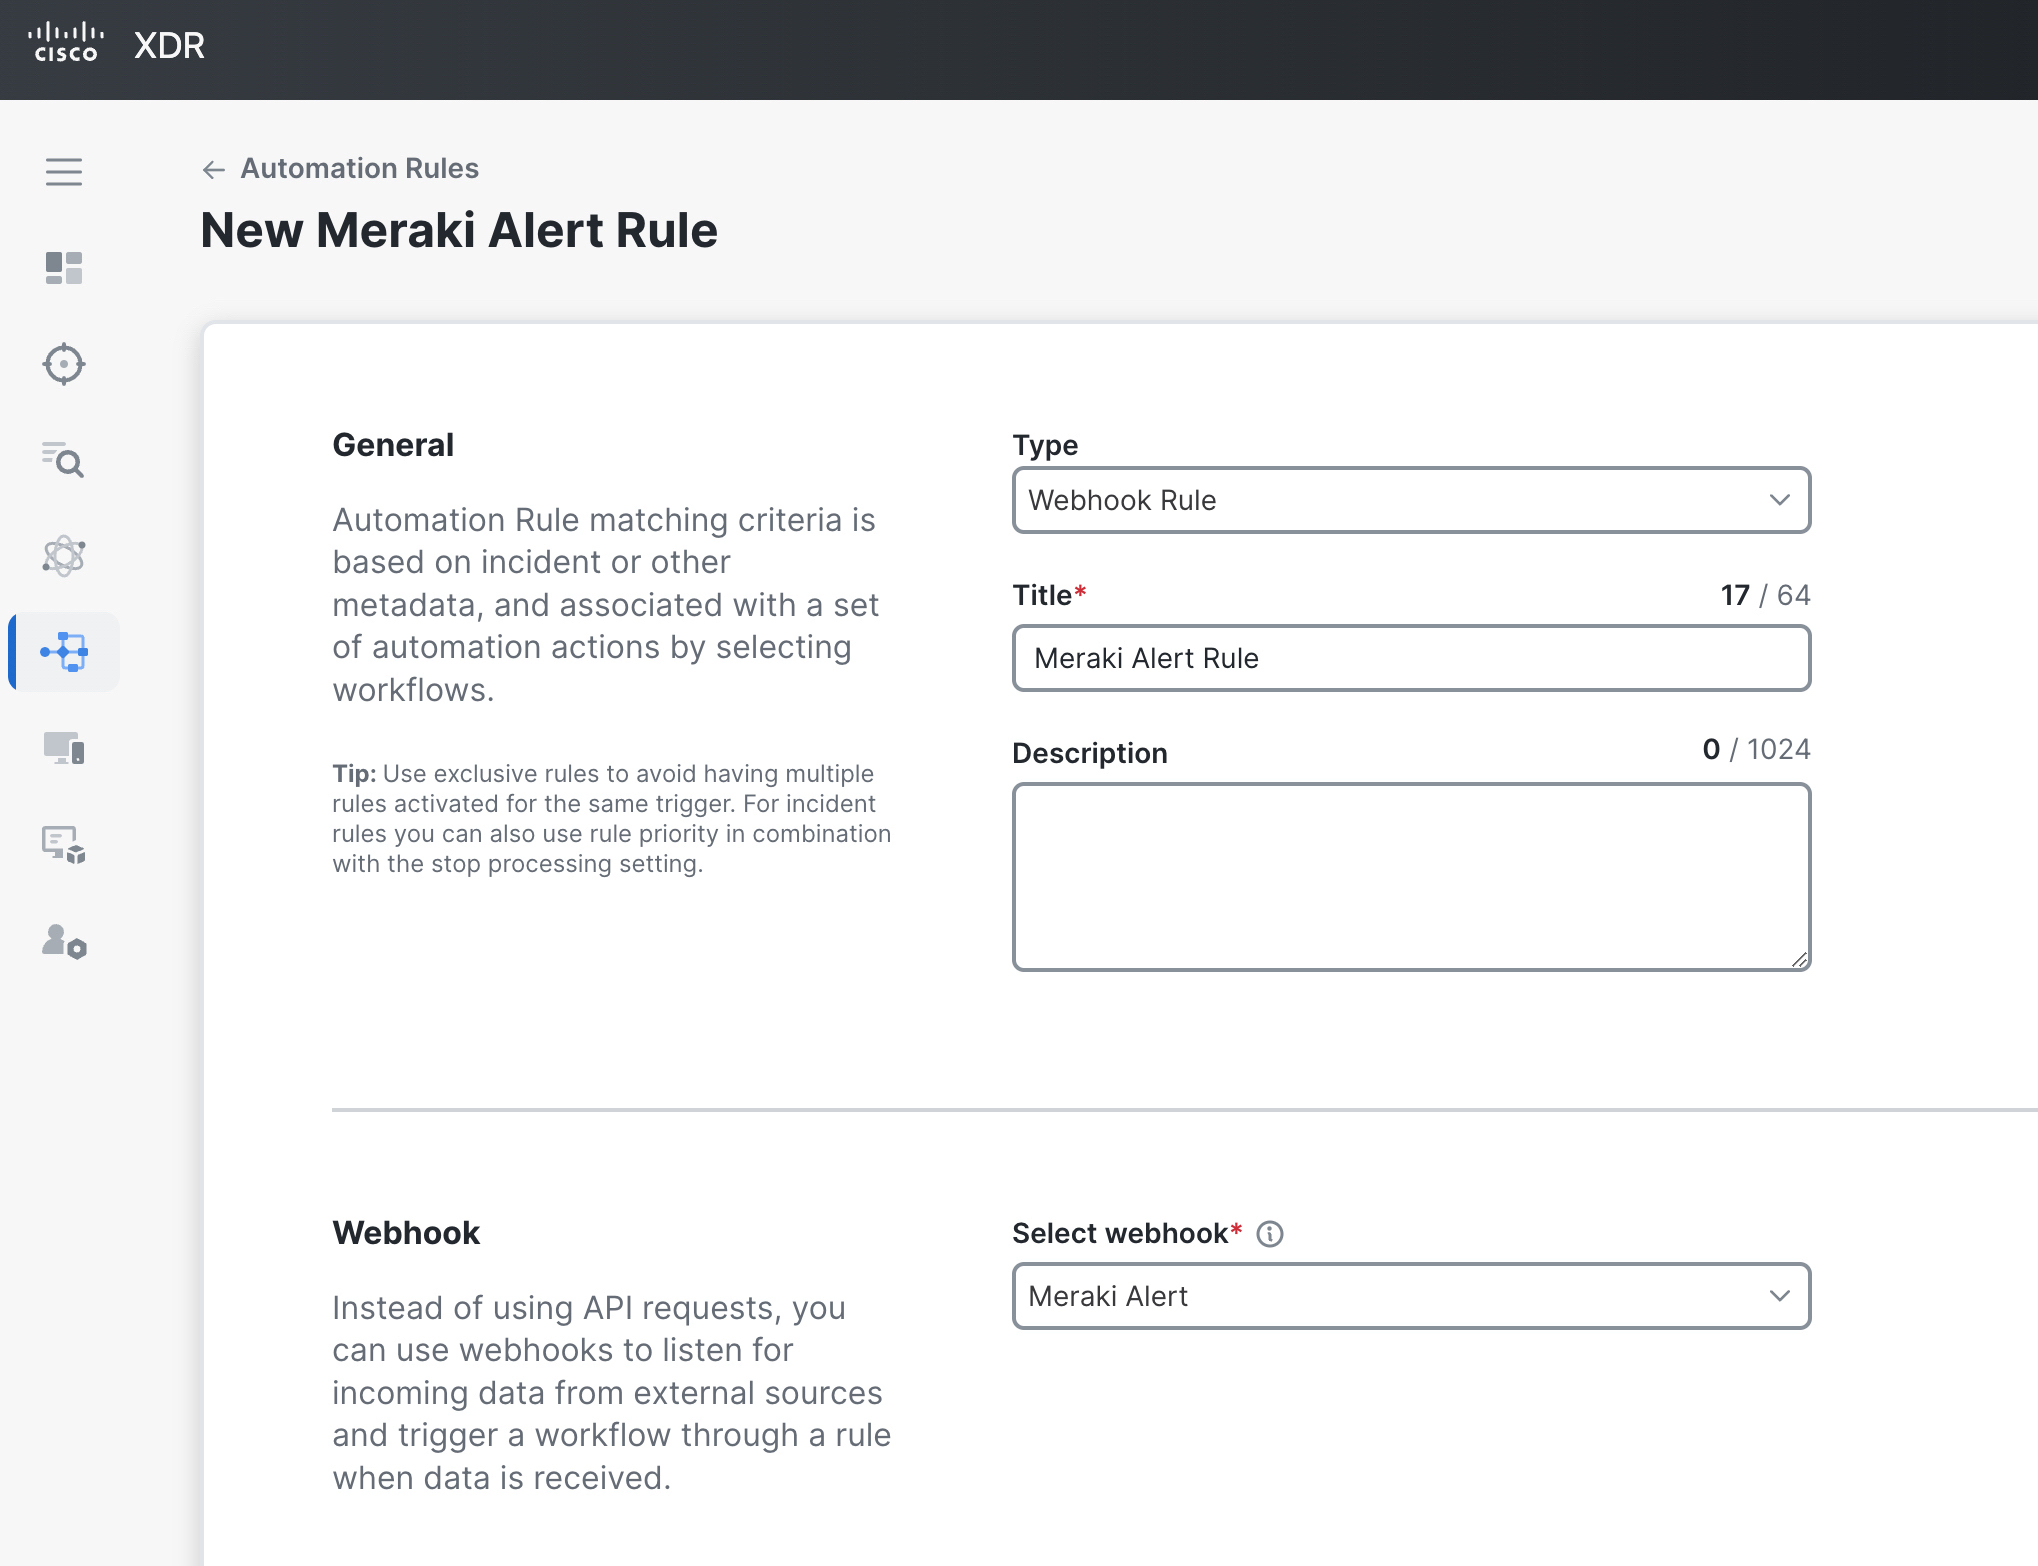
- You can now go to the Automation Rules tab and create a Webhook rule to listen for incoming data from the webhook. This rule will be used as a trigger to execute the associated workflow.
Template
- HTTP Server URL:
<YOUR FULL XDR WEBHOOK URL> - Body: body.liquid (simply the raw Meraki Alert JSON)
- Headers: headers.liquid (
"Content-Type":"application/json")