Cisco Modeling Labs v2.4
2.4.x
- Overview
- Product Documentation
- CML 2.4 Release Notes
- CML 2.4 Installation Guide
- CML 2.4 User Guide
- CML User's Guide
- Overview of CML 2.x
- Using CML and the HTML5 UI
- Dashboard
- Workbench
- Adding Nodes to a Lab
- Starting, Stopping, and Wiping Nodes
- Deleting Nodes
- Creating Links
- Rules for Creating Links and Interface Overprovisioning
- Adding Interfaces and Overprovisioning
- Overprovisioning Interfaces with Link Creation
- Hiding Links
- Starting Simulations
- Connecting to a Node's Console
- Changing Global Console Settings
- Download the Console History
- Setting CPU limit on node
- Launch sequencing and CPU limiting
- Stopping Simulations
- External Connectivity for Simulations
- Link Packet Capture
- Lab Sharing
- Console Server
- Breakout Tool
- Custom VM Images
- Creating a New Node Definition
- CML 2.4 Admin Guide
- Resources
Connecting to a Node’s Console
Once a simulation is started, you may connect to the console or, for applicable nodes, the VNC server for a node.
Tip
CML provides three ways to access the console for a running node:
the Console tab in the UI (see below)
the Console Server
Procedure
Hover over the desired node to activate the node’s action ring.
Click the Console button on the action ring to open the node’s Console pane in the lower pane of the Workbench.
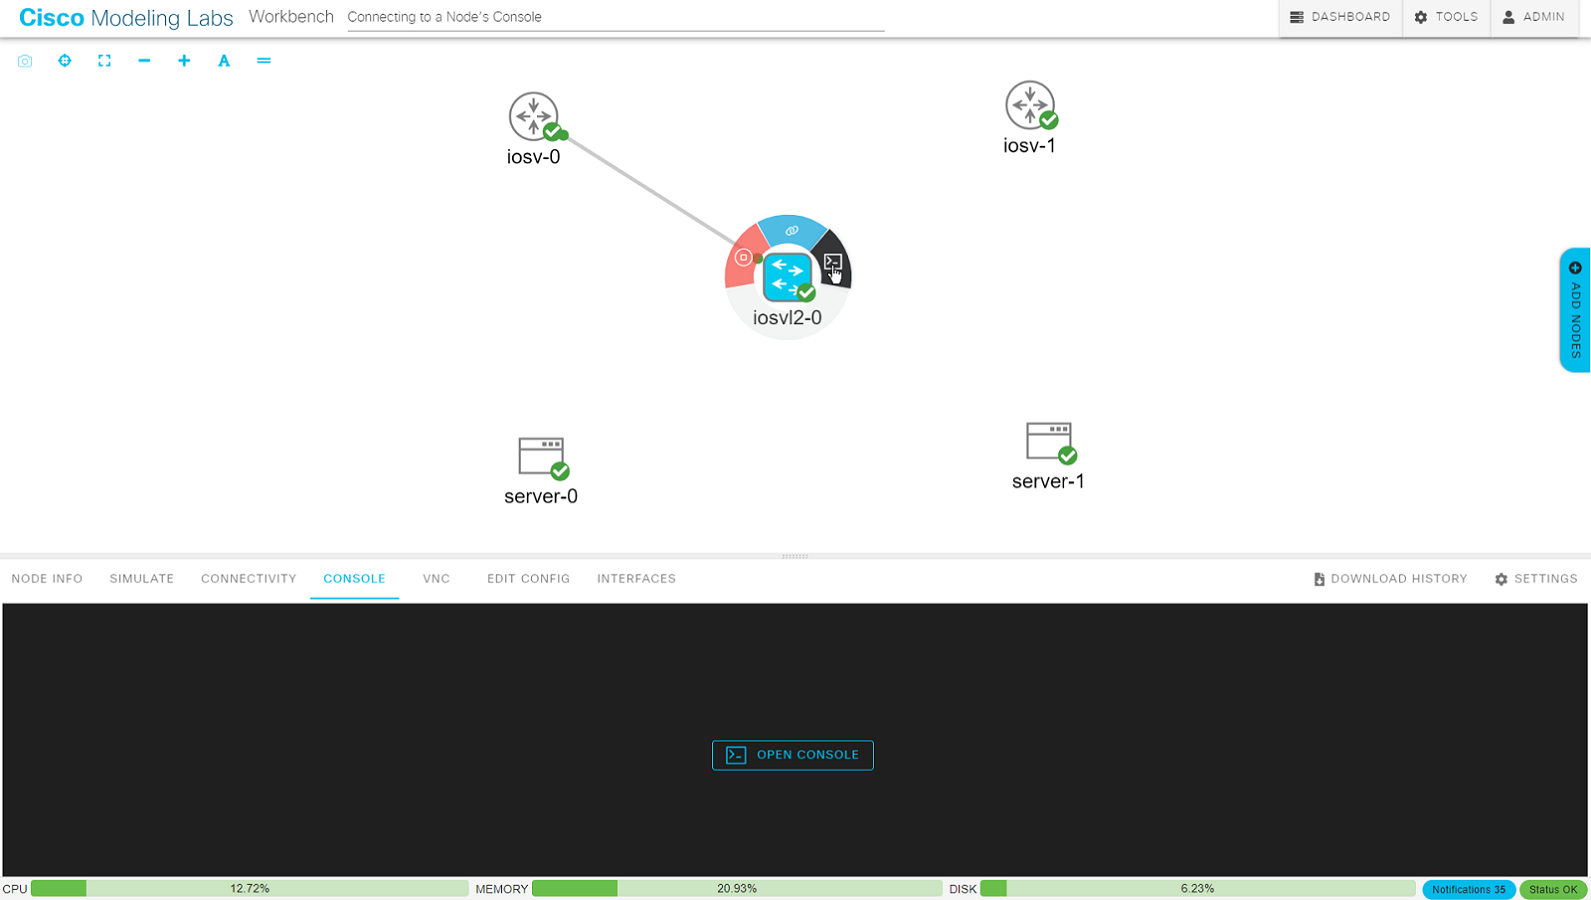
Using the node’s action ring to open the Console pane
Click the Open Console button in the Console pane at the bottom of the Workbench to activate the console connection.