- Overview
- Product Documentation
- CML 2.4 Release Notes
- CML 2.4 Installation Guide
- CML 2.4 User Guide
- CML User's Guide
- Overview of CML 2.x
- Using CML and the HTML5 UI
- Dashboard
- Workbench
- Adding Nodes to a Lab
- Starting, Stopping, and Wiping Nodes
- Deleting Nodes
- Creating Links
- Rules for Creating Links and Interface Overprovisioning
- Adding Interfaces and Overprovisioning
- Overprovisioning Interfaces with Link Creation
- Hiding Links
- Starting Simulations
- Connecting to a Node's Console
- Changing Global Console Settings
- Download the Console History
- Setting CPU limit on node
- Launch sequencing and CPU limiting
- Stopping Simulations
- External Connectivity for Simulations
- Link Packet Capture
- Lab Sharing
- Console Server
- Breakout Tool
- Custom VM Images
- Creating a New Node Definition
- CML 2.4 Admin Guide
- Resources
Method 2 - Expanding the Existing Virtual Disk
Note
A virtual machine’s hard disk cannot be expanded (edited) when the VM contains a snapshot. The snapshot must be deleted in VMware before expanding the existing virtual disk. Alternatively, you may follow Method 1 - Adding a Second Virtual Disk (.vmdk) to add a new “physical” disk.
This method requires that the existing virtual disk (HDD) size has already been edited (expanded) using the CML server’s virtual machine settings.
Procedure
Log into the System Administration Cockpit as the system administrator account. See Logging into the System Administration Cockpit.
Click Storage in the navigation bar on the left side of the page.
Edit Volume Group. Click vg00 volume group shown in the Devices group.
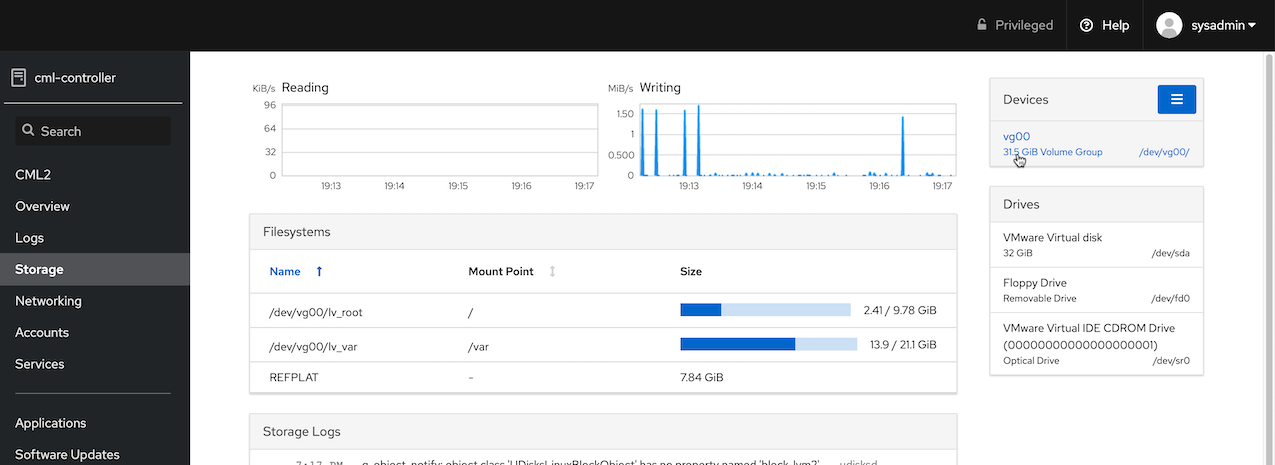
Selecting the volume group on the Storage page
Add Physical Volume. In the Physical Volumes group, click the + button to add the new virtual hard disk.
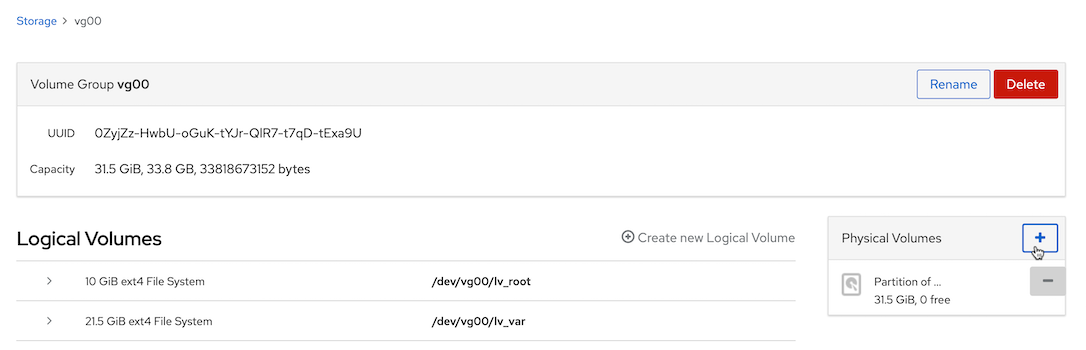
Adding a physical volume to the volume group
Select Disk. Select the new unpartitioned space and click Add.
Note: disk will be marked as /dev/sda.
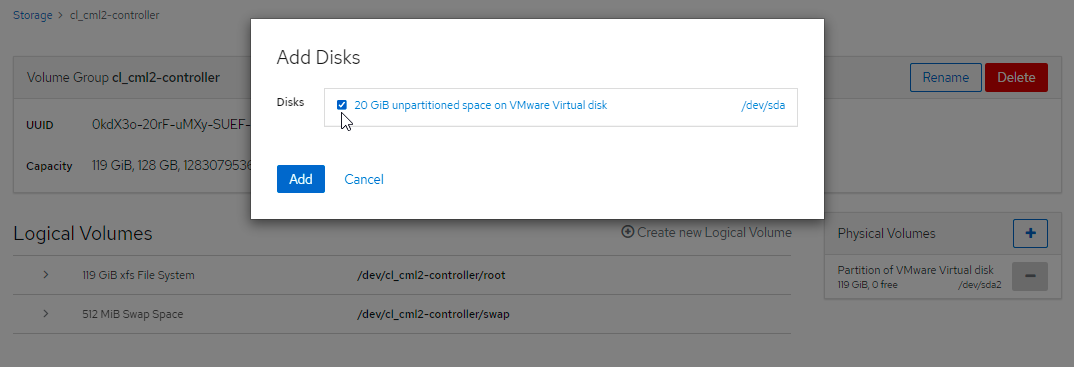
Add Disks dialog
Grow Logical Volume. Expand the lv_var volume in the Logical Volumes area and click
Grow.
The Grow Logical Volume pop-up dialog is shown.
Grow Logical Volume Dialog. Use the slider to increase the disk size to the desired amount; then click the Grow button in the dialog.
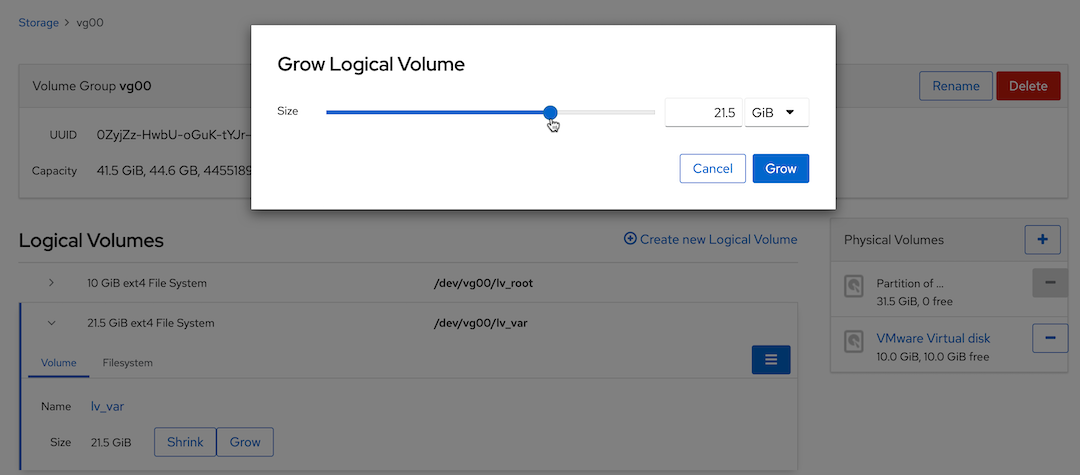
Grow Logical Volume dialog
The Logical Volumes group should now report the new total size. The new disk size is also shown in the Dashboard.