- Overview
- Product Documentation
- CML 2.4 Release Notes
- CML 2.4 Installation Guide
- CML 2.4 User Guide
- CML User's Guide
- Overview of CML 2.x
- Using CML and the HTML5 UI
- Dashboard
- Workbench
- Adding Nodes to a Lab
- Starting, Stopping, and Wiping Nodes
- Deleting Nodes
- Creating Links
- Rules for Creating Links and Interface Overprovisioning
- Adding Interfaces and Overprovisioning
- Overprovisioning Interfaces with Link Creation
- Hiding Links
- Starting Simulations
- Connecting to a Node's Console
- Changing Global Console Settings
- Download the Console History
- Setting CPU limit on node
- Launch sequencing and CPU limiting
- Stopping Simulations
- External Connectivity for Simulations
- Link Packet Capture
- Lab Sharing
- Console Server
- Breakout Tool
- Custom VM Images
- Creating a New Node Definition
- CML 2.4 Admin Guide
- Resources
Creating Links
Links function like a physical wire that connects two interfaces. Link the nodes in your lab to create the desired network topology.
Procedure
In the Workbench, hover over the desired source node for the new connection to activate the action ring for the node.
Click on the blue link button on the action ring.
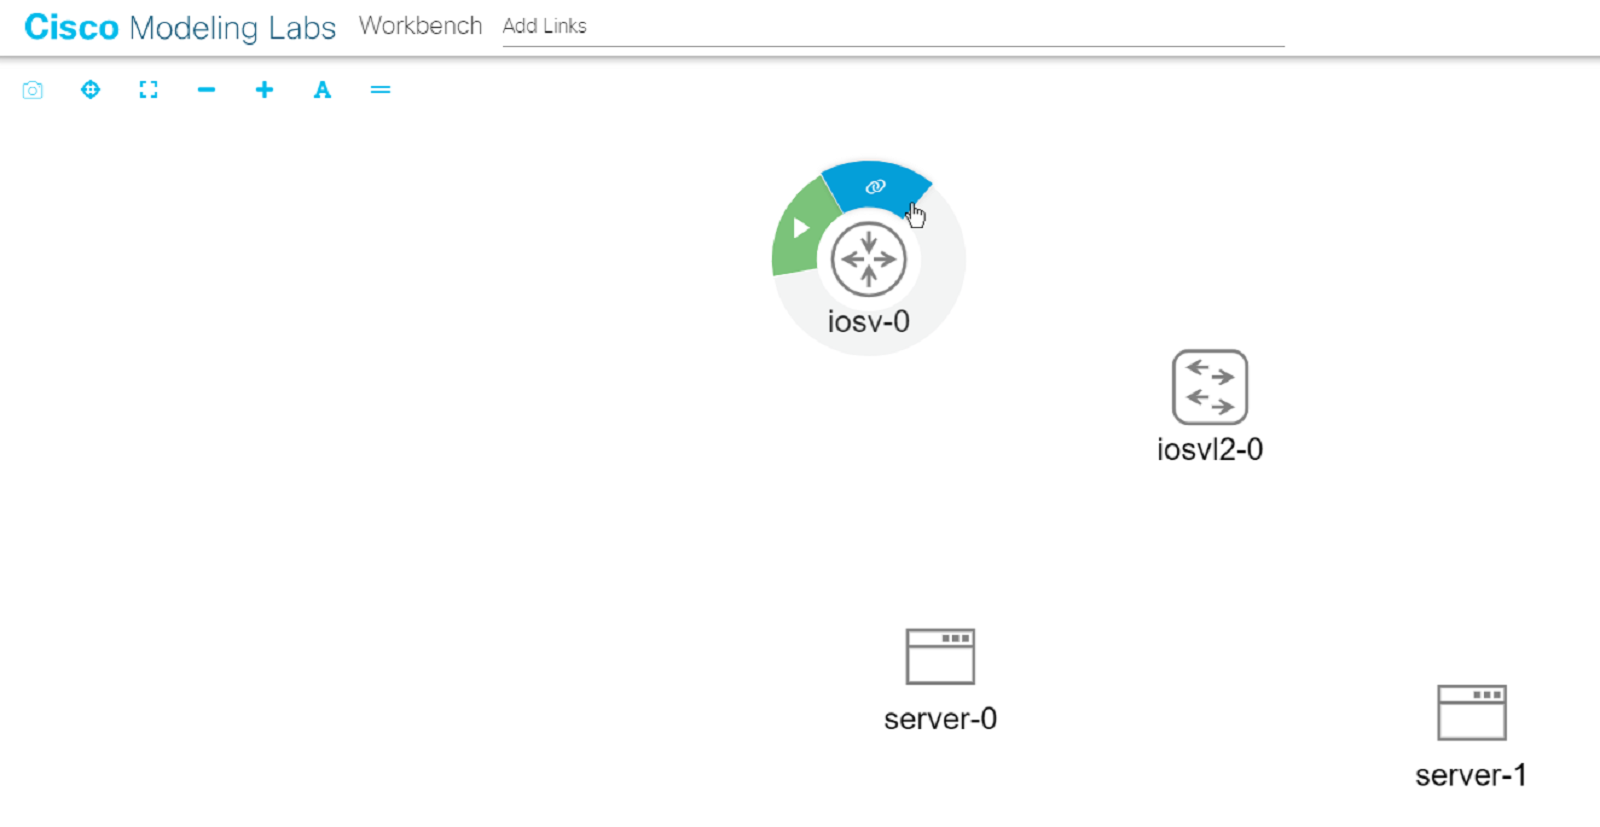
Starting a new link from a node in the Workbench
Note: if the mouse cursor changes to a cancel icon when you hover over the link button on the action ring, the Workbench is indicating that that the source node has no more available interfaces. You will not be able to create any additional connections to or from this node until an existing interface is freed.
Drag away from the source node to start creating a connection.
As you drag the mouse, a link from the original node to the cursor is shown. The Workbench highlights nodes that are valid targets for the connection.
Hover the mouse over the desired destination node for the connection and then click the mouse button.
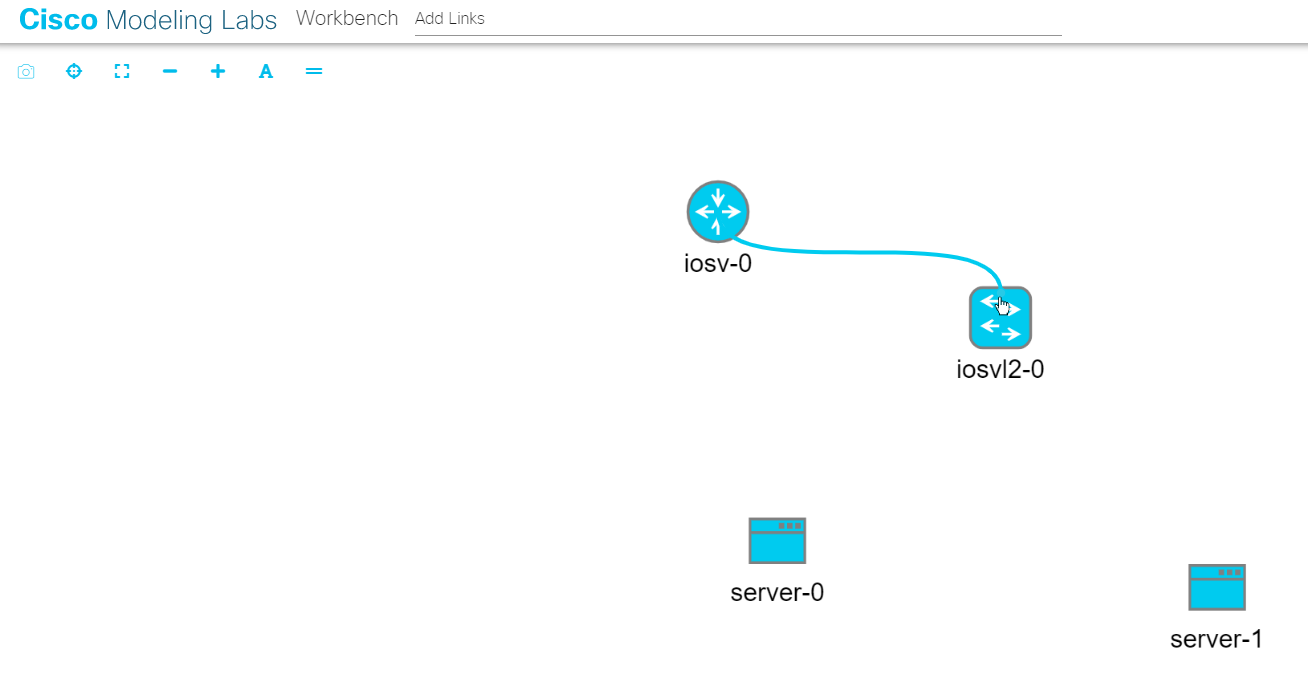
Selecting the destination node for a link in the Workbench
The Workbench pops up an interface selection dialog.
Note: the currently selected node should be highlighted. If the selected node is not highlighted, and the mouse cursor changes to a cancel icon, the Workbench is indicating that the destination node has no more available interfaces. You will not be able to create any additional connections to or from this node until an existing interface is freed.
Select the desired interface on the Source and Destination nodes in the dialog. By default, the dialog is populated with the first unused interface on each node.
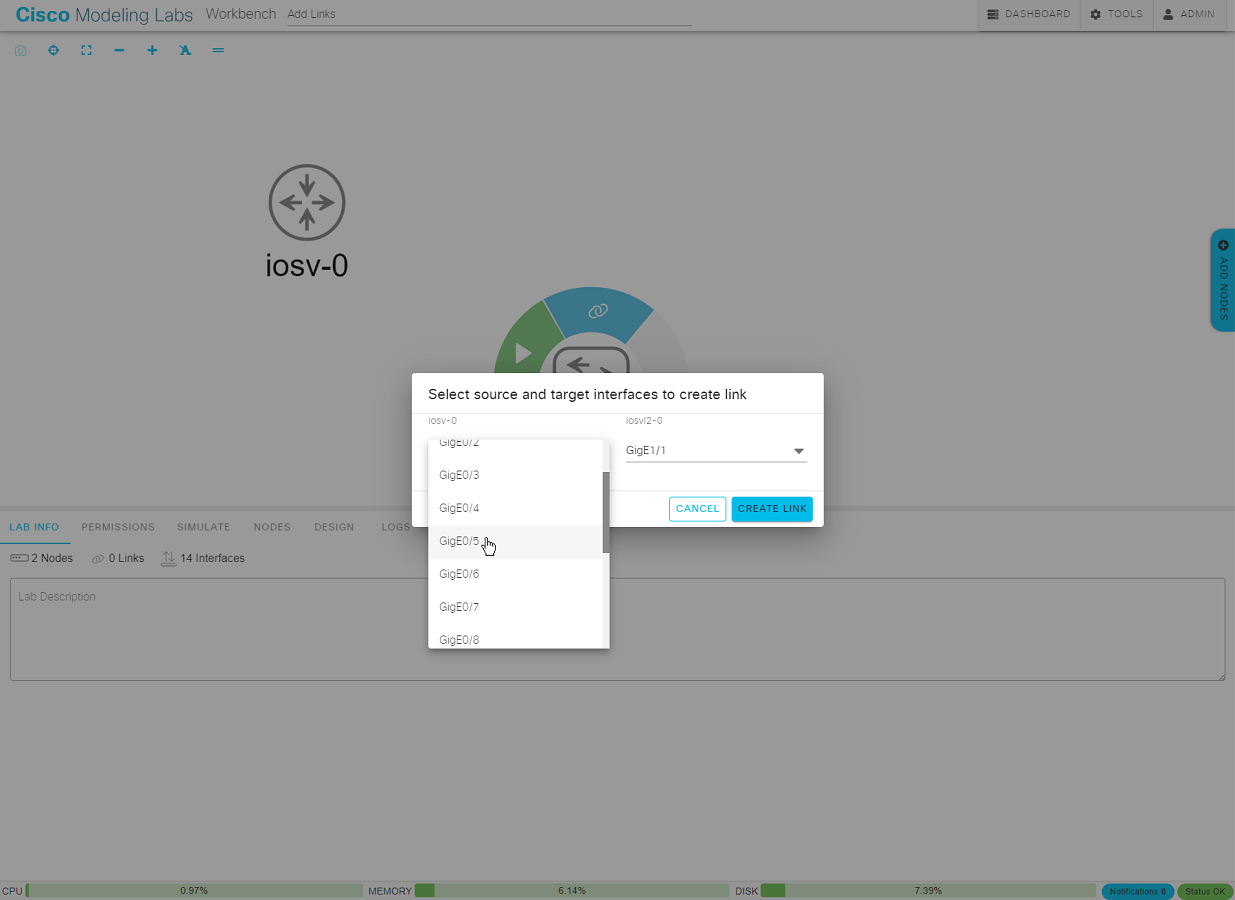
Selecting the interfaces on each end of the new link
Click Create Link to create the new link.
The dialog closes, and the new link is added to the lab.