Authorization
Access methods
There are two forms of authentication and authorization for dashboard API:
- App-scoped access - Uses OAuth 2.0 grants
- Admin-scoped access - Uses API keys
Choosing the right authentication method
| Feature | OAuth 2.0 Grants | API Keys |
|---|---|---|
| Best for | Third-party applications, organization-wide automation | Personal scripts, admin-specific tasks |
| Scope | App-scoped with granular permissions | Admin-scoped based on user role |
| Permissions | Configurable per application | Inherits from admin's role |
| Identity | Application identity | Admin identity |
| Management | Organization level | Individual admin level |
| Token lifetime | 60 minutes (auto-refresh) | Permanent until revoked |
App-scoped access: OAuth 2.0 grants
Developers can register their applications to enable OAuth-powered auth grants. This access is app-scoped, managed at the organization level, and can be managed by any admin in an organization with the appropriate permissions. OAuth is typically used with applications that should have a specific set of permissions across an entire dashboard organization and not necessarily operate on behalf of any one admin. For more on OAuth, please read our OAuth documentation.
Admin-scoped access: API keys
API keys operate on behalf of the identity that owns them, and are often used when API permissions should be determined by the admin's role in a given organization. Unlike an OAuth grant, admin-scoped access maintains admin context in all API operations.
A Meraki identity has an email address, a password, and, potentially, 2FA registration and/or API keys. This record can be re-used across organizations if an existing admin in an organization with the appropriate permissions grants the identity an admin record in that organization.
Each identity can have have up to two valid API keys at a time regardless of their org membership(s).
API key management
Each identity manages its own API keys, just like it manages its own password and 2FA registration. If an identity has been added to an organization as an admin, then their API key(s) will have access to that organization according to the admin's role in that organization. For example,
- If an identity is a full org admin in Org1, then their API key(s) will have the same permissions in Org1.
- If an identity has limited admin permissions in Org2, then their API key(s) will have the same limited permissions in Org2.
- Admins can belong to multiple organizations at a time (e.g., Org1 and Org2) and have different permissions in each organization.
Obtaining your API key
Note: These steps presume you have already created your own organization or been granted an admin role in an existing organization.
- Sign in to your Meraki dashboard: https://dashboard.meraki.com
- Navigate to
Organization>API & Webhooksfrom the left nav. - Select
API keys and accessfrom the top tabs.
This page lists your personal API keys, if any. You have the option to revoke your own or generate yourself a new one.
⚠️ Security Best Practice
Treat your API key like a password. Never commit it to source code or share it publicly. Store it in environment variables or secure credential management systems.
Bearer Auth
Dashboard API v1 supports Bearer Auth using the standard Authorization header parameter. The value will be a string that begins with the word Bearer, followed by your Meraki API key or OAuth credentials.
Example header:
{
 "Authorization": "Bearer <API_KEY>"
}
Example cURL request:
curl https://api.meraki.com/api/v1/organizations \
  -L -H 'Authorization: Bearer {API_KEY}'
Example Python usage:
# Example 1: Best practice
# This example will read the local environment variable `MERAKI_DASHBOARD_API_KEY`
# so that you don't have to add it to your source code. Please see below for
# setting up environment variables.
import meraki
dashboard = meraki.DashboardAPI()

# Example 2: Riskier
# Defining your API key as a variable in source code is not recommended. Please
# consult the below regarding best practices.
import meraki
API_KEY = '6bec40cf957de430a6f1f2baf056b99a4fac9ea0'  # Example API key
dashboard = meraki.DashboardAPI(API_KEY)
Setting up environment variables
Note: When developing scripts with an API key, it's a best practice to create a local environment variable
MERAKI_DASHBOARD_API_KEYand set it to your API key, so that you can omit it from your source code.
Linux/macOS:
export MERAKI_DASHBOARD_API_KEY="your_api_key_here"
Windows (PowerShell):
$env:MERAKI_DASHBOARD_API_KEY="your_api_key_here"
Windows (Command Prompt):
set MERAKI_DASHBOARD_API_KEY=your_api_key_here
Troubleshooting
If you get a 401 Unauthorized error (with message "Missing API key") when using dashboard API v1 with Bearer token, check the following to troubleshoot:
As an example, when using your API key to retrieve the GET /organizations operation, you should see the same data as shown when navigating to https://api.meraki.com/api/v1/organizations in your browser, using an authenticated session with the credentials that generated the API key.
Next, check that your API call has the correct header with the following (and not v0's
X-Cisco-Meraki-API-Key):
Authorization: Bearer {API_KEY}
If making the API call in cURL, check that the --location-trusted flag is included.
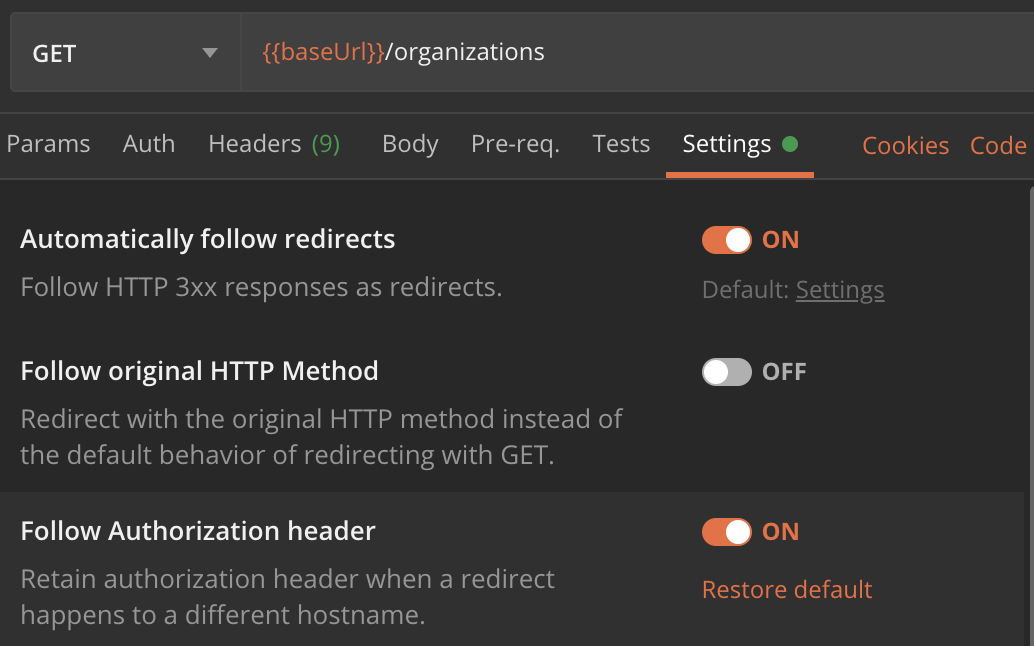
If making the API call in Postman, check that the setting “_Follow Authorization header_” is enabled.
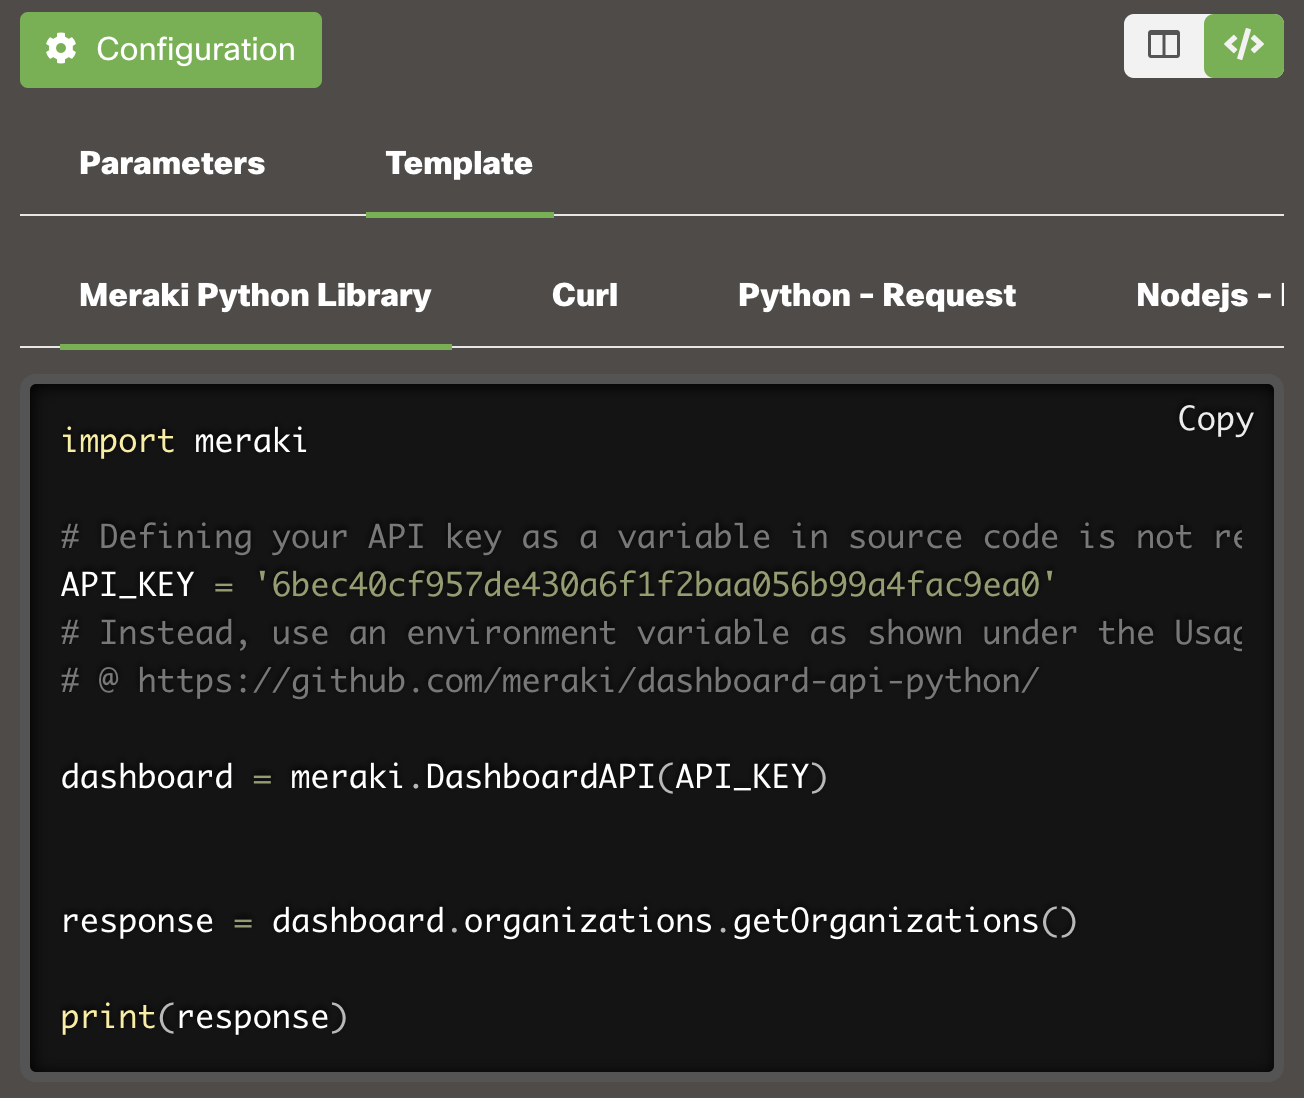
If using the Python library, authorization is handled automatically, so assuming the right API key is supplied, the Python code snippet for getOrganizations > Template > Meraki Python Library will work w/ the v1 library installed.
If you really want to write your own functions in Python, then you will need to define a new instance of the requests.Session class that does not rebuild_auth upon a redirect. For example:
from requests import Session
class NoRebuildAuthSession(Session):
    def rebuild_auth(self, prepared_request, response):
      '''
      No code here means requests will always preserve the Authorization header when redirected.
      Be careful not to leak your credentials to untrusted hosts!
      '''
session = NoRebuildAuthSession()
API_KEY = '6bec40cf957de430a6f1f2baf056b99a4fac9ea0'  # Example API key
response = session.get('https://api.meraki.com/api/v1/organizations/', headers={'Authorization': f'Bearer {API_KEY}'})
print(response.json())
If using PowerShell with Invoke-RestMethod, make sure that the -PreserveAuthorizationOnRedirect flag is included.
The behavior here is standard and due to API clients like cURL and Postman stripping the Authorization header, for security purposes, when following an HTTP redirect.