In app chat
Utilizing our mobile SDKs it is possible to build rich chat experiences within native mobile applications.
This guide demonstrates how to build a chat experience powered by a simple Q&A bot, with escalation to a real agent within Webex Engage.
We will see how to:
- Consume and route incoming, mobile originated (MO), and outgoing, mobile terminated (MT), messages
- Search for, create, and append to, Engage chats
- Configure and integrate a simple Q&A bot
- Escalate bot powered chats to a real agent
Note: While this guide uses the In App channel, the same principles apply to all other 3rd party channel which isn't natively supported by Engage
Prerequisites
This guide assumes you have access to:
- A Webex Connect tenant
- A Webex Engage tenant
- A mobile app that has integrated one of our Messaging SDKs.
Note: Comprehensive SDK integration instructions can be found within our Quickstart guides for Android and iOS
Components
This solution is comprised of the following components:
- Engage API asset - Allows messages to be routed via API within Engage
- Connect App Asset - Allows messages to be routed to and from a mobile application
- Connect Inbound Webhook - To consume messages sent from Engage
- Connect MO Flow - To orchestrate mobile originated messages between app, bot and Engage
- Connect MT Flow - To forward messages sent from Engage to the mobile app
Inbound Webhook setup
An inbound webhook is required to allow Connect to consume messages which are sent from Engage.
Login to your Webex Connect tenant and perform the following steps.
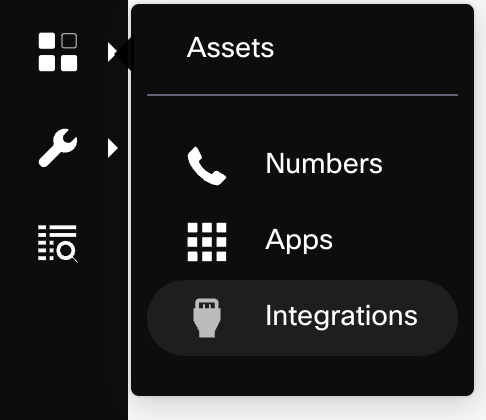
Navigate to Assets -> Integrations and press the 'Add integration' button to create a new 'Inbound Webhook'.
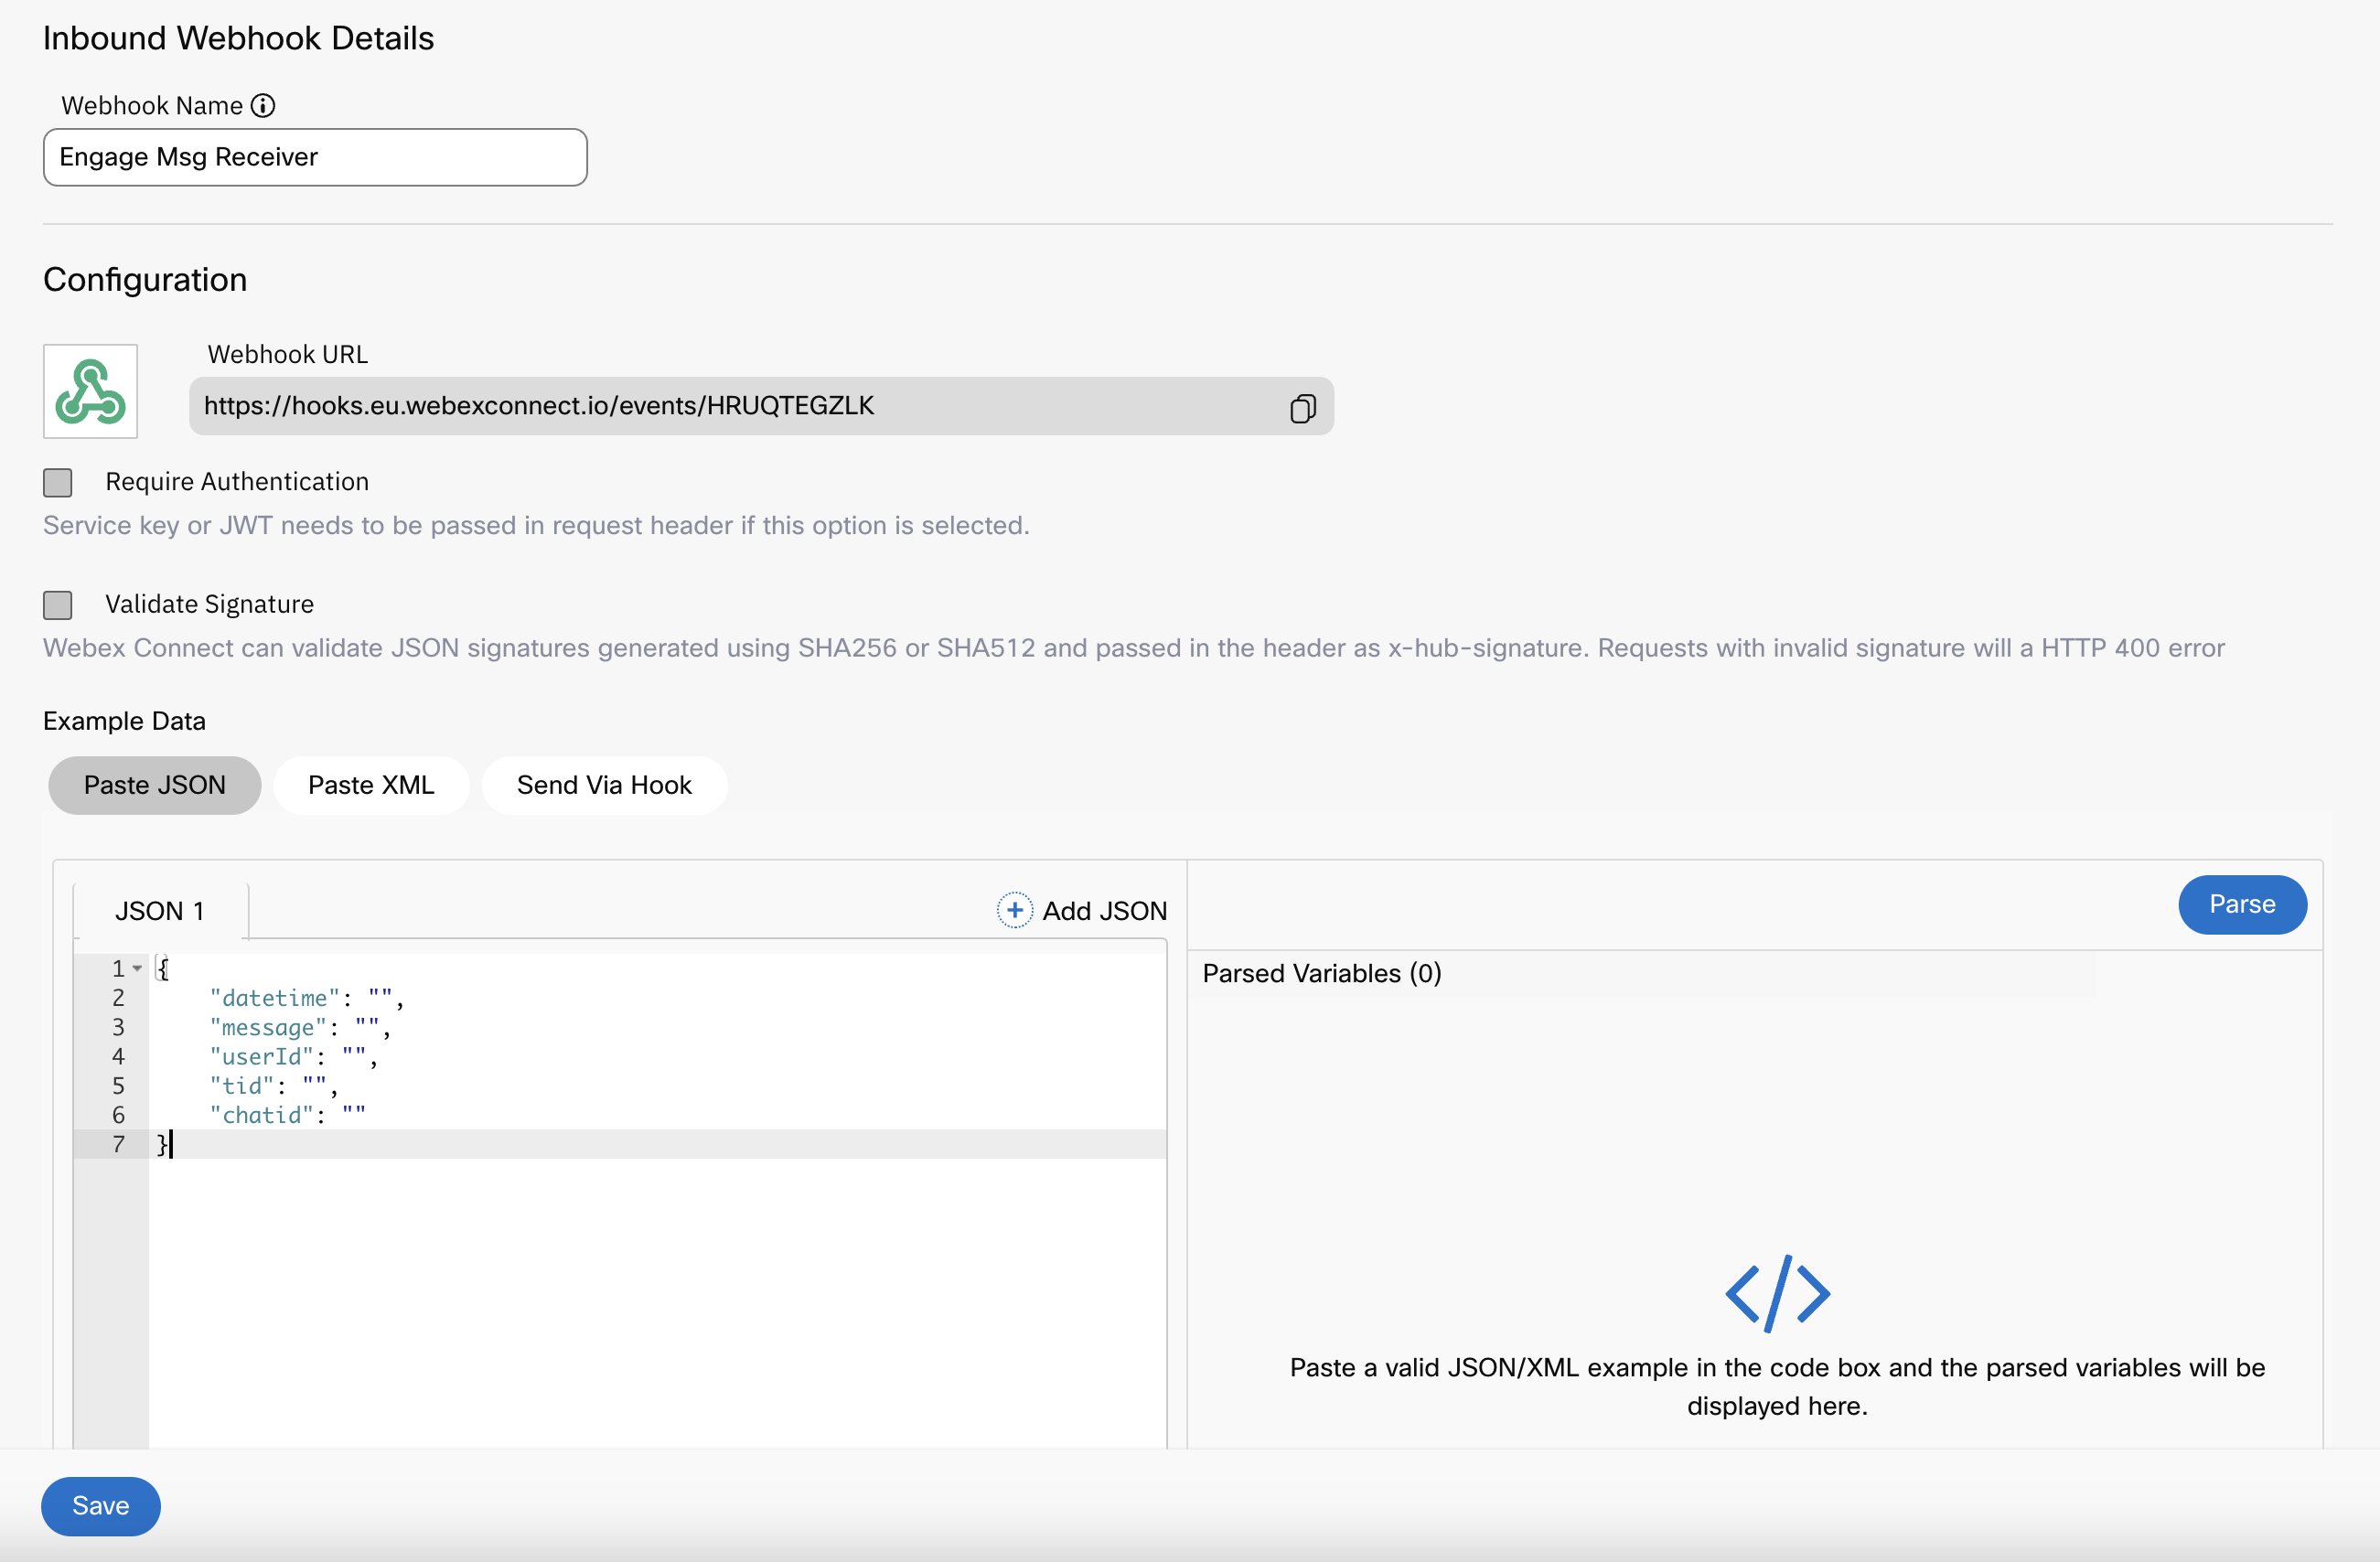
Enter a name, such as 'Engage Msg Receiver'.
Make a note of the Webhook URL, you will need this later.
Add the following JSON snippet into the box:
{
    "datetime": "",
    "message": "",
    "userId": "",
    "tid": "",
    "chatId": ""
}
Press the Parse button.
Press the Save button.
Engage setup
Within this section we will create an Engage API asset and API key which will be used to send messages between Engage and Connect.
We will also capture a team id which is required to create chats for a specific team.
Create an API Asset
Login to your Engage tenant to access the Admin Dashboard.
Note: You may need to press the 'Try new version' button located in the top right of the page.
Within the left hand menu bar, select the Assets option.
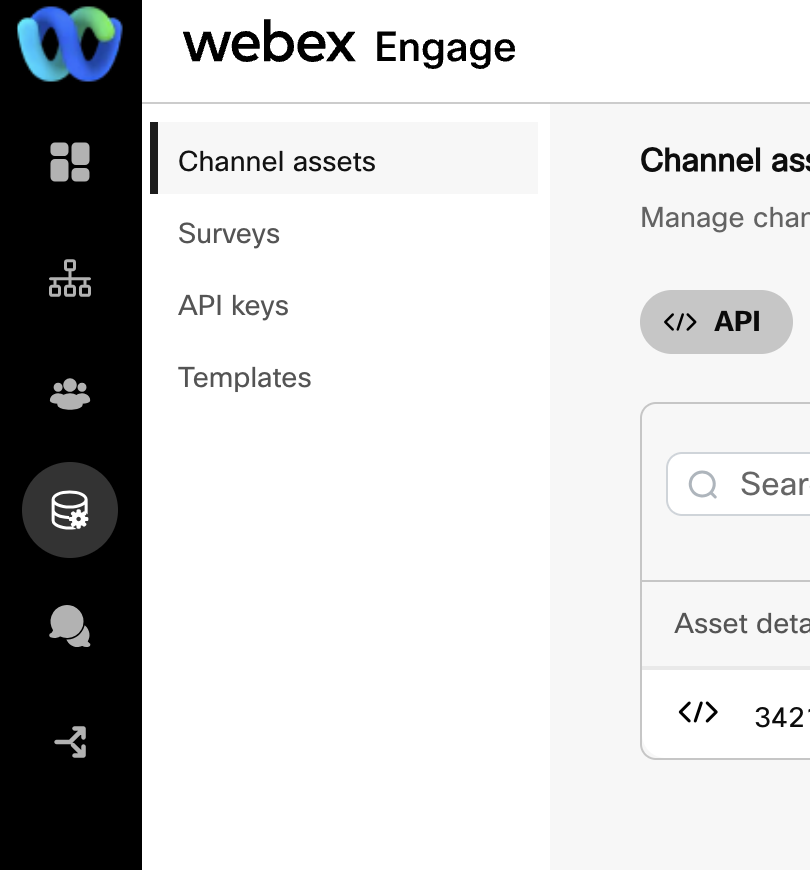
Press the blue '+ API asset' button.

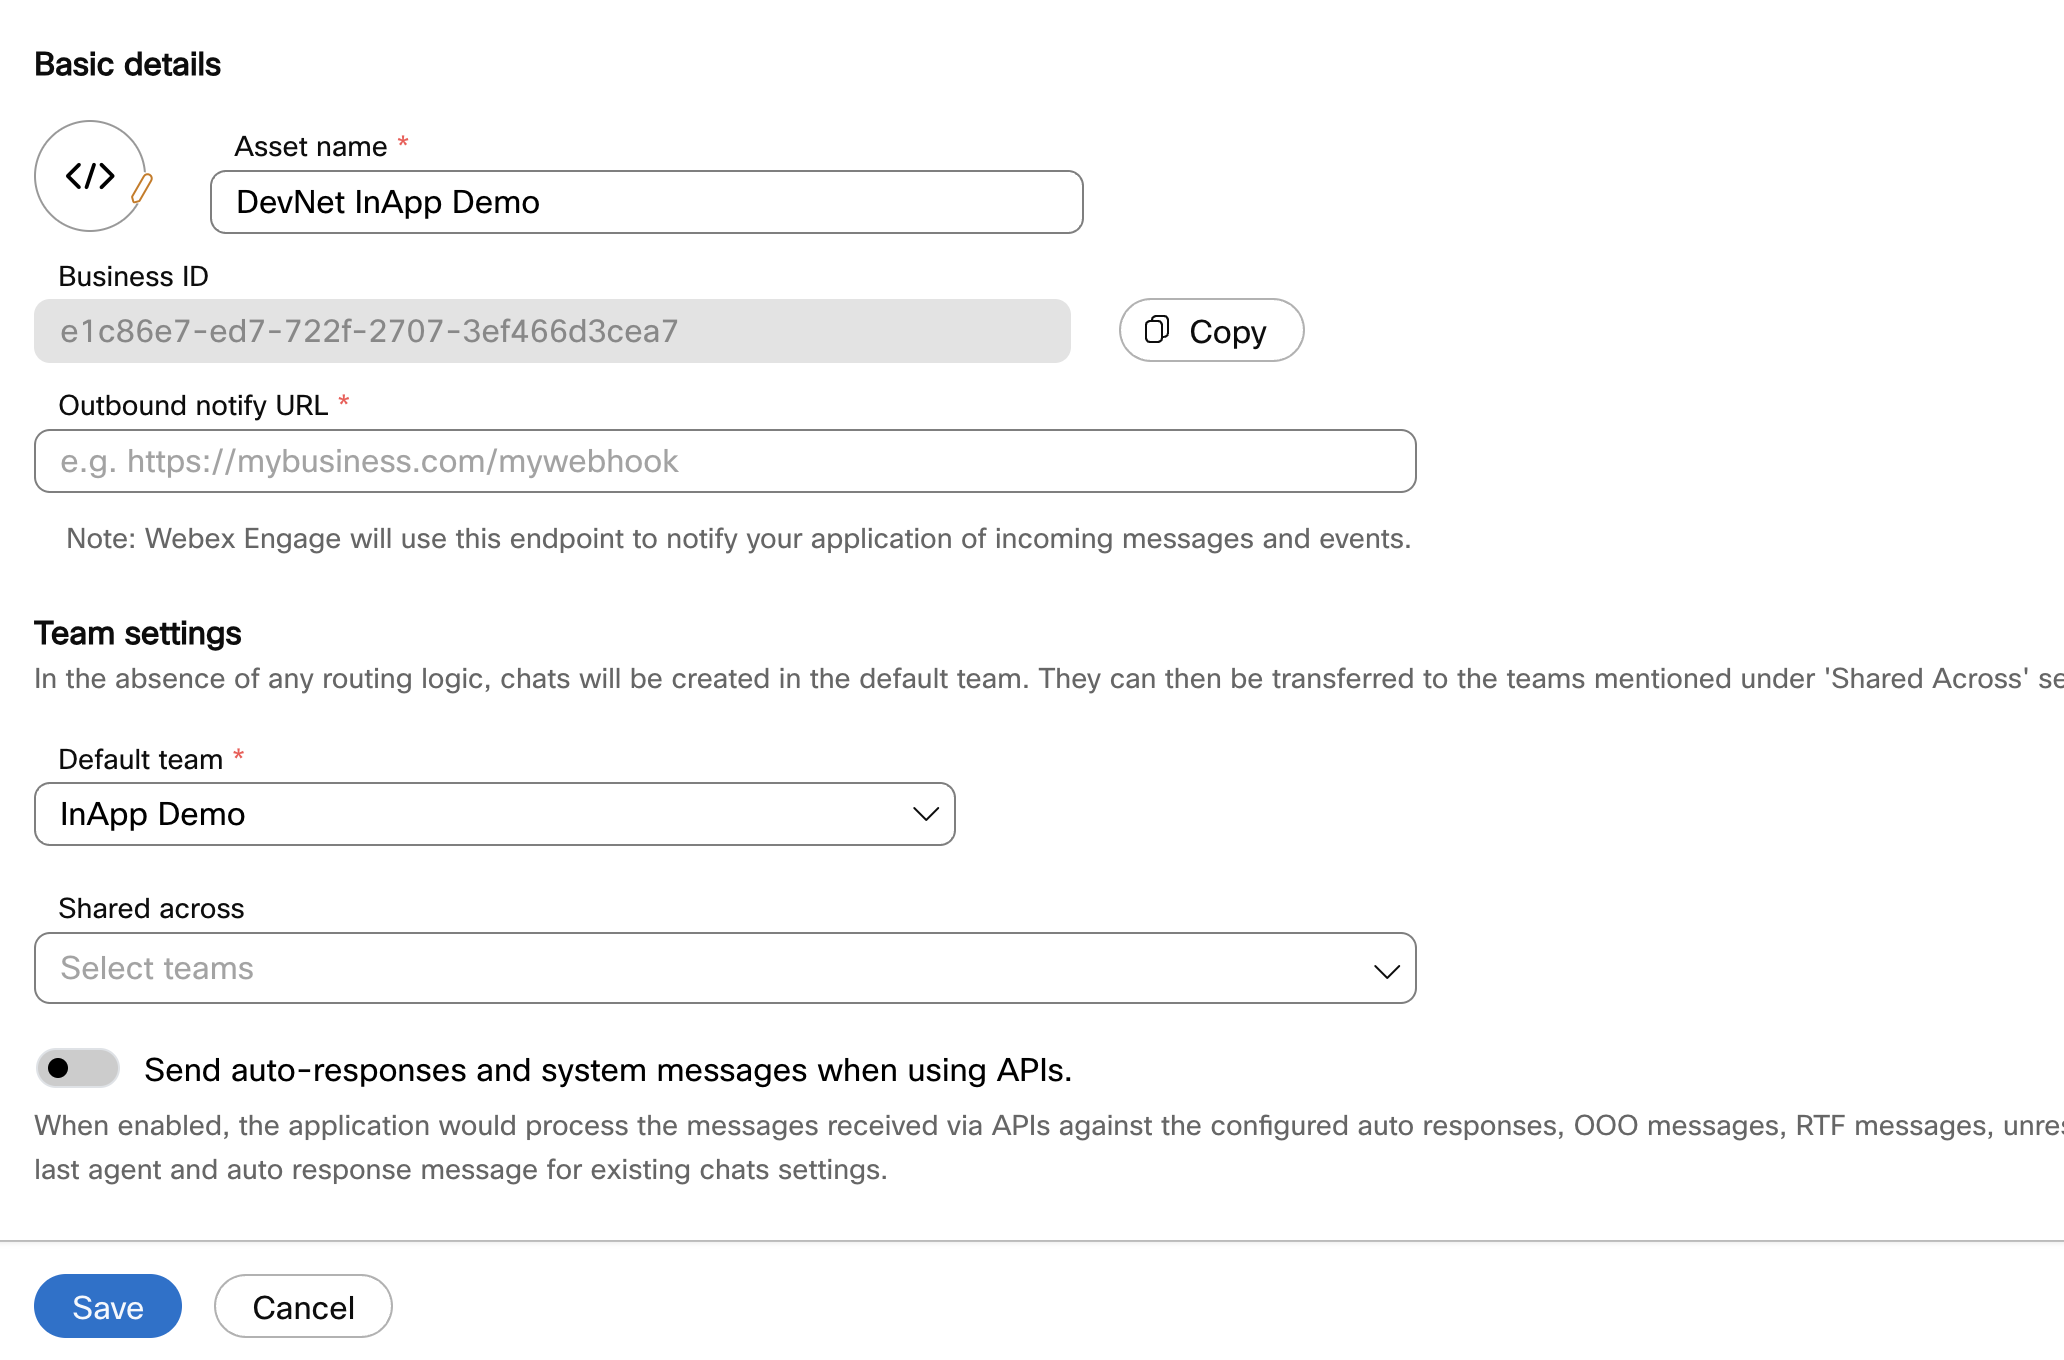
Enter an asset name.
Make a note of the Business ID, you will need this later.
Within the 'Outbound notify URL' paste the inbound webhook that you made a note of earlier.
Within the 'Team settings' section, select a Default team.
Press the Save button.
Create an API Key
Select the API keys option from the sub menu.
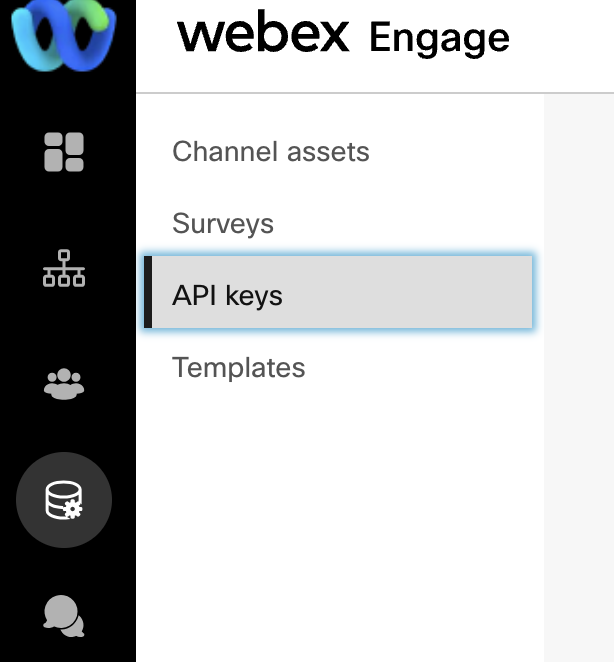
Press the 'Add API keys' button.

Enter a name for the key.
Within the 'Team settings' -> 'Shared across', select the same team you selected when creating the API asset.
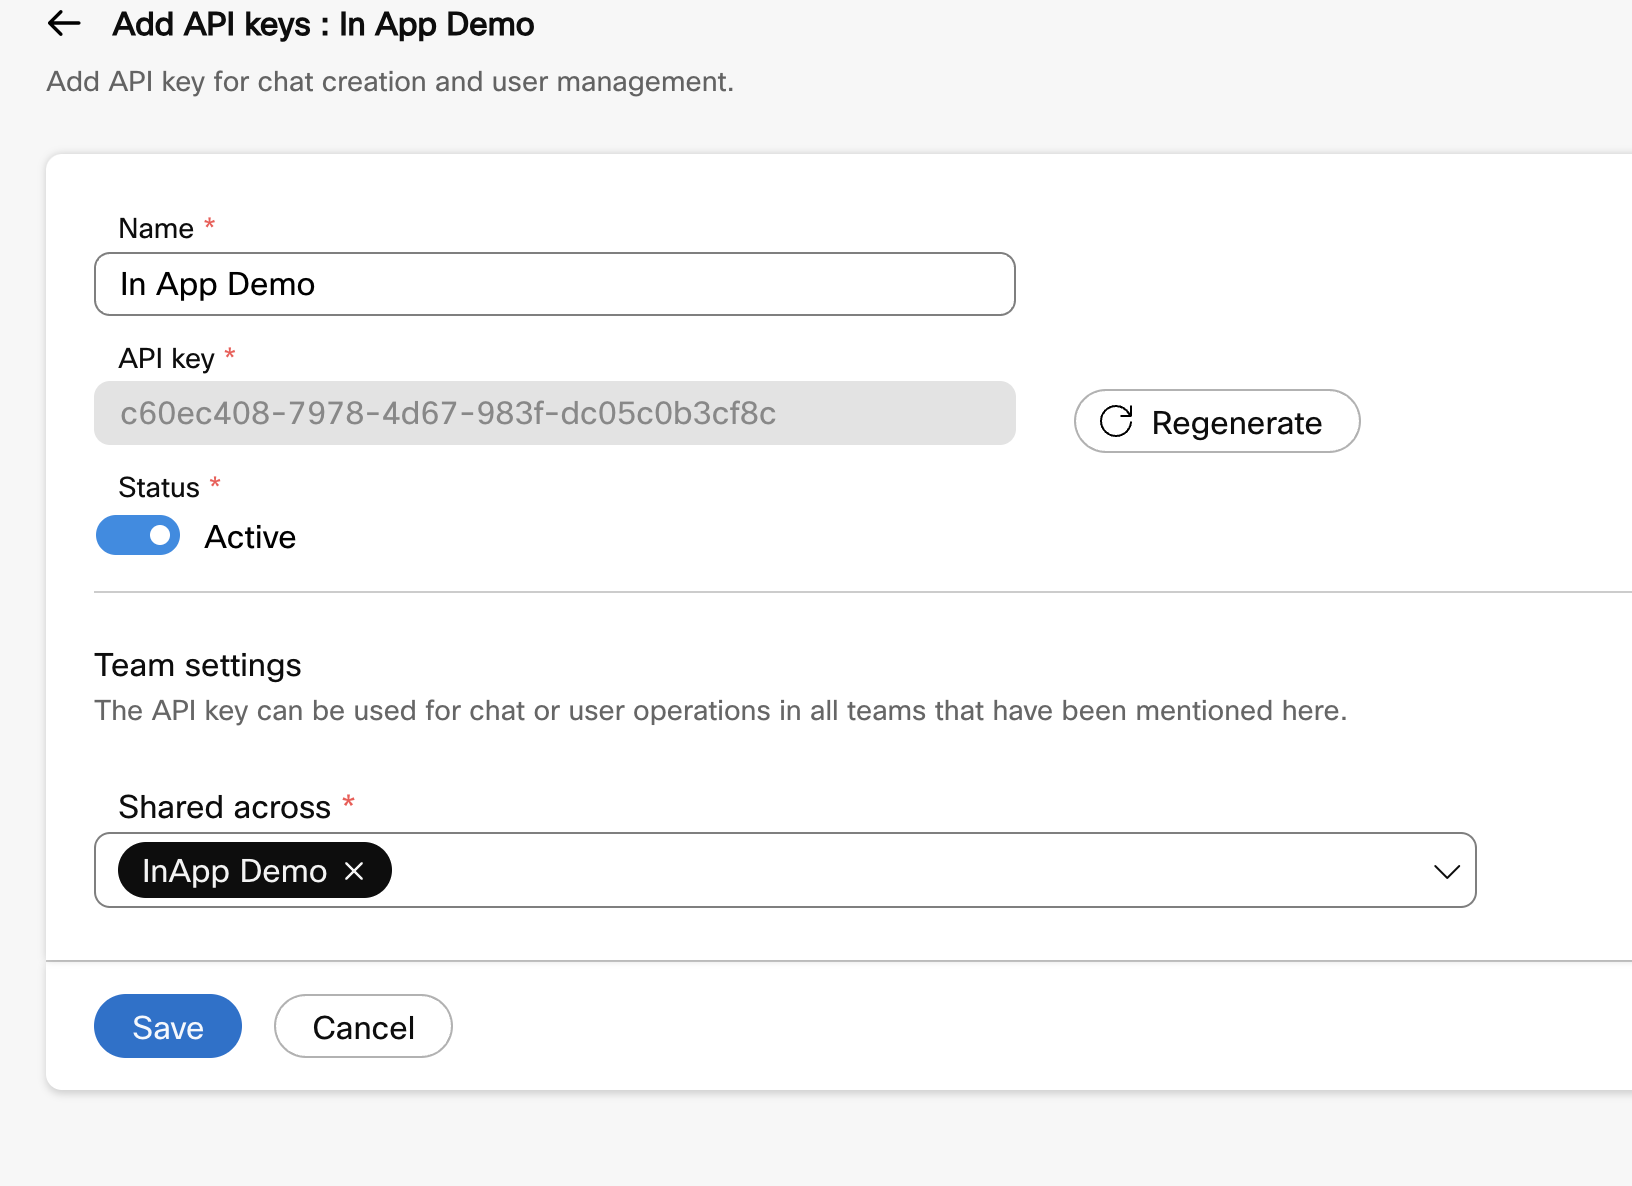
Make a note of the API key, you will need this later.
Press the Save button.
Obtain the Team id
The team id is required to create chats within the correct team. In this section we will capture the id for the team you used when creating your Engage asset.
From the left side menu, select Groups.
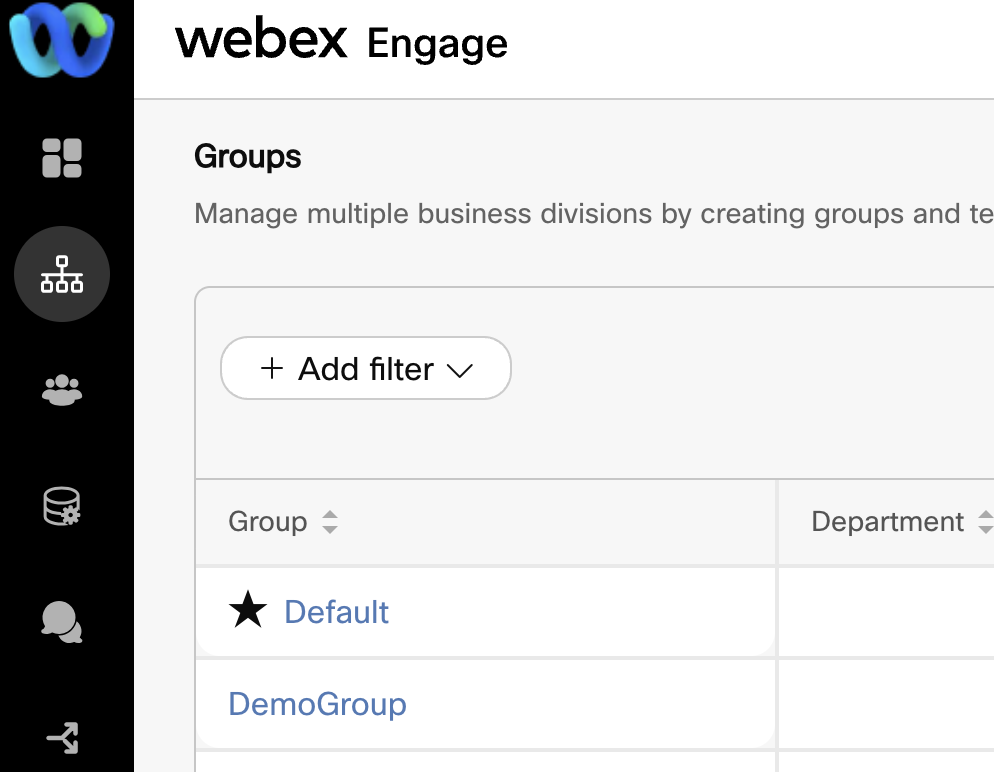
Select the group which contains your team, in this example, we've used DemoGroup.
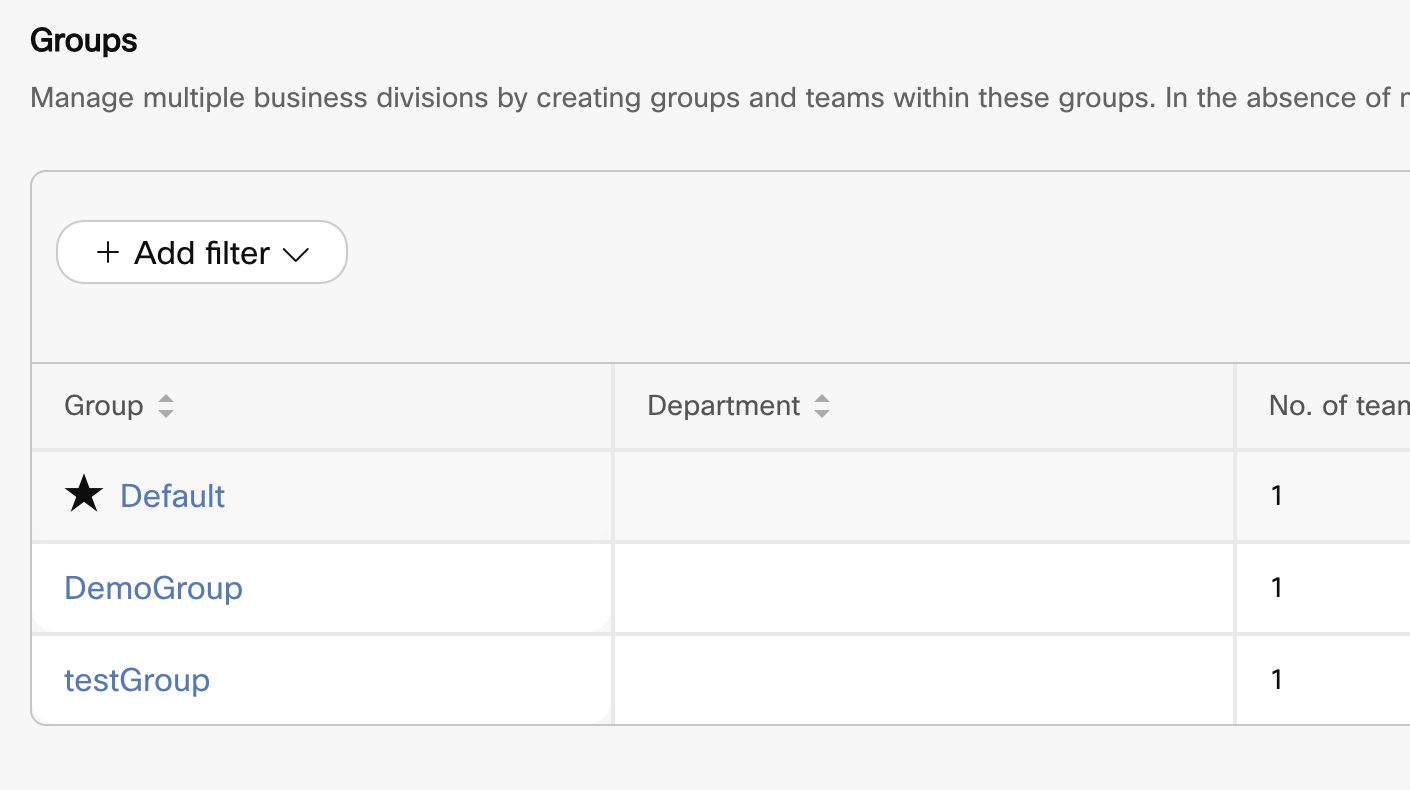
Select the Teams tab and click your team name to open it.
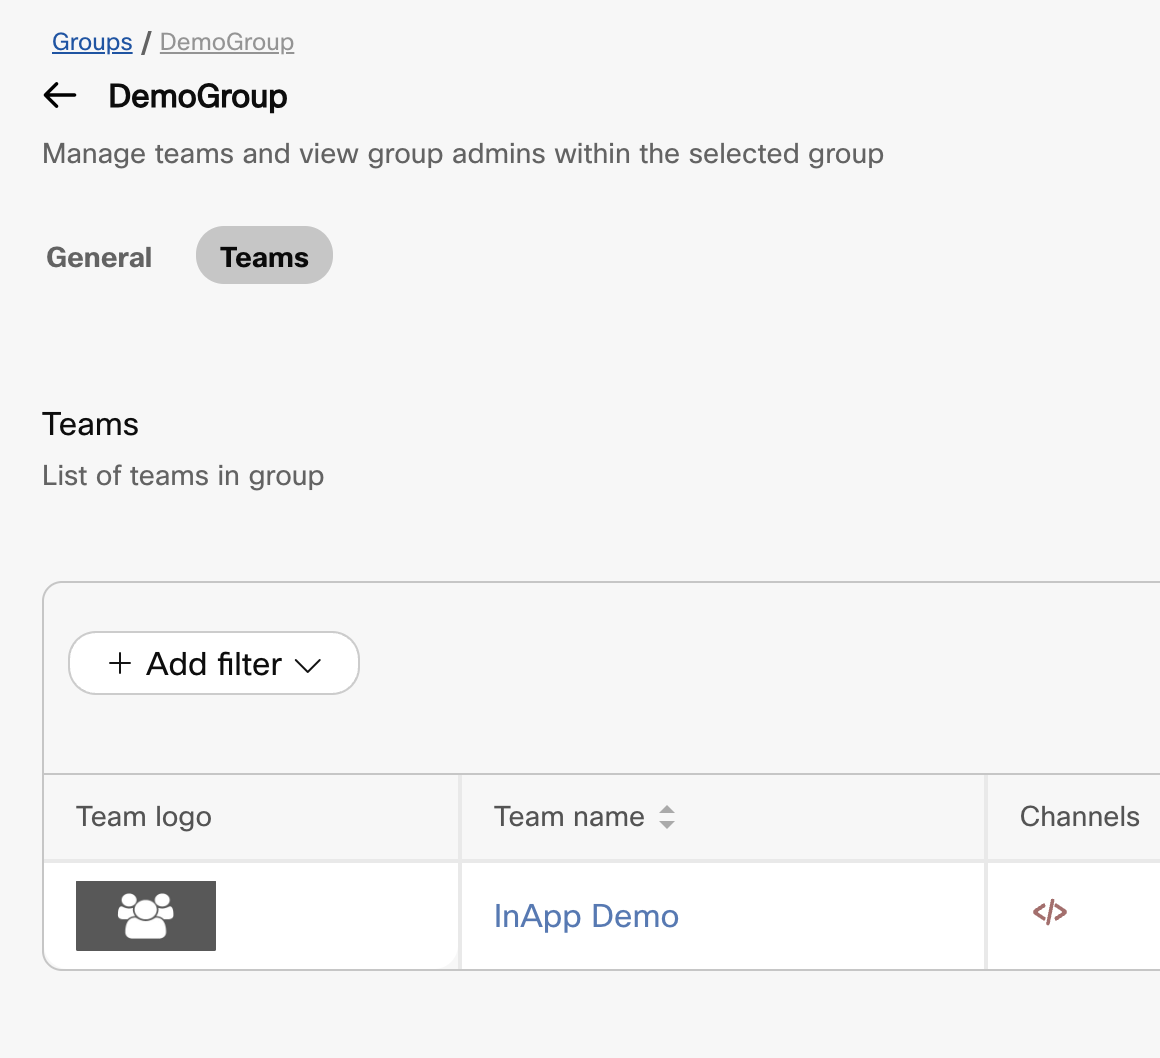
Within the browser address bar, the team id is displayed at the end of the url.
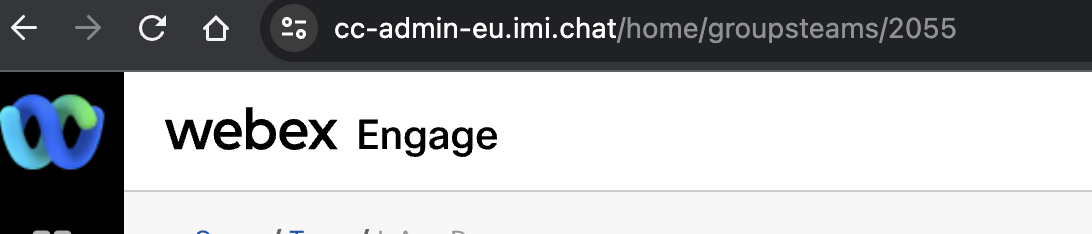
Make a note of the team id, you will need this later.
Create an auth code
To access Engage APIs we need to create an auth code, this will be used to call the Engage authorize API to obtain an access token. The access token is required to call all other Engage APIs.
The auth code is a combination of your API key and your Engage tenant domain, separated by an @ symbol, like so:
YOUR_API_KEY@YOUR_ENGAGE_TENANT_DOMAIN
Example:
9d61eaa2-74f3-4fd8-a10a-4d5b23ee1d17@dummy-engage-uk.imi.chat
The key must be Base64 encoded, which will produce a string such as:
OWQ2MWVhYTItNzRmMy00ZmQ4LWExMGEtNGQ1YjIzZWUxZDE3QGR1bW15LWVuZ2FnZS11ay5pbWkuY2hhdA==
To Base64 encode your auth code, you will need a tool that is capable of creating a base64 encoded string.
Some examples are:
Notepad++ - Windows Only Visual Studio Code - Mac / Linux / Windows
Visual Studio Code requires a plugin for Base64 encode
Mac users can alternatively run the following command from a terminal window:
echo -n "STRING_TO_ENCODE" | base64
Make a note of your Base64 encoded auth code, you will need this later.
Bot configuration
Within this section we will create a basic Q&A Bot for use within our Workflows.
Login to your Connect tenant, open the App Tray and select Bot Builder.
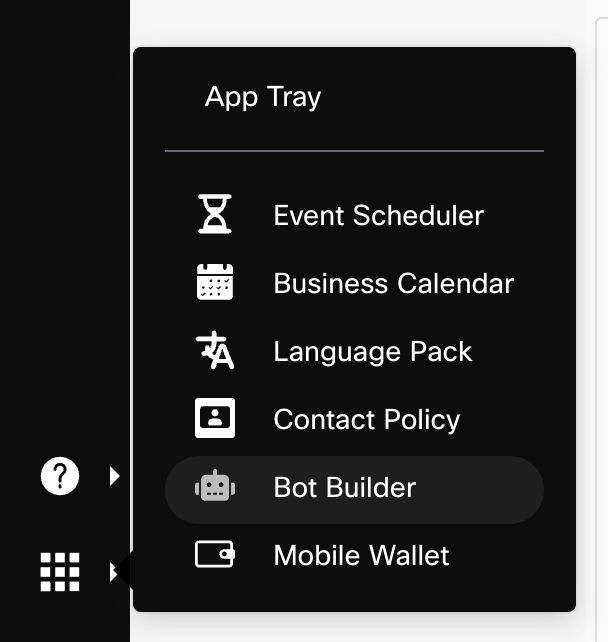
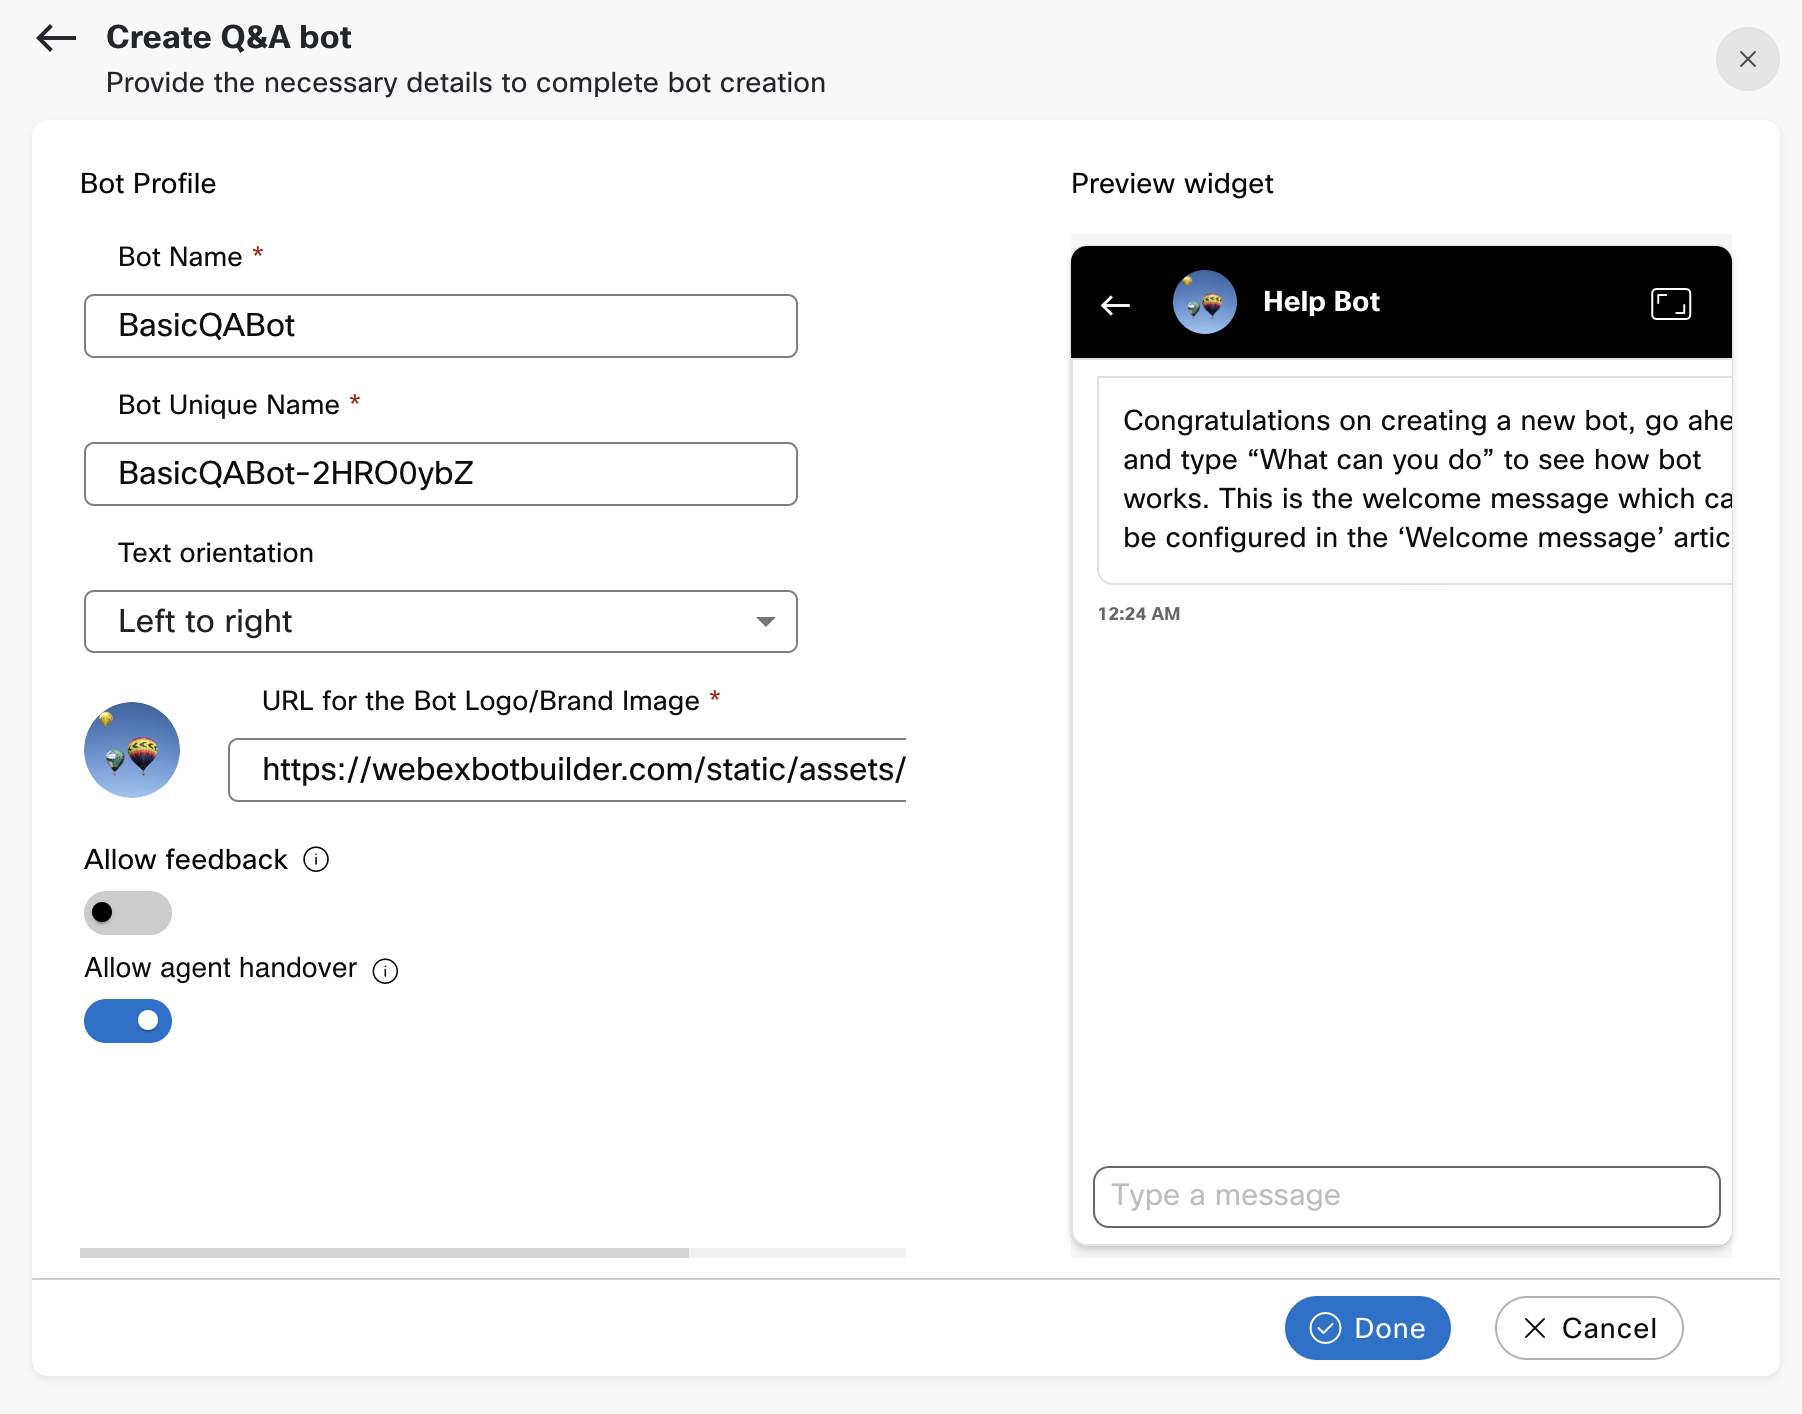
Within the Bot Builder UI, press the '+ New Q&A Bot' button.

Enter a Bot Name, in this example we've used BasicQABot.
Make a note of the Bot Unique Name, you'll need this later.
Enable the 'Allow agent handover' option.
Press the Done button.
Wait while the bot finishes provisioning, after a short while the Articles page should be displayed.
Note: We won't change or add any articles for now, as this is outside the scope of this guide.
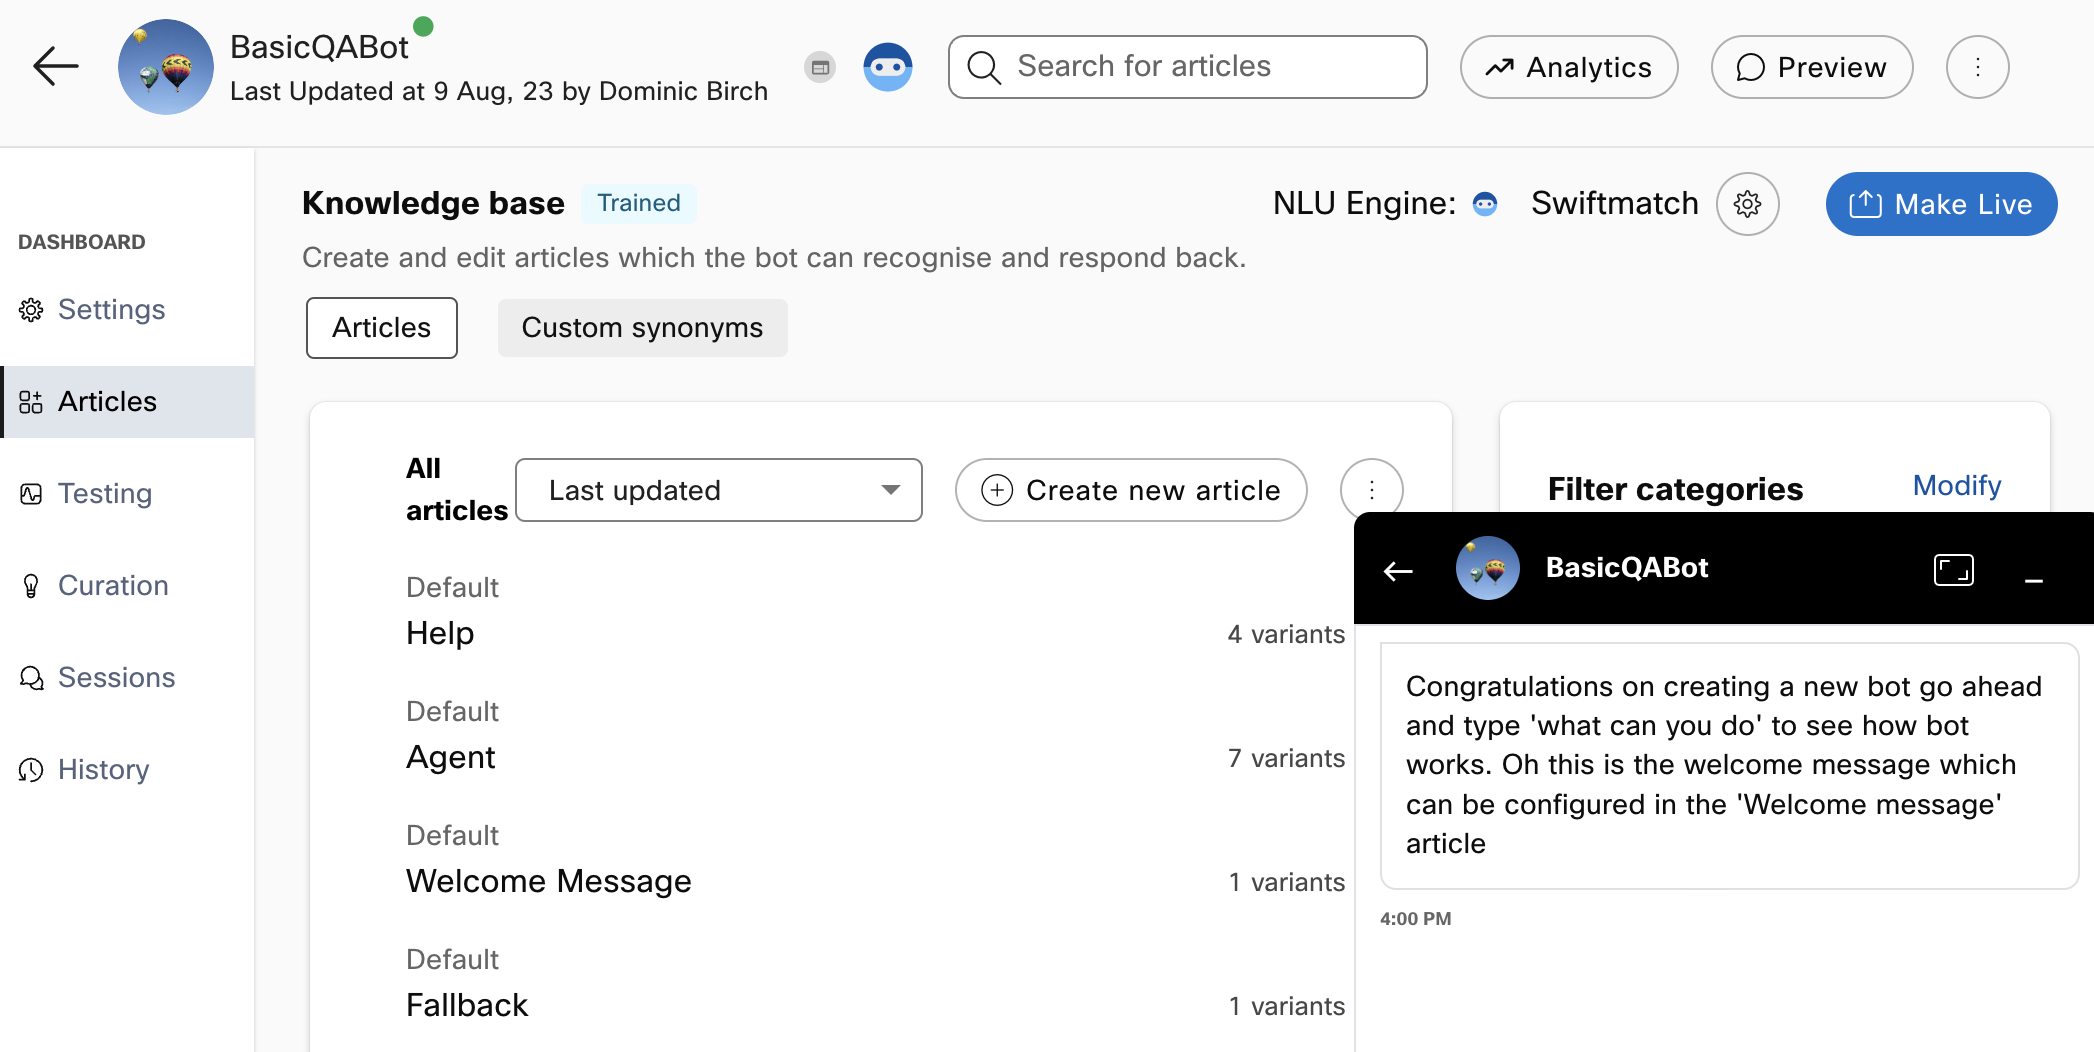
Press the Make Live button.
Within the popup, press the 'Make live' button.
Connect Workflows
Within this section we will import premade flows which contain the logic for routing messages between the app, bot and Engage platform.
While importing, we will modify certain details so that the flow works with your own assets.
In App MO Workflow
This flow is responsible for consuming mobile originated (MO) messages and routing them to a Q&A bot. When the bot needs to escalate the chat to an agent, an Engage chat is created and future messages are routed to the agent until the chat is closed.
Download the InAppChatMO.workflow file
Within Connect, click the Services menu option.
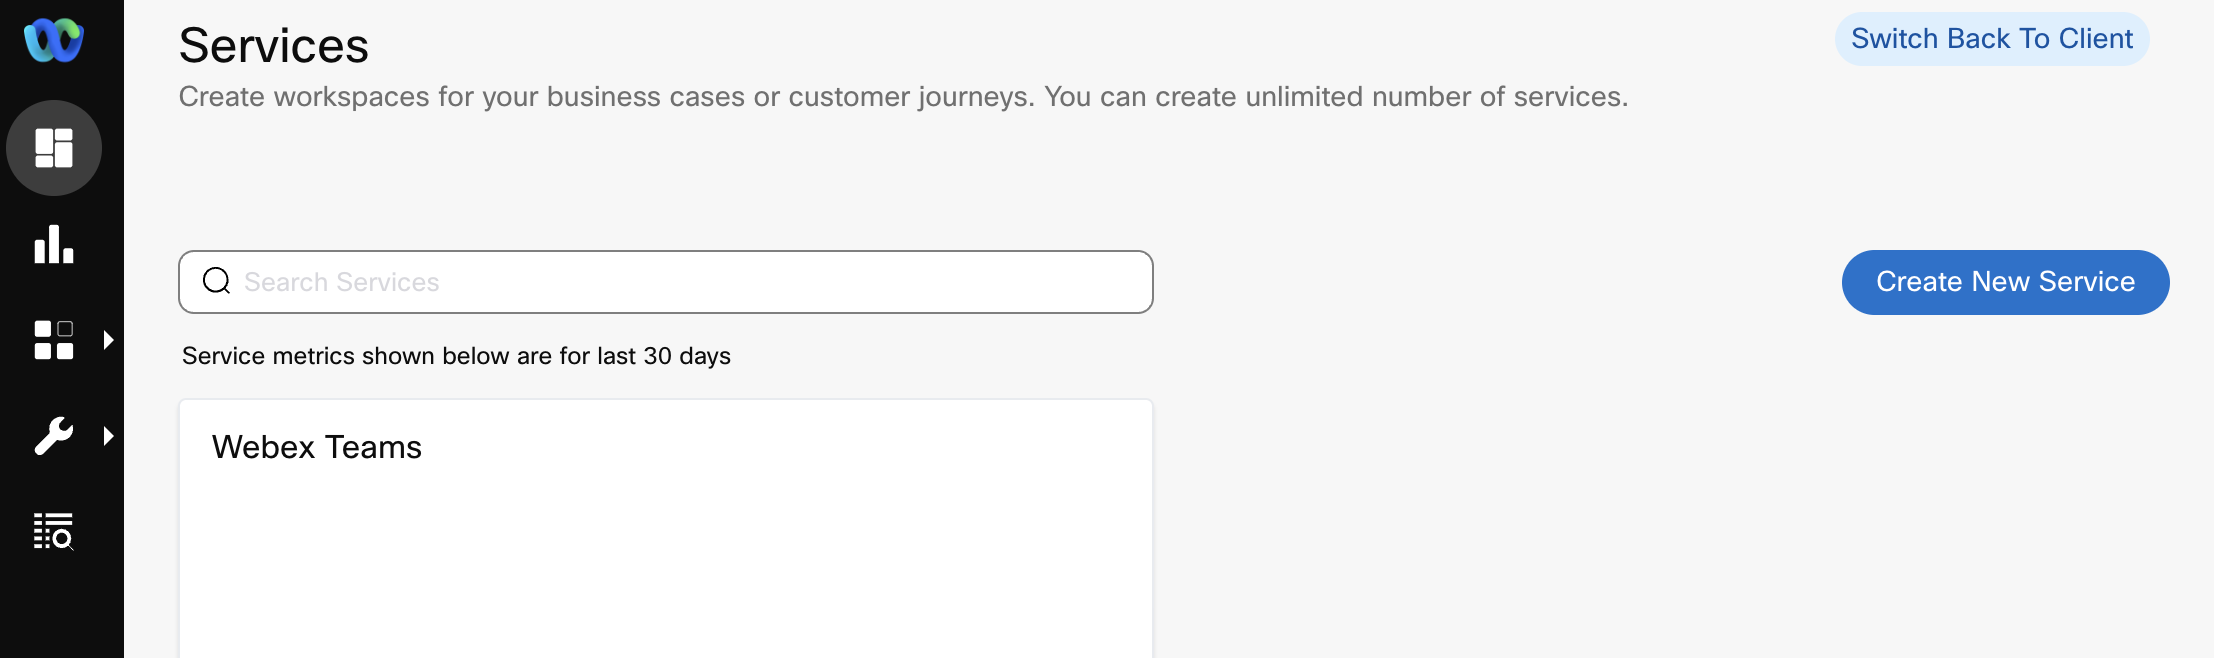
Press the 'Create New Service' button.
Enter a name for your service.
Press the 'Create' button.
Click the 'Flows' tab.

Click the 'Create Flow' button.
Enter a name for your flow, such as 'In App MO'.
Within the 'Method' box, select 'Upload a flow'.

Press the 'Choose File' button and choose the InAppChatMO.workflow file that you downloaded earlier.
Press the 'Create' button.
The flow opens to the 'Configure Mobile & Web App Event' panel.
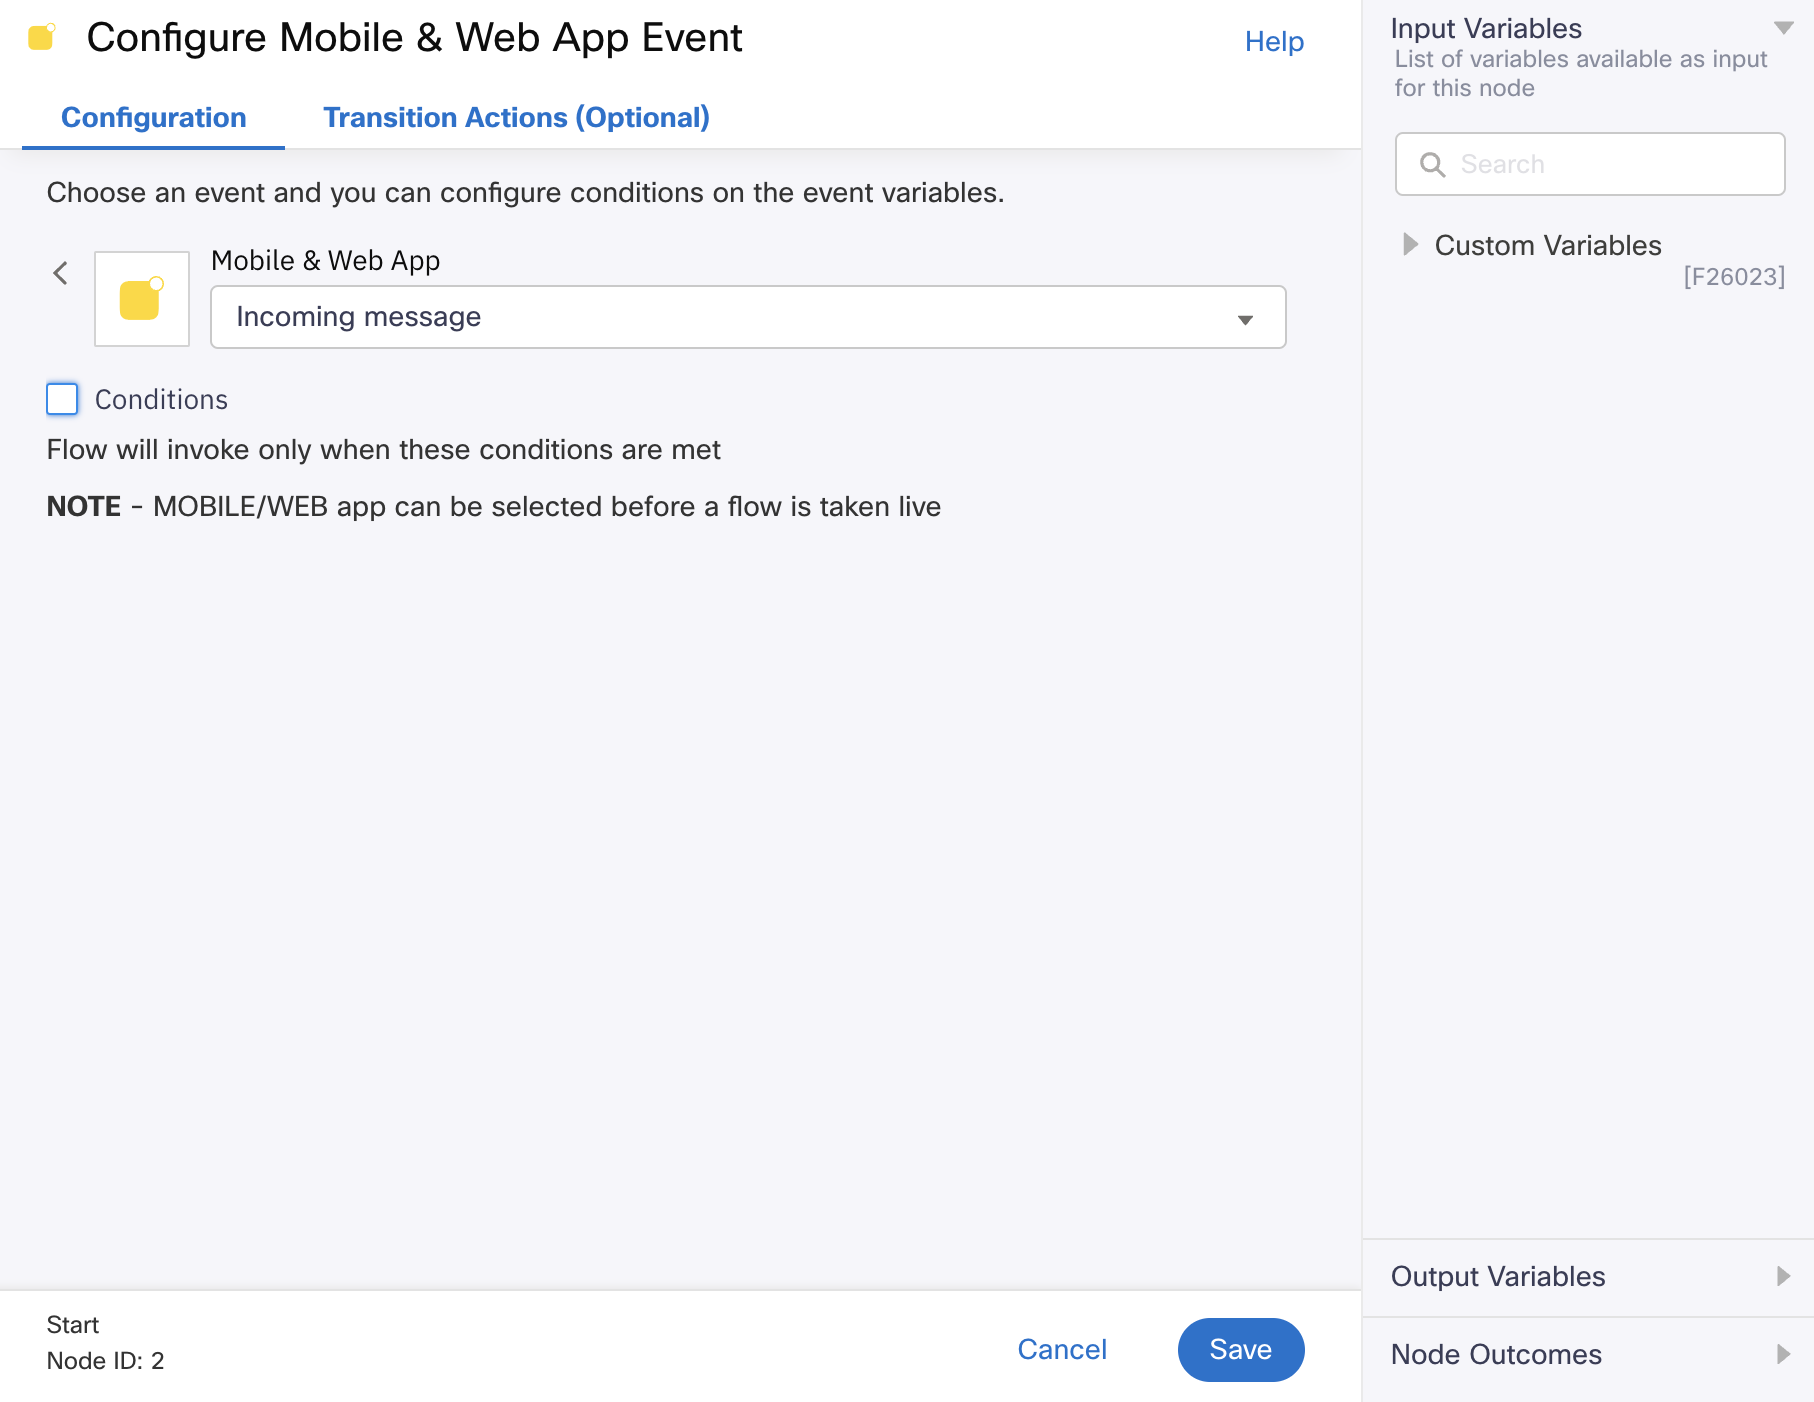
Uncheck the 'Conditions' checkbox. For the purpose of this guide, Conditions are not needed.
Press the 'Save' button.
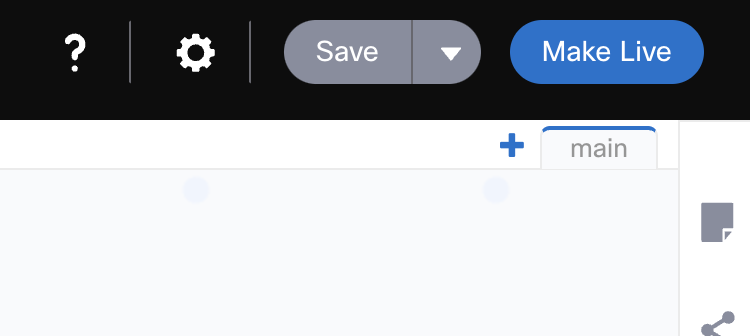
Press the 'Settings' button (cog icon).

Select the 'Custom variables' tab.
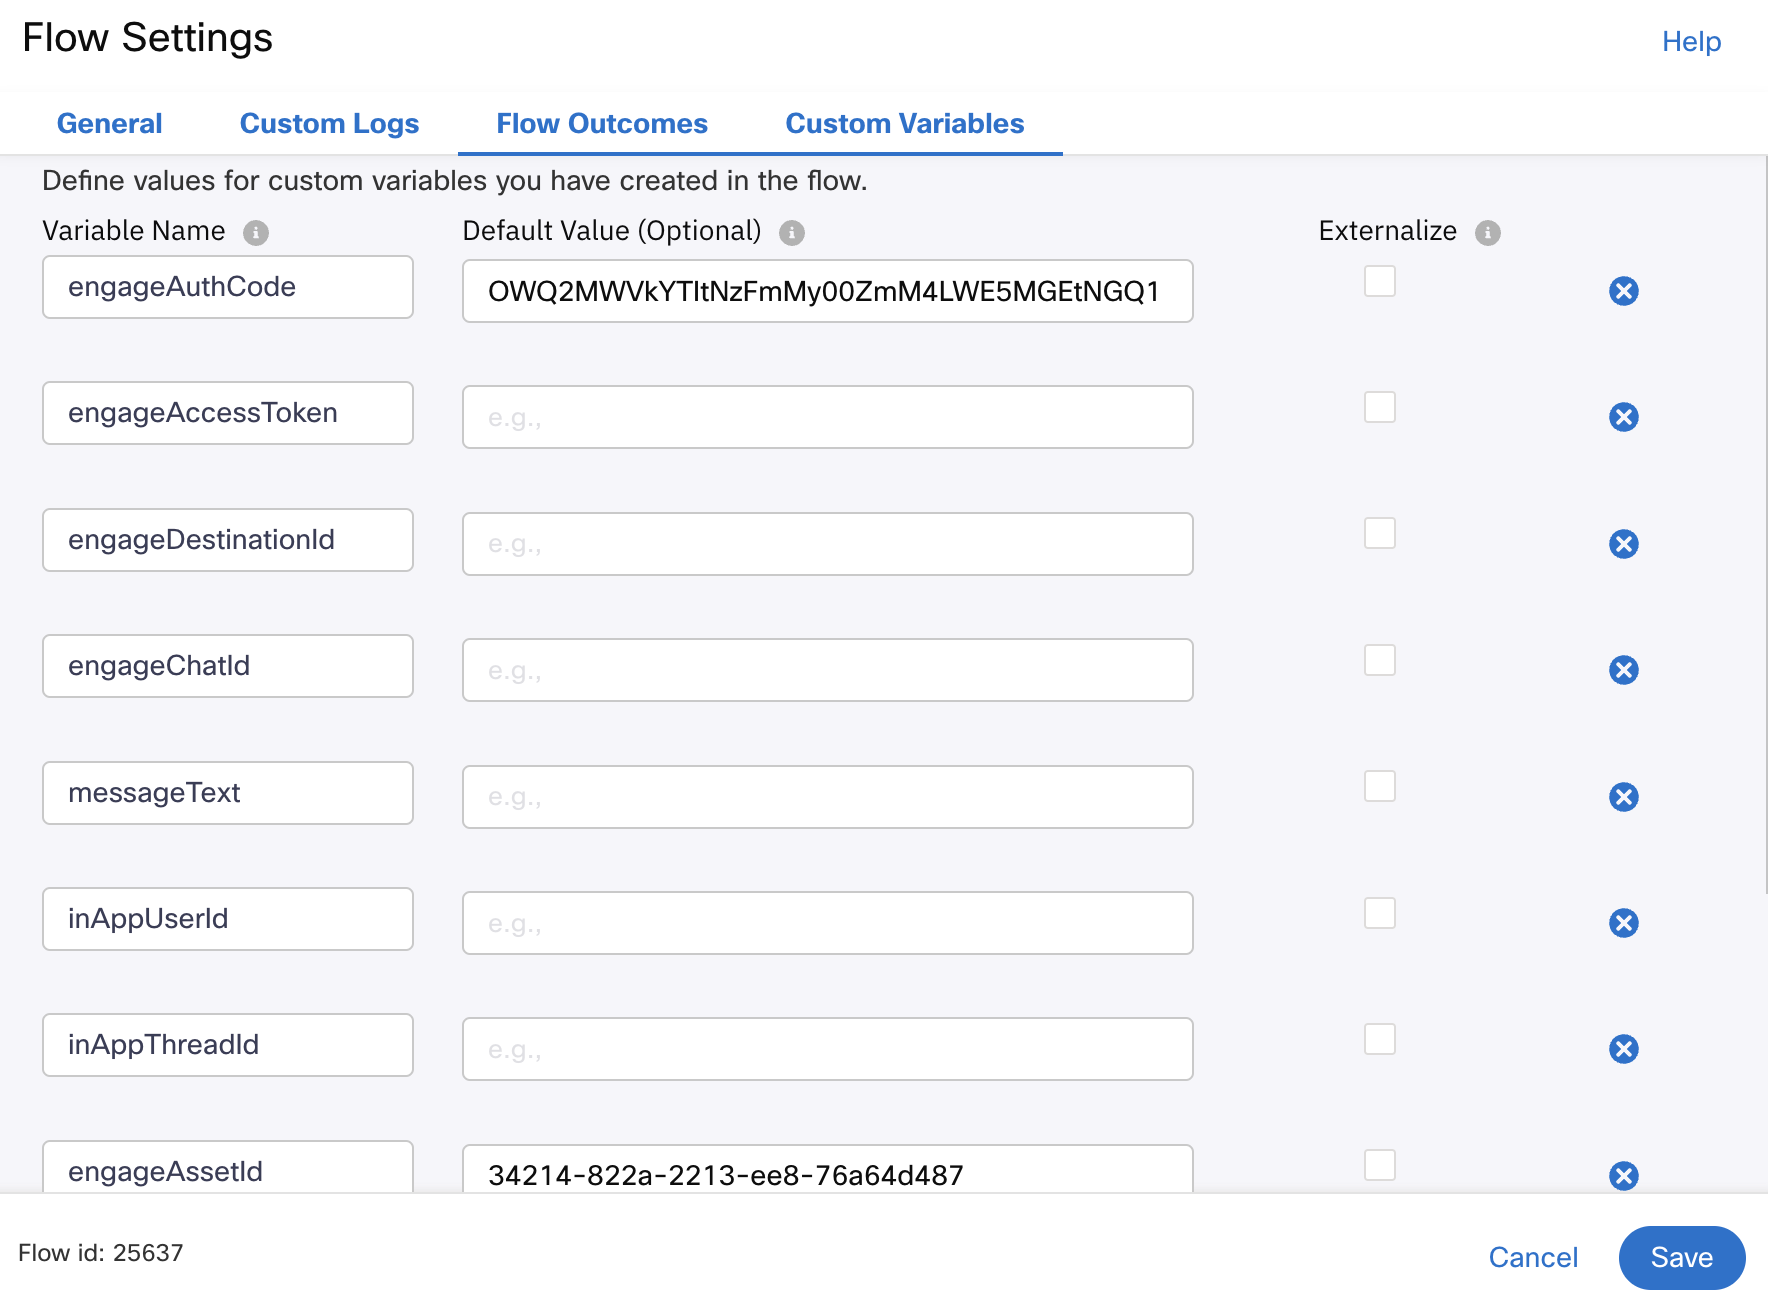
You now need to replace some variable values with those that you noted down earlier in this guide:
Locate the variable named 'engageAuthCode' and enter your base64 encoded auth code into the 'default value' box.
Locate the variable named 'engageAssetId' and enter your Engage Business Id into the 'default value' box.
Locate the variable named 'engageTeamId' and enter your Engage Team Id into the 'default value' box.
Press the 'Save' button.
Locate the QnA bot node and double click to open.
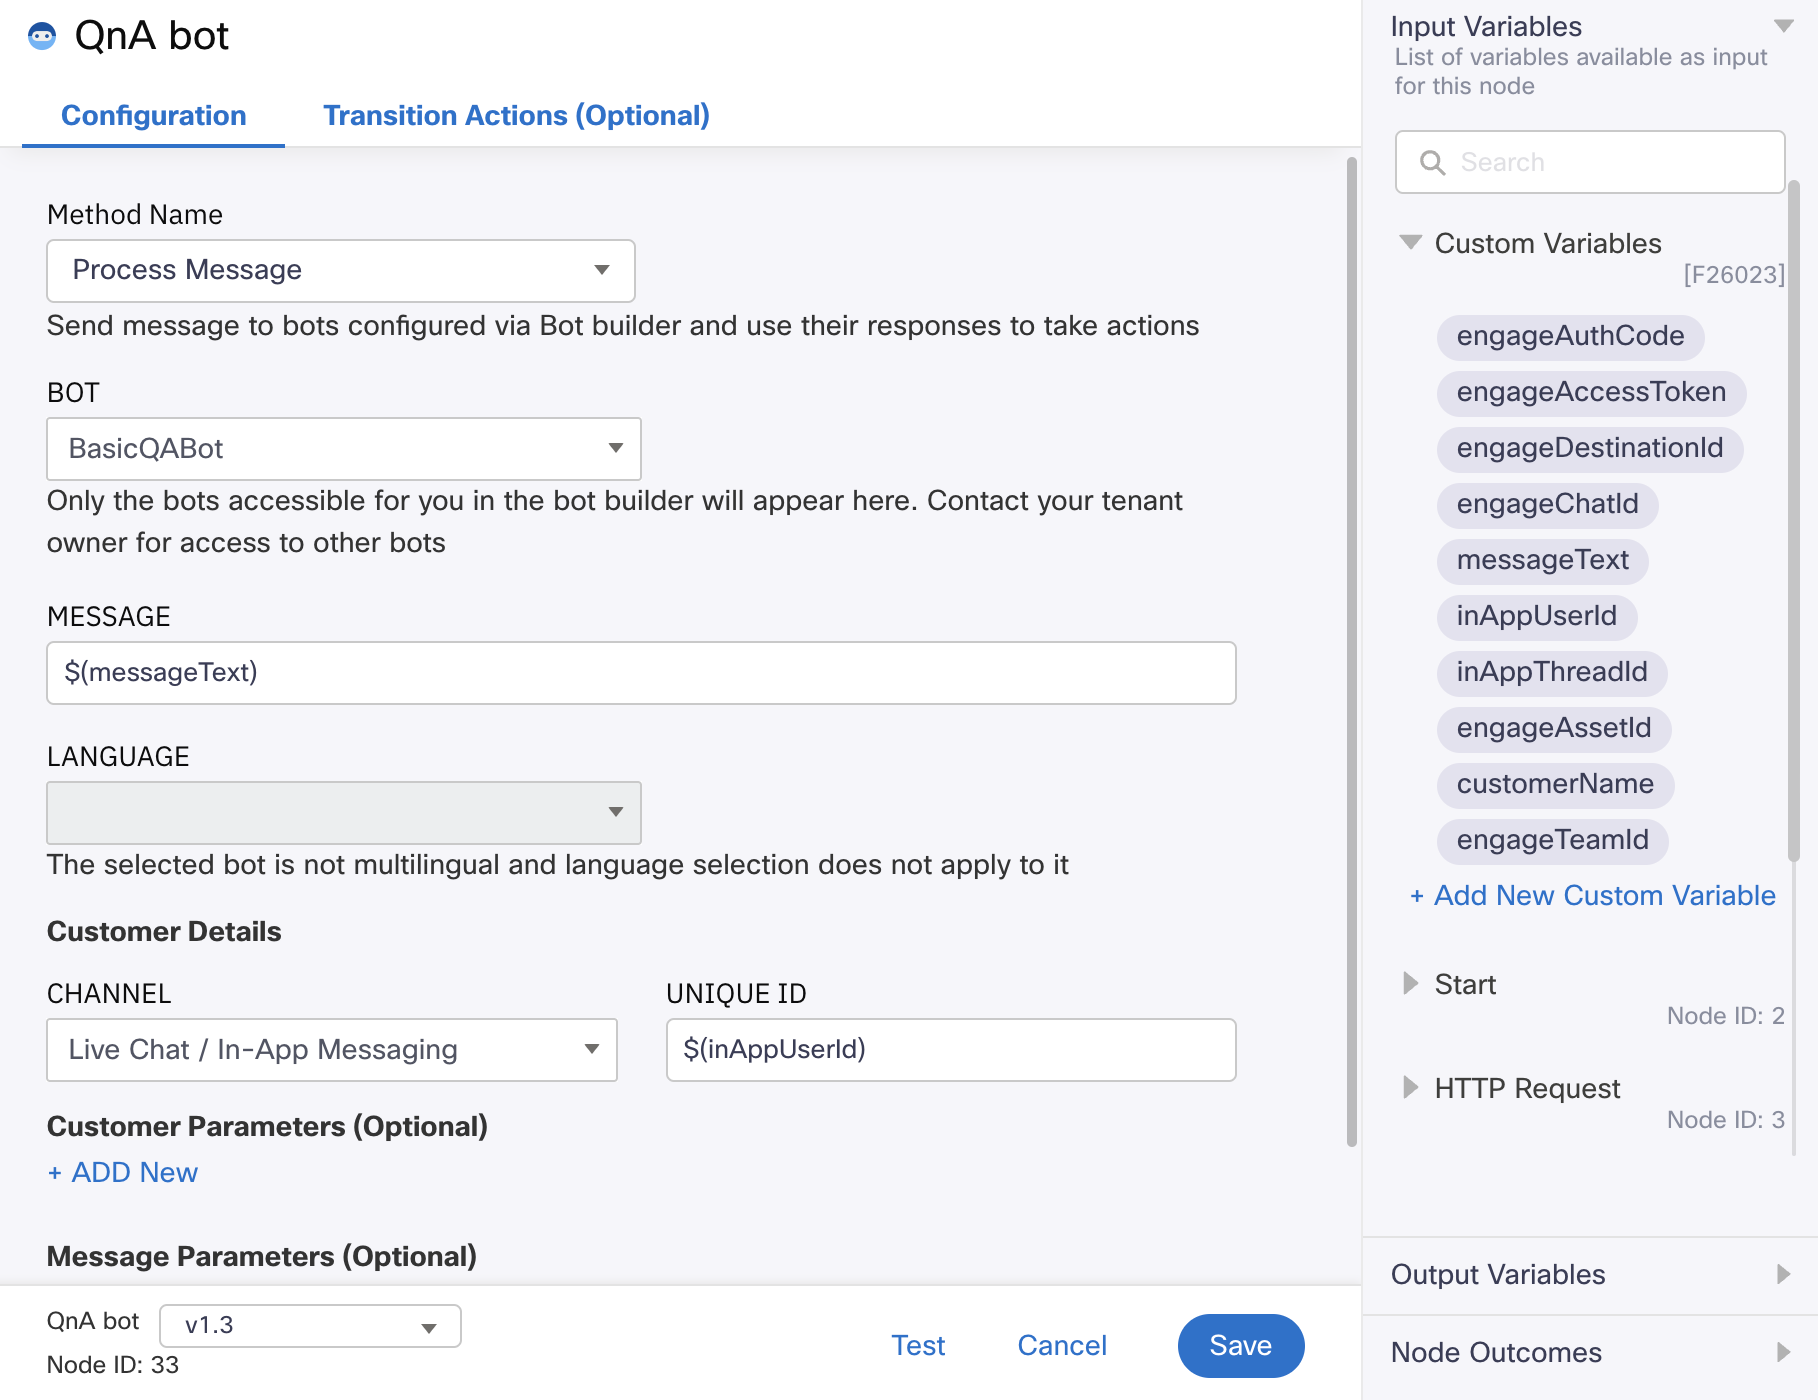
Within the 'BOT' field, select the bot that you configured earlier.
Ensure the 'CHANNEL' field is set to 'Live Chat / In-App Messaging'.
Ensure the 'UNIQUE ID' field is set to '$(inAppUserId)'. (Do not copy the quotes)
Press the 'Save' button.
Open each 'Receive' node and click the Save button. (Required due to flow import)
Press the 'Make Live' button to publish the flow.
The 'Make Live' panel will appear.
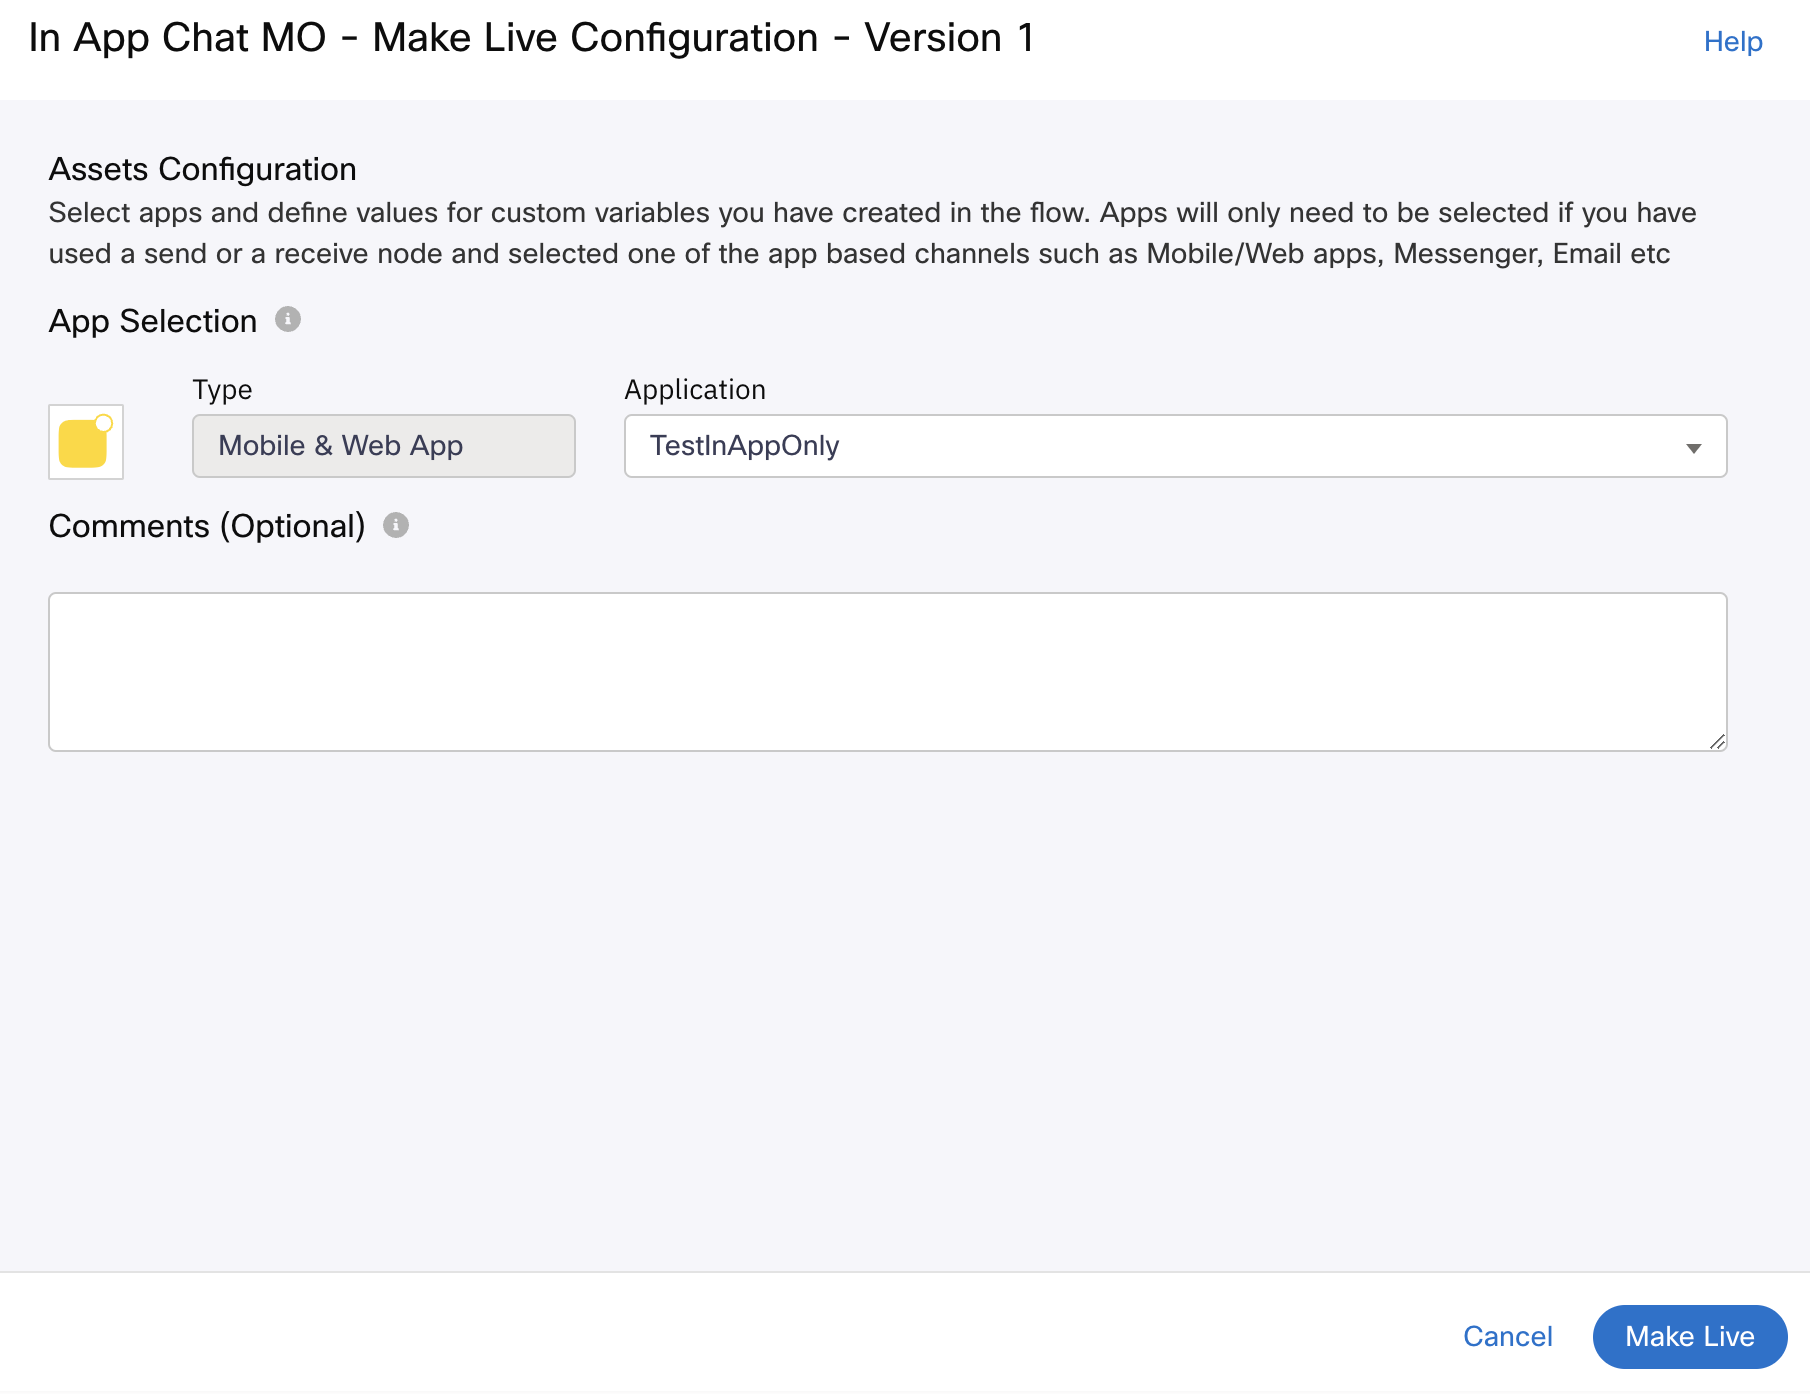
Within the 'Application' field, select your app asset.
Press the 'Make Live' button.
In App MT Workflow
This flow is responsible for consuming messages from Engage and routing them to the app user, hence the term 'mobile terminated (MO)'.
Download the InAppChatMT.workflow file
Within your Connect service, click the 'Flows' tab.
Click the 'Create Flow' button.
Enter a name for your flow, such as 'In App MT'.
Within the 'Method' box, select 'Upload a flow'.
Press the 'Choose File' button and choose the InAppChatMT.workflow file that you downloaded earlier.
Press the 'Create' button.
The flow canvas will open to the Configure Webhook node panel.
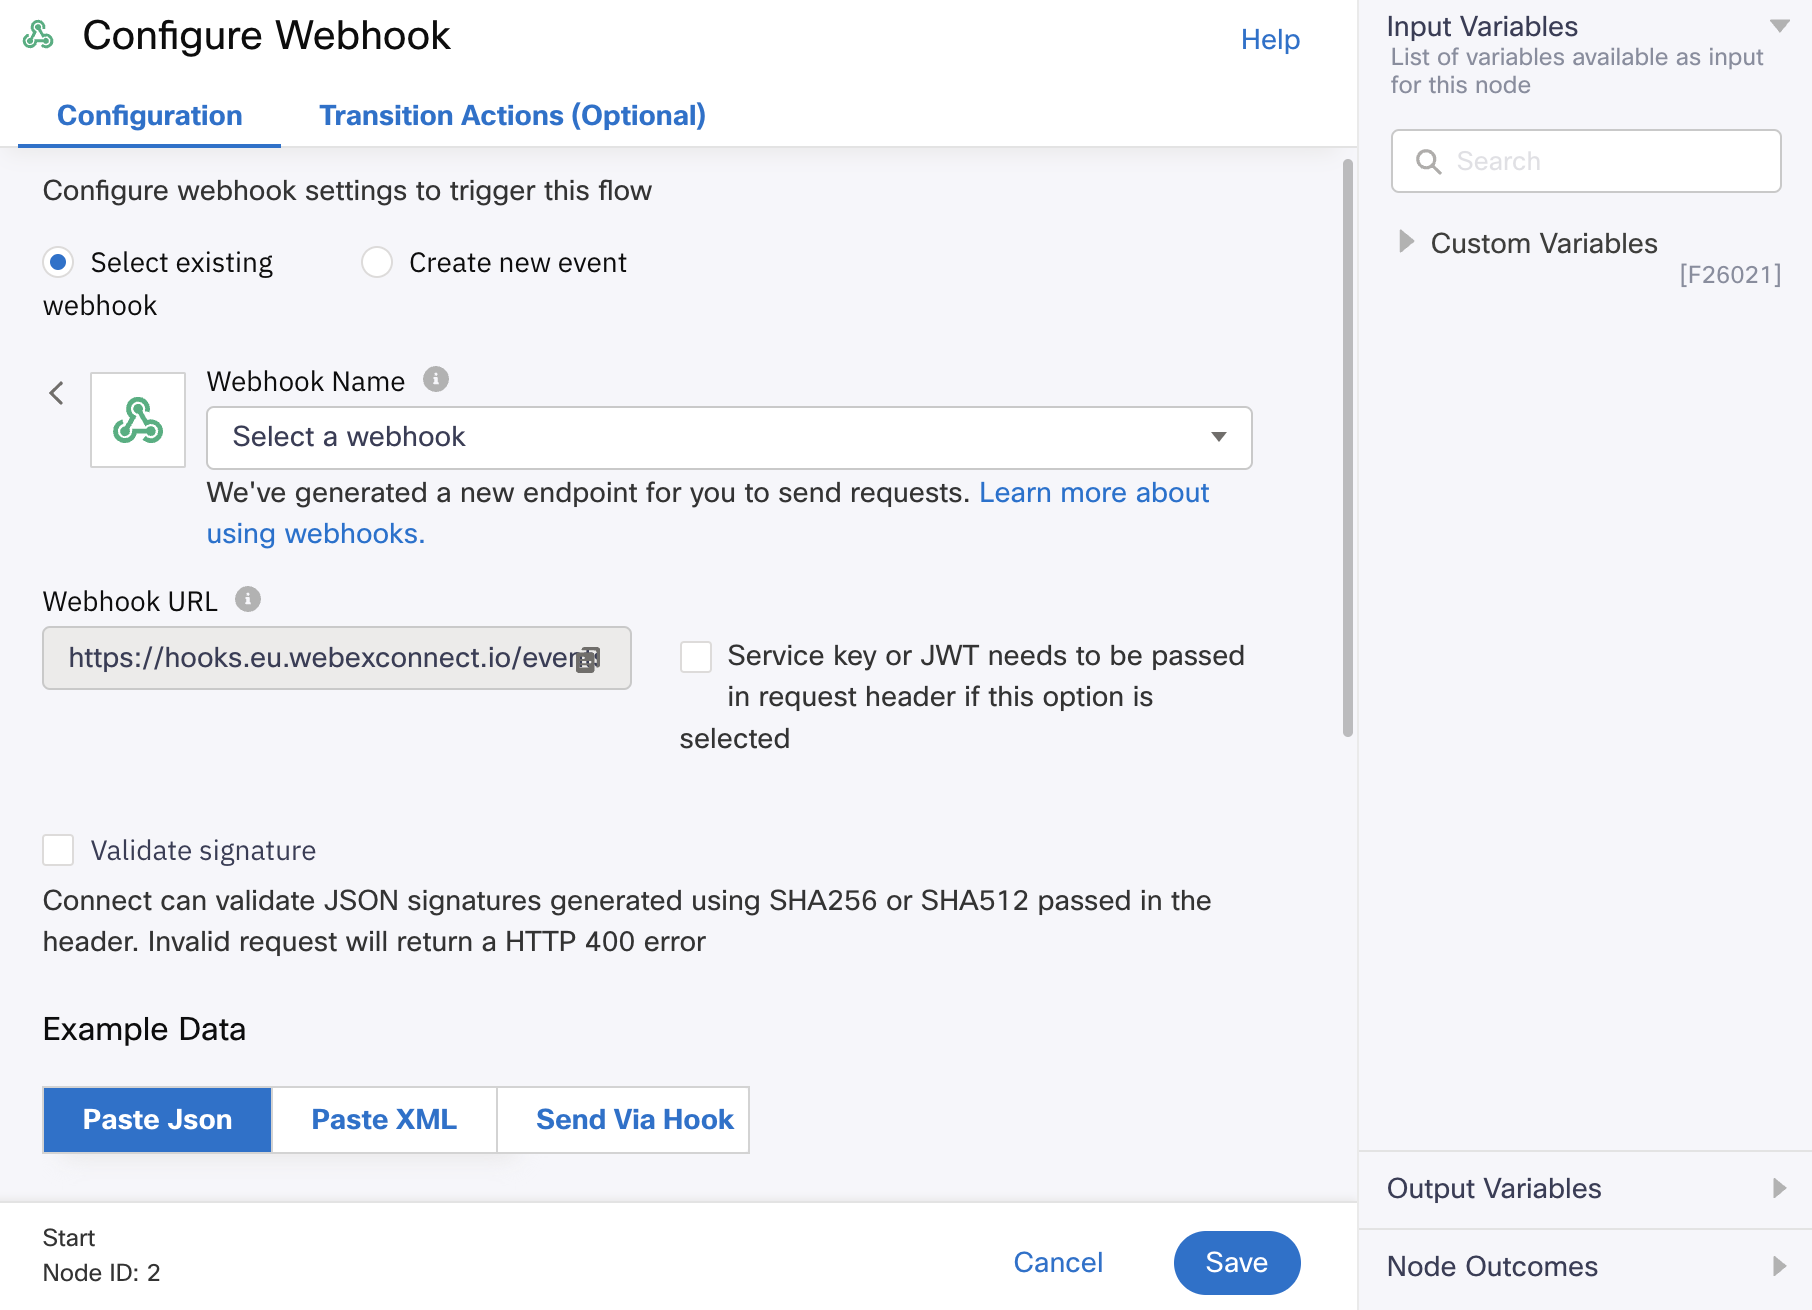
Select the 'Select existing webhook' option.
Within the 'Webhook Name' dropdown, select Inbound webhook that you configured earlier.
Press the 'Save' button.
Press the 'Make Live' button to publish the flow.
The 'Make Live' panel will appear.
Within the 'Application' field, select your app asset.
Press the 'Make Live' button.
Test
Now that all configuration is complete, we are ready to test the experience.
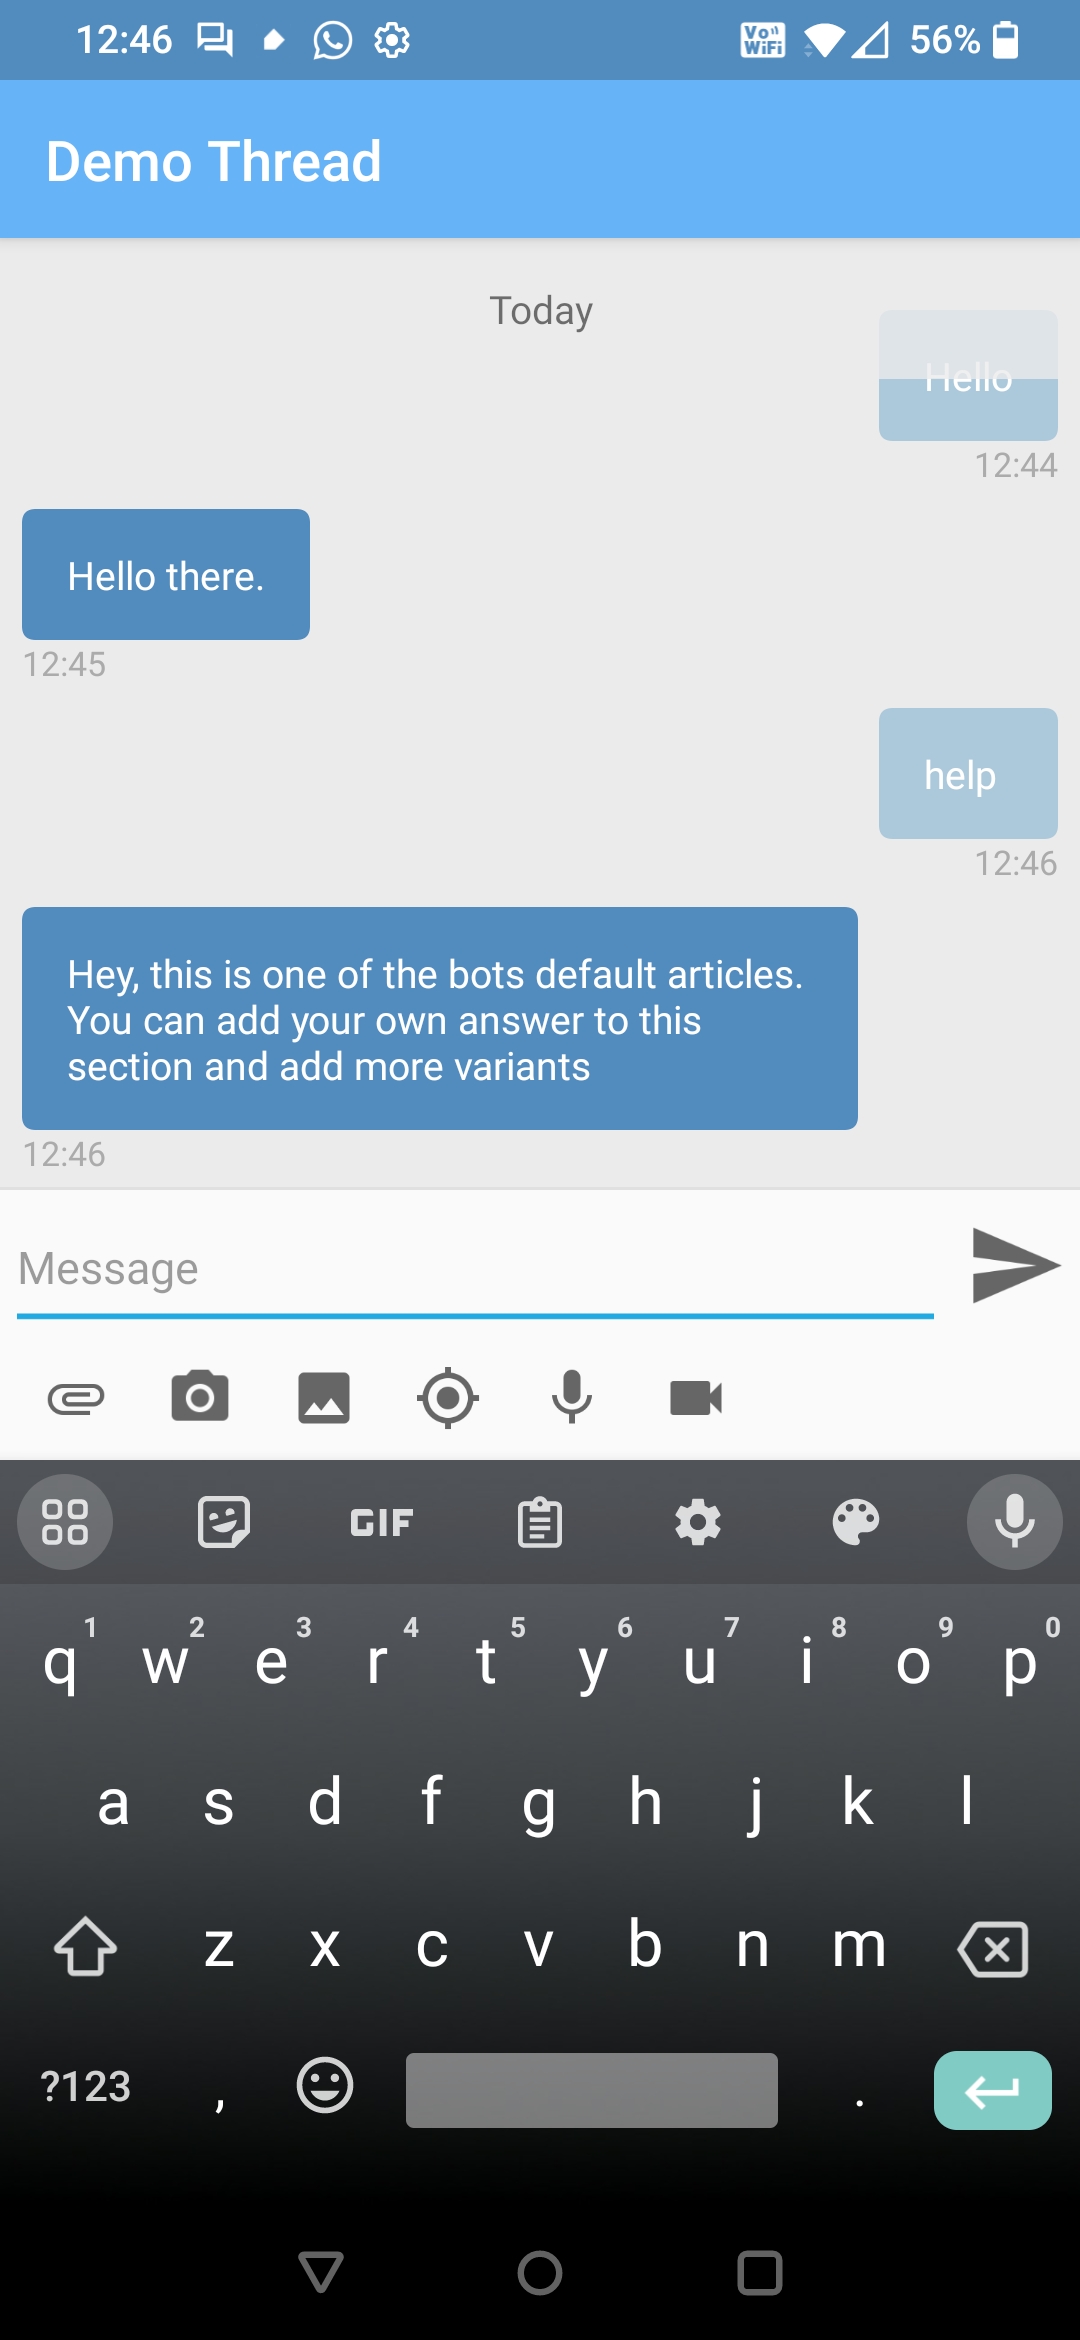
Open your mobile app and create a new chat.
Send a message with the text 'Hello'.
The bot should respond with 'Hello there'.
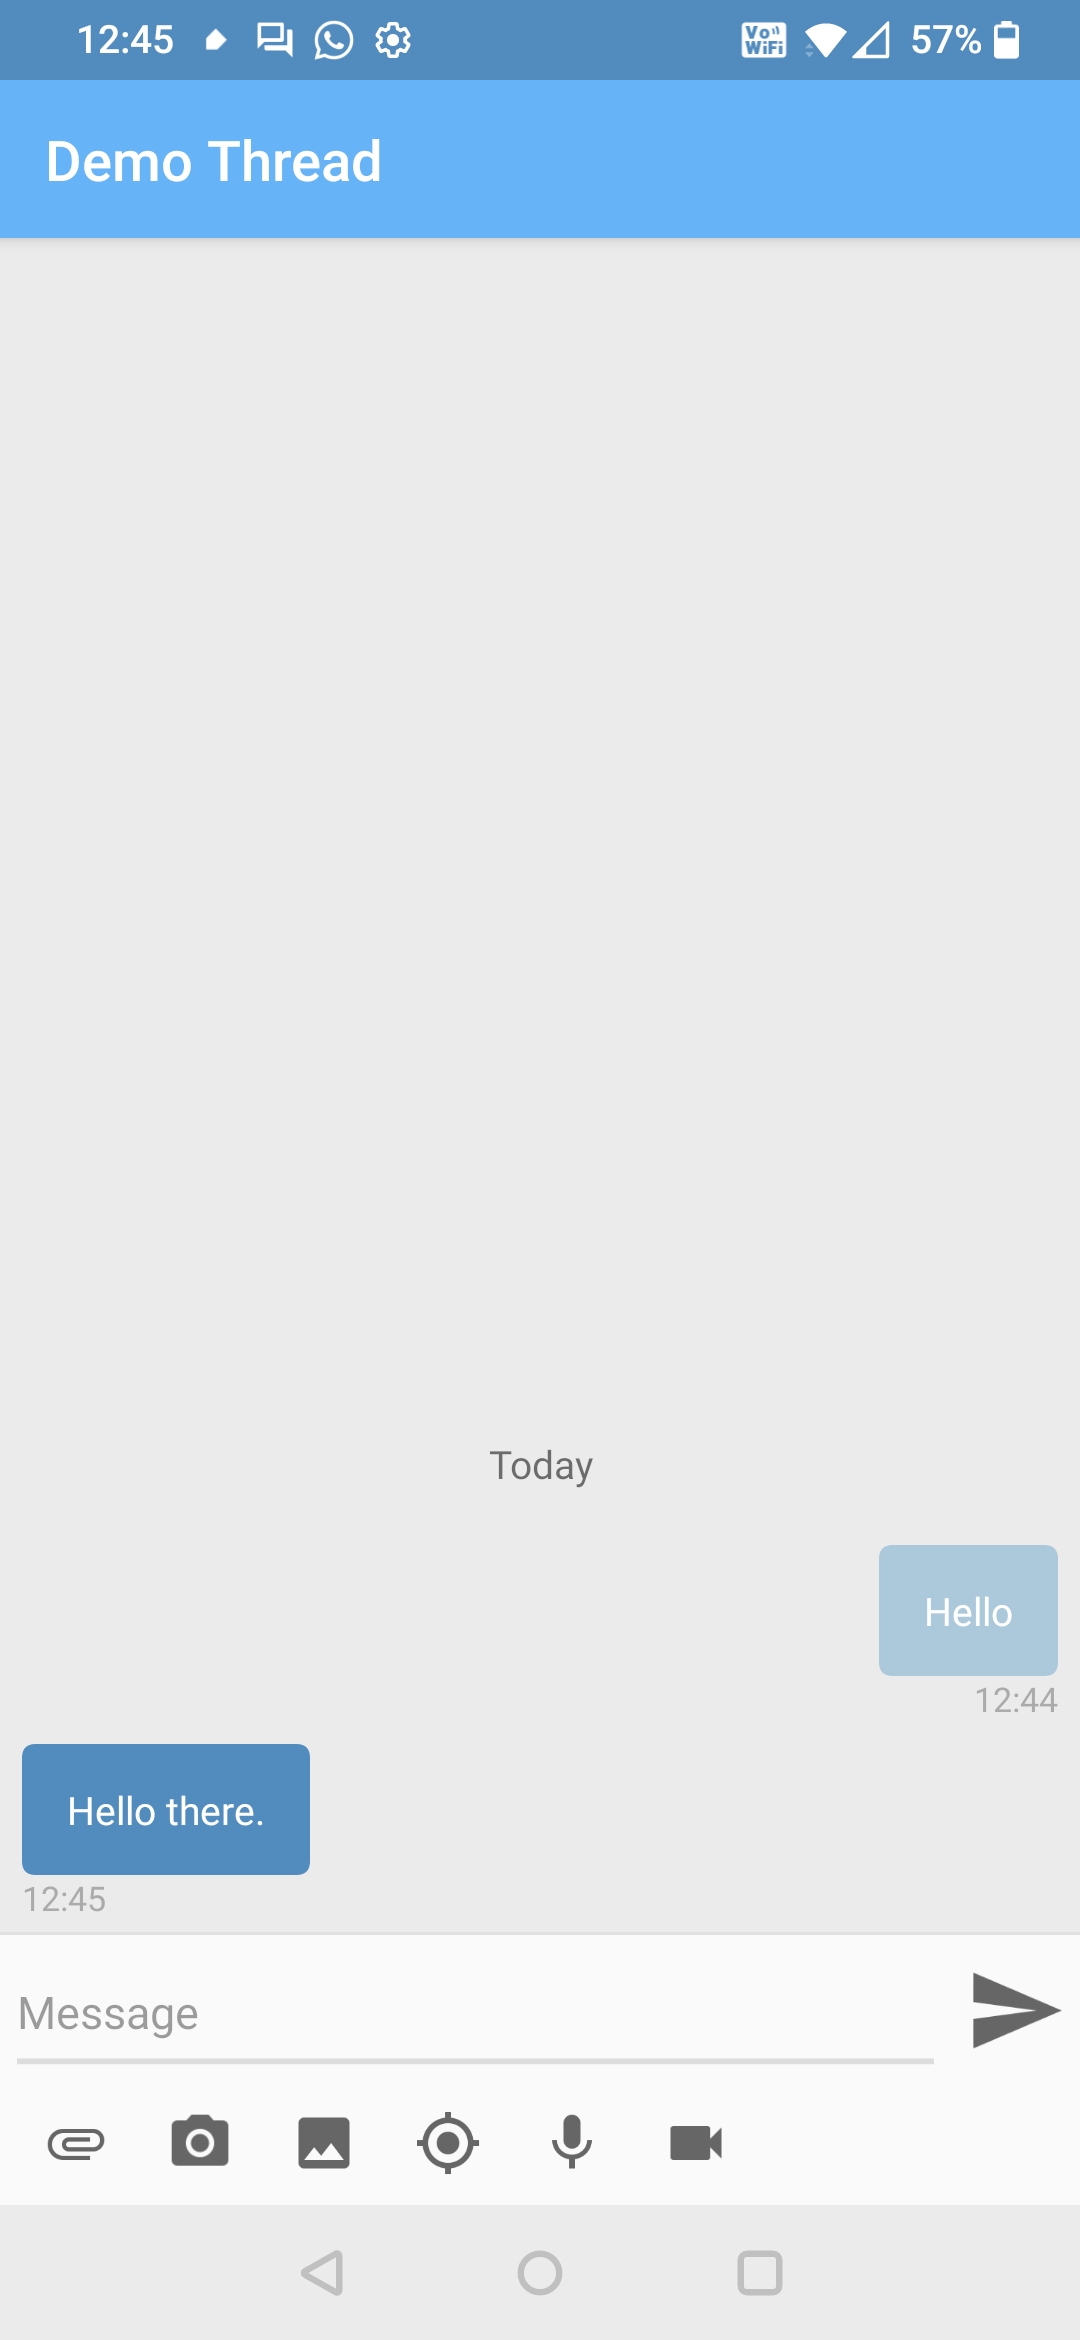
Send another message with the word 'Help'.
The bot should respond with another message, indicating the response is a default article.
Send another message with the word 'agent'.
A message is returned asking you to input your name.
Reply with your name.
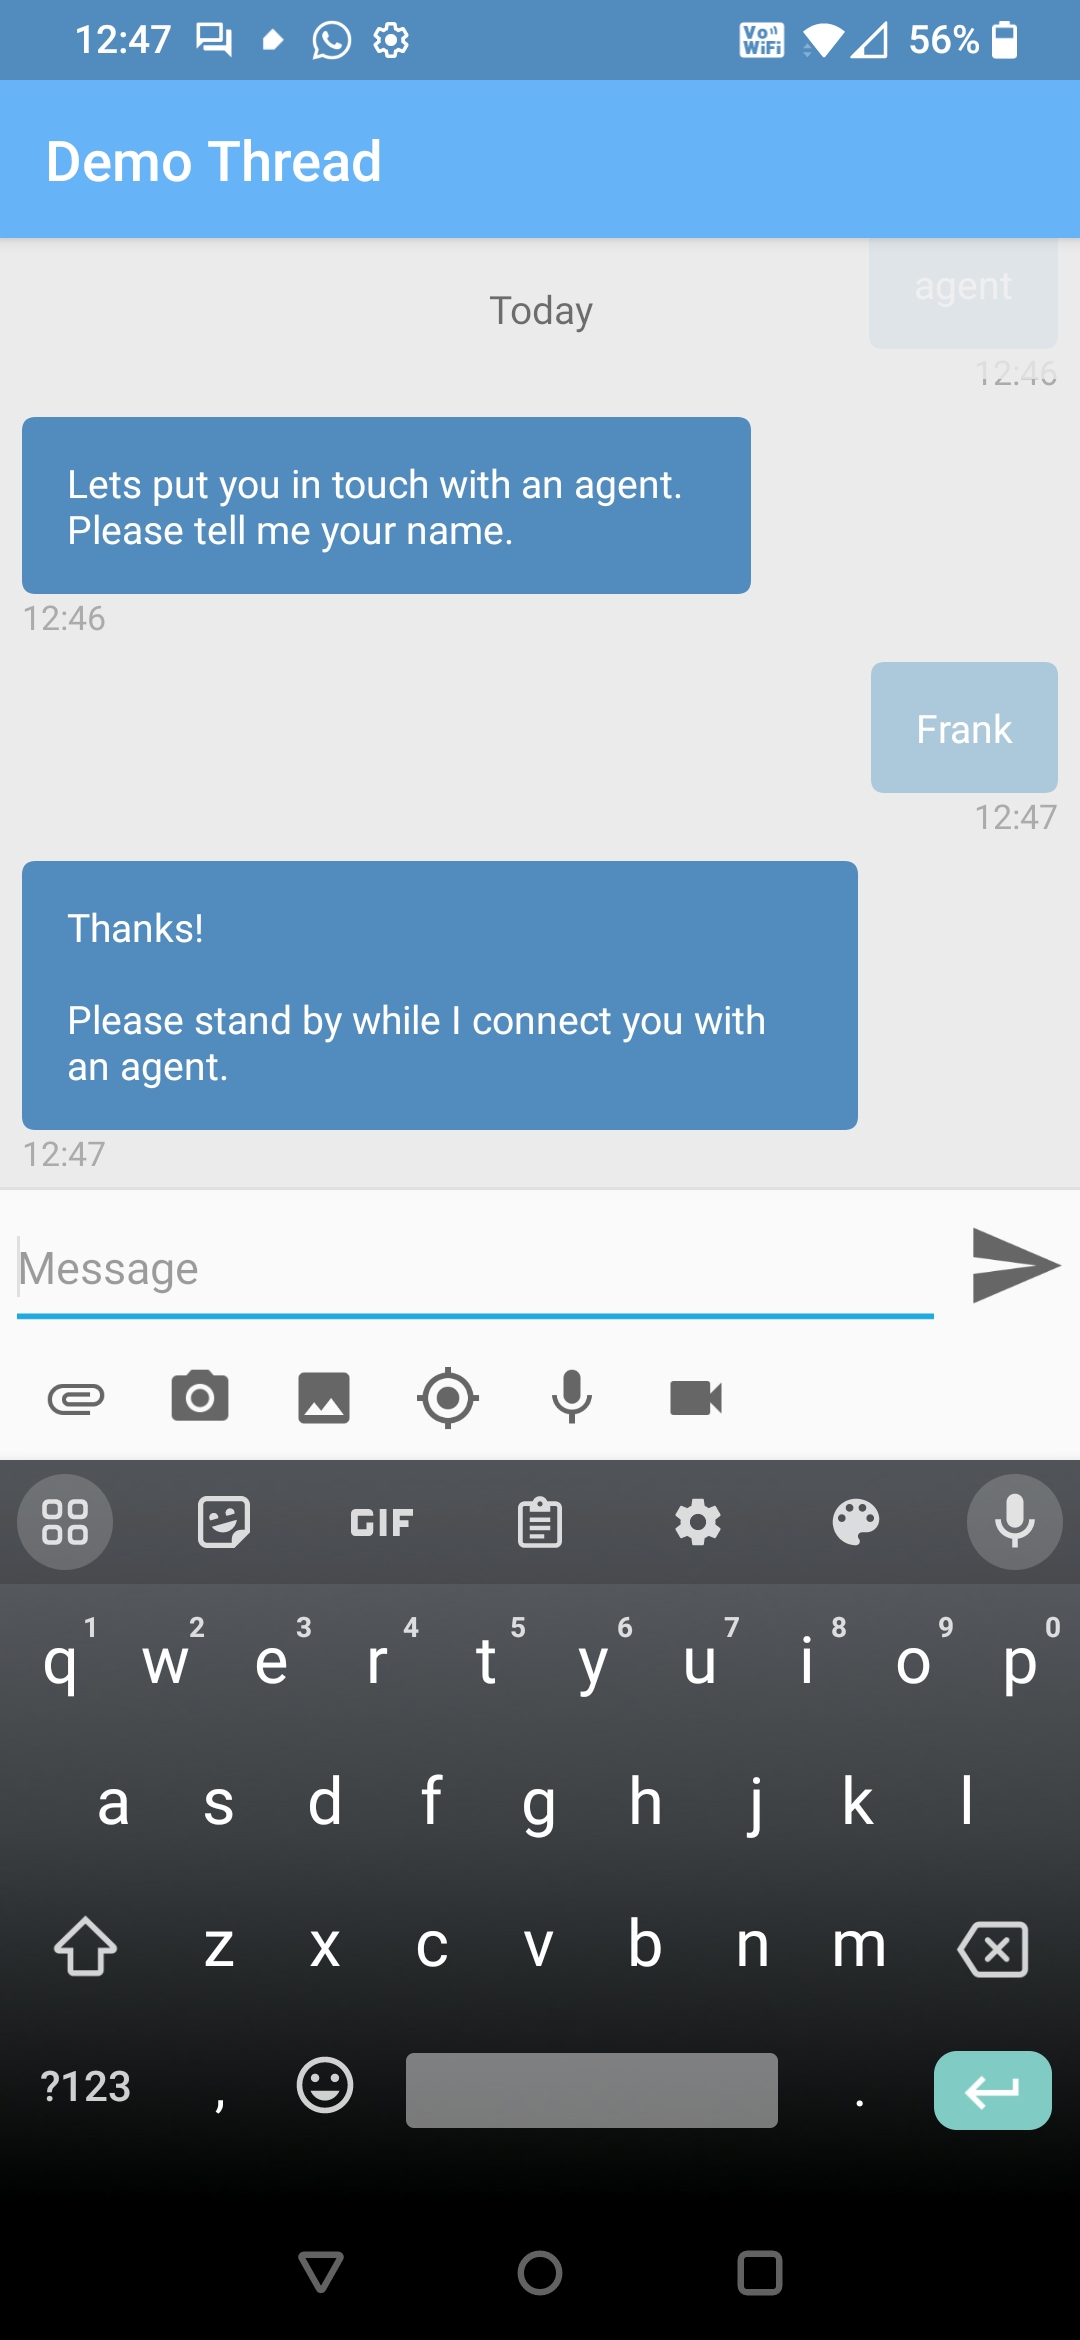
At this point a new conversation is created within Engage.
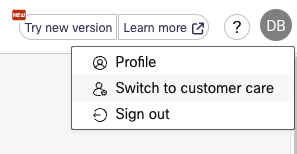
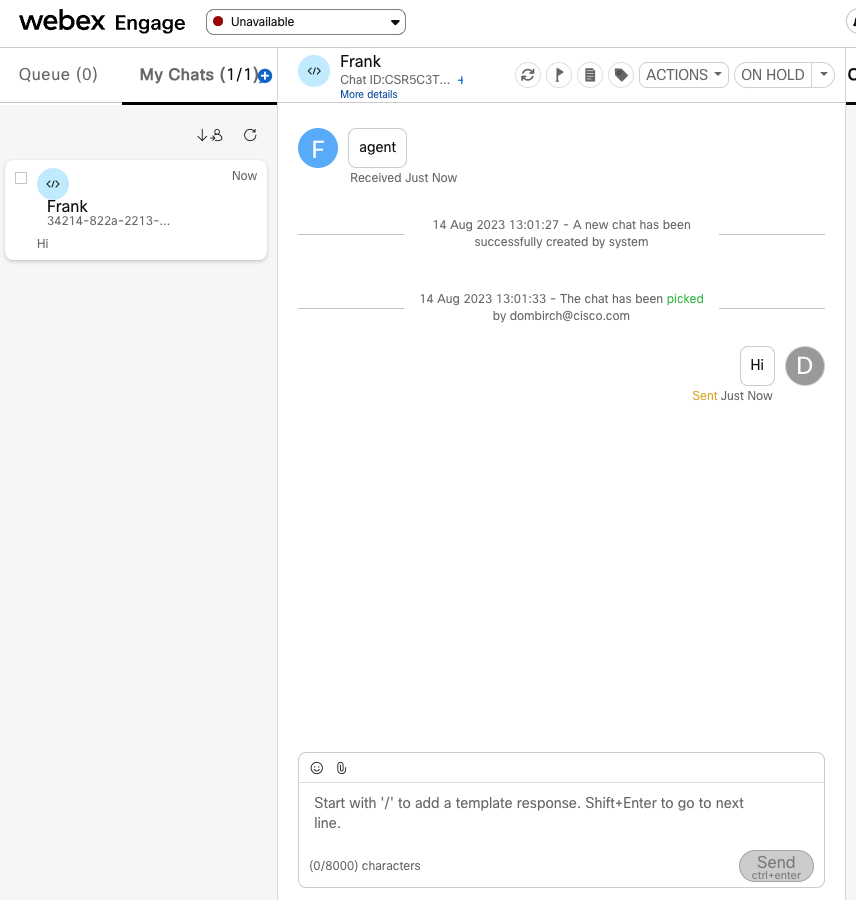
Open Engage and navigate to Customer Care by clicking your user icon and selecting 'Switch to customer care'.
Navigate to the Chat console and click 'Queue'
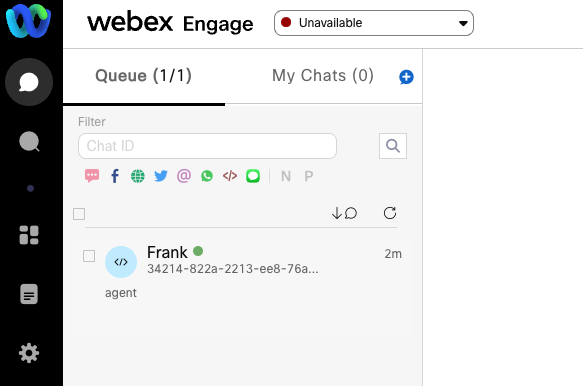
A new chat should exist within the Queue, click the chat to open it.
Click 'Yes' in the popup to pick up the chat.
Messages sent from the agent console will appear within the app, and messages sent from the app will appear within the agent console.
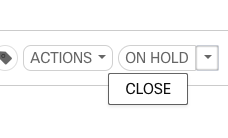
When you are finished sending messages, close the chat by pressing the arrow next to the 'On Hold' button and selecting 'Close'.
Workflow walkthrough
Within this section we will take a closer look at the workflows that power the experience.
Concepts
The solution comprises three core systems:
- A mobile app that has integrated the Connect Messaging SDK.
- The Engage platform, which provides a contact center desktop for agents.
- The Connect platform, which comprises various assets and provides logic, in the form of workflows, to route messages between the mobile app and Engage or a bot.
The Engage platform represents a conversation between an agent and a channel as a Chat, a chat is identified by a unique chat id.
The Connect platform represents a conversation as a thread, a thread is identified by a unique thread id and a user id.
The Connect Messaging SDK allows client applications to communicate with the Connect platform and perform operations such as creating threads and publishing, and receiving, messages.
Therefore, to route messages between a mobile app and Engage, there must be a Connect Thread, an Engage chat and logic to marshall messages between the two. In essence, both Connect and Engage have their own distinct representations of the same conversation.
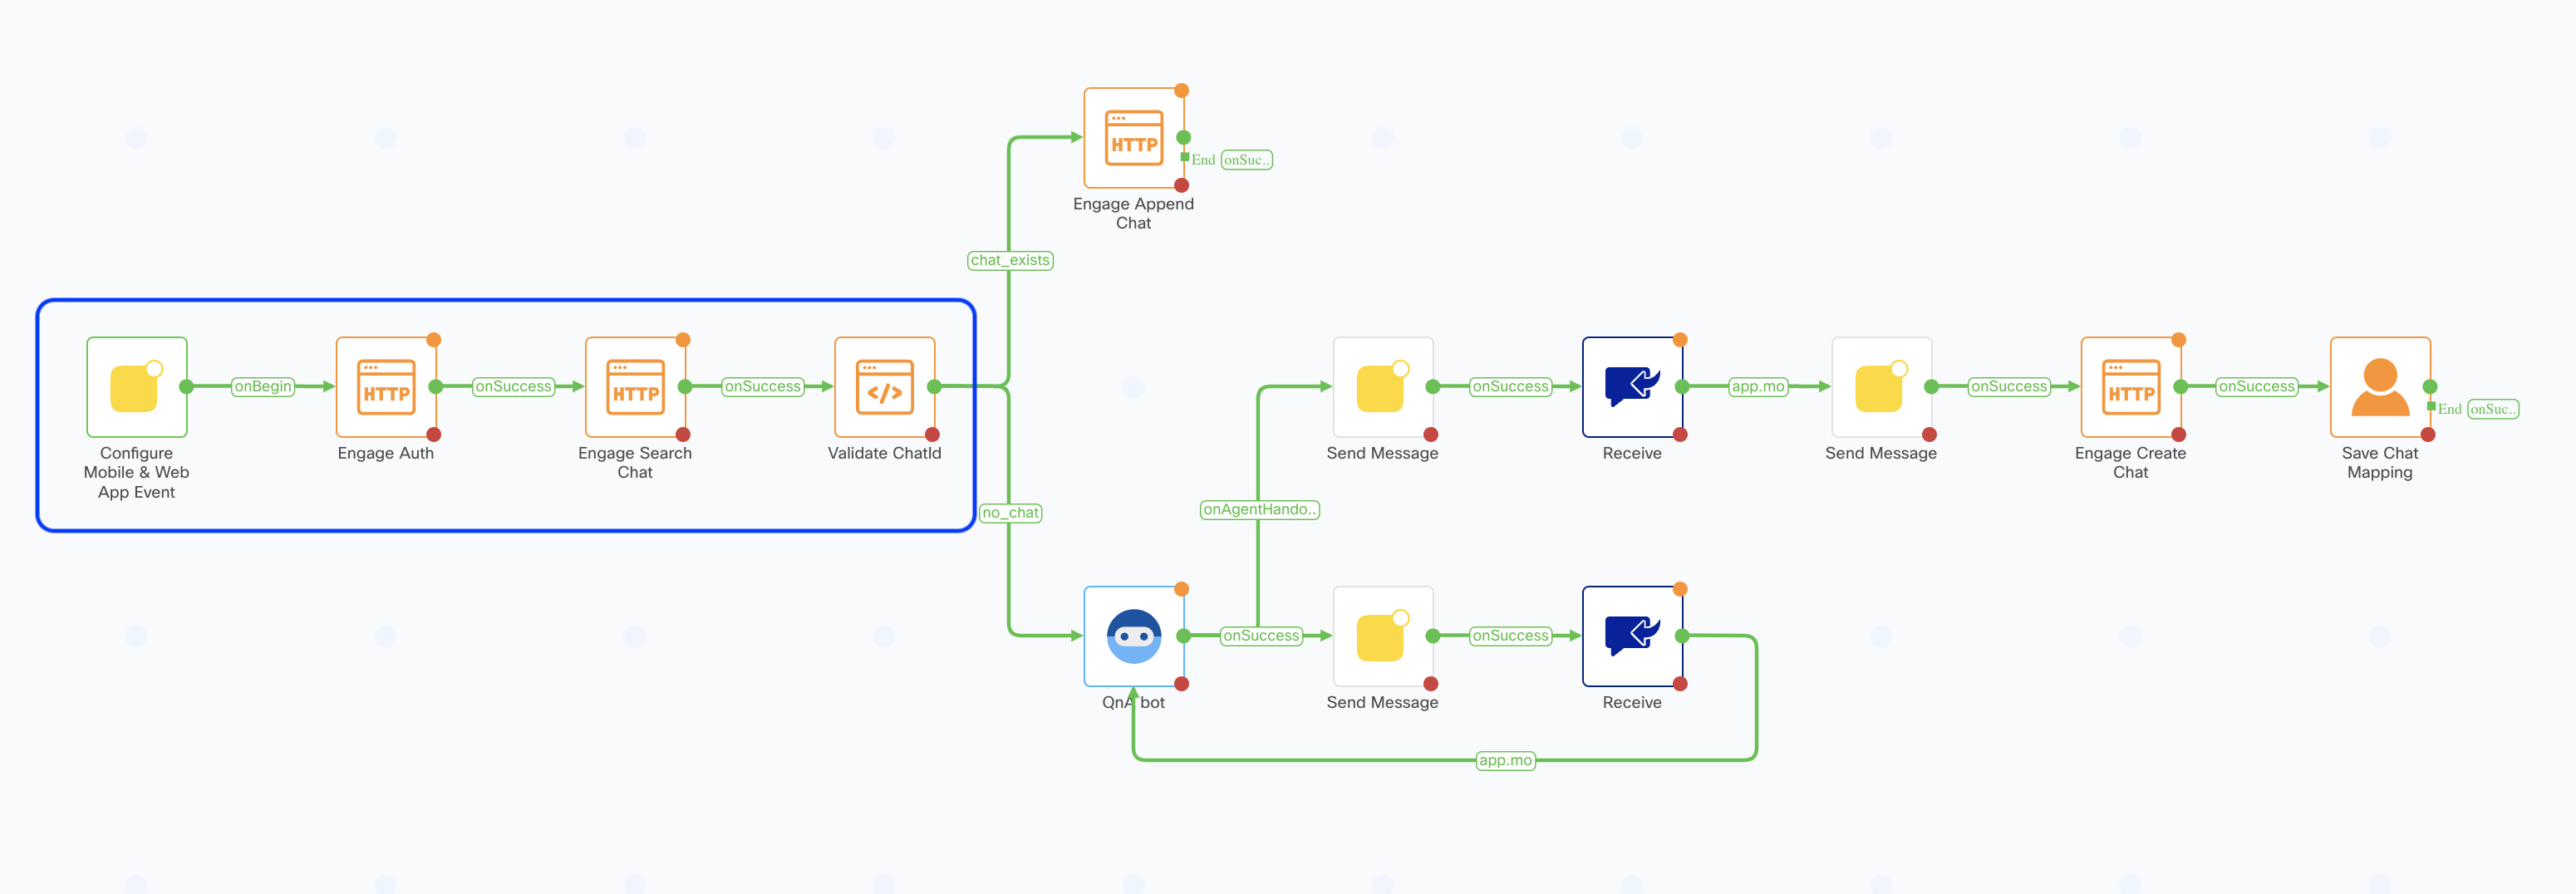
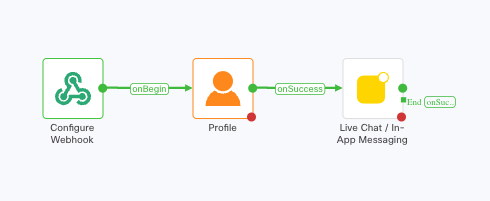
In App MO Workflow walkthrough
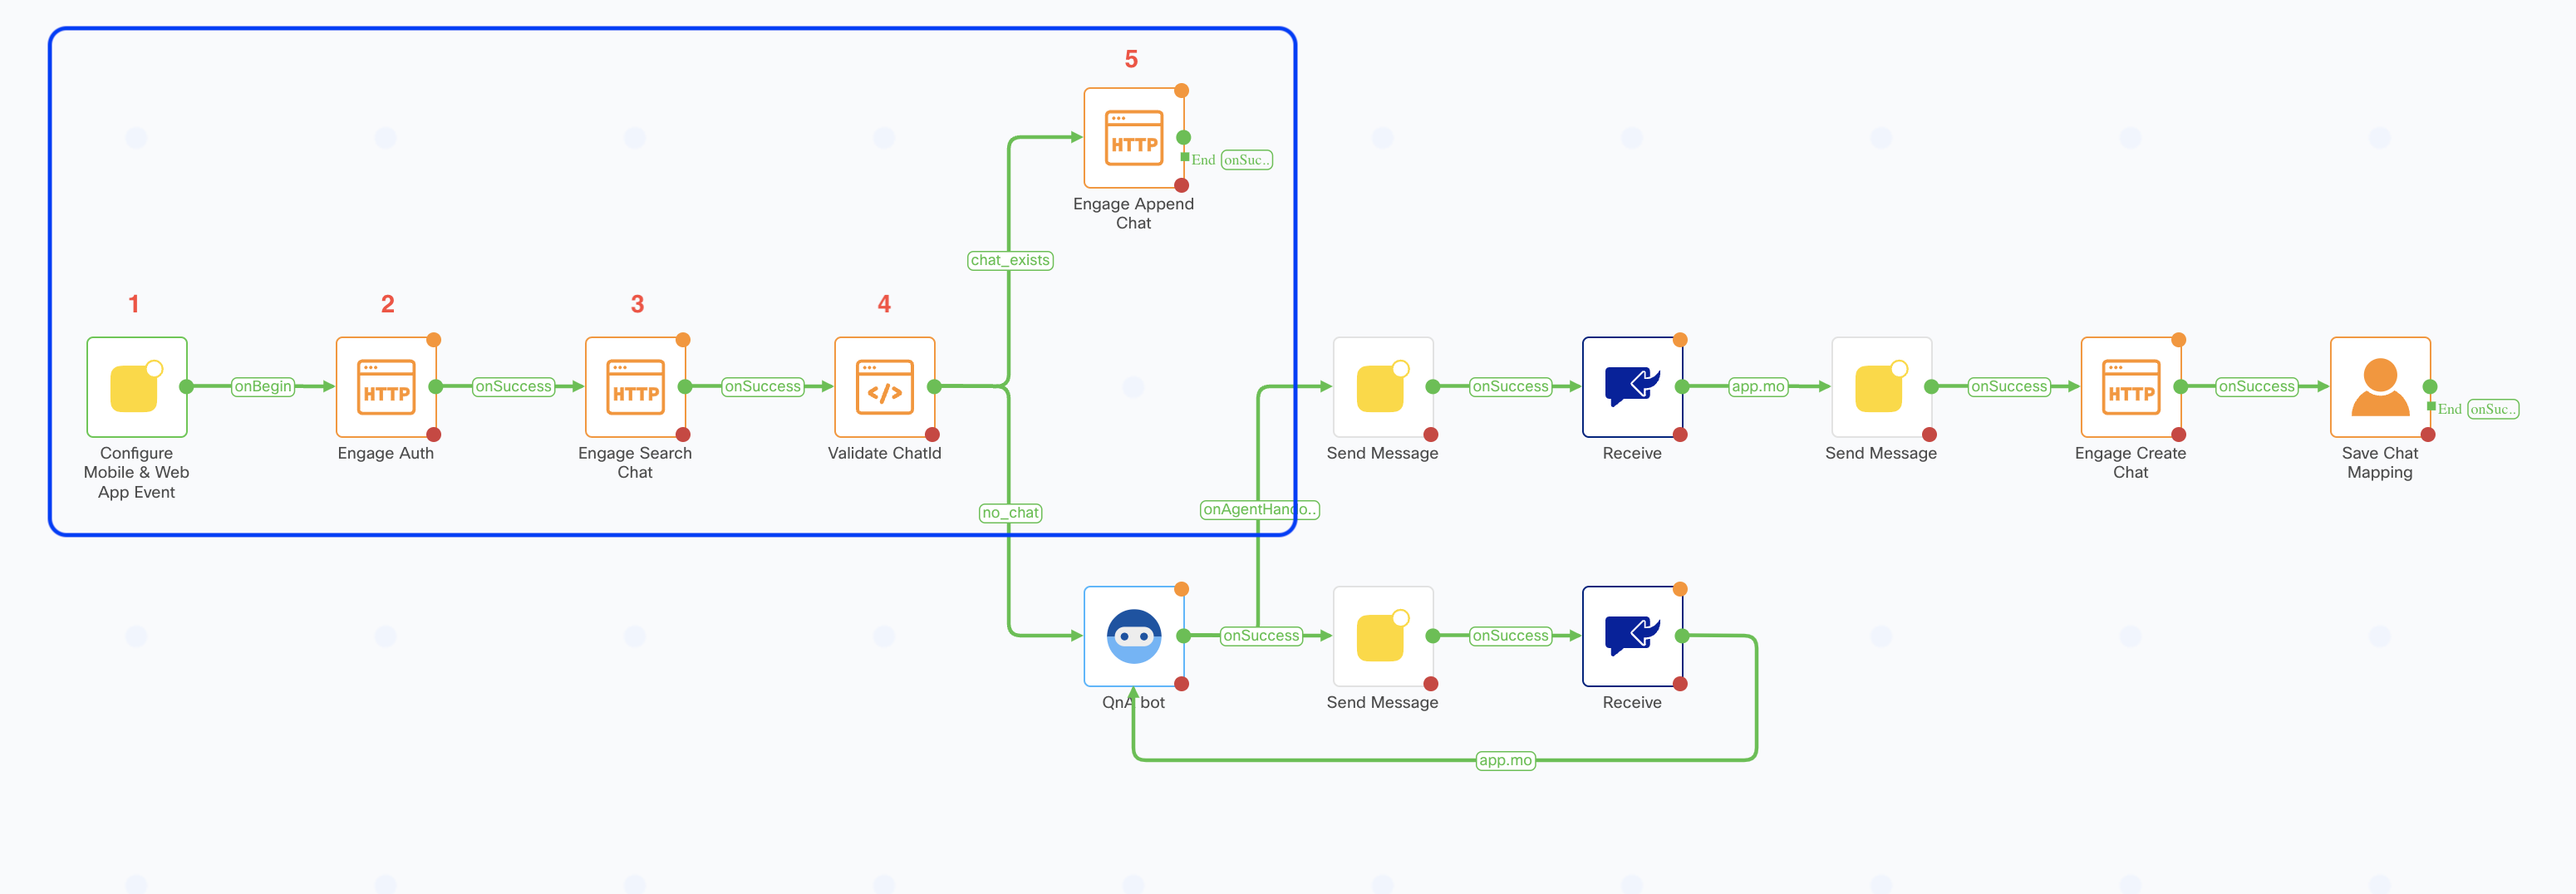
- The workflow starts with an In App node that is triggered when a new message is sent from the app.
- An HTTP node is used to call the Engage Authorize API to exchange an Auth code for an Access token.
- The Engage Chat Search API is called to determine if a chat already exists which corresponds to the Connect thread.
- An evalute node is used to determine whether the data returned from the Search API indicates that an Engage chat exists.
- Where an Engage chat does exist, the Chat API is called to append the message received from the app to the Engage chat.
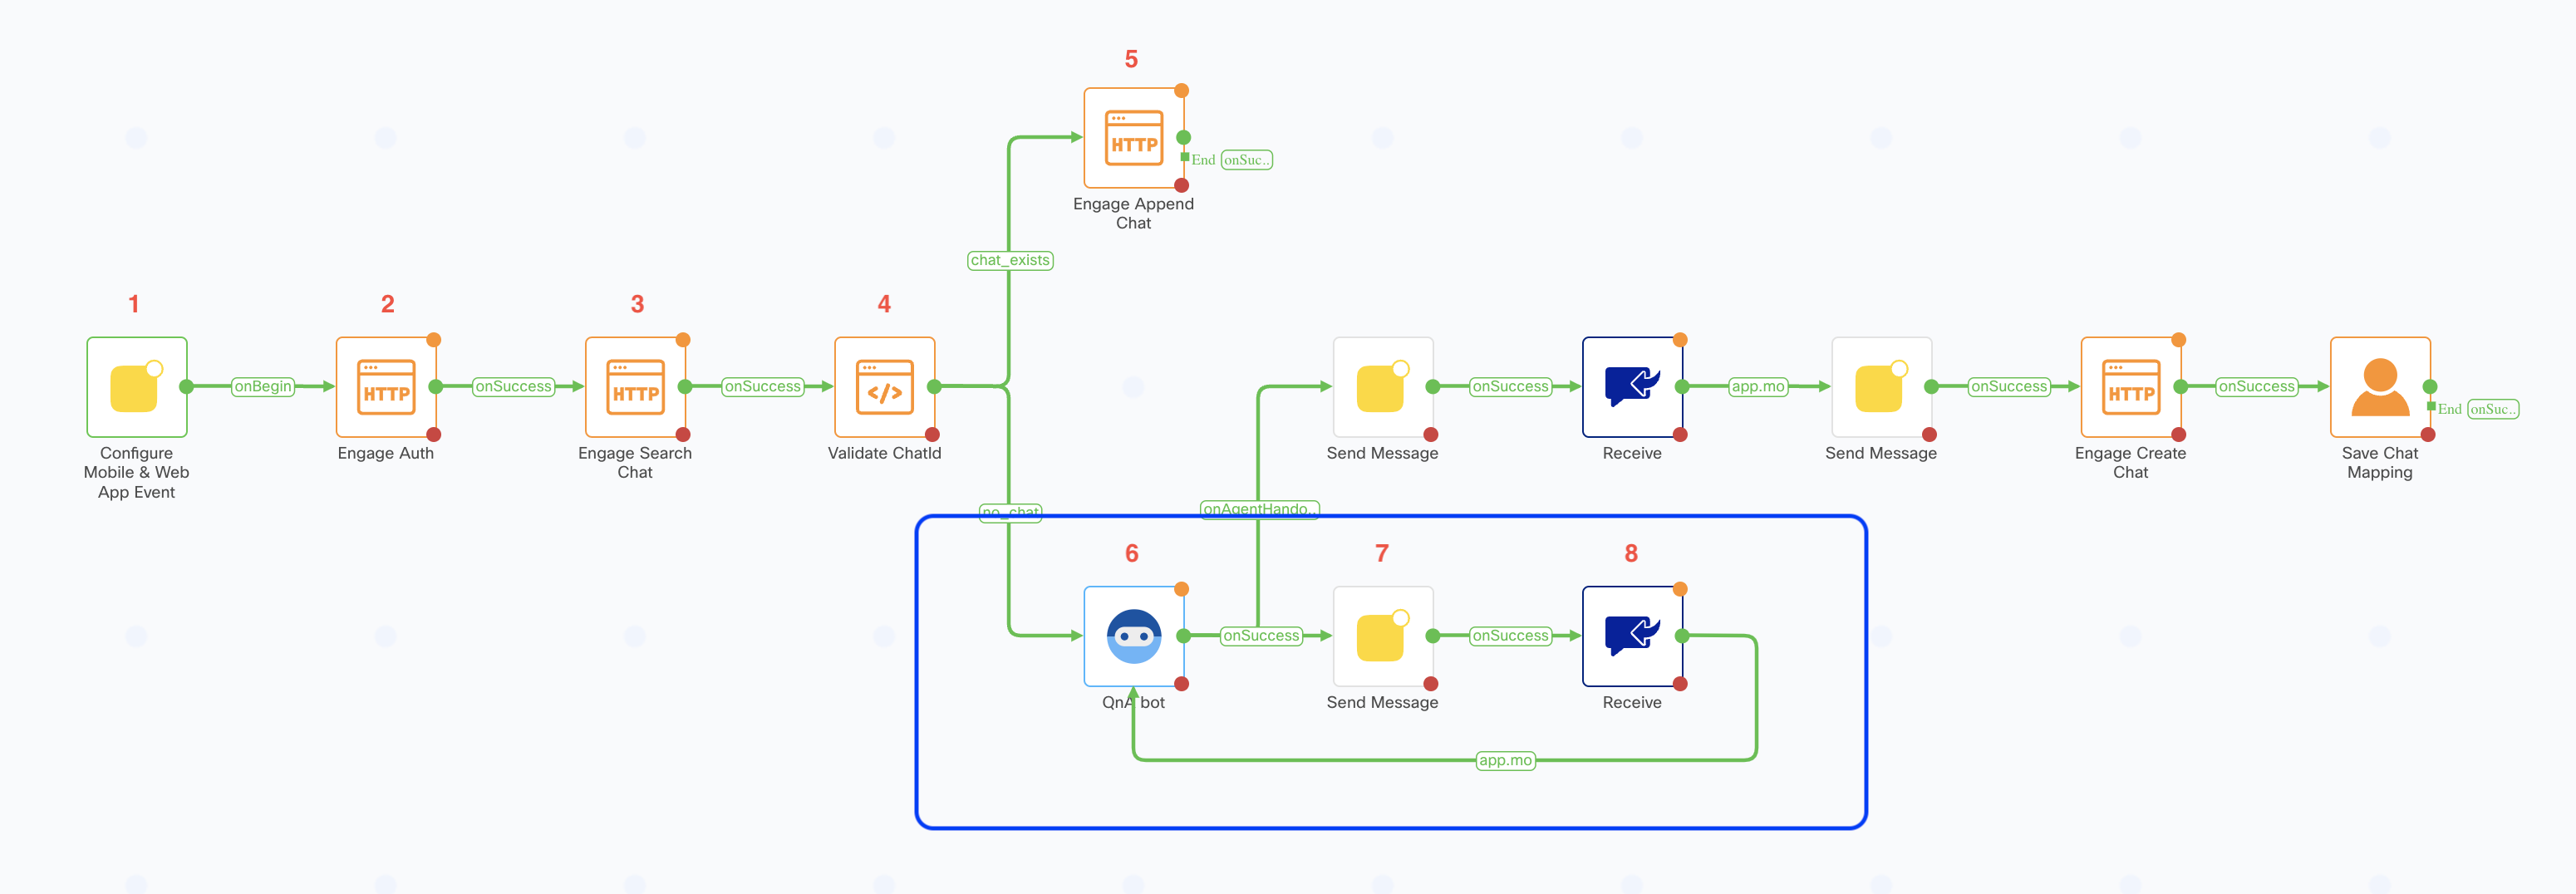
If an engage chat doesn't exist, we enter a bot message loop.
- The incoming message is routed to a Bot, the bot will process the message and return a response.
- An In App Message node sends the Bot response back to the app.
- The receive node waits for a response from the app user and loops back to pass the response to the Bot.
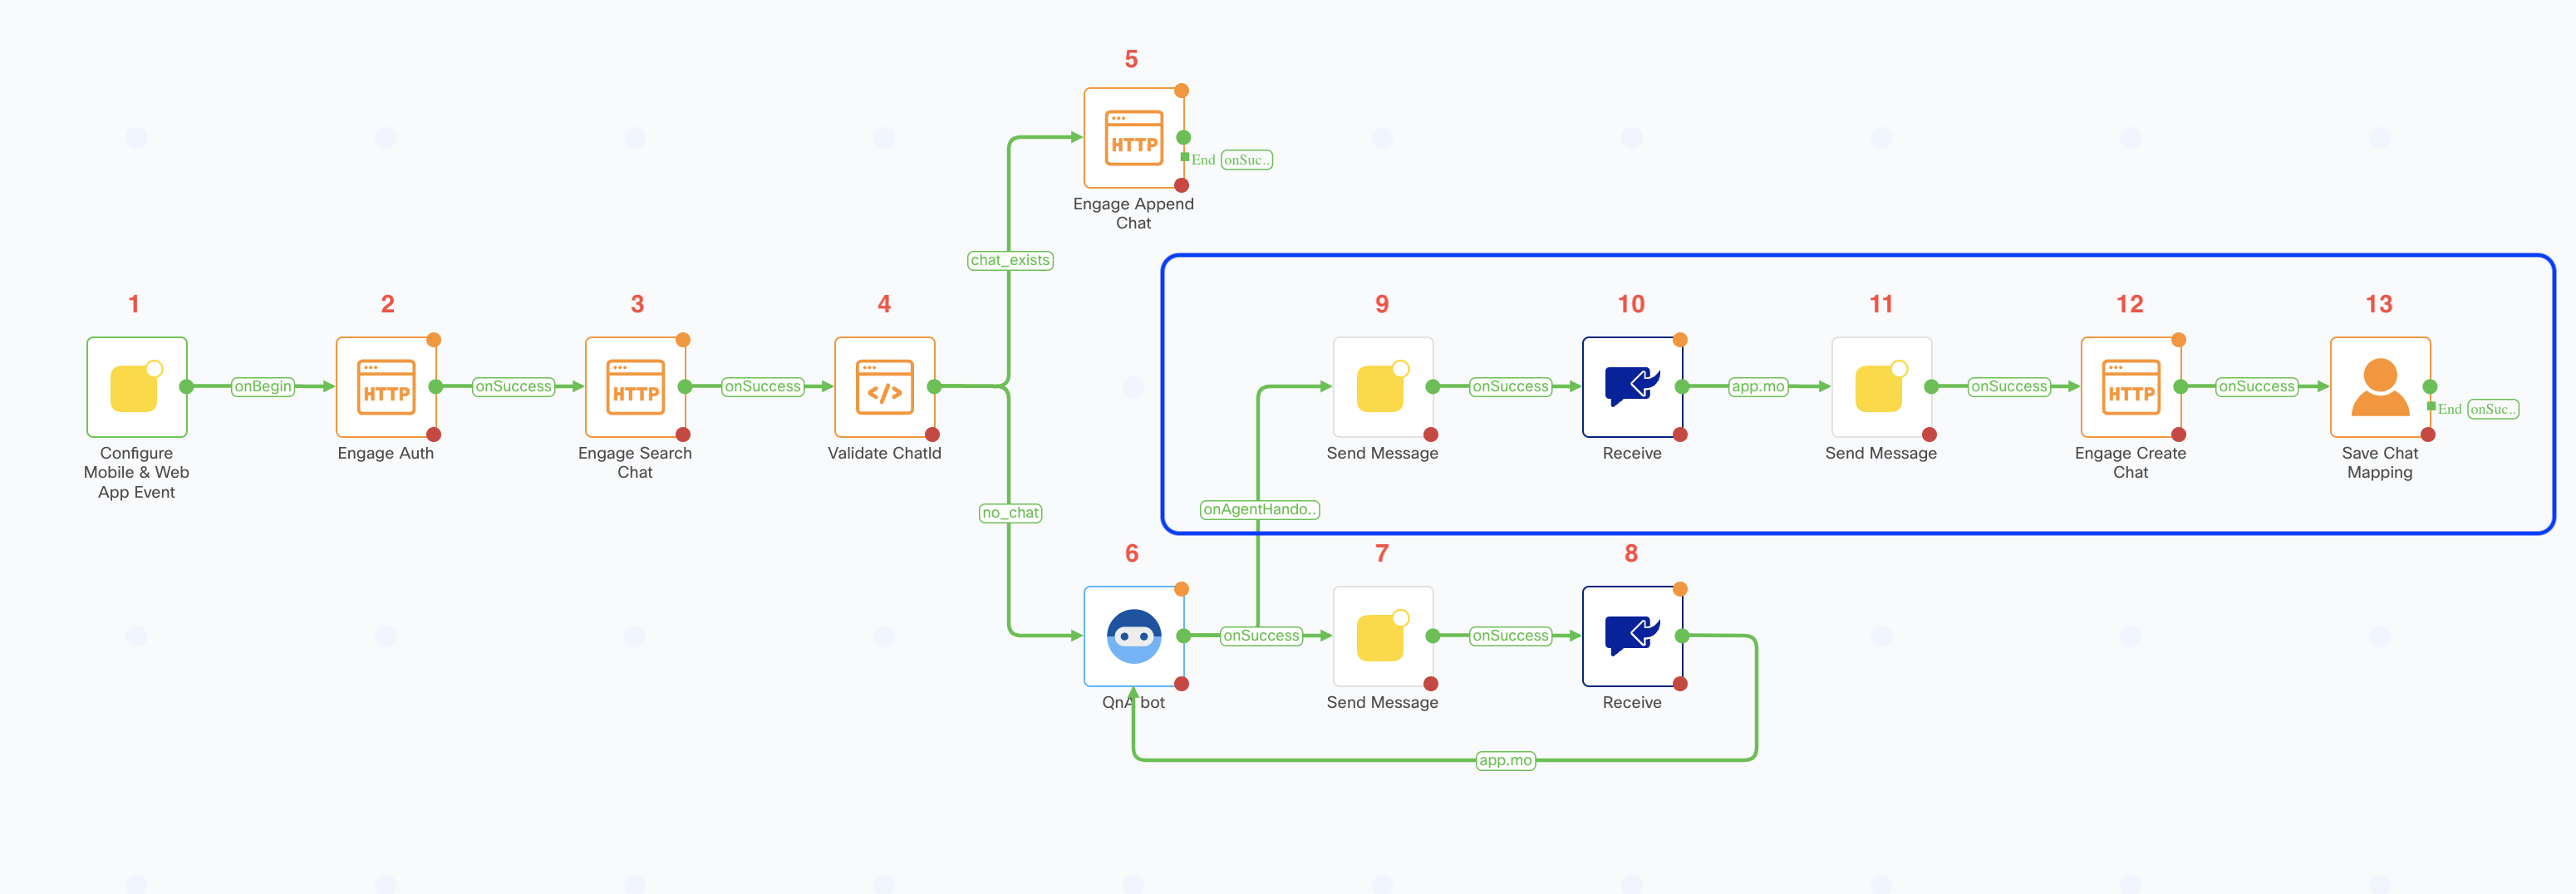
If the bot determines the chat needs to be passed to an agent, the agent handoff path is executed.
- A message is sent asking the app user to enter their name.
- The receive node waits for a response from the app user.
- A message is sent to the app user informing them they are being transferred to an agent.
- The Engage Chat API is called to create a chat.
- The mapping between the Engage Chat Id and the Connect Thread and User Ids are stored.
In App MT Workflow walkthrough
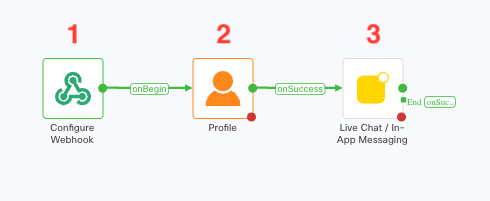
- The workflow starts with a Webhook node that is triggered when a new message is sent from Engage.
- The Connect Thread and User Ids are loaded from the store. This mapping was previously stored within the MO flow.
- The message from Engage is sent to the app.