This documentation corresponds to an older version of the product, is no longer updated, and may contain outdated information.
Please access the latest versions from https://cisco-tailf.gitbook.io/nso-docs and update your bookmarks. OK
You can manipulate data in the CDB with the help of XML files or the UI, however, these approaches are not well suited for programmatic access. NSO includes libraries for multiple programming languages, providing a simpler way for scripts and programs to interact with it. The Python Application Programming Interface (API) is likely the easiest to use.
This chapter will show you how to read and write data using the Python programming language. With this approach, you will learn how to do basic network automation in just a few lines of code.
The environment setup that happens during the sourcing of the
ncsrc file also configures the
PYTHONPATH environment variable. It allows the Python
interpreter to find the NSO modules, which are packaged with the
product. This approach also works with Python virtual environments and
does not require installing any packages.
Since the ncsrc file takes care of
setting everything up, you can directly start the Python interactive
shell and import the main ncs module. This
module is a wrapper around a low-level C _ncs
module that you may also need to reference occasionally. Documentation
for both of the modules is available through the built-in
help() function or separately in the HTML format.
If the import ncs statement fails, please
verify that you are using a supported Python version and that you have
sourced the ncsrc beforehand.
Generally, you can run the code from the Python interactive shell
but we recommend against it. The code uses nested blocks, which are hard
to edit and input interactively. Instead, we recommend you save the code
to a file, such as script.py, which you can then
easily run and rerun with the python3 script.py command.
If you would still like to interactively inspect or alter the values
during the execution, you can use the
import pdb; pdb.set_trace() statements at the location of
interest.
With NSO, data reads and writes normally happen inside a
transaction.
Transactions ensure consistency and avoid race conditions, where
simultaneous access by multiple clients could result in data corruption,
such as reading half-written data.
To avoid this issue, NSO requires you to first start a transaction
with a call to ncs.maapi.single_read_trans() or
ncs.maapi.single_write_trans(),
depending on whether you want to only read data or read and write data.
Both of them require you to provide the following two parameters:
- user
-
Username (string) of the user you wish to connect as
- context
-
Method of access (string), allowing NSO to distinguish between CLI, web UI, and other types of access, such as Python scripts
These parameters specify security-related information that is used for auditing, access authorization, and so on. Please refer to The AAA infrastructure in Administration Guide for more details.
As transactions use up resources, it is important to clean up after
you are done using them.
Using a Python with code block will ensure that clean up is
automatically performed after a transaction goes out of scope.
For example:
with ncs.maapi.single_read_trans('admin', 'python') as t:
    ...
In this case, the variable t stores the
reference to a newly started transaction. Before you can actually access
the data, you also need a reference to the root element in the data
tree for this transaction. That is, the top element, under which all of
the data is located. The ncs.maagic.get_root()
function, with transaction t as a parameter,
achieves this goal.
Once you have the reference to the root element, say in a variable
named root, navigating the data model becomes
straightforward. Accessing a property on root
selects a child data node with the same name as the property.
For example, root.nacm gives you access to the
nacm container, used to define fine-grained access control.
Since nacm is itself a container node, you can select
one of its children using the same approach.
So, the code root.nacm.enable_nacm refers to another
node inside nacm, called enable-nacm.
This node is a leaf, holding a value, which you can print out with the
Python print() function.
Doing so is conceptually the same as using the
show running-config nacm enable-nacm command
in the CLI.
There is a small difference, however. Notice that in the CLI the
enable-nacm is hyphenated, as this is the actual node name
in YANG. But names must not include the hyphen (minus) sign in Python,
so the Python code uses an underscore instead.
The following is the full source code that prints the value:
import ncs

with ncs.maapi.single_read_trans('admin', 'python') as t:
    root = ncs.maagic.get_root(t)
    print(root.nacm.enable_nacm)
As you can see in this example, it is necessary to import only the
ncs module, which automatically imports all the
submodules. Depending on your NSO instance, you might also notice
that the value printed is True,
without any quotation marks.
As a convenience, the value gets automatically converted
to the best-matching Python type, which in this case is a boolean
value (True or False).
Moreover, if you start a read/write transaction instead of a
read-only one, you can also assign a new value to the leaf.
Of course the same validation rules apply as using the CLI and you need
to explicitly commit the transaction if you want the changes to persist.
A call to the apply() method on the transaction
object t performs this function. Here is an example:
import ncs

with ncs.maapi.single_write_trans('admin', 'python') as t:
    root = ncs.maagic.get_root(t)
    root.nacm.enable_nacm = True
t.apply()You can access a YANG list node in a manner similar to how you
access a leaf. However, working with a list more resembles
working with a Python dict than a list, even
though the name would suggest otherwise. The distinguishing feature
is that YANG lists have keys that uniquely identify each list item.
So, lists are more naturally represented as a kind of a dictionary
in Python.
Let's say there is a list of customers defined in NSO, with a YANG schema such as:
container customers {
  list customer {
    key "id";
    leaf id {
      type string;
    }
  }
}
To simplify the code, you might want to assign the value of
root.customers.customer to a new variable
our_customers.
Then you can easily access individual customers (list items) by their
id. For example, our_customers['ACME'] would
select the customer with id equal to ACME.
You can check for the existence of an item in a list using the Python
in operator, for example,
'ACME' in our_customers.
Having selected a specific customer using the square bracket syntax,
you can then access the other nodes of this item.
Compared to dictionaries, making changes to YANG lists is quite a
bit different. You cannot just add arbitrary items because they must
obey the YANG schema rules.
Instead, you call the create() method on the list
object and provide the value for the key. This method creates and returns
a new item in the list if it doesn't exist yet. Otherwise, the method
returns the existing item. And for item removal, use the Python
built-in del function with the list object and
specify the item to delete. For example,
del our_customers['ACME']
deletes the ACME customer entry.
In some situations, you might want to enumerate all of the list
items. Here, the list object can be used with the Python for
syntax, which iterates through each list item in turn. Note that this
differs from standard Python dictionaries, which iterate through the keys.
The following example demonstrates this behavior.
import ncs

with ncs.maapi.single_write_trans('admin', 'python') as t:
    root = ncs.maagic.get_root(t)
    our_customers = root.customers.customer

    new_customer = our_customers.create('ACME')
    new_customer.status = 'active'

    for c in our_customers:
      print(c.id)

    del our_customers['ACME']
    t.apply()
Now let's see how you can use this knowledge for network automation.
-
No previous NSO or netsim processes are running. Use the ncs --stop and ncs-netsim stop commands to stop them if necessary.
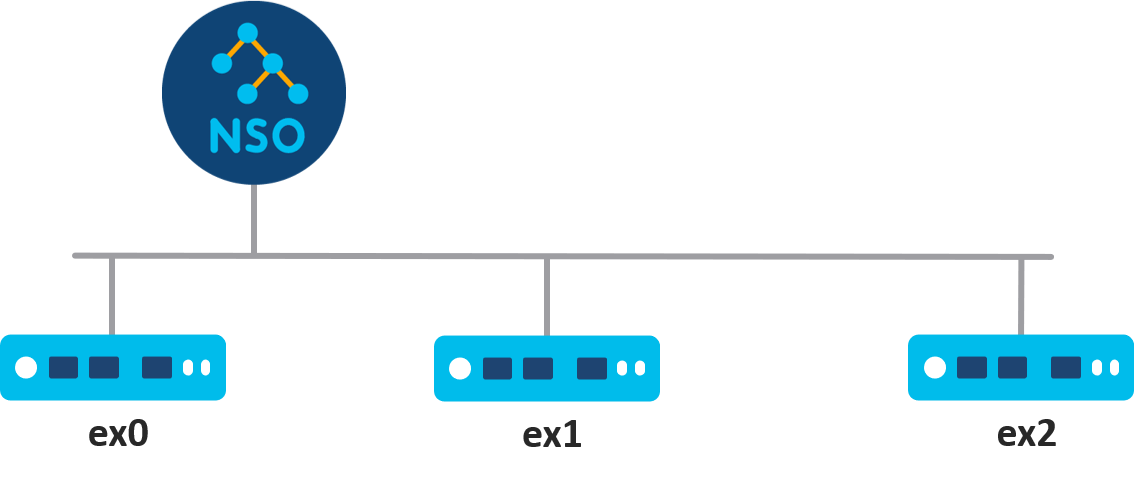
Leveraging one of the examples included with the NSO installation allows you to quickly gain access to an NSO instance with a few devices already onboarded. The “getting-started/developing-with-ncs” set of examples contains three simulated routers that you can configure.
Navigate to the 0-router-network directory
with the following command:
$ cd $NCS_DIR/examples.ncs/getting-started/developing-with-ncs/0-router-networkYou can prepare and start the routers by running the make and netsim commands from this directory.
$ make clean all && ncs-netsim startWith the routers running, you should also start the NSO instance that will allow you to manage them.
$ ncsIn case the ncs command reports an error about an address already in use, you have another NSO instance already running that you must stop first (ncs --stop).
Before you can use Python to configure the router, you need to know what to configure. The simplest way to find out how to configure the DNS on this type of a router is by using the NSO CLI.
$ ncs_cli -C -u adminIn the CLI, you can verify that the NSO is managing three routers and check their names with the following command:
admin@ncs# show devices listTo make sure that the NSO configuration matches the one deployed on routers, also perform a sync-from action.
admin@ncs# devices sync-fromLet's say you would like to configure the DNS server 192.0.2.1 on the ex1 router. To do this by hand, first enter the configuration mode.
admin@ncs# configThen navigate to the NSO copy of the ex1 configuration,
which resides under the devices device ex1 config path, and
use the ? and TAB keys to explore the
available configuration options. You are looking for the DNS
configuration.
admin@ncs(config)# devices device ex1 configOnce you have found it, you see the full DNS server configuration path is:
devices device ex1 config sys dns server
As an alternative to using the CLI approach to find this path,
you could also consult the data model of the router in the
packages/router/src/yang/ directory.
As you won't be configuring ex1 manually at this point, exit the configuration mode.
admin@ncs(config)# abortInstead, you will create a Python script to do it, so exit the CLI as well.
admin@ncs# exitYou will place the script into the
ex1-dns.py file. In a text editor, create a
new file and add the following text at the start:
import ncs

with ncs.maapi.single_write_trans('admin', 'python') as t:
    root = ncs.maagic.get_root(t)
The root variable allows you to access
configuration in the NSO, much like entering the configuration
mode on the CLI does.
Next, you will need to navigate to the ex1 router. It makes
sense to assign it to the ex1_device variable,
which makes it more obvious what it refers to and easier to access
in the script.
ex1_device = root.devices.device['ex1']
In NSO, each managed device, such as the ex1 router, is an
entry inside the device list. The list itself is located in
the devices container, which is a common practice for lists.
The list entry for ex1 includes another container,
config, where the copy of ex1 configuration is kept.
Assign it to the ex1_config variable.
ex1_config = ex1_device.config
Alternatively, you can assign to ex1_config
directly, without referring to ex1_device, like so:
ex1_config = root.devices.device['ex1'].config
This is the equivalent of using
devices device ex1 config on the CLI.
For the last part, keep in mind the full configuration path you
found earlier. You have to keep navigating to reach the server
list node. You can do this through the sys and dns
nodes on the ex1_config variable.
dns_server_list = ex1_config.sys.dns.server
DNS configuration typically allows specifying multiple servers
for redundancy and is therefore modeled as a list. You add a new DNS
server with the create() method on the list object.
dns_server_list.create('192.0.2.1')Having made the changes, do not forget to commit them with a
call to apply() or they will be lost.
t.apply()
Alternatively, you can use the dry-run parameter with the
apply_params() to, for example, preview what will be
sent to the device.
    params = t.get_params()
    params.dry_run_native()
    result = t.apply_params(True, params)
    print(result['device']['ex1'])
    t.apply_params(True, t.get_params())
Lastly, add a simple print statement to notify you when then script completes.
print('Done!')Save the script file as ex1-dns.py and run
it with the python3 command:
$ python3 ex1-dns.pyYou should see Done! printed out.
Then start the NSO CLI to verify the configuration change.
$ ncs_cli -C -u adminFinally, you can check the configured DNS servers on ex1 by using the show running-config command.
admin@ncs# show running-config devices device ex1 config sys dns serverIf you see the 192.0.2.1 address in the output, you have successfully configured this device using Python!
The code in this chapter is intentionally kept simple to demonstrate the core concepts and lacks robustness in error handling. In particular, it is missing the retry mechanism in case of concurrency conflicts as described in the section called “Handling Conflicts”.
Perhaps you've wondered about the unusual name of the Python
ncs.maagic module? It is not a typo but a
portmanteau of the words Management Agent API (MAAPI) and magic.
The latter is used in the context of so-called magic methods in Python.
The purpose of magic methods is to allow custom code to play nicely with
the Python language. An example you might have come across in the past
is the __init__() method in a class, which gets
called whenever you create a new object. This one and similar methods
are called magic because they are invoked automatically and
behind-the-scenes (implicitly).
The NSO Python API makes extensive use of such magic methods
in the ncs.maagic module. Magic methods help
this module translate an object-based, user-friendly programming interface
into low-level function calls.
In turn, the high-level approach to navigating the data hierarchy with
ncs.maagic objects is called the
Python Maagic API.