Topologies
Whereas static testbeds define the physical network devices that work together as a test platform that your tests are executed against, LaaS-NG is a network orchestration tool used to create on-the-fly LaaS testbeds (based on LaaS-NG topologies) that can contain both physical and virtual hardware to represent or describe Cisco platforms. Topologies are one layer above a testbed and describe how a testbed can be constructed.
LaaS-NG brings up the nodes in the topology, dynamically stitches the requested devices together and links them using a pool of available devices to create the network connections between the nodes. LasS-NG is also referred to as a dynamic or logical testbed.
How Topologies are Managed by XPRESSO?
Support for registering topologies in XPRESSO requires a backend orchestrating engine. By default/design, the orchestrating engine used by XPRESSO is the Cisco LaaS-NG.
Note the following operational details/requirements/attributes that apply to topologies in XPRESSO:
Topologies are currently supported for LaaS in XPRESSO, but not for static topologies.
In order to create a Job, the topology, Execution Engine, and Test Harness must be in the same geographical location.
If your Group uses LaaS to manage their lab and testing resources, you need to register the LaaS instance and Domain with XPRESSO to use the topologies within that Domain for your Job Runs. See "LaaS Instances and Domains" for information about:
How LaaS can be used with XPRESSO to remove the burden of having to create physical testbeds for each and every test.
How to request that a System Admin add (register) a LaaS Instance in XPRESSO for a Group.
How to determine which LaaS Domains are registered for a Group.
When the LaaS Domain registry is completed by the System Admin, the topology in a given LaaS Domain is associated with a working Group. You can then associate one or more of the registered LaaS Domains associated with a topology to a Job Run. See "Specifying which LaaS Testbed(s) are Used for Job Runs?" for additional information.
Also see the "LaaS Testbed Attributes" topic for additional information about how Topologies are managed by XPRESSO.
Virtual Topologies vs. Physical Topologies
Virtual topologies define a pool of virtual devices (e.g.: in a VM environment) which can be orchestrated and linked in order to create a testbed upon request.
Physical (hardware) topologies are a pool of physical devices which can be linked for the same purpose. Both topologies provide the re-use of devices and virtual space.
When topologies are used for a Job Run, the system generates LaaS testbeds for the execution during the Job Run and then tears them down once the run is completed.
NOTE:
You have the option to specify that a LaaS testbed not be torn down after the Job Run completes in case you need to debug or triage a problem. As required, configure the "Keep Testbed Intact After Runtime" parameter on the Job Request Wizard.
Viewing LaaS Topologies
To view available LaaS topologies in XPRESSO, go to the Topologies page. (Main Navigation Bar→Main Menu→RESOURCES→Topologies).
Topologies are depicted using the following three image representations on the Topologies page; the following information is provided for all three image Types: Name of the Topology | Path to the Topology | Associate Domain:
XPRESSO default image: This image indicates a topology has been requested but has not been configured yet using the LaaS Canvas Editor or a User-generated image has not been used and therefore, no image is currently available to display in XPRESSO; a stand-in (default) image is used to pictorially indicate this on the topologies page.
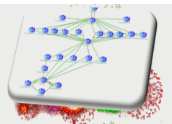
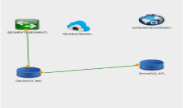
LaaS Canvas Editor image: This image is derived from the image created by the LaaS Canvas Editor that can be accessed directly from XPRESSO (see step 4b in the "To create a New Topology" procedure below for information about how to launch this tool).
User-generated image (not shown pictorially). Can be any image a User has chosen from within the LaaS GUI or uploaded into the LaaS tool.
NOTE:
If a topology image fails to render correctly on the topology page (no image is displayed; just a blank screen), the problem can be attributed to the image not correctly rendering on the LaaS GUI. See the LaaS-NG user documentation for corrective action.
Clean Operations on Topologies/LaaS Testbeds
When you run a job/profile on a topology, the LaaS testbed is orchestrated for the Job run and if a Clean option is selected, the corresponding clean file is launched on testbed devices as part of the job/profile run.
Exception with Device Folders
If you use the LaaS Canvas Editor to model the required topology, you have the option to add a device folder to the topology. When you use a device folder in these topologies:
XPRESSO is not able to determine in advance which exact device in the folder will be free and used as part of the LaaS testbed orchestration.
As a result, XPRESSO is limited to performing platform level Clean operations on these LaaS testbed devices as part of the job/profile run.
Running Clean Operations
Two options are available to run a Clean operation on topologies:
- For Virtual topologies: You can provide an OVA image; LaaS in turn brings up the virtual testbed (this provides the equivalent of performing a Clean operation).
- For Physical topologies: Follow these steps ...
Register the Clean yaml for each Topology / Device / Platform in LaaS.
Run your job/profile on the specific LaaS topology with the Clean option selected. See "Creating Job Profiles in XPRESSO" for more information.
OR
Reserve the topology first. Wait until the LaaS testbed is generated for the reservation. See "Reserving a Topology" for more details.
Add a clean file for the orchestrated LaaS testbed.See "Cleaning a Testbed" for additional information about how to add a Clean YAML file to clean a testbed.
Run your job/profile on the specific LaaS testbed with the Clean option selected. See "Creating Job Profiles in XPRESSO" for more information.
NOTE:
When running a Clean on virtual devices, it may be necessary to modify the Clean yaml connection block for each device (as shown below) to instruct the Clean operation to wait for the device to be ready before proceding.
devices:
  <dev>:
    connect:
      retry_timeout: 100
      retry_interval: 100
Registering New Topologies
Both Privilege Members and Group Admins can register new topologies in XPRESSO:
To Register a New Topology:
From the Main Navigation Bar, choose Main Menu→RESOURCES→Topologies to open the Topologies page.
Click the Topology button located on the right side of the page. The Create a Topology page opens.
Configure both the Topology Name and the LaaS Domain parameters and click Save. The screen refreshes to the LaaS View in the Topology Wizard.
As required, toggle between the following steps in the Topology Wizard:
- Overview (Informational): Provides a general summary about the topology such as:
- Location (path) Details
- Associated LaaS Domain
- Type of Topology: Physical | Virtual
- Domain Maximum Reservation Duration
- Minimum Reservation Duration
- Creation Date and the User who created it.
- LaaS View: Allows you to:
- Launch the LaaS-NG GUI using the LaaS Canvas Editor from within XPRESSO.
- Drag-and-drop devices/interfaces/Lab tools on the left-side of the LaaS Canvas Editor to the right-side of the canvas to create virtual or hardware topologies (this depends on which object_type you are adding on the canvas).
- As you build your topology, click the Save button (bottom-left side of the Canvas) as required to upload the data into XPRESSO. These topologies are capable of orchestrating your LaaS Testbeds.
TIP:
Use the scroll wheel on your mouse to quickly zoom in/out of a region as you build your topology or alternatively, use the area magnifying window (top-right corner) to bear down on a region.- Reservations: The Reservations step allows you to:
- See all pending Reservations made on the topology.
- Click the Reserve button to make a new reservation for the topology (provides a Quick Link to the Reserving topology page.
- History: Click on the History step to see all History Tracking Details about all significant events that occurred to the topology such as the creation date and when it was last modified.
Post-registration Topology Operations
You can perform the following post-registration management operations with topologies from the Topologies page. (Main Navigation Bar→Main Menu→RESOURCES→Topologies).
View Topology details via the Overview panel in the Topology Wizard; see step 4a in the above procedure for which information can be viewed.
Edit: Provides the same functionality as detailed in Step 4b in the above procedure.
Clone: Allows you to make a duplicate of an existing topology. See the next sub-topic below for explanation about how the Clone function differs from the Snapshot function.
Reserve: Provides the same functionality as detailed in Step 4c in the above procedure.
Delete: Allows you to delete the topology from the XPRESSO database.
Cloning vs. Snapshot Functionality Explained
XPRESSO has two similar functional terms related to topologies:
Cloning a Topology
Taking a Snapshot of a Topology
This topic clarifies the similarities and differences between them:
Cloning a Topology
Purpose: Allows you to make a duplicate of an existing topology so it can be reused for another Job Run or modified to create another topology model (objects can be added, deleted, or modified as required via the LaaS Canvas Editor).
What gets replicated: Cloning only replicates the parent topology objects (devices/interfaces/Lab tools) and does not replicate any associate children objects such as reservation(s), testbed, or Job Request information.
Where do you perform this action: Cloning a topology is performed on the Topologies page. See the "Post-registration Topology Operations" topic above.
Other associate attributes:
There is no limit on the number of times you can clone a topology (but it is dependent of the availability of devices within LaaS itself (they must be present). If a device is no longer available in LaaS, you cannot clone the topology in XPRESSO.
When a topology is cloned, it is still subject to any localized configuration changes made on the LaaS side. For example, if a device has been temporarily disabled in LaaS (but can still be selected with the LaaS Canvas Editor in XPRESSO), you will be unable to reserve it via XPRESSO until the device is re-enabled/back online via LaaS.
You can clone an existing topology at any time; there are no operational restrictions preventing this action.
Depending on the domain and instance you are cloning to, cloning a topology could take anywhere between a few seconds to a few minutes.
For topologies cloned to a different domain, the actual content and image sync could take a few minutes.
TIP:
When cloning topologies across domains, that is, from one domain to another, ensure that the destination instance is reachable and the devices (from source domain) also exist in the destination domain.
Taking a Snapshot of a Topology
Purpose: Allows you to take a snapshot of an existing LaaS topology and it's configuration at that point in time so it can be reused to re-create the test environment at a later time. This significantly decreases the time to set up a LaaS-NG topology since the entire test infrastructure is replicated.
What gets replicated: Taking a snapshot replicates both the parent topology objects (devices/interfaces/Lab tools) and all associate children test environment objects such as reservation(s), testbed, and Job Request information.
Where do you perform this action: You can take a snapshot of an existing LaaS topology on the Registered Reservations page. See the "Post-registration Reservation Operations" topic in "Reserving Testbeds and Topologies" for more information.
Other associate attributes:
Once you take the snapshot and it is saved to the XPRESSO database, you can access all snapshots associated with a parent topology via the topology page. They do not show up on the main topologies page but within the snapshot section of the parent topology from which the snapshot was taken. The snapshot section of the parent topology lists all snapshots taken.
You can only take a snapshot of a LaaS-NG topology (and its children objects) that has a Reservation in an active operational state.
When you take a snapshot of a LaaS-NG topology, a message displays immediately on the dashboard to acknowledge your request to take a snapshot was received by XPRESSO. However, depending on the complexity of the topology, creating and saving the snapshot can range from minutes to hours.
There is no limit on the number of times you can take a snapshot of a topology but they are subject to the same LaaS dependencies rules as Cloned topologies (see above for details).
All actions (operations) that can be performed on a Cloned topology, can also be performed on a topology taken with a snapshot (including cloning a snapshot to create a new topology).