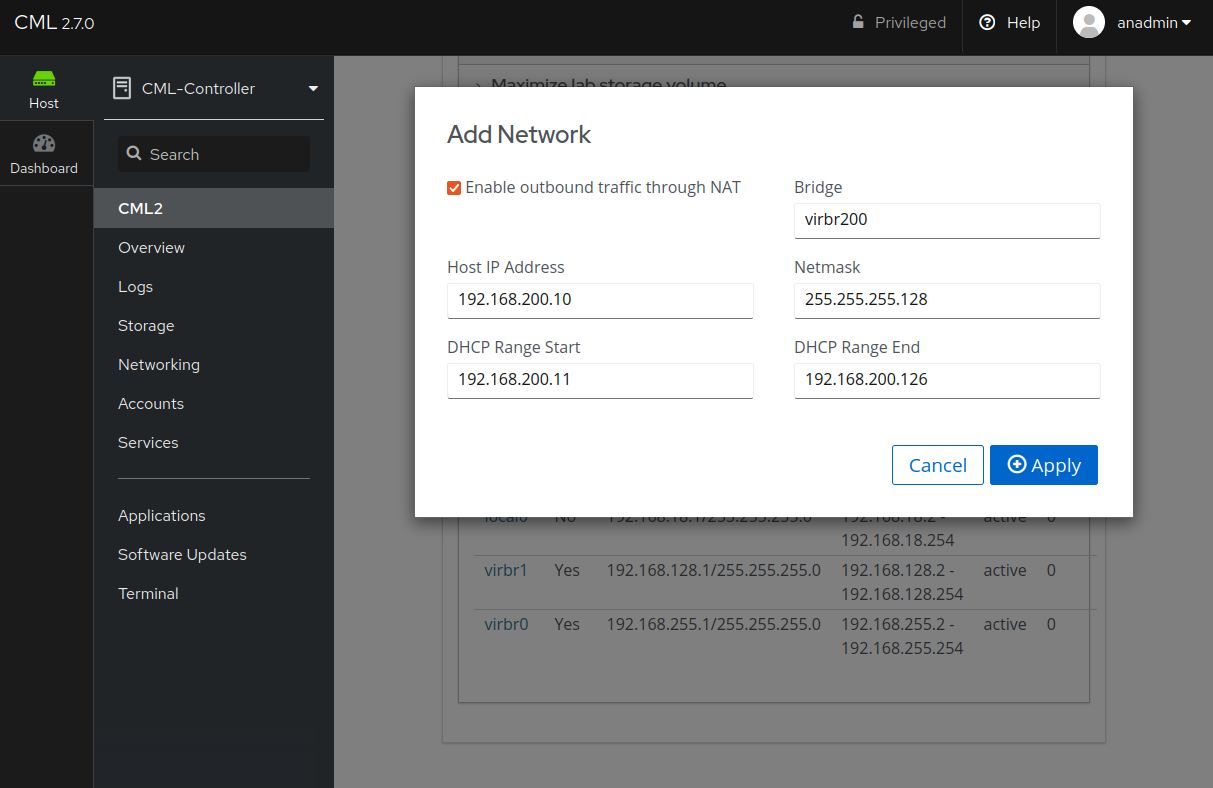
Adding DHCP Network Bridges
This procedure creates a new DHCP network and an associated bridge interface on the CML host. Prepare a suitable IPv4 subnet which is large enough for all lab nodes which will be connected to it at the same time.
You may reserve some addresses for static configuration by making the range of automatically assigned addresses smaller than the network.
Procedure
Log into the System Administration Cockpit as the system administrator account. See Logging into the System Administration Cockpit.
Click CML2 in the navigation bar on the left side of the page.
Expand the DHCP Networks section.
Click the Add Network button to open a dialog.
If the created network should not support NAT, uncheck the respective checkbox.
(Optional) Adjust the bridge name for the new network; the dialog will suggest the first unused bridge with the correct base name.
Enter the Host IP Address for the CML bridge from the desired subnet. This address must be neither the network nor broadcast address of the new subnet.
Enter the netmask or CIDR prefix between 2 and 30 into the Netmask input.
Adjust the first and last addresses for the range of IP addresses within the new subnet which will be assigned to lab nodes via DHCP, into the DHCP Range Start and DHCP Range End input fields, respectively. The range must contain at least one address, and must contain none of the network, CML host, or broadcast addresses of the configured subnet.
When you change the host or subnet values and thus make the current range invalid, then the dialog range will adjust to the largest set which excudes the host IP.

Add DHCP Network Dialog
Click Apply.
The new bridge interface is now created appears in the Networks table. Repeat the process for any additional bridges, then continue with configuring the bridge using the Configuration of External Connector Bridges section of the Admin Guide.