Starting, Stopping, and Wiping Nodes
When starting a lab simulation, CML starts a virtual machine (VM) for each node in the lab. Similarly, stopping a lab or wiping a lab affects all of the nodes in the lab. If you want to start, stop, or wipe individual nodes, you can do that in the Workbench. If you are running a simulation, you can start, stop, or wipe individual nodes in that simulation without stopping the entire lab or interrupting the other nodes in the simulation.
Procedure
In the Workbench, select a node.
Click the Start, Stop, or Wipe button in the Settings tab in the Sidebar pane.
- Start
Starts a VM associated with the node.
Starting a node allocates a VM for the node if one does not already exist. If the node has been started before, it reuses the already-allocated resources, such as disk images and MAC addresses.
- Stop
Stops the VM associated with the node.
Stopping a node releases its memory and CPU resources. A stopped node is still present on the CML server and retains its disks and other properties for use when it is started again.
- Wipe Node
Deletes all state associated with the node.
Wiping a node removes all state and properties associated with the node from the CML server. The next time you start the node, CML will re-create it and assign new MAC addresses, disks, and other resources. Since a wiped node has no pre-existing state, the node will load its bootstrap configuration the first time it is restarted. The node’s bootstrap configuration can be found in the Config tab in the Sidebar pane.
Procedure
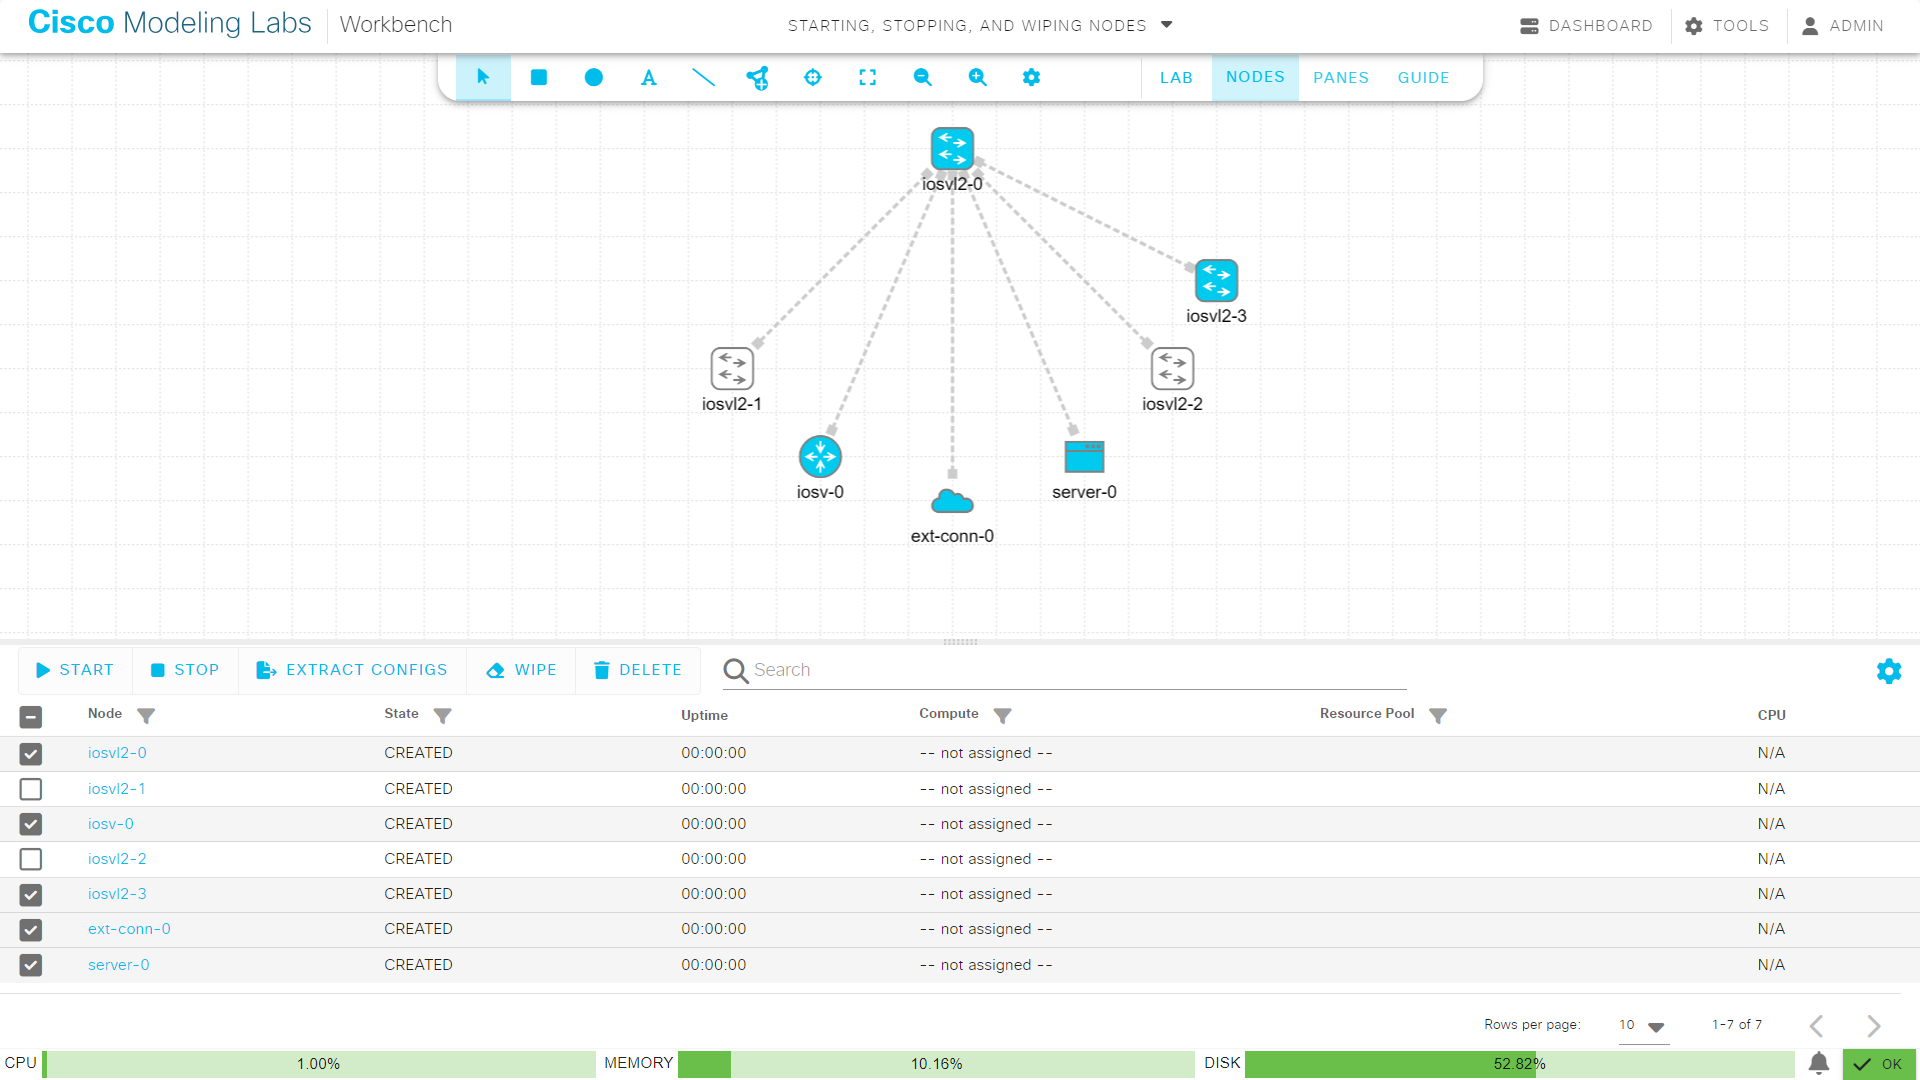
In the Workbench, click Nodes button in the toolbar.
Select single or multiple nodes in the Nodes pane and click the Start, Stop, or Wipe button.

The Workbench’s Nodes pane with Start, Stop, and Wipe actions
Related Topics