Adding Smart Annotations to a Lab
CML automatically creates a smart annotation for each distinct tag in your lab. The first time that you add a tag to a node in your lab, CML creates a smart annotation associated with that tag. The Workbench shows the smart annotation visualization in the canvas. If you don’t see the new smart annotation in the canvas, see Hiding and Showing Smart Annotations and confirm that your canvas settings are configured to show smart annotations.
Open the lab that you want to edit in the Workbench by clicking the lab tile or lab title in the Dashboard page.
Procedure
Click to select a node that you’d like to include in your smart annotation.
The Sidebar pane for that node is shown.
In the Settings page of the Sidebar, enter the new tag in the Tags field.
Don’t forget to press ENTER to add the tag.
The tag is added to the node, and CML automatically adds a smart annotation to the lab that is associated with the tag. The smart annotation is shown as a colored circle around the node in the canvas.
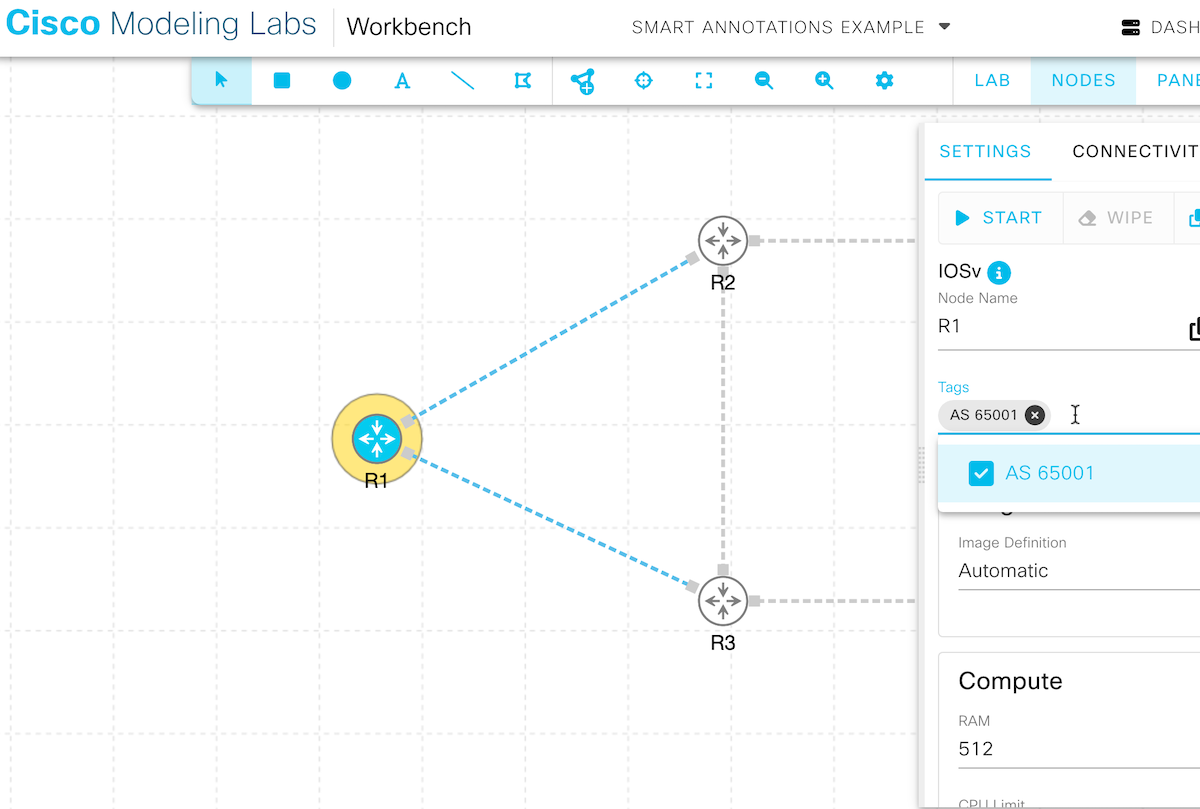
Smart annotation with one tagged node.
Your lab now has a new smart annotation associated with the new tag. You can add the tag to other nodes to include them in the smart annotation’s area. You can also select the smart annotation itself to configure its properties.
Related Information