Bare Metal Installation
Follow these instructions for a bare metal deployment of CML on a dedicated server. The bare metal installation process is semi-automated, similar to the OVA deployment as a CML VM. You should have already downloaded a copy of the CML controller ISO file and refplat ISO file.
The server where you plan to install CML must be configured for UEFI boot mode. You may enable secure boot, but this is optional.
The server will use its configured boot order. Ensure that the server is set to boot from the hard drive where CML is going to be installed, so that it boots that system after the installation completes.
Procedure
The CML controller ISO file is a bootable installer disc.
With a UCS Server, you can use the CIMC’s KVM console to mount the ISO file remotely as a mapped CD/DVD drive.
Slow transfer speeds or network disruptions during the installation process can cause the installation to fail.
We recommend uploading the controller ISO file to a datastore that is co-located with the server. For example, copying files from an ISO file on your local system to a server in your data center across a slow VPN connection will likely lead to a failed installation.
There is also a bug in CIMC that makes the process of copying files from the mapped ISO file to the disk take much longer. The bug affects only HTML5-based KVM console. If your server is running an affected CIMC version, either upgrade to an unaffected CIMC version or use CIMC’s Java-based console.
As an alternative option to KVM console, if you can put the ISO file onto a co-located webserver, you can use it to create a CIMC-mapped DVD drive in your server in the Virtual Media tab of CIMC Compute Remote Management.
Boot your server from the installer disc. With the CIMC KVM console, you would use <F6> to enter boot selection
menu and choose the entry mentioning UEFI and the vKVM- or CIMC-mapped DVD option, depending on the previous steps.
The installation process is automatic and non-interactive. The installer disc will load its operating system and verify the integrity of the installer disc (this may take a long time). It then configures itself for installation and finally installs CML to the selected disk device.
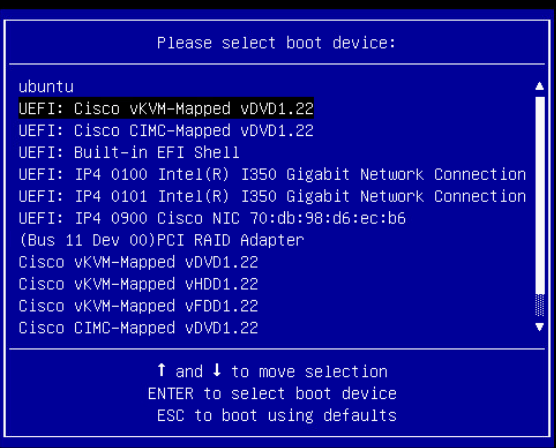
Selecting UEFI boot of vKVM- or CIMC-mapped DVD with the CML installer
By default, CML will be installed on the first available disk device. The selected and other disk options will be listed before the installation proceeds. In case there are multiple disks attached and the indicated selection is not correct, reboot the system before the installation proceeds, and force the disk selection using the procedure described in the next section.
Wait until the installation finishes.
When the installation process finishes, it will “eject” the ISO and reboot. When the server reboots, it should be configured to boot CML. On first boot, initial configuration procedure will take place.
Again, using the CIMC KVM console, mount the refplat ISO file remotely as a mapped CD/DVD drive. Do not set your system to boot from the mapped CD/DVD drive. Boot from the hard disk to start your new CML instance.
In case of installing a cluster compute host, the reference platforms are not needed and you can skip this step.
To complete the initial set-up script for the CML installation, you will need access to the server’s console so that you can configure the initial CML accounts and the CML server’s networking. You may work on the server’s local console to complete these steps, or you may use the CIMC virtual KVM console.
Your CML server will require that the reference platforms are accessible during the initial set-up steps. If you forgot to mount the refplat ISO file before starting the initial configuration, you can do it during the installation. You may need to press Retry multiple times before the refplat ISO is mounted, and the initial set-up script recognizes that the reference platforms are available. You may also choose to skip copying the reference platforms during the initial setup and do that manually at a later time.
Once you have mounted the refplat ISO and rebooted your server, you are ready to complete the initial system configuration. Continue the installation with Initial Set-up. Remember to follow the instructions on Copy Refplat ISO to Disk after you license your CML server.
Installation with Multiple Attached Disk Devices
When the installer configures the installation process, it looks for a suitable disk device attached to the server. The whole space provided by the selected disk will be used for the installation, which will override all data on it.
In case multiple disks are detected, it will select the first in an ordering determined by the installer’s operating system. This ordering may be affected by, e.g., attaching or detaching devices, including removable USB disks, or by server management configuration. This potential re-ordering is not harmful once CML is installed on the server.
We recommend you never attach disk devices containing important data to the server during installation.
Multiple physical disks which form a hardware RAID are detected as a single disk and do not need further consideration. CML installer does not support setting up software RAID, but multiple disks may be used to extend disk space on the server post-installation.
In case you need a specific disk to be selected out of those available on the system, you may review and affect the automatic detection process using the procedure below, which complements the normal bare-metal installation procedure in a few steps.
Each detected disk has a short device name, such as sda, nvme0n1, vda, and hda.
Multiple disks of the same type get named sdb, sdc and so on. These names are
likely but not completely guaranteed to be ordered the same between reboots.
In addition, each disk device has a set of alternate names, containing its respective serial numbers or similar identifiers. These identifiers are typically also accessible in server management interface.
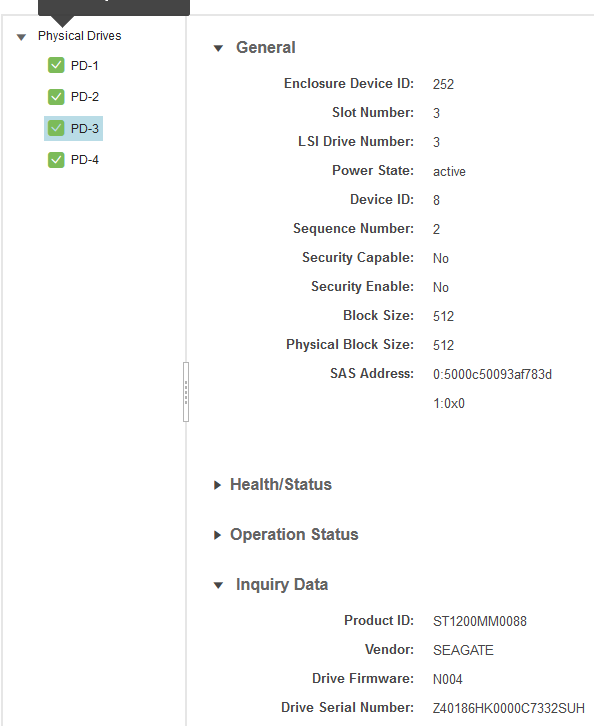
Disk device identifiers
During its disk selection process, the installer will list each detected device along with its size and alternate names.
It will then wait for a few minutes in order for you to review the selection.
Procedure
(Optional) Collect and note down any serial number or identifier of the disk device you want to use as the target of CML installation.
In case of identifiers such as WWN or attached SAS-address, there might be small differences (at the end) between the values reported by CIMC and the installer.
If you have such an identifier, you may choose to specify the GRUB parameter as described below even on first install attempt, without waiting for the installer to boot twice. Otherwise, you can review what identifieres are available in the installer during the next step.
Start the automatic installation following the regular installation procedure. Wait for the installer to list the available disk devices and its selection.
You may choose to use the device name, such as sdc, with a slight chance
it will change. In the example below, you can select the same device by using
MRAID, which is unique within the list of available names. The middle option
could be selected using sdb, 93aef45b, or EKSL.
The first match in order will be selected even if multiple disks match.
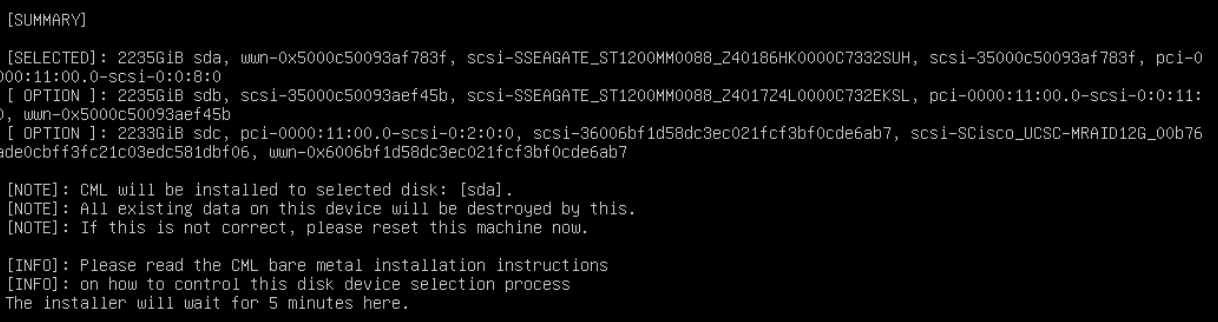
Installer disk default selection
In case the selection is wrong, note down whichever alternate names were detected along the desired disk. You only need any part of one name, that is unique among all options. Reboot the server before installation proceeds, and start the installation again.
Once the installer is selected for boot, it will wait for a few seconds in its bootloader menu.
Ensure you are typing into the console of the server (e.g., click into the remote KVM screen),
and press E over the highlighted item to edit it.
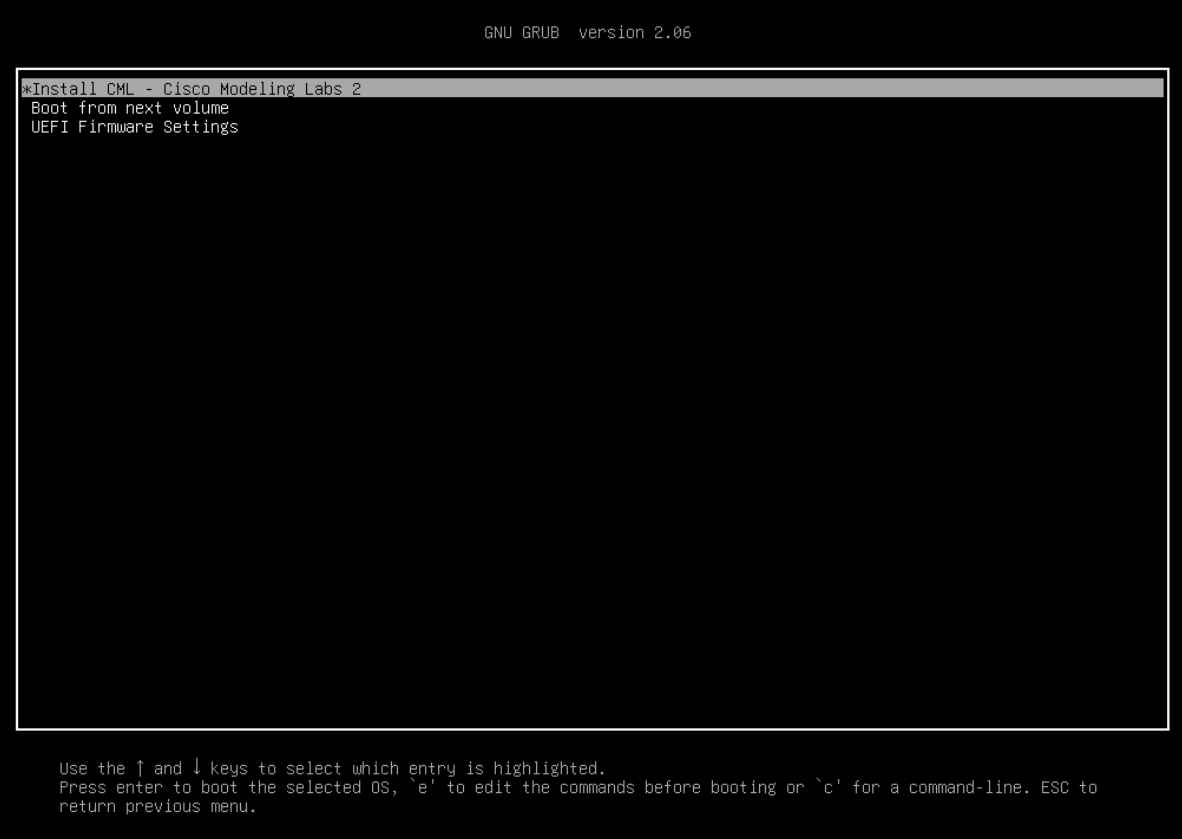
Installer GRUB menu to interrupt
Append the parameter cml_system_disk=XXX to the line starting with linux,
where XXX is the unique (part of) name of the desired target disk device from previous steps.
To repeat, you may choose to use the device name, such as sdc,
with a slight chance it will change. Using the example from above,
we select the same device by using MRAID, which is unique within
the list of available names. The middle option could be selected
using sdb, 93aef45b, or EKSL.
The first match in order will be selected even if multiple disks match.
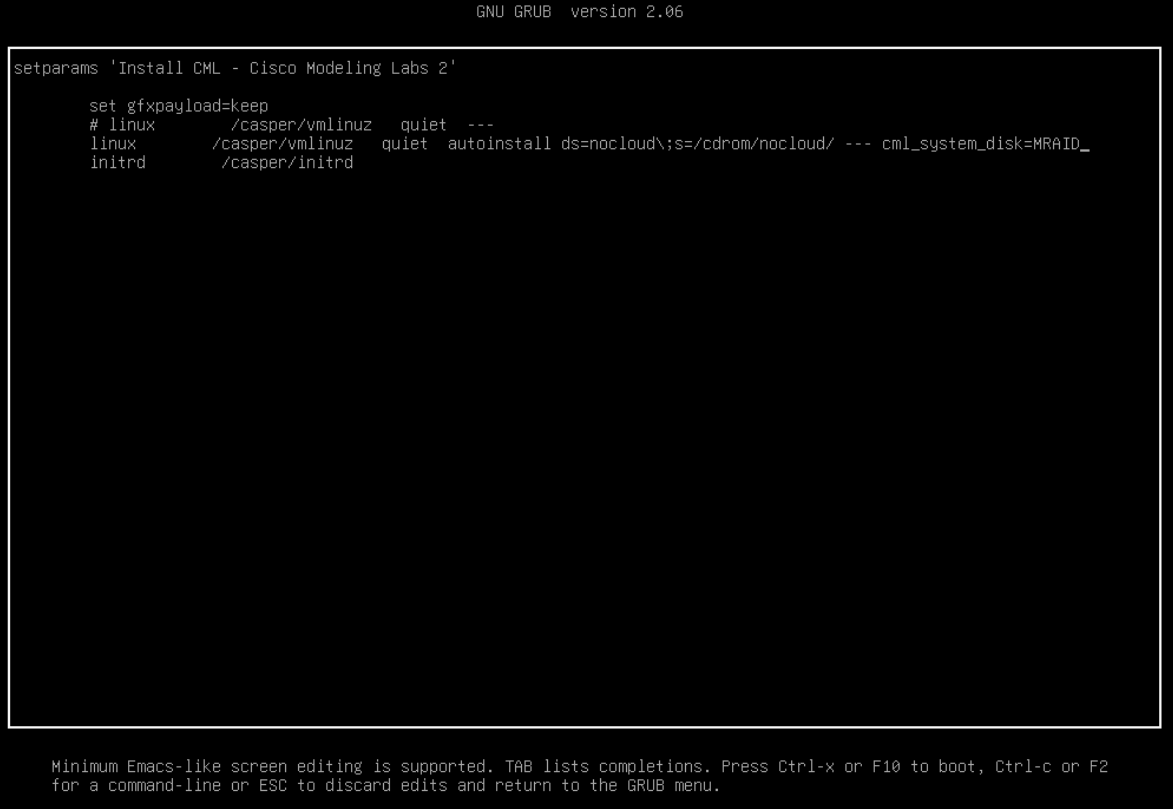
Configuring a custom disk device
Press <Ctrl+X> to boot using the edited configuration. Wait for the disk selection step again.
Confirm that the desired disk device has been selected for installation and wait
for the installer to proceed and complete the installation.

Installer disk custom selection
Complete the remaining installation steps as described by the main procedure.