Adding Ethernet Interfaces
These instructions for adding Ethernet interfaces are meant to be used as a general guide and may not work for all deployments. When adding a new interface, standard networking rules apply and should be considered independent from the CML server application.
The following instructions are also oriented at VMware desktop deployments. Consult CIMC, UCS Manager, Intersight or equivalent documentation on how to configure additional vNICs or physical interfaces for your bare metal server.
For VMware ESXi deployments, please make sure you have taken the prerequisite steps to configure networking for external connectivity. They are described in step 5 of the Deploying the OVA on ESXi Server section of the CML Installation Guide.
The CML server is configured with a single ethernet interface by default. Additional interfaces may be added at any time, but must be manually configured. In this example, a new vNIC is added to the CML virtual machine to allow nodes in your labs to access another network segment. You may add a network interface while the virtual machine is running, but we recommend that you stop all running simulations prior to making changes to the virtual machine’s hardware.
Procedure
In VMware, open the CML virtual machine’s settings window. From the toolbar, choose VM > Settings.
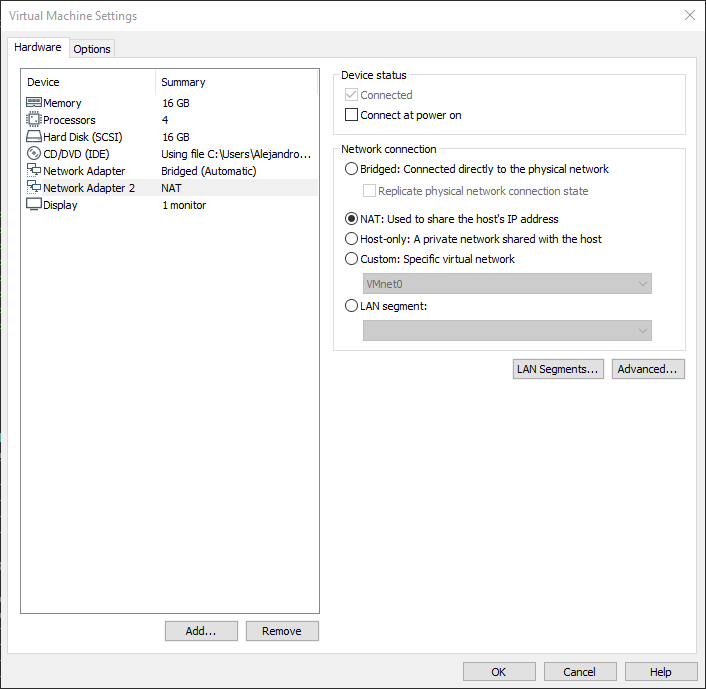
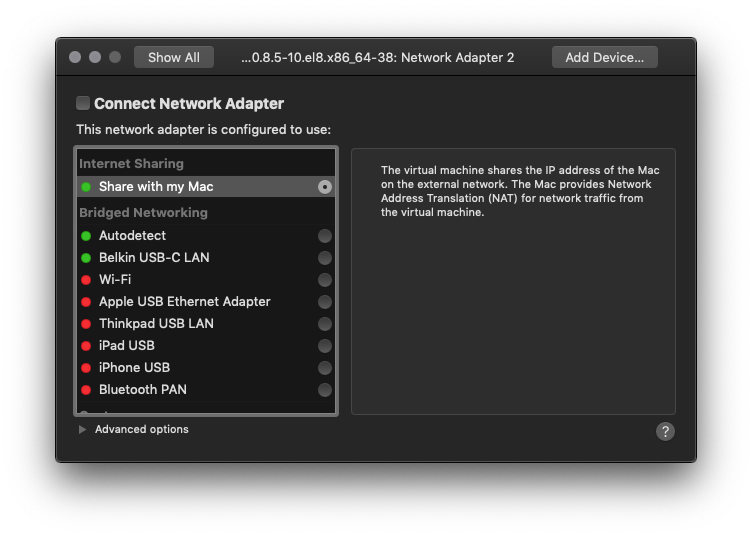
Add a new network adapter. If you are using VMware Workstation, click the Add button at the bottom of the Hardware pane, select Network Adapter, and click Finish. If you are using VMware Fusion, click the Add Device button at the top right of the dialog window, select Network Adapter, and click Add….
Caution
Do not connect the adapter at this time!
If you are using VMware Workstation, uncheck the Connect at power on check box under Device Status and select the desired Network Connection mode. If you are using VMware Fusion, uncheck the Connect Network Adapter check box and select the desired Network Connection mode. In both cases, the new vNIC will be connected to the NAT network of the host.
With the new vNIC disconnected, log into the System Administration Cockpit as the system administrator account. See Logging into the System Administration Cockpit.
Click Networking in the navigation bar on the left side of the page.
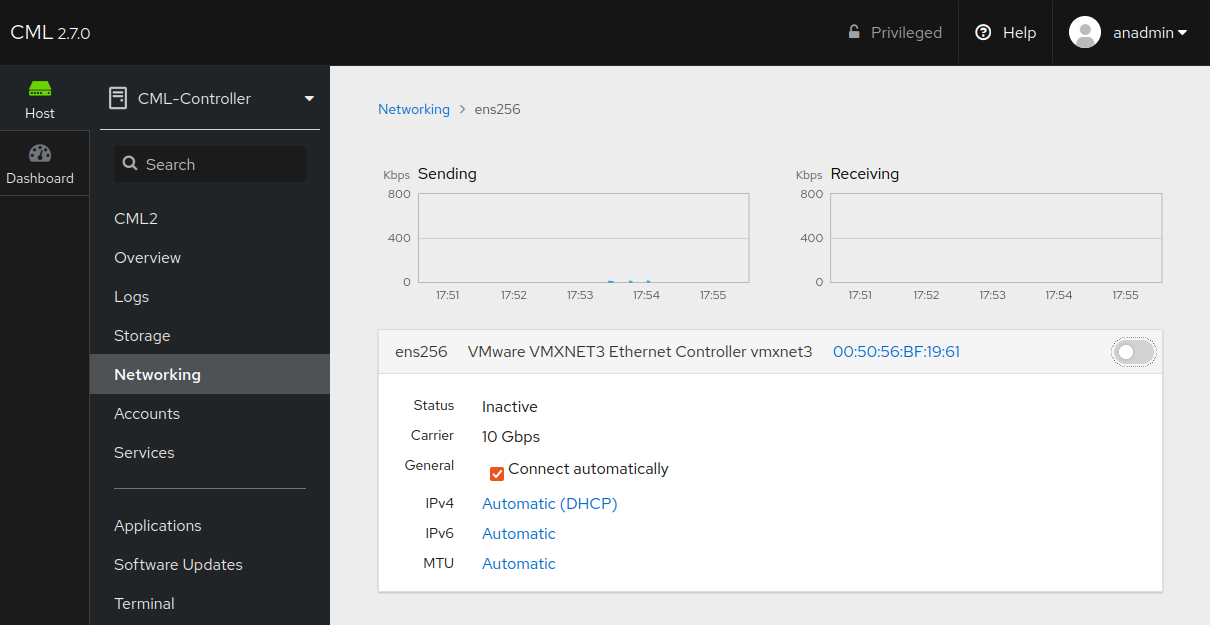
A new ethernet interface is now available to the CML VM and can be configured in the System Administration Cockpit. Click on its name. You can match the MAC address of the network adapter against the outside management tools to confirm which Linux interface name belongs to which vNIC. You may also disable the interface using the toggle button.

Networking page of the System Administration Cockpit for an ethernet interface
You can use each new interface to set up one L2 bridge for use by external connector lab nodes; see Adding L2 Bridge External Connectors for instructions.
On VMWare ESXi and bare metal deployments, you can connect each Ethernet interface as a VLAN trunk as well, and set up VLAN subinterfaces over it, each of which can be used by a separate L2 bridge; see the instructions at Adding VLAN Interfaces for details.
Once the setup of L2 bridges is completed, you will return to connect the Ethernet interface in VMWare settings.

