Handling 802.1p Frames in UCS
In bare metal Cisco UCS deployments, each vNIC which is set to vlan access mode will handle the configured tag at this layer. However, to support traffic carrying priority information as per the 802.1p standard, incoming frames will remain tagged, with vlan id set to zero. This does not consitute a problem for the CML server itself, which will handle traffic with 802.1Q tags in vlan 0 gracefully as if it was untagged. In L2 bridges used for external connectivity, it will forward the traffic unchanged to labs, so that use cases which need this information can be supported.
However, several lab node types do not recognize these tagged frames and ignore them. A common symptom of this is when lab nodes connected to a bridged external connector do not get their IP configured from an outside DHCP server. Performing a link capture will then reveal the vlan 0 tags present on incoming packets.
If you encounter and need to fix this issue, follow this procedure for each vNIC interface which is connected into the affected bridge. All interfaces in access mode will have the same issue, but only those which are used for L2 bridges need to be fixed. This includes the primary interface which the System Bridge bridge0 contains.
The fix will configure the CML server to drop the tag on incoming vlan 0 frames.
The Release Notes for CML 2.6.0 contain a workaround which is the same basic solution as what these steps enable. That workaround was not persistent across reboots, but this one is. If you applied the workaround, you may disable it using the instructions from the release notes, and switch to this method instead.
Procedure
Log into the System Administration Cockpit as the system administrator account. See Logging into the System Administration Cockpit.
Click Networking in the navigation bar on the left side of the page.
Look up the bridge in the Interfaces table you wish to fix. Click the bridge name to open its configuration page. Note down in its Ports table the name of the Ethernet interface that needs to be adjusted.
In the following steps, we will use the example interface name enp13s0.
Click Terminal in the navigation bar on the left side of the page.
Create a new service instance for your interface.
sudo systemctl enable --now virl2-vlan-zero@enp13s0
Click Services in the navigation bar on the left side of the page.
Look up and click virl2-vlan-zero@enp13s0 in the list.
In the service details of the new service instance that opens, confirm that the service is enabled and running.
The Enable and Start toggle should be in the enabled state.
Note
While in enabled state, the label of the toggle is Stop and Disable. Disabling the service using this toggle will also delist the service instance in the Services table and remove it from the system.
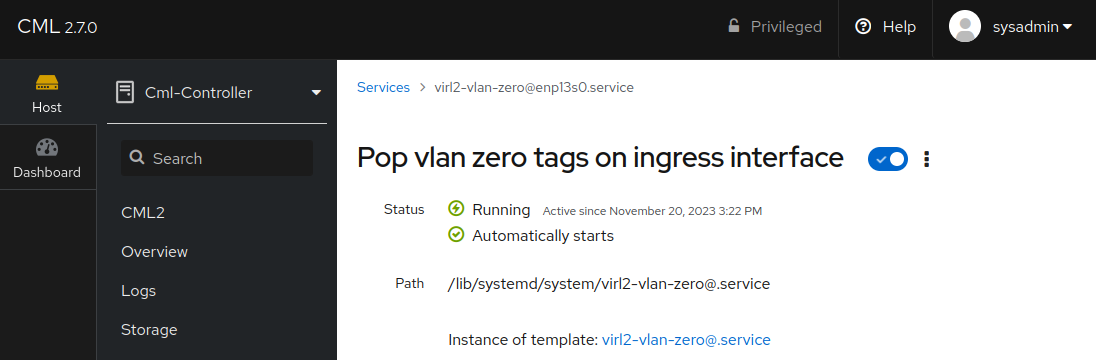
Vlan Zero Service Page
The service sets up the necessary adjustments to the selected interface when it is started. Stopping the service instance will remove the adjustments. As long as the service instance is enabled, it will be started on each host boot.