Pidgin for Windows
Pidgin is a multiplatform instant messaging client that supports many common messaging protocols, including XMPP. You can use Pidgin to establish an XMPP connection and view XMPP messages published by the Cisco Finesse Notification Service.
Note | You cannot be signed in to Pidgin at the same time you are signed in to Finesse as the XMPP event feed is disrupted. |
Notifications that result from API requests made in Postman appear in the XMPP Console tool of the Pidgin application. For example, if you use Postman to change an agent's state, you can see the resulting agent state change event in the Pidgin XMPP Console window.
Note | Make sure that
you use the same username and resource values in both Postman and Pidgin.
|
You can download Pidgin from http://www.pidgin.im/download/.
Perform the following steps to configure XMPP:
- In Pidgin, go to Tools > Plugins to open the Plugins dialog box.
- Check the XMPP Console and XMPP Service Discovery check boxes.
Perform the following steps to configure Pidgin:
- Add an account for your XMPP server. Go to Pidgin > Accounts > Manage Accounts > Add Account. The Add Account dialog box opens.
- For Protocol, select XMPP.
- For Username, enter the username for the agent that you added.
- For Domain, enter the fully-qualified domain name of the Cisco Finesse server.
- For Resource, enter any text.
- For Password, enter the
password of the agent.
The Pidgin Interface 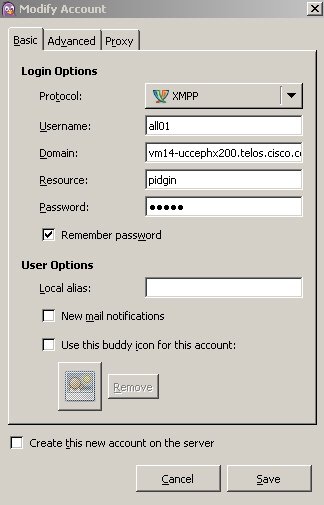
- Click Save.
- Click the Advanced tab.
- Check the Allow plaintext auth over unencrypted streams check box.
- For Connect Server, enter the IP address of the Finesse server.
- If the Connection Security drop-down menu is present, choose Use encryption if available.
- Click Save.
Note | Connect port and File transfer proxies should be filled in automatically (5222 should appear in the Connect port field). |
Note | When connecting
to the secure port 5223:
|
The XMPP logo next to the agent's name becomes active (is no longer dimmed). To see event messages in Pidgin, open the XMPP Console.

Note | The agent must be signed in to Finesse through Postman or the browser interface to be signed in to the XMPP account on Pidgin. |
The XMPP Console window immediately begins to update every few seconds with iq type statements. The window does not display an event message until an event occurs. If the XMPP Console window fills with iq type notifications and becomes difficult to navigate, close and reopen it to refresh with a clean window.
