Add Network Devices and Assets
Note: Only SEA System Admin role can access this menu on IoT OD.
Use System Management to provide secure remote communication with IoT network devices and assets. The asset can either be a network device or the subtended devices attached to that network device.
Note: Cisco also provides a guided, new user workflow and quick wizard designed to help a first-time SEA System Admin to access a remote OT Asset in a few steps. For more information, see SEA: New User Workflow. For a more efficient means of installing and updating network devices or assets see SEA Quick Wizard.
Summary steps
- Add Network Devices that were previously onboarded and configured.
- SEA installs and activates SEA Agent on the network device in the background.
- Add the Asset attached to the network devices that users can access.
- Configure SEA Plus protocols for network devices and Assets.
Note: On Cisco IR devices running IOS or IOS-XE, the SEA Agent is automatically installed and configured on the network device.
Add Network Devices
- From the Services pane, choose Secure Equipment Access > System Management.
- From the Network Devices tab, click Add Network Device. A list of possible network devices opens.
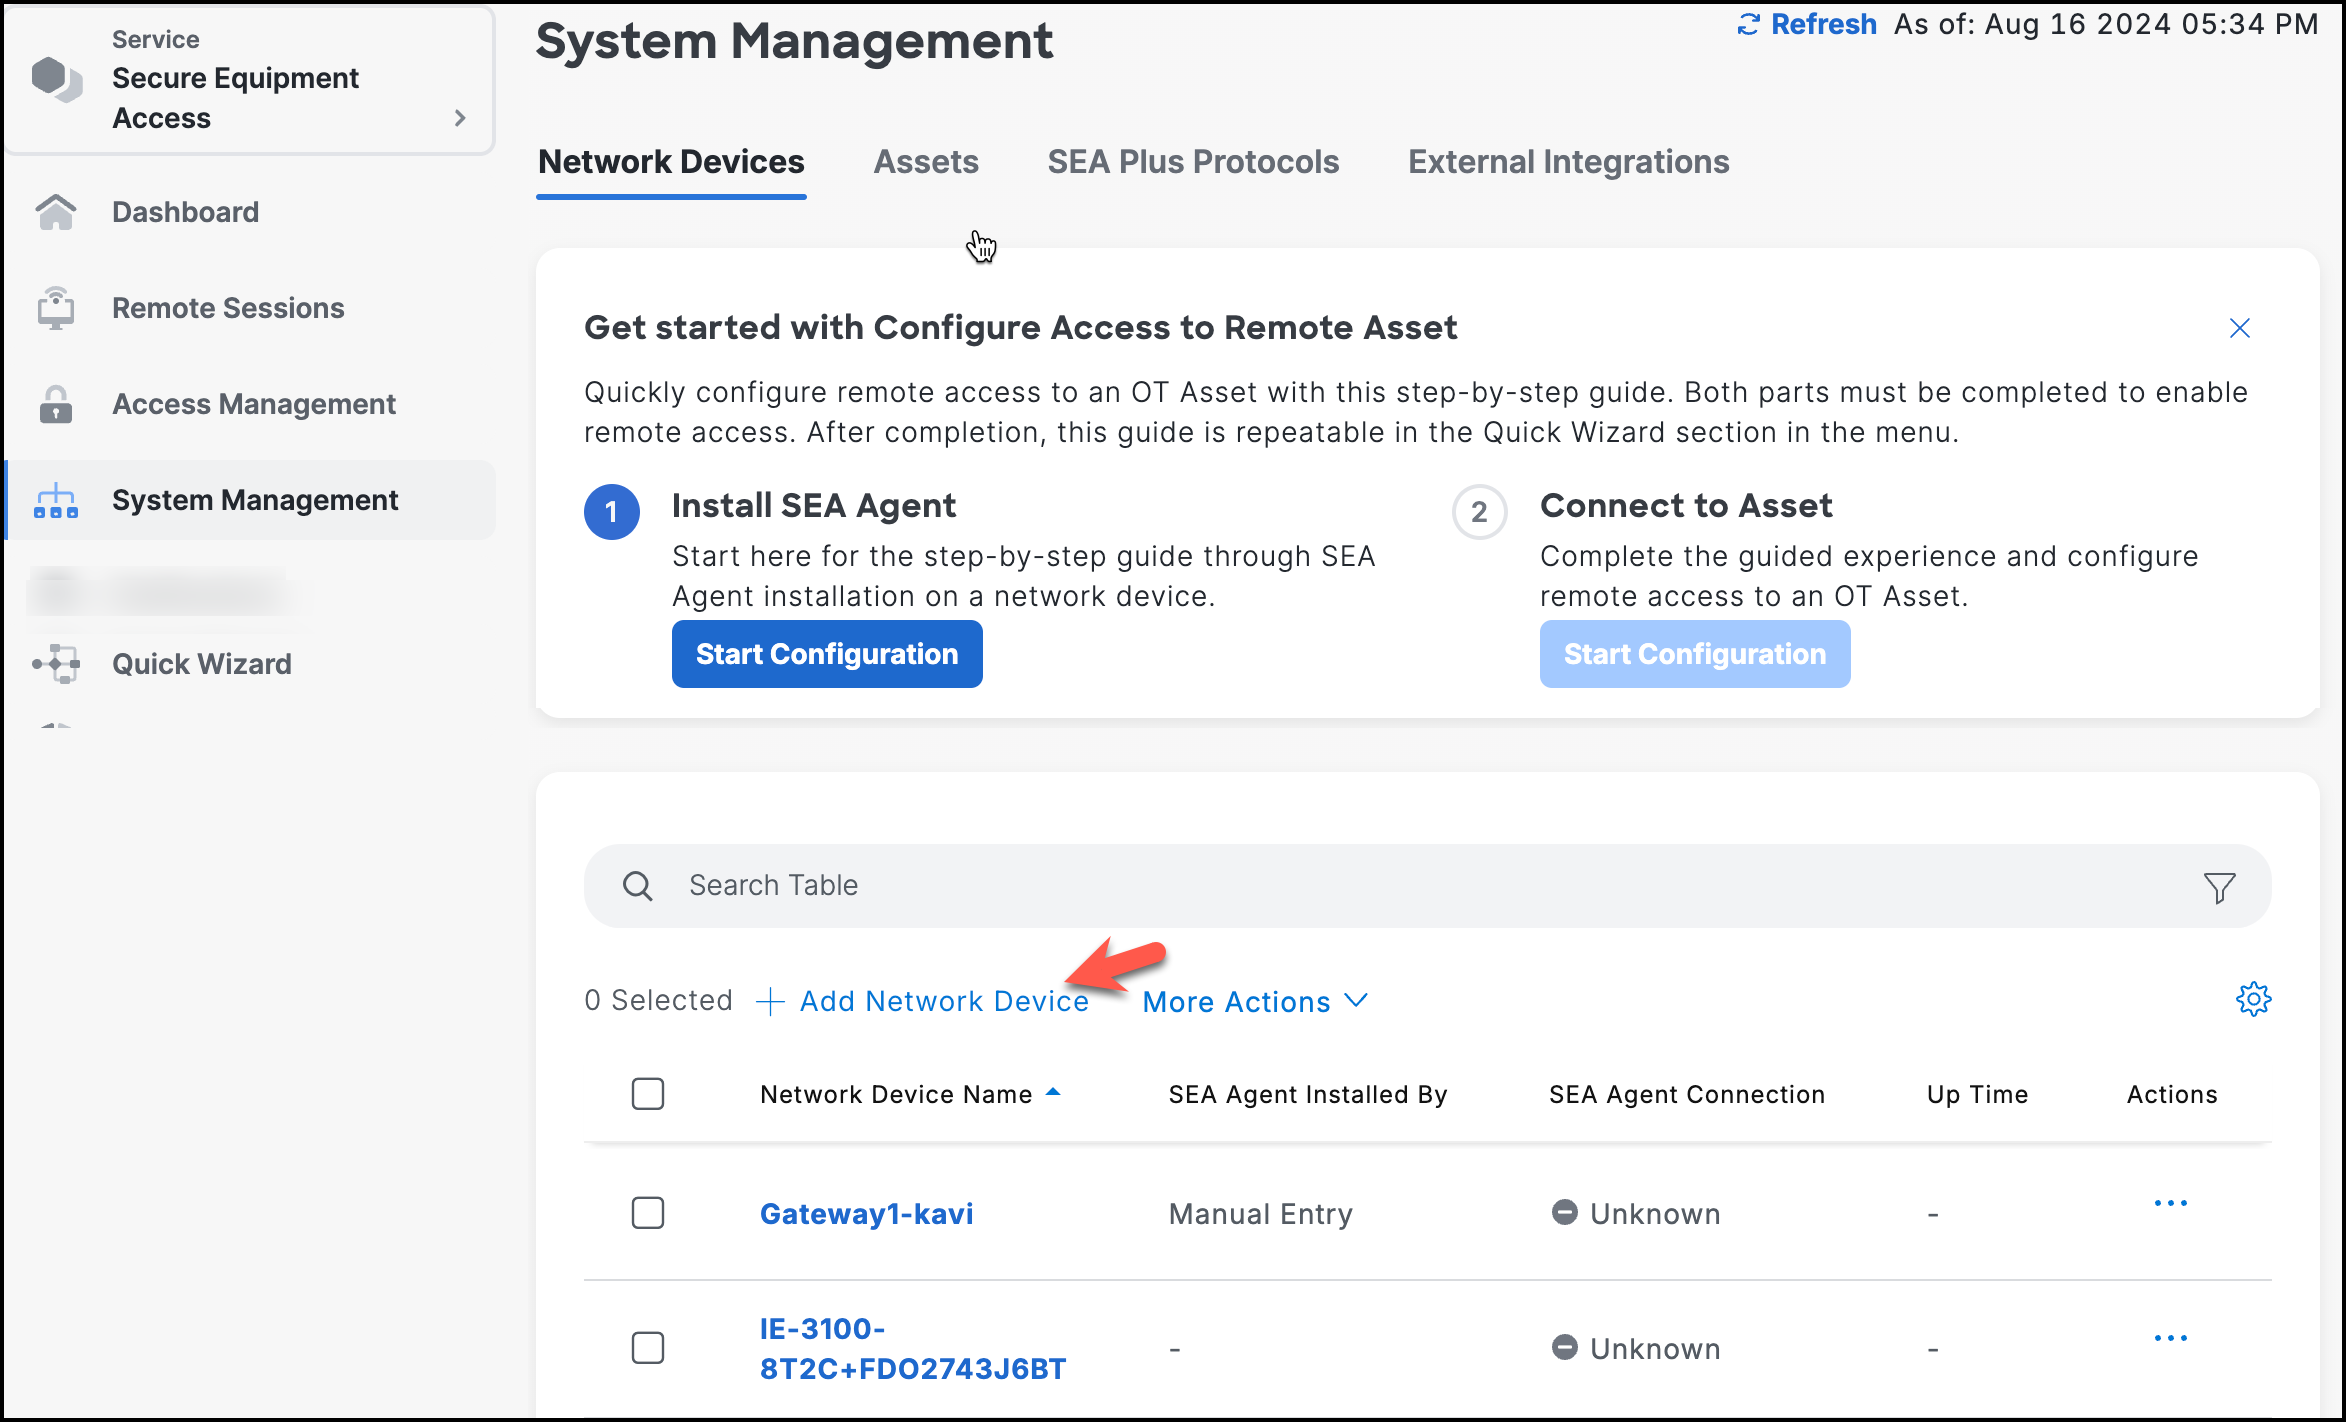
- Choose a network device from the list or search for it in the Search field. Click Next.
- Enter a network device description, if needed, and click Add Network Device. SEA service starts the installation of the SEA Agent on the device in the background.
Note: At this step, if you are installing a switch, you can configure the switch for HTTP(S) proxy support. Click here for directions on configuring for HTTP(S) proxy support. To configure switch with multi-VLAN configuration, see click here.
Click Next. A confirmation box opens.
Check the SEA Agent state of deployment associated with the network device.
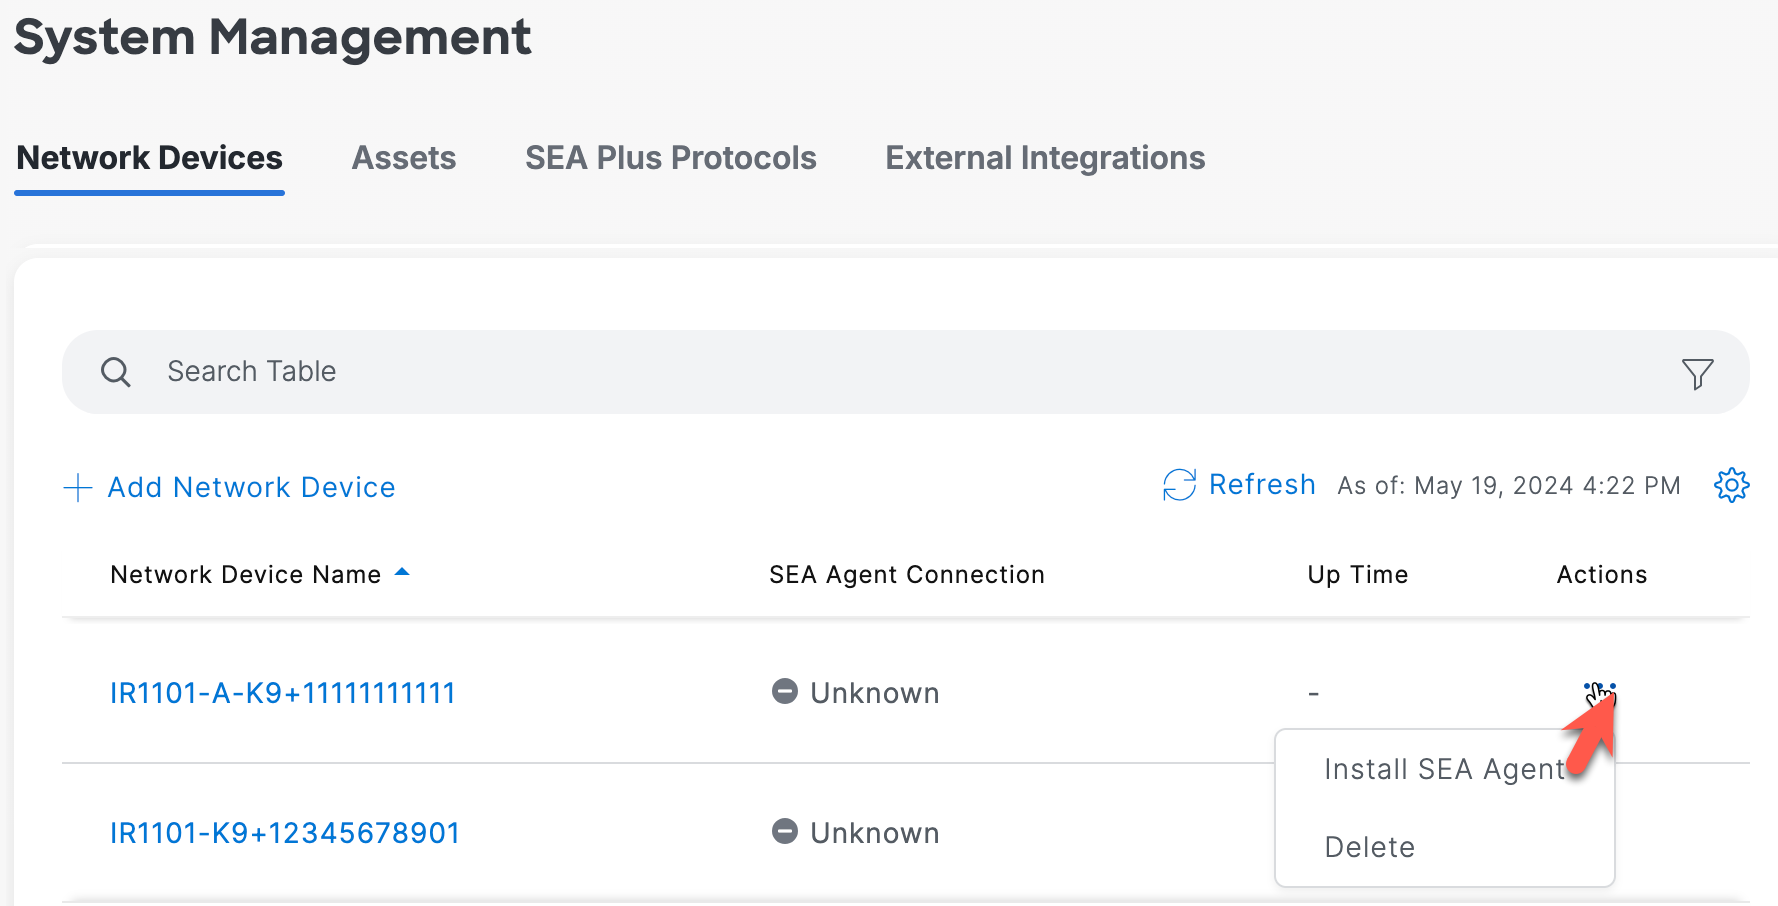
- The SEA Agent deployment state changes to Installed, and this can take up to 5 minutes. If the status doesn't change to Installed, go to the network device listing and hover over the 3 dots in the Actions column and choose Install SEA Agent.
Manually Add Assets
To manually add an asset for a device:
Note: These devices can be subtended devices, or the network device itself.
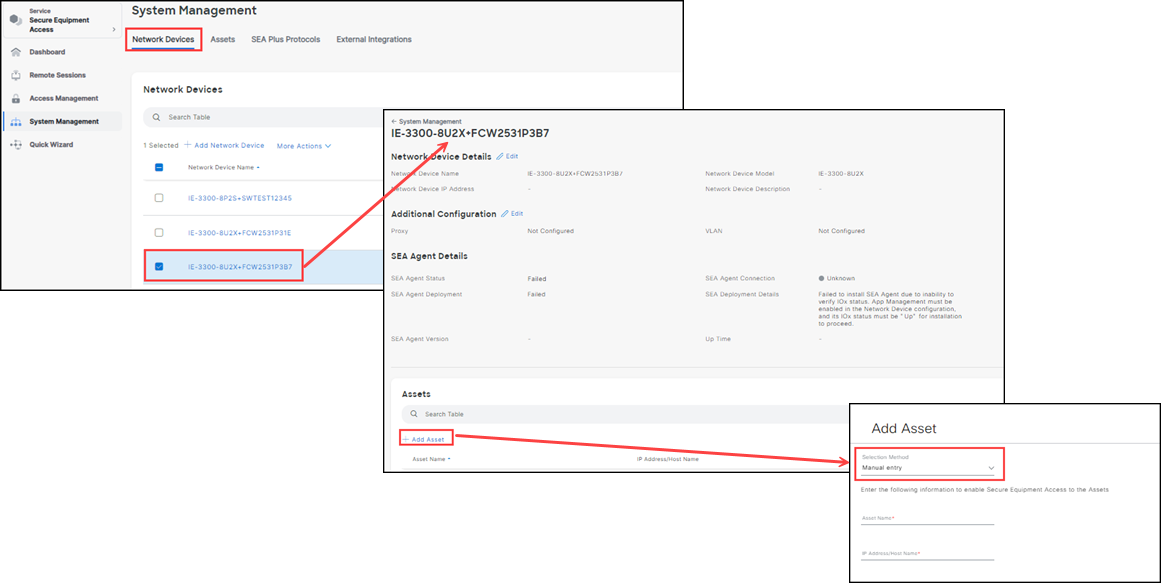
- From the System Management page, choose a Network Device.
- From the Network Device details page, click Add Asset.
- On the Add Asset page, choose one of the following options:
- Select from list (Recommended)
- Manual entry
- After you choose the option, enter the asset name, IP address or host name, and description in the respective fields and click Add.
Note: To access this asset using the SEA Plus protocol, you must enter the IP address only. Entering the hostname will cause the SEA Plus connection to fail.
The asset is associated with the network device.
Using the Network Device as an Asset for Configuration or Troubleshooting
Use the network device itself as an asset to configure or troubleshoot the device. For IR devices, use the VirtualPortGroup0 IP address and for IE devices, use the VLAN IP address that SEA Agent is configured to run on, to add access methods for accessing the device itself.
Configure SEA Plus Protocol Definitions
Note:
- The SEA Plus App must be running (minimum version is 0.70).
- There is an existing Network Device and Asset configured for remote access.
To configure an SEA Plus protocol:
From the Services panel, choose Secure Equipment Access > System Management.
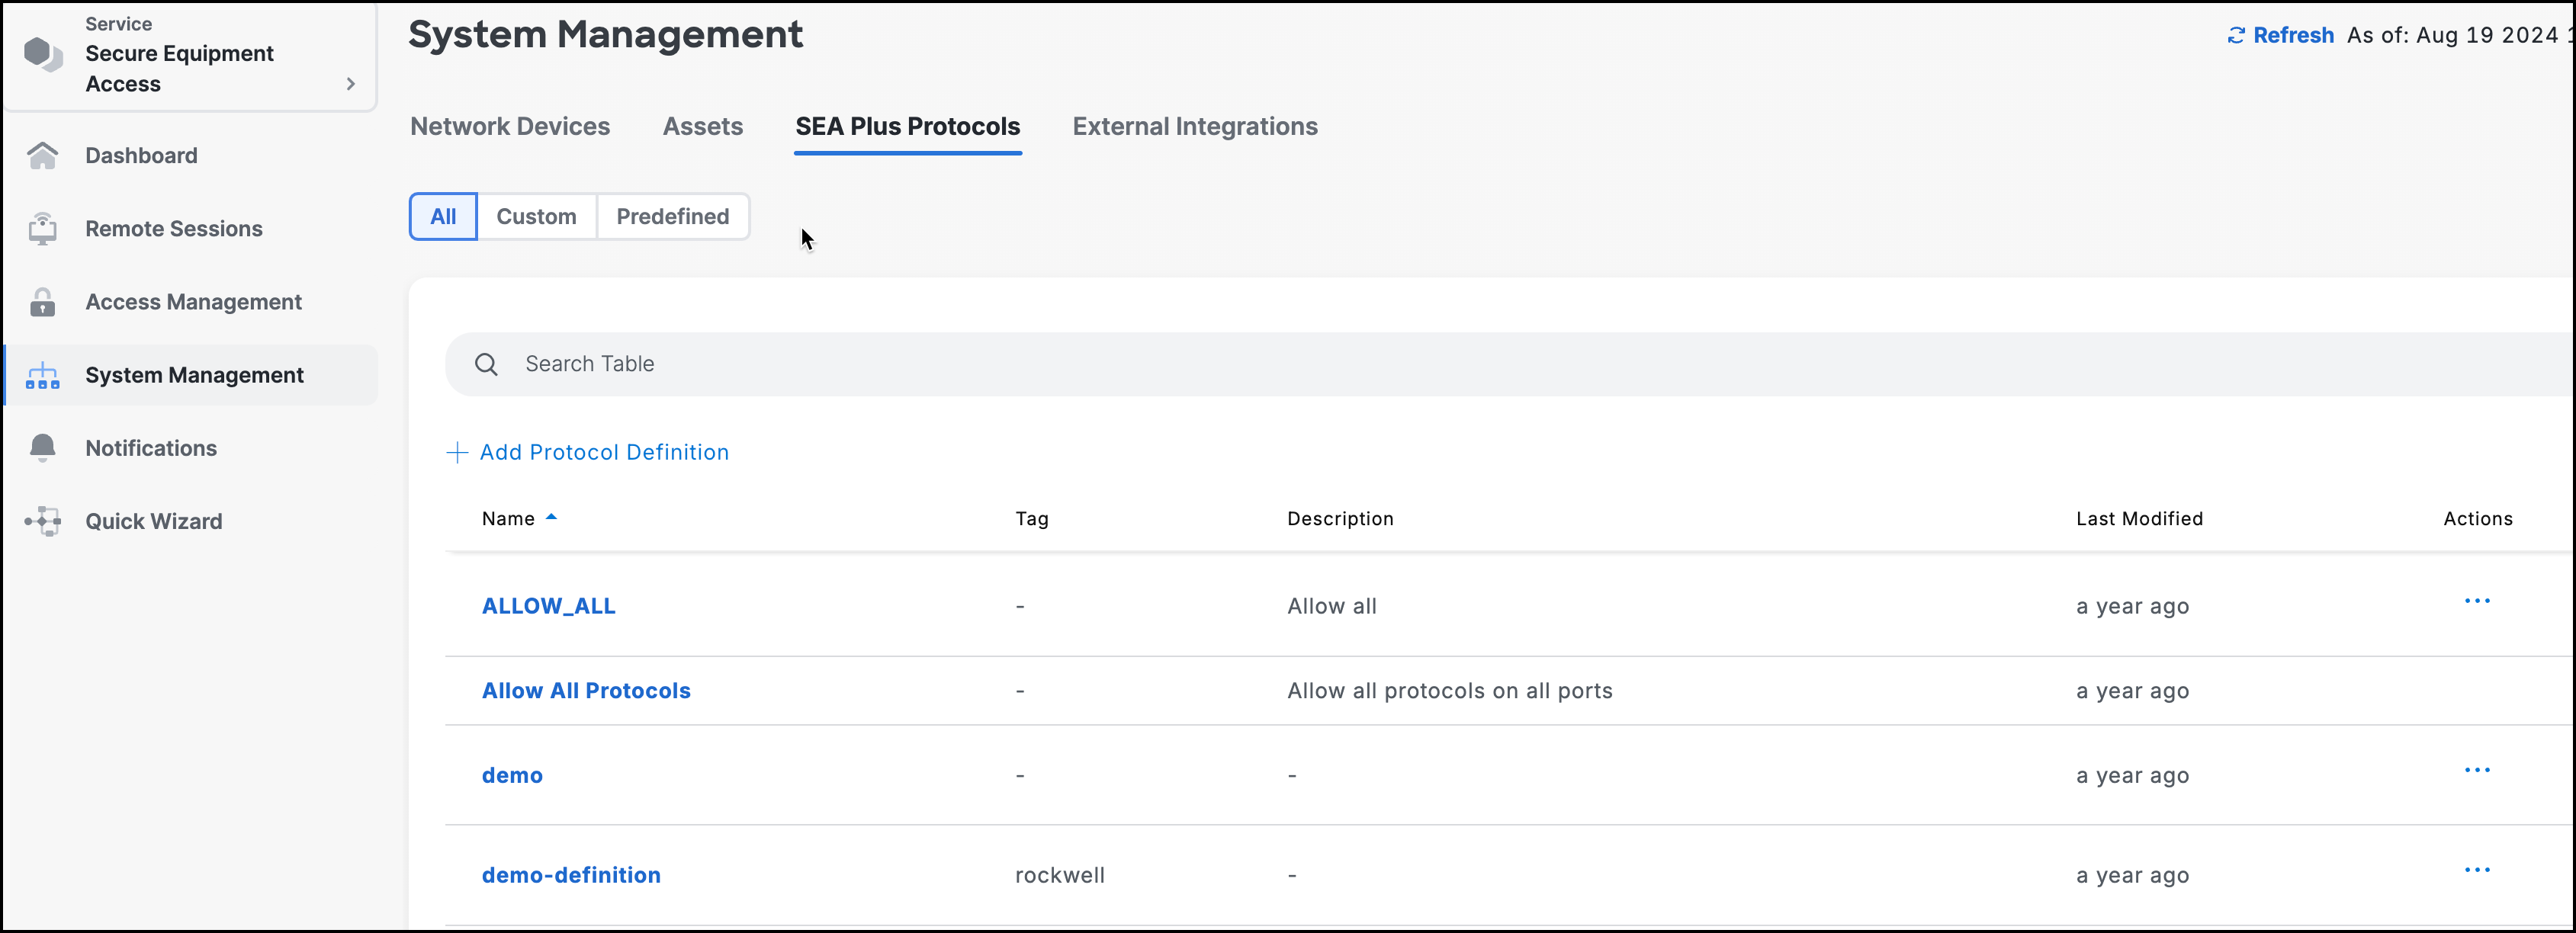
Choose the SEA Plus Protocols tab. This screen has three SEA Plus Protocol Definition setting filters.
- All (Default): Choose this filter to list all the definitions created (custom and predefined).
- Custom: Choose this filter to list all the custom definitions created.
- Predefined: Choose this filter for a list of "out of the box" protocol definitions that can help you get started.
Note:
- The three predefined definitions: Allow all Protocols, TCP All Ports+ICMP, and UDP All Ports+ICMP should be used with caution. Once you are familiar with setting up the SEA Plus Definitions, we recommend configuring your own protocols and ports to fit your needs and security requirements.
- You cannot add SEA Plus Protocol Definitions from the Predefined filter.
The SEA Protocols screen lists the following:
- Name: Protocol Definition Name.
- Tag (optional): Used for grouping definitions.
- Description: Description of the protocol definition.
- Last modified: Protocol definition was last modified.
- Actions: Clone or Delete.
The SEA Plus Protocols screen also includes a Search Table field and a filter icon (right side of the screen) for searching through long lists of protocol definitions.
Note: If you clone a protocol definition, the definition has the same name with a number in parenthesis. For example, Protocol (1), Protocol (2), etc.
- To add a Custom Protocol Definition, click Add Protocol Definition.
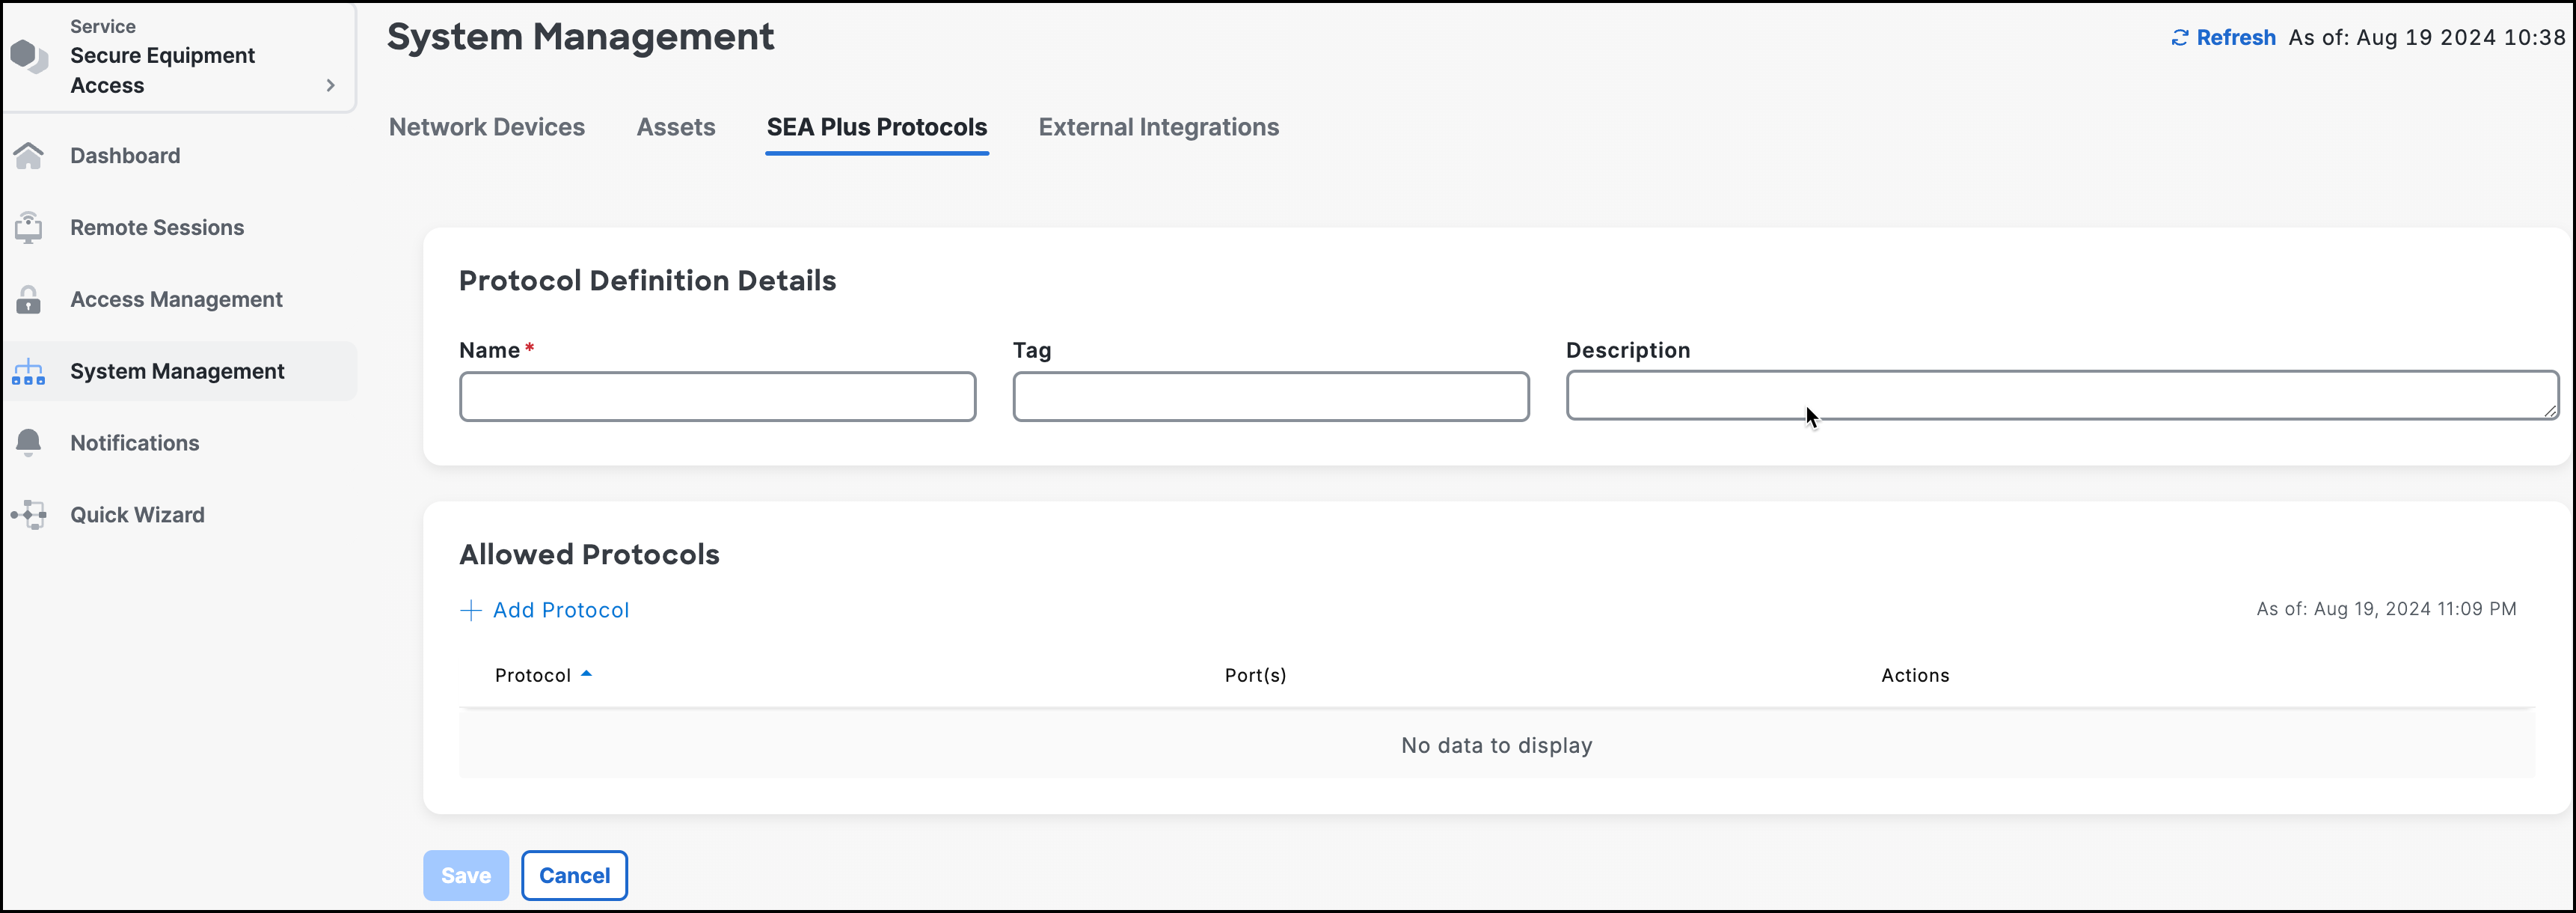
Make sure you are in the SEA Plus Protocols tab. Then enter:
a. (Required) Type in a protocol definition name.
b. (Optional) Type in an identifying tag (for grouping).
c. (Optional) Type in a useful description.
Click Add Protocol.
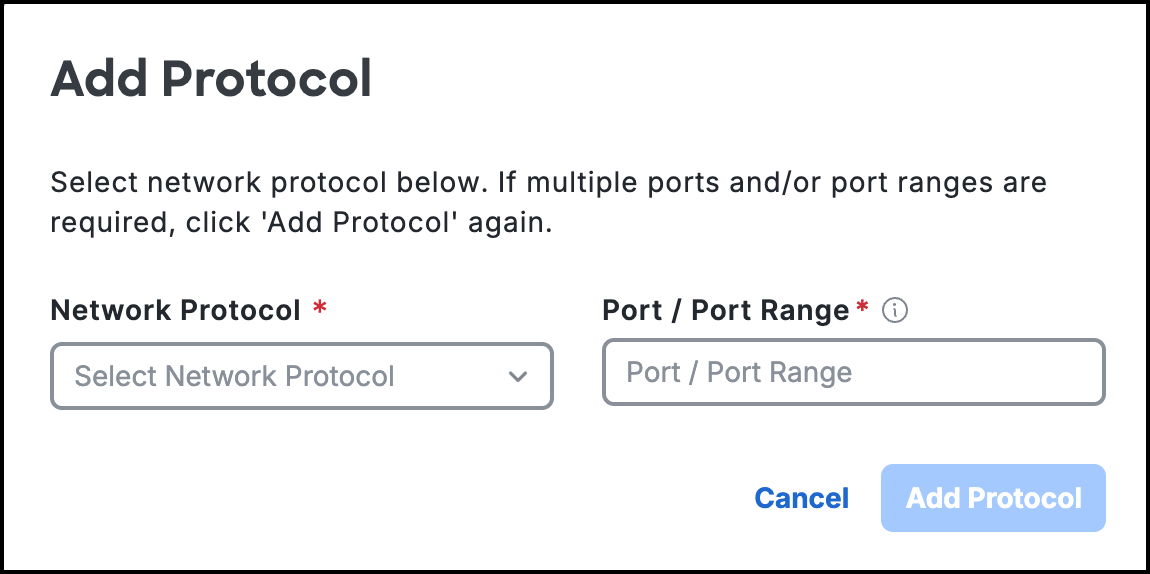
- In the Add Protocol screen choose one of the following protocols:
- TCP All Ports
- UDP All Ports
- TCP
- UDP
- ICMP
- For UDP and TCP, specify a single Port (or Port Range, for example 85-110) for that protocol.
- Click Add Protocol. The protocol is added to the protocol list.
- To add additional protocols, repeat step 6-9.
- Click Save Protocol Definition. The custom protocol definition is added to the SEA Plus Protocol Definitions list.
Once the definitions are created they can be used when you create the access methods for SEA Plus. (See SEA Plus Access Method.)
Note: To configure an IE3x00 switch or IR18xx router in SEA, refer to the appropriate section below.
SEA: Proxy Support for Switches
To configure an SEA agent with proxy support on an externally managed device (such as a IE3x00 switch), see SEA: HTTP(S) proxy support
SEA: Muli-VLAN Support
To configure an SEA agent with VLAN or Static IP support on an externally managed device (such as an IR1101 or IR1800 router), see SEA: Muli-VLAN and Static IP support.