SEA: New System Admin Workflow
The guided new user workflow is designed to help a first-time SEA System Admin to set up and access a remote OT Asset in very few steps and to be able to access the asset later in the future. Unlike the Quick Wizard you must install an SEA Agent before you can install an Asset. Once you install the agent and asset, the screen changes to show the link to the newly installed network device as well as links to the asset, the type of access method used, and the ability to launch the access method.
As an SEA System Admin, when you log in and open the SEA application, the System Management screen opens with the setup card. This card allows you first to install the SEA Agent, then add a Remote Asset and configure the appropriate Access Method to communicate with the asset.
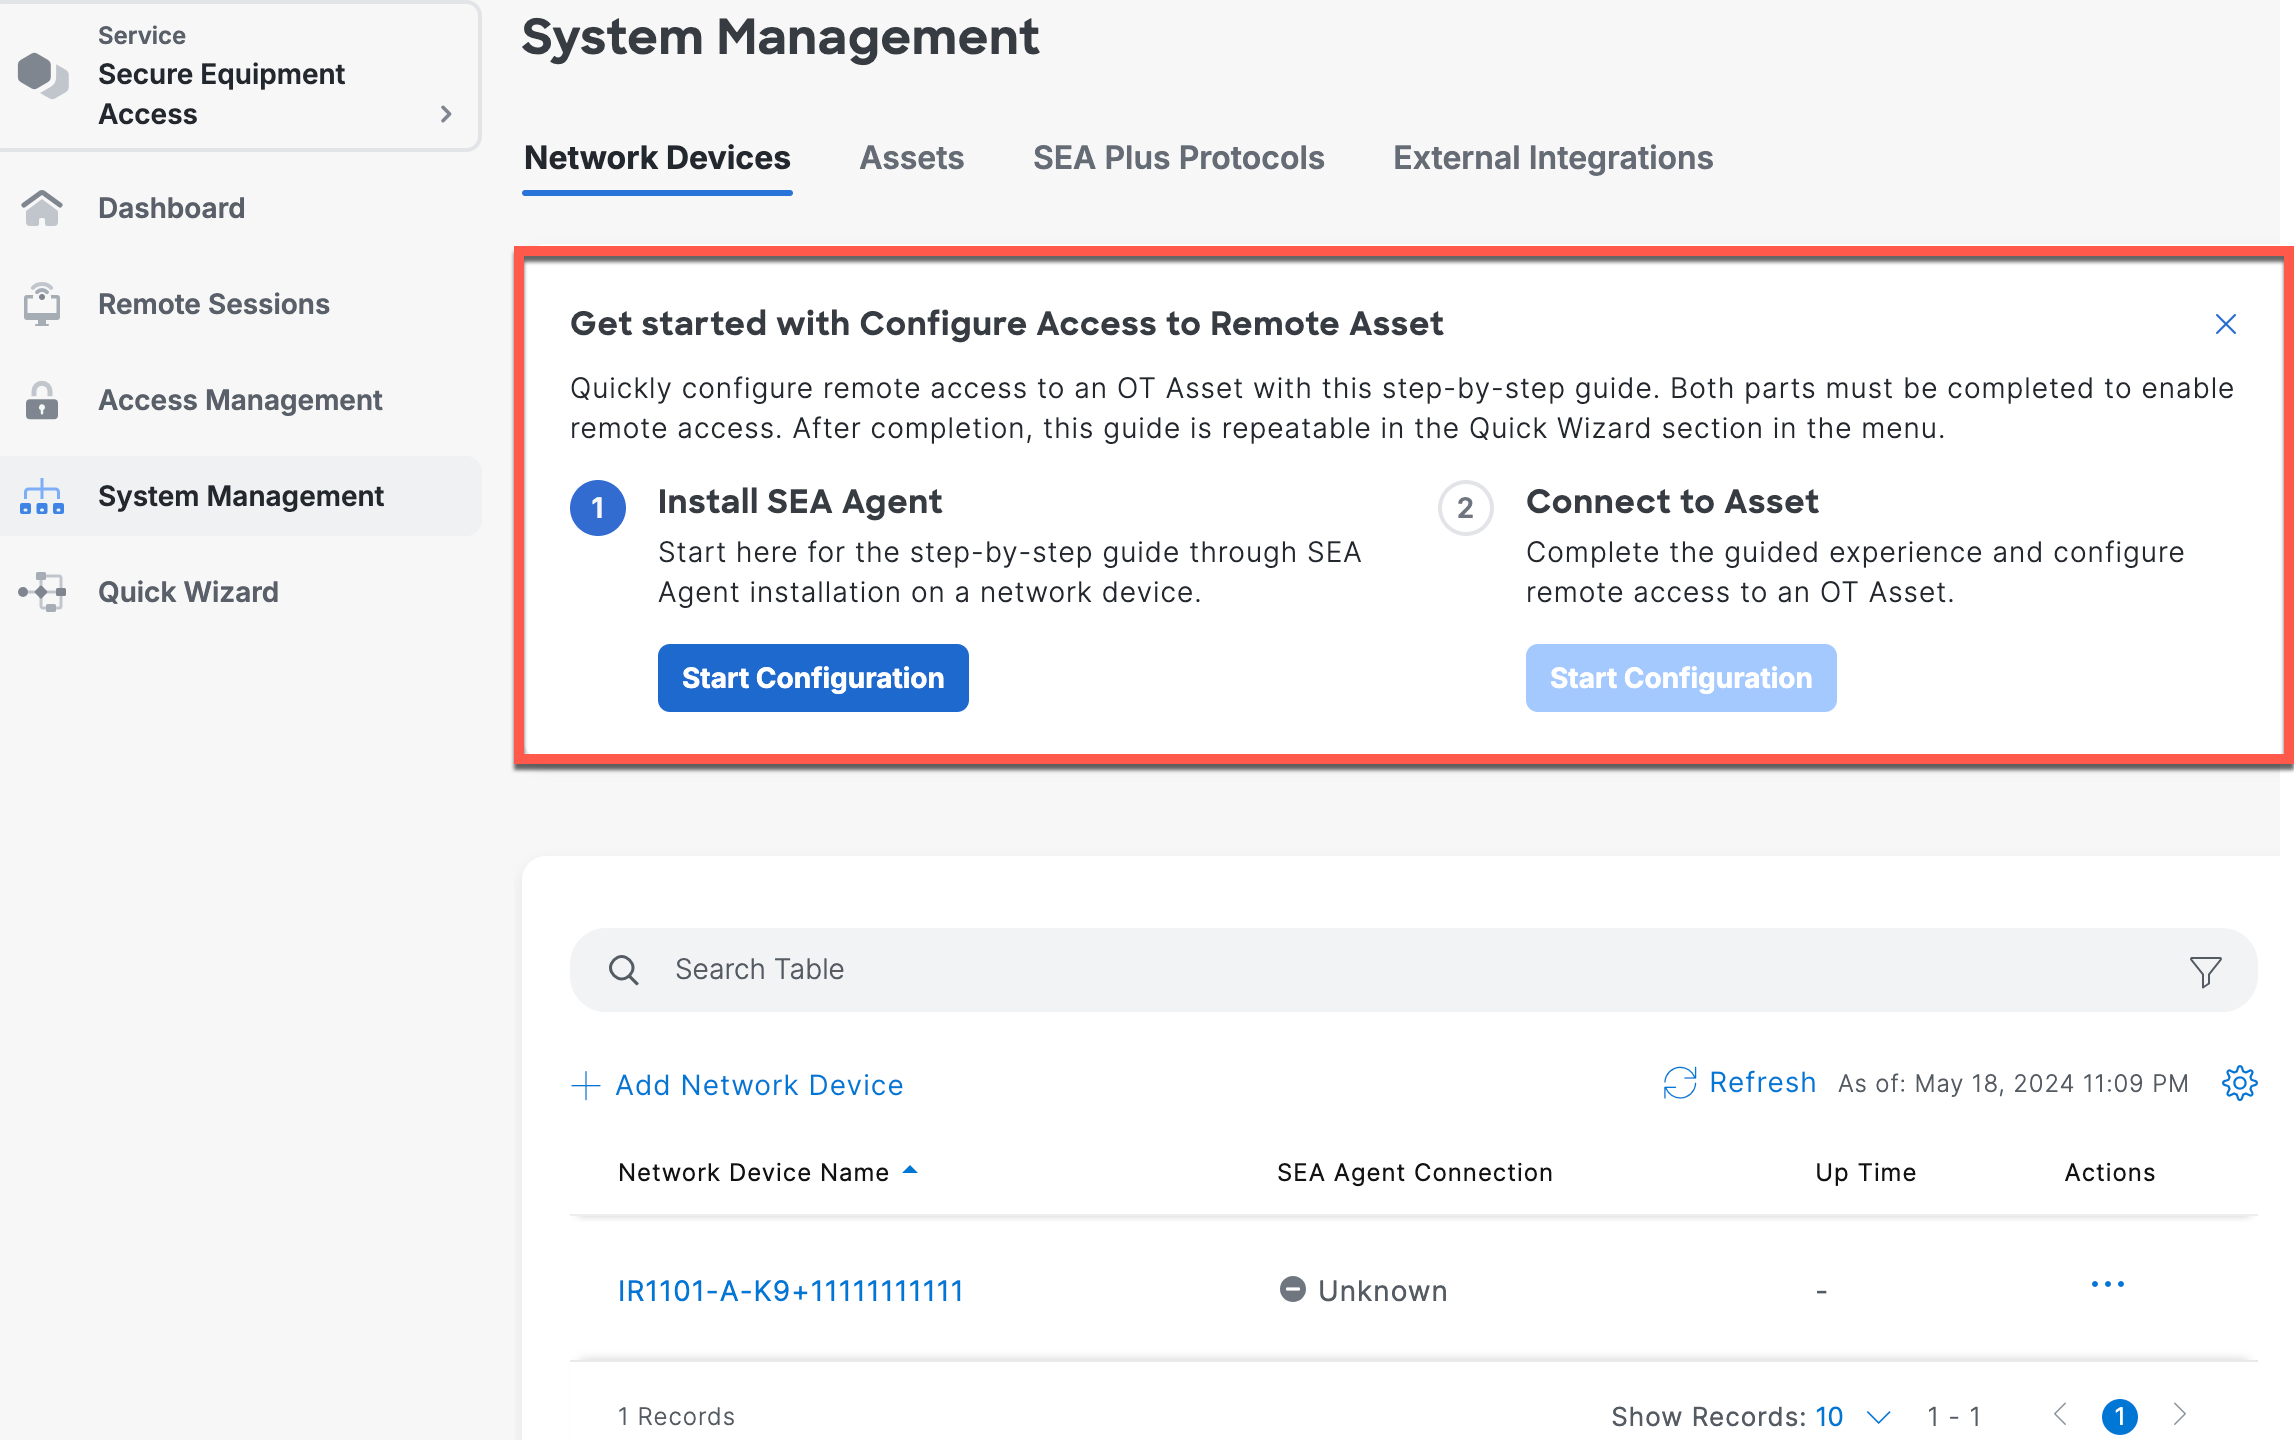
IMPORTANT: If you close the configuration flow card, it will not open again, when you access System Management. If you still need guidance, use the Quick Wizard menu option in the left navigation menu. When you log into SEA again, you can use the Quick Wizard to install, connect, and deploy Network Devices.
Note: You can add and configure SEA Agents and Network Assets using Add Network Devices and Assets.
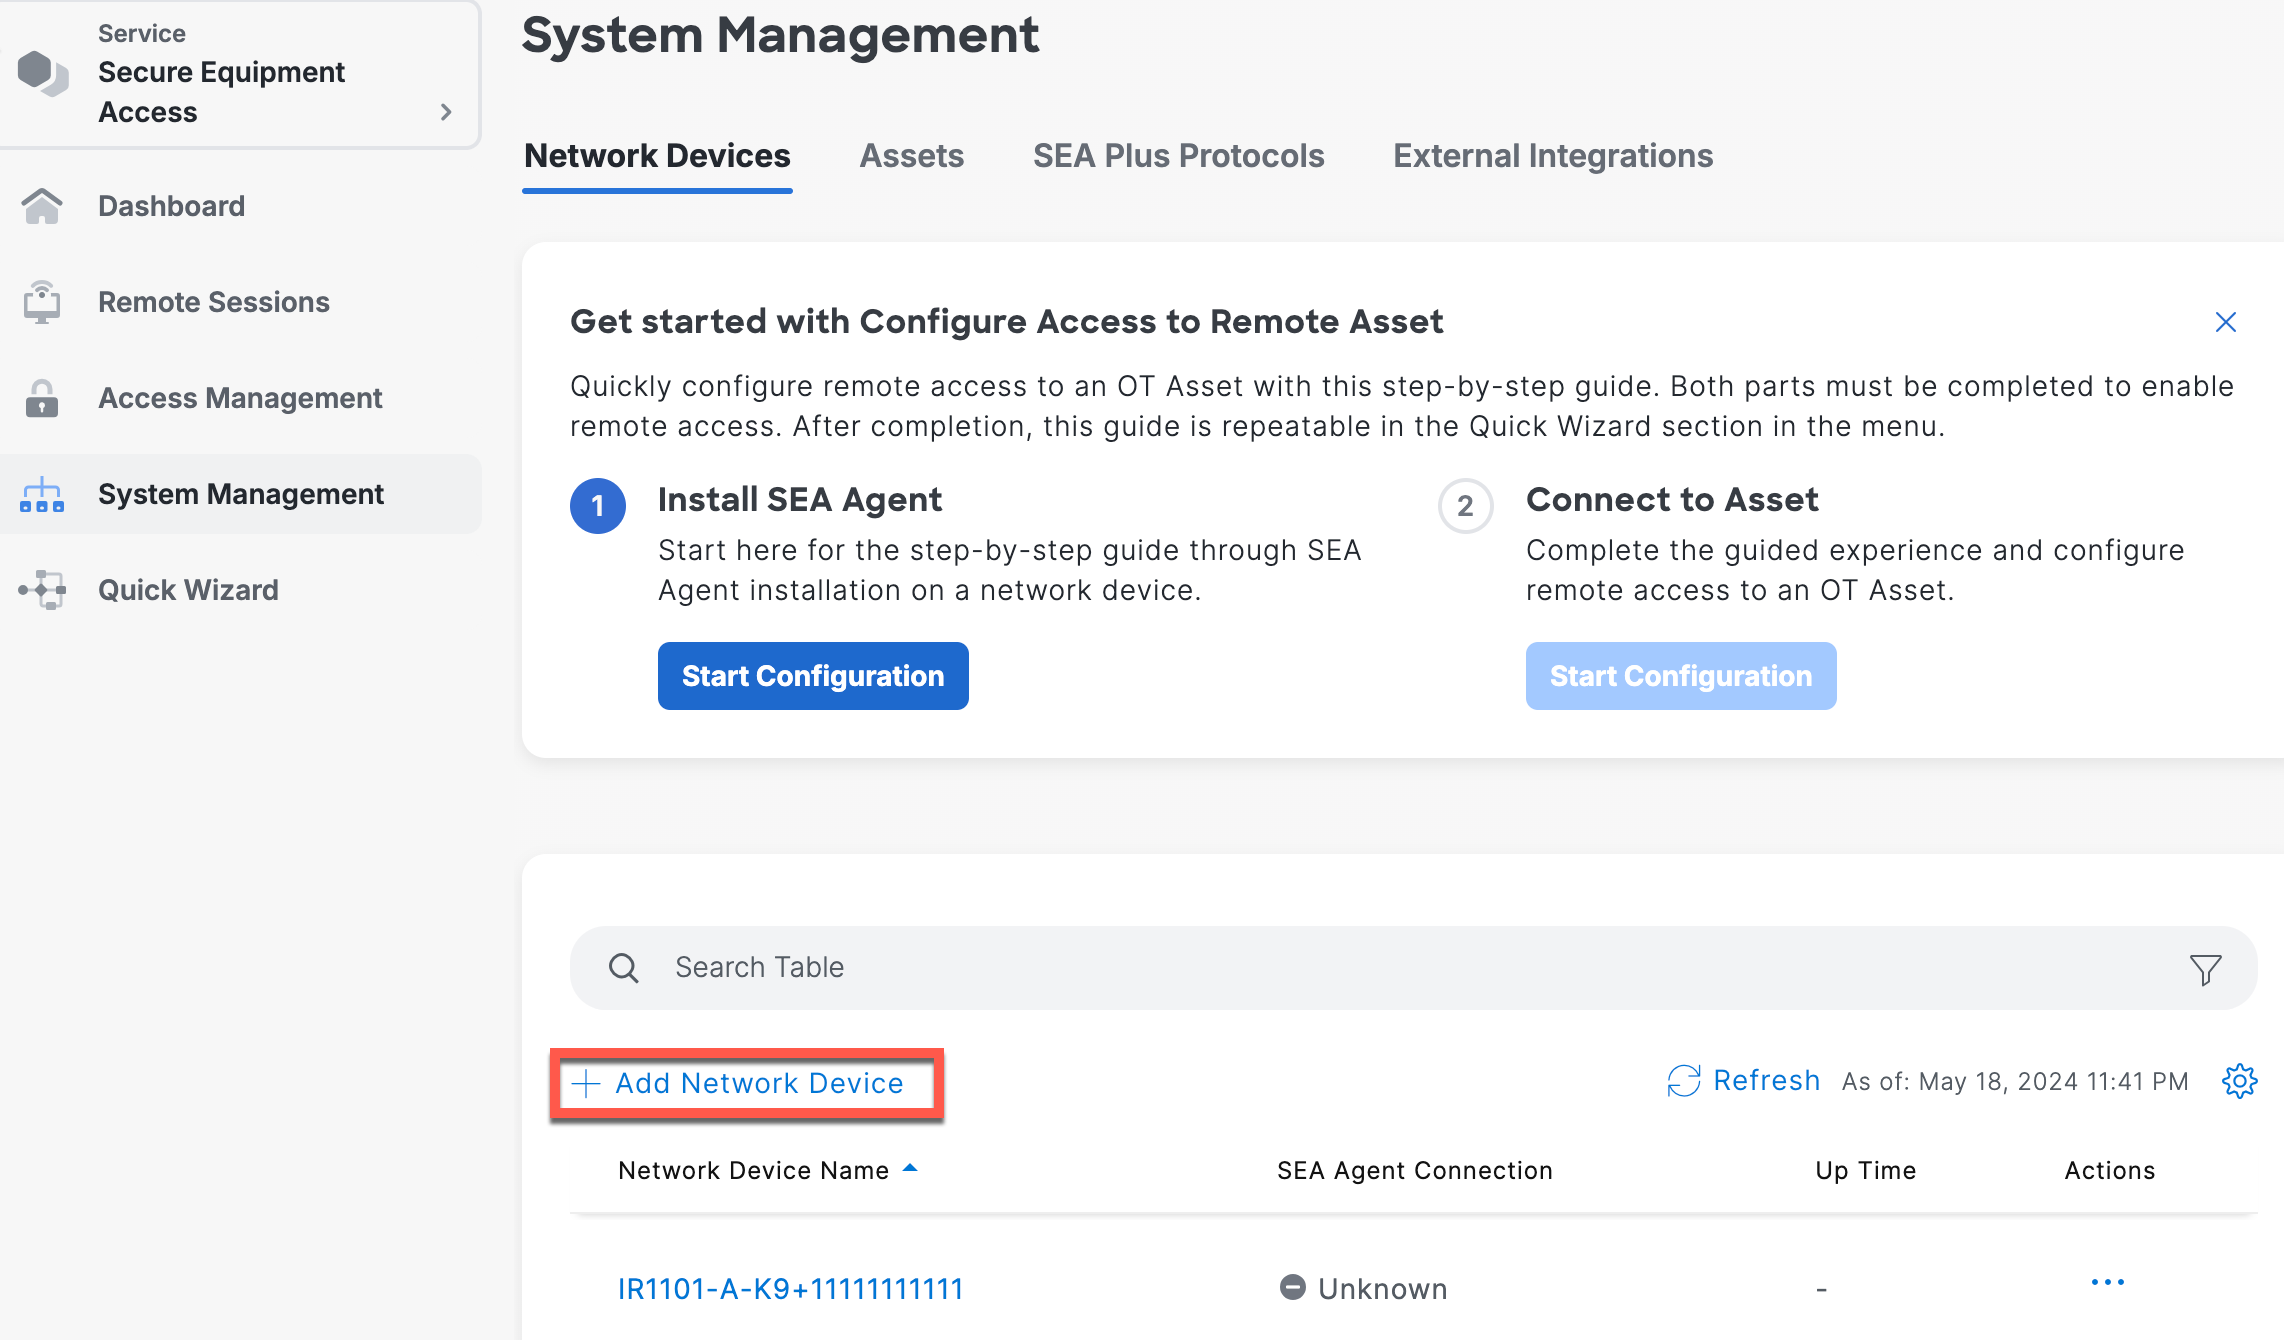
Install SEA Agent and Asset
To install and configure an SEA Agent for a Network Device:
- Click System Management.
- Install SEA Agent, click Start Configuration.

- In the Install SEA Agent screen select an existing Network Device from the list. Click Next.
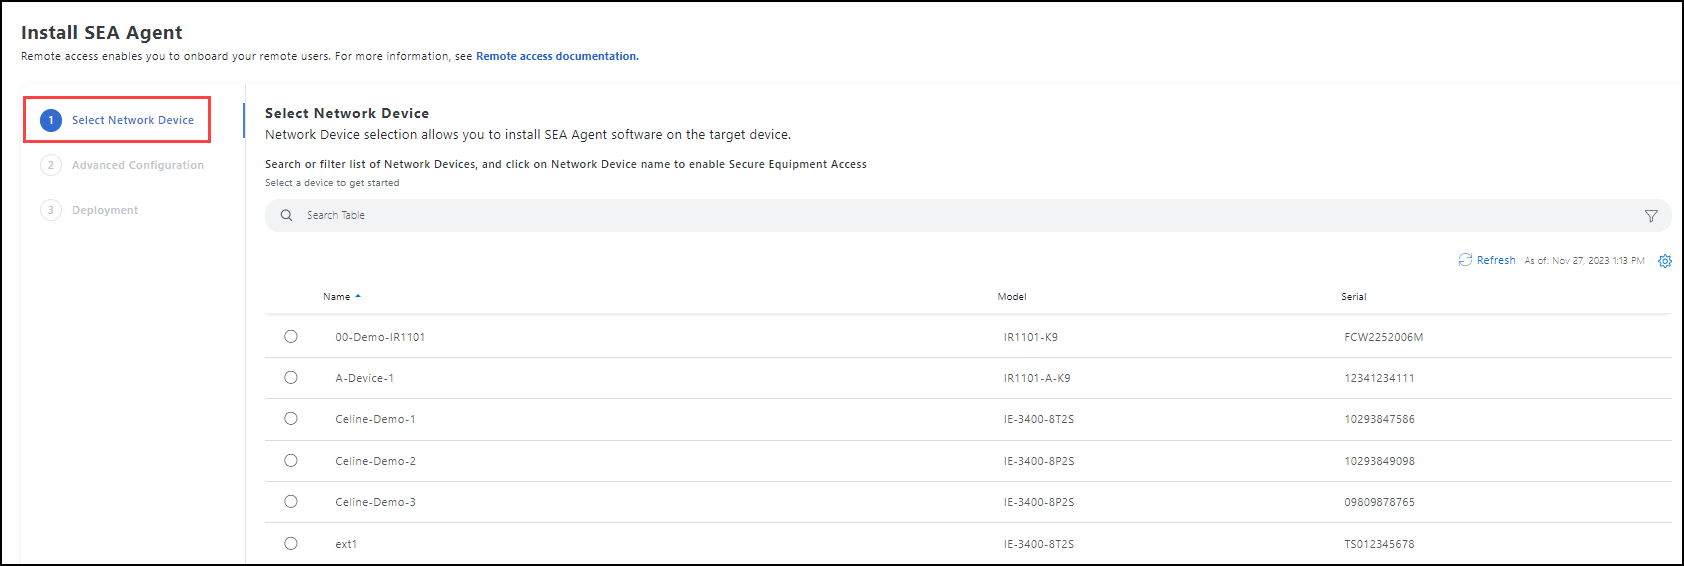
- The Advanced Configuration screen opens.
The Advanced Configuration screen differs according to what Network Device is selected.
Note: For information on router or switch configuration, see SEA: HTTP(S) proxy support or SEA: Multi-VLAN and Static IP support.
Advanced Configuration screen
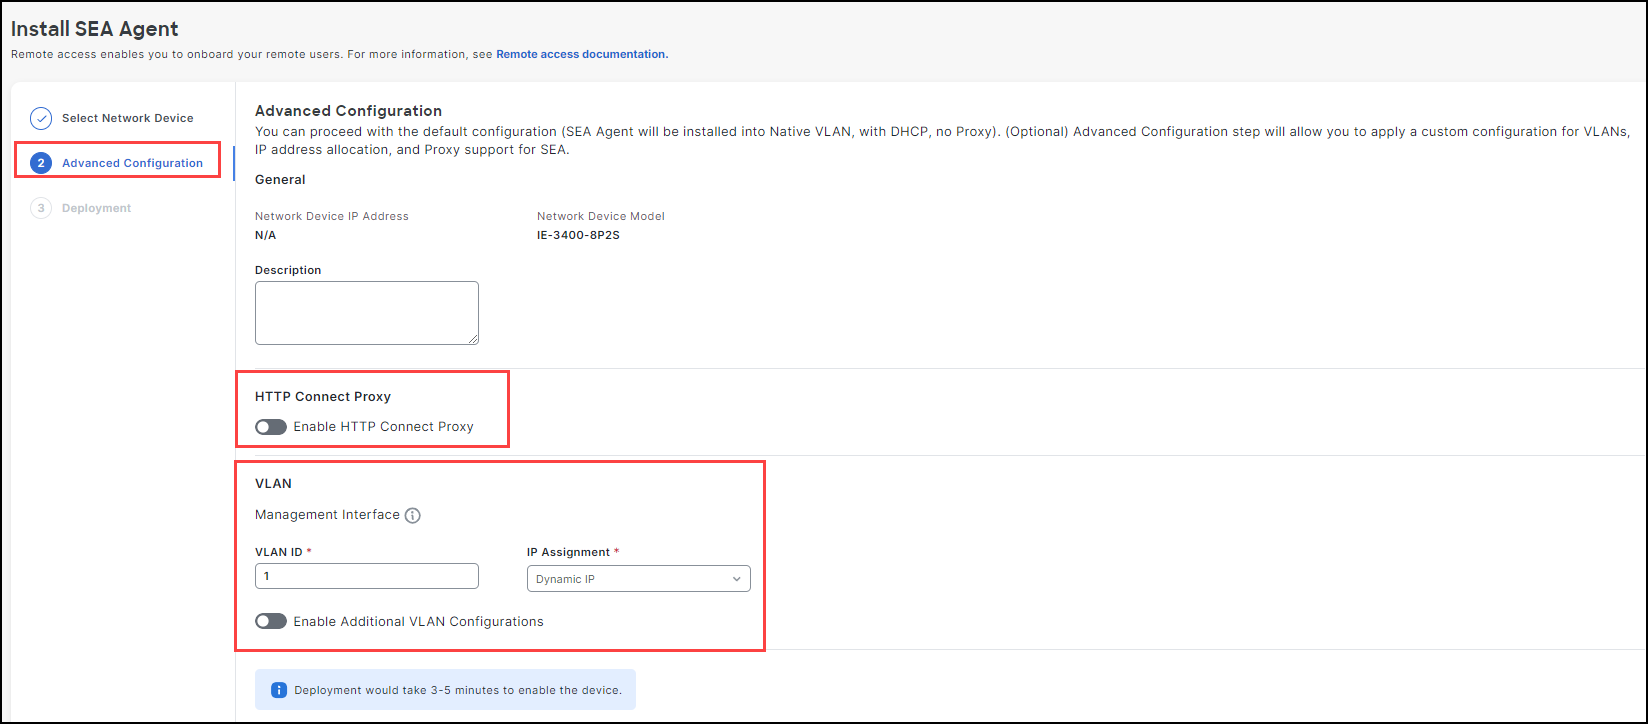
When you have configured the Network Device, click Deploy. It can 3-5 minutes to enable the device.
Once you deploy the Network Device, you are returned to the System Management screen with a green check by Install SEA Agent and the Connect to Asset button activated.

Note:
- If the installation fails, a Deployment Failed screen opens and gives a reason.
- If you return to the Get started with Configure Access to Remote Asset screen before the Network Device is deployed or if the deployment fails, the Install SEA Agent field color is Yellow and a message describing the installation status shows.

Connect to Remote Asset
- After choosing Connect to Asset, the screen opens to the Configure Connected Asset section, enter the Asset Name and the IP Address.

- In the next Connect to Asset screen, enter the Access Method for the Connected Asset and enter the pertinent information for that Access Method. For information on each access method, see Access Methods.
/secure_equipment_access/sea_plus_access_method.md
Note: All access methods are available Except SEA Plus. Click here for more information on using SEA Plus as an access method.
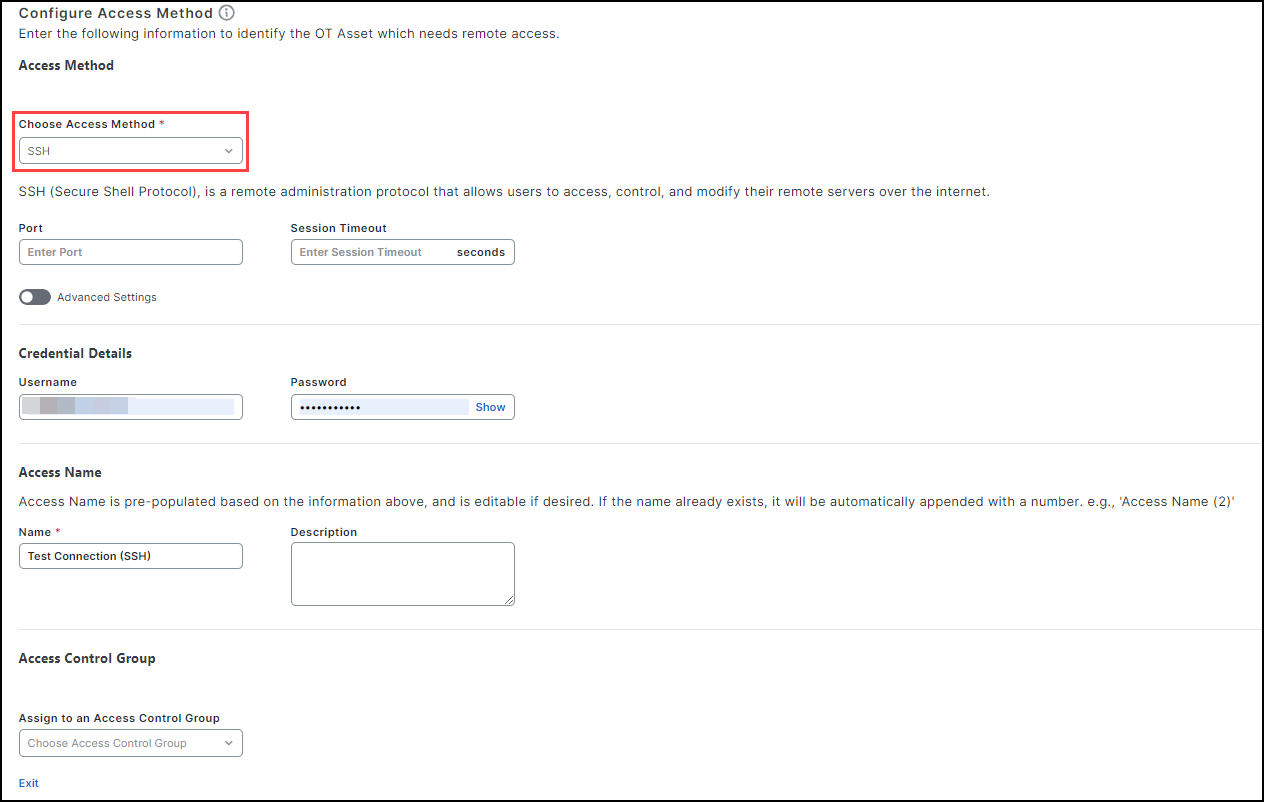
- (Optional) Choose an existing group in the Assign to an Access Control Group field.
Note: To assign an Access Control Group from this screen, the access group must already be created. Click here to create an Access Control Group. Once you creat a group and test the Access Method described in Step 5.
- When done, click Next test the configuration.
- Click Validate Test Method to launch the remote session to the Connected Asset.
- Click Complete. You are returned to the System Management screen where the Agent and Asset icons are green and links are provided that enable you view the network device and asset as well as to view and launch the access method used.
