Update network device firmware
EDM allows you to maintain and keep your devices up-to-date. Manually perform or schedule a firmware upload and install action for a future time. You can schedule a single job with a maximum of 2500 devices.
To update software:
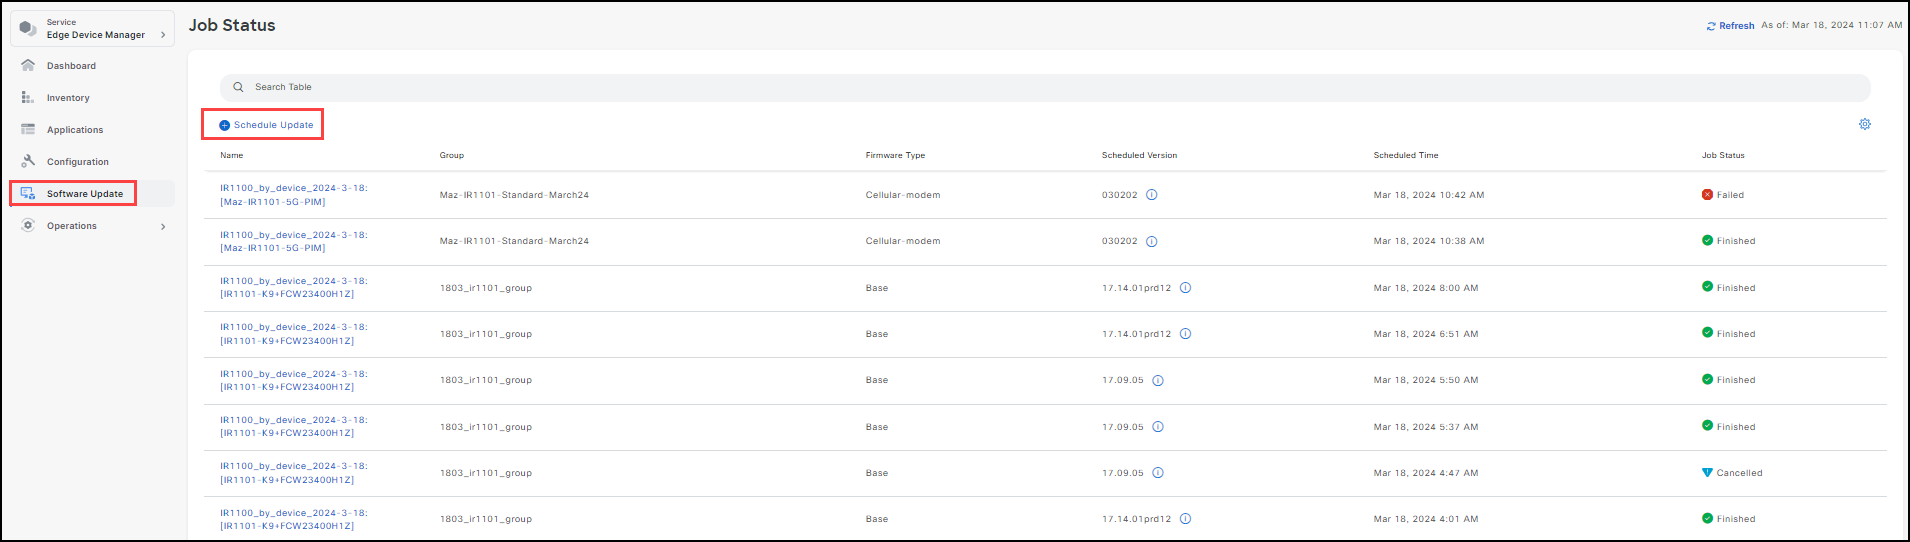
- From the left pane, click Software Update.
- On the Job Status page, click Schedule Update. The Select Devices page opens.
- Update the firmware either by group or device as long all the devices are of the same group or device type.
**Note**:
- This example shows By Device for the firmware update.
- Use the filter icon located at the right side of the screen to filter for specific device type, status, or firmware version..
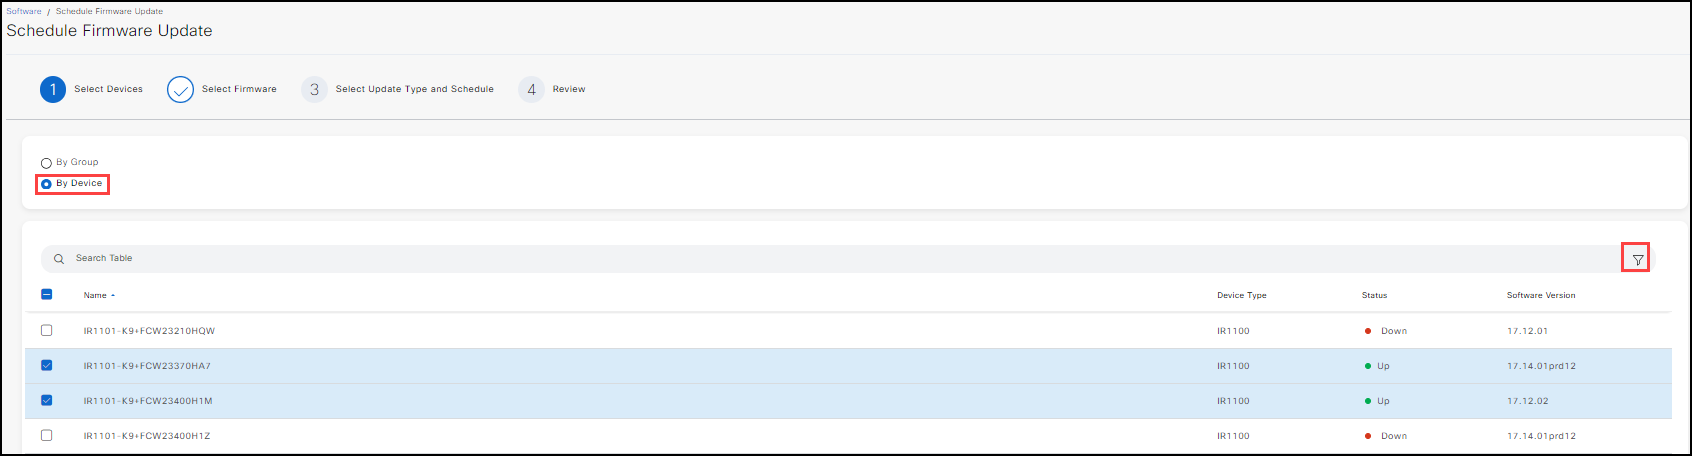
- Select the Devices or Groups, and click Next to advance to the Select Firmware screen. Select only devices/groups of same device type for a single firmware job.
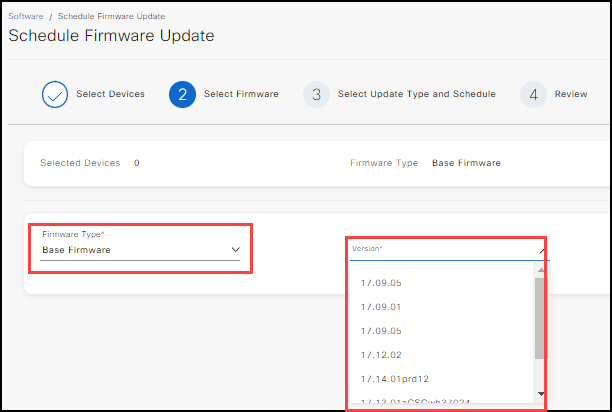
- In the Firmware Type field, select one of the following:
- Base Firmware: Allows you to choose the Firmware Version appropriate for your needs.
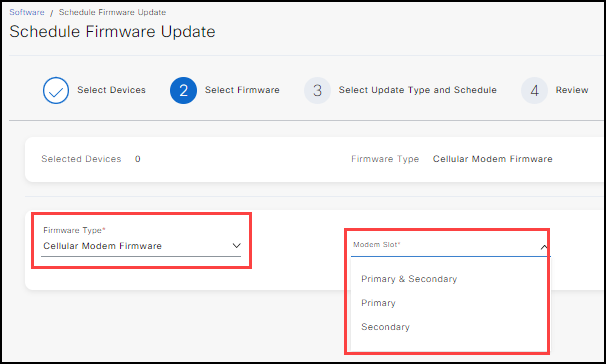
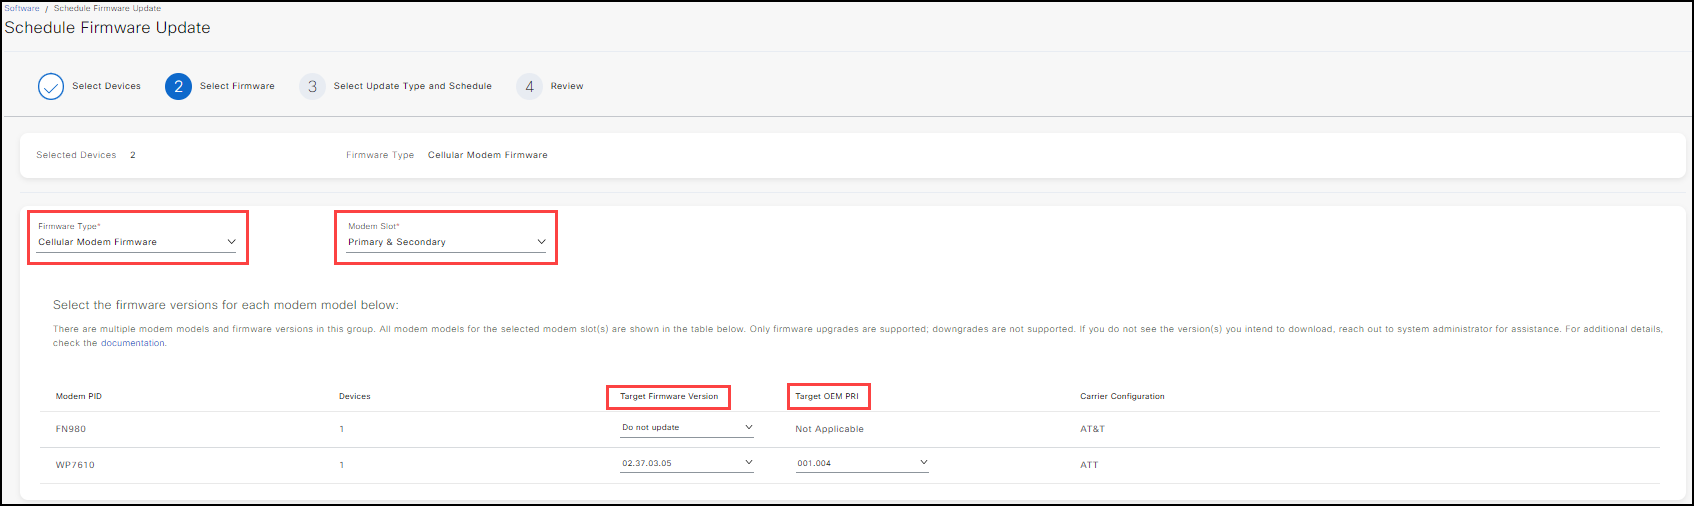
- Cellular Modem Firmware: Allows you to choose either Primary and Secondary, Primary, or Secondary modem slot for either the chassis or expansion module.
- Access Point: (IR829 models only) Allows you to choose the Firmware Version appropriate to your needs.
Note: For the IR829 model, the firmware type includes Access Point Firmware in the dropdown list. Use the appropriate Version for your device/group.
- Select the appropriate Firmware Version (for Base Firmware , Access Point Type) and Modem Slot (for Cellular Modem Firmware).
- The Modem Slot has 3 drop-down options available:
- Primary: Only modems inserted in primary slots are upgraded.
- Secondary: Only modems inserted in secondary slots are upgraded.
- Primary & Secondary: Modems inserted in both primary and secondary slots are upgraded.
The table presented here provides the slot designations for each device type.
| IR Model | Primary Slot | Secondary Slot |
|---|---|---|
| IR18xx | Cellular 0/4/0 | Cellular 0/5/0 |
| IR1101 | Cellular 0/1/0 | Note: A cellular modem can be inseterd in either: Top expansion module (0/3/0) or bottom expansion module (0/4/0)but never both |
Base Firmware/Access Point Firmware
Cellular Modem Firmware
Once you have selected the Base Firmware/Access Point Firmware and the Firmware Version the screen updates to list the available devices and firmware versions for review.
Firmware Update Screen
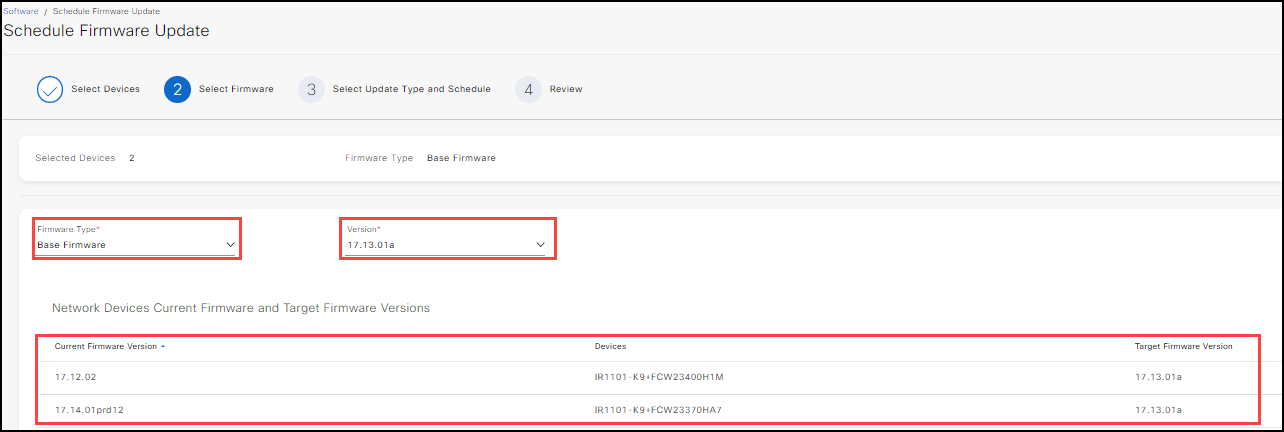
Note: For Base Firmware (and Access Point Firmware), the list includes the Current Firmware Version, Device, and Target Firmware Version.
Once you select the Cellular Modem Firmware and the Modem Slot, the screen updates to list modem PIDs and Carriers for the selected devices along with the option to choose Modem Firmware and OEM PRI Files where applicable. The OEM PRI list is only populated once you select the target firmware version.
Cellular Modem Update screen
IMPORTANT: Not all modem firmware is uploaded and available on IoT OD. If there is a modem that you need to upgrade and the firmware / OEM is not available in the dropdown, please contact IoT OD Admin to make the firmware available.
Note:
- Cellular firmware downgrades are not supported and can damage the modem if tried. So, OD will not download a file to the device if the firmware version is lower than the version running on the device. This error indicated in Job Detail page after scheduling the job.
- Telil Firmware type (FN980 and LM960):
- One single file contains modem firmware, OEM PRI, and Carrier PRI for all carrier types. This *.bin file is downloaded to the device when you select the version. The OEM PRI is not applicable here.
- Sierra Wireless Firmware type (WPxxxx, EMxxxx):
- The Modem firmware and OEM PRI are both applicable. You can select do not update for the firmware version, if you intend to update only the OEM PRI file.
- There is a third file called the Carrier PRI for the EMxxxx series that is auto downloaded, depending on the firmware version selected.
- If you selected both primary and secondary slots for upgrading, the above files are downloaded for each modem slot.
- The modem in the primary slot is upgraded first and then the modem in the secondary slot upgrades.
- The Cisco Embedded Event Manager (EEM) performs the installation, as there are multiple actions that are performed for each file downloaded.
- High level actions performed in the EEM:
- Enable Notification profile.
- For a given modem slot:
- Check if images are available in /managed/images folder.
- Move images from /managed/images to individual slot folders for {cellular firmware + cellular pri} and {oempri}.
- Record the current active profile and APN modem.
- Trigger install for modem firmware.
- Wait 15 minutes for upgrade and reload to be complete.
- Check if modem is up and loaded with new firmware.
- Trigger OEM upgrade if requested.
- Wait 15 minutes for upgrade and reload to be complete.
- Check if modem is up and loaded with new OEM version.
- Recreate the active profile with APN.
- Recommendations while using this feature:
- Have a backup uplink apart from the one that's being upgraded.
- For each modem firmware that is uploaded for a carrier type, try on one device with a backup uplink and then trigger a bulk operation.
- If multiple modems or cellular uplinks are available, trigger install for one modem at a time.
- After configuring the devices (or group), click Next to advance to the Select Update Type and Schedule screen.
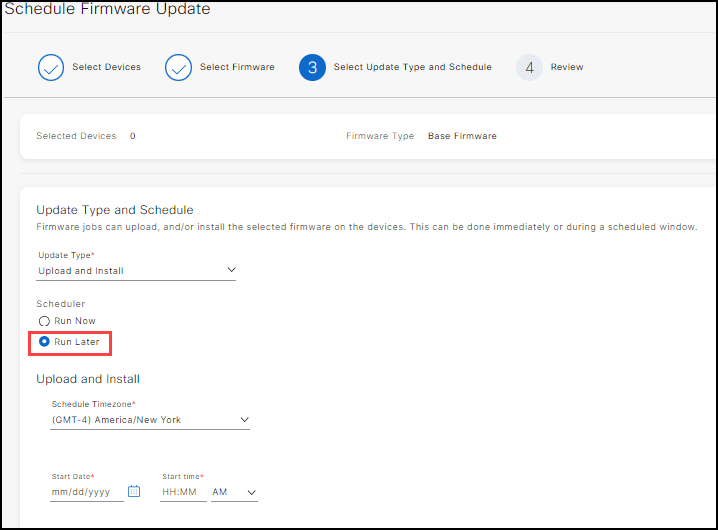
- In the Select Update Type and Schedule screen, choose the Update Type, either:
- Upload: Upload the firmware to the group (or device), but don't install it.
- Install: Install the firmware to the group (or device).
- Upload and Install: Upload and install the firmware to the group (or device).
- To run your firmware update, choose either:
- Run Now
- Run Later
Note:
- If you choose Run Now, click Next to open the Review screen.
- If you choose Run Later, skip to the Schedule a firmware update section below.
Schedule a firmware update
To schedule a firmware update for a future date:
- Click Run Later in the Schedule Firmware Update screen, the Scheduler section opens with the appropriate action as a header (Upload, Install, or Upload and Install.
- Choose the Timezone when the action happens.
- Choose the Start Date (mm/dd/yyyy). the field or the calendar icon to choose a Start Date.
- Enter the Start Time (HH/MM) and choose either AM/PM.
Review and Update Firmware
Once devices (or groups) are configured, click Next. The Review screen opens.
- Review all your settings.
- When all settings are reviewed and accepted, click Schedule Update.
- The status is listed as Scheduled in the Job Status screen.
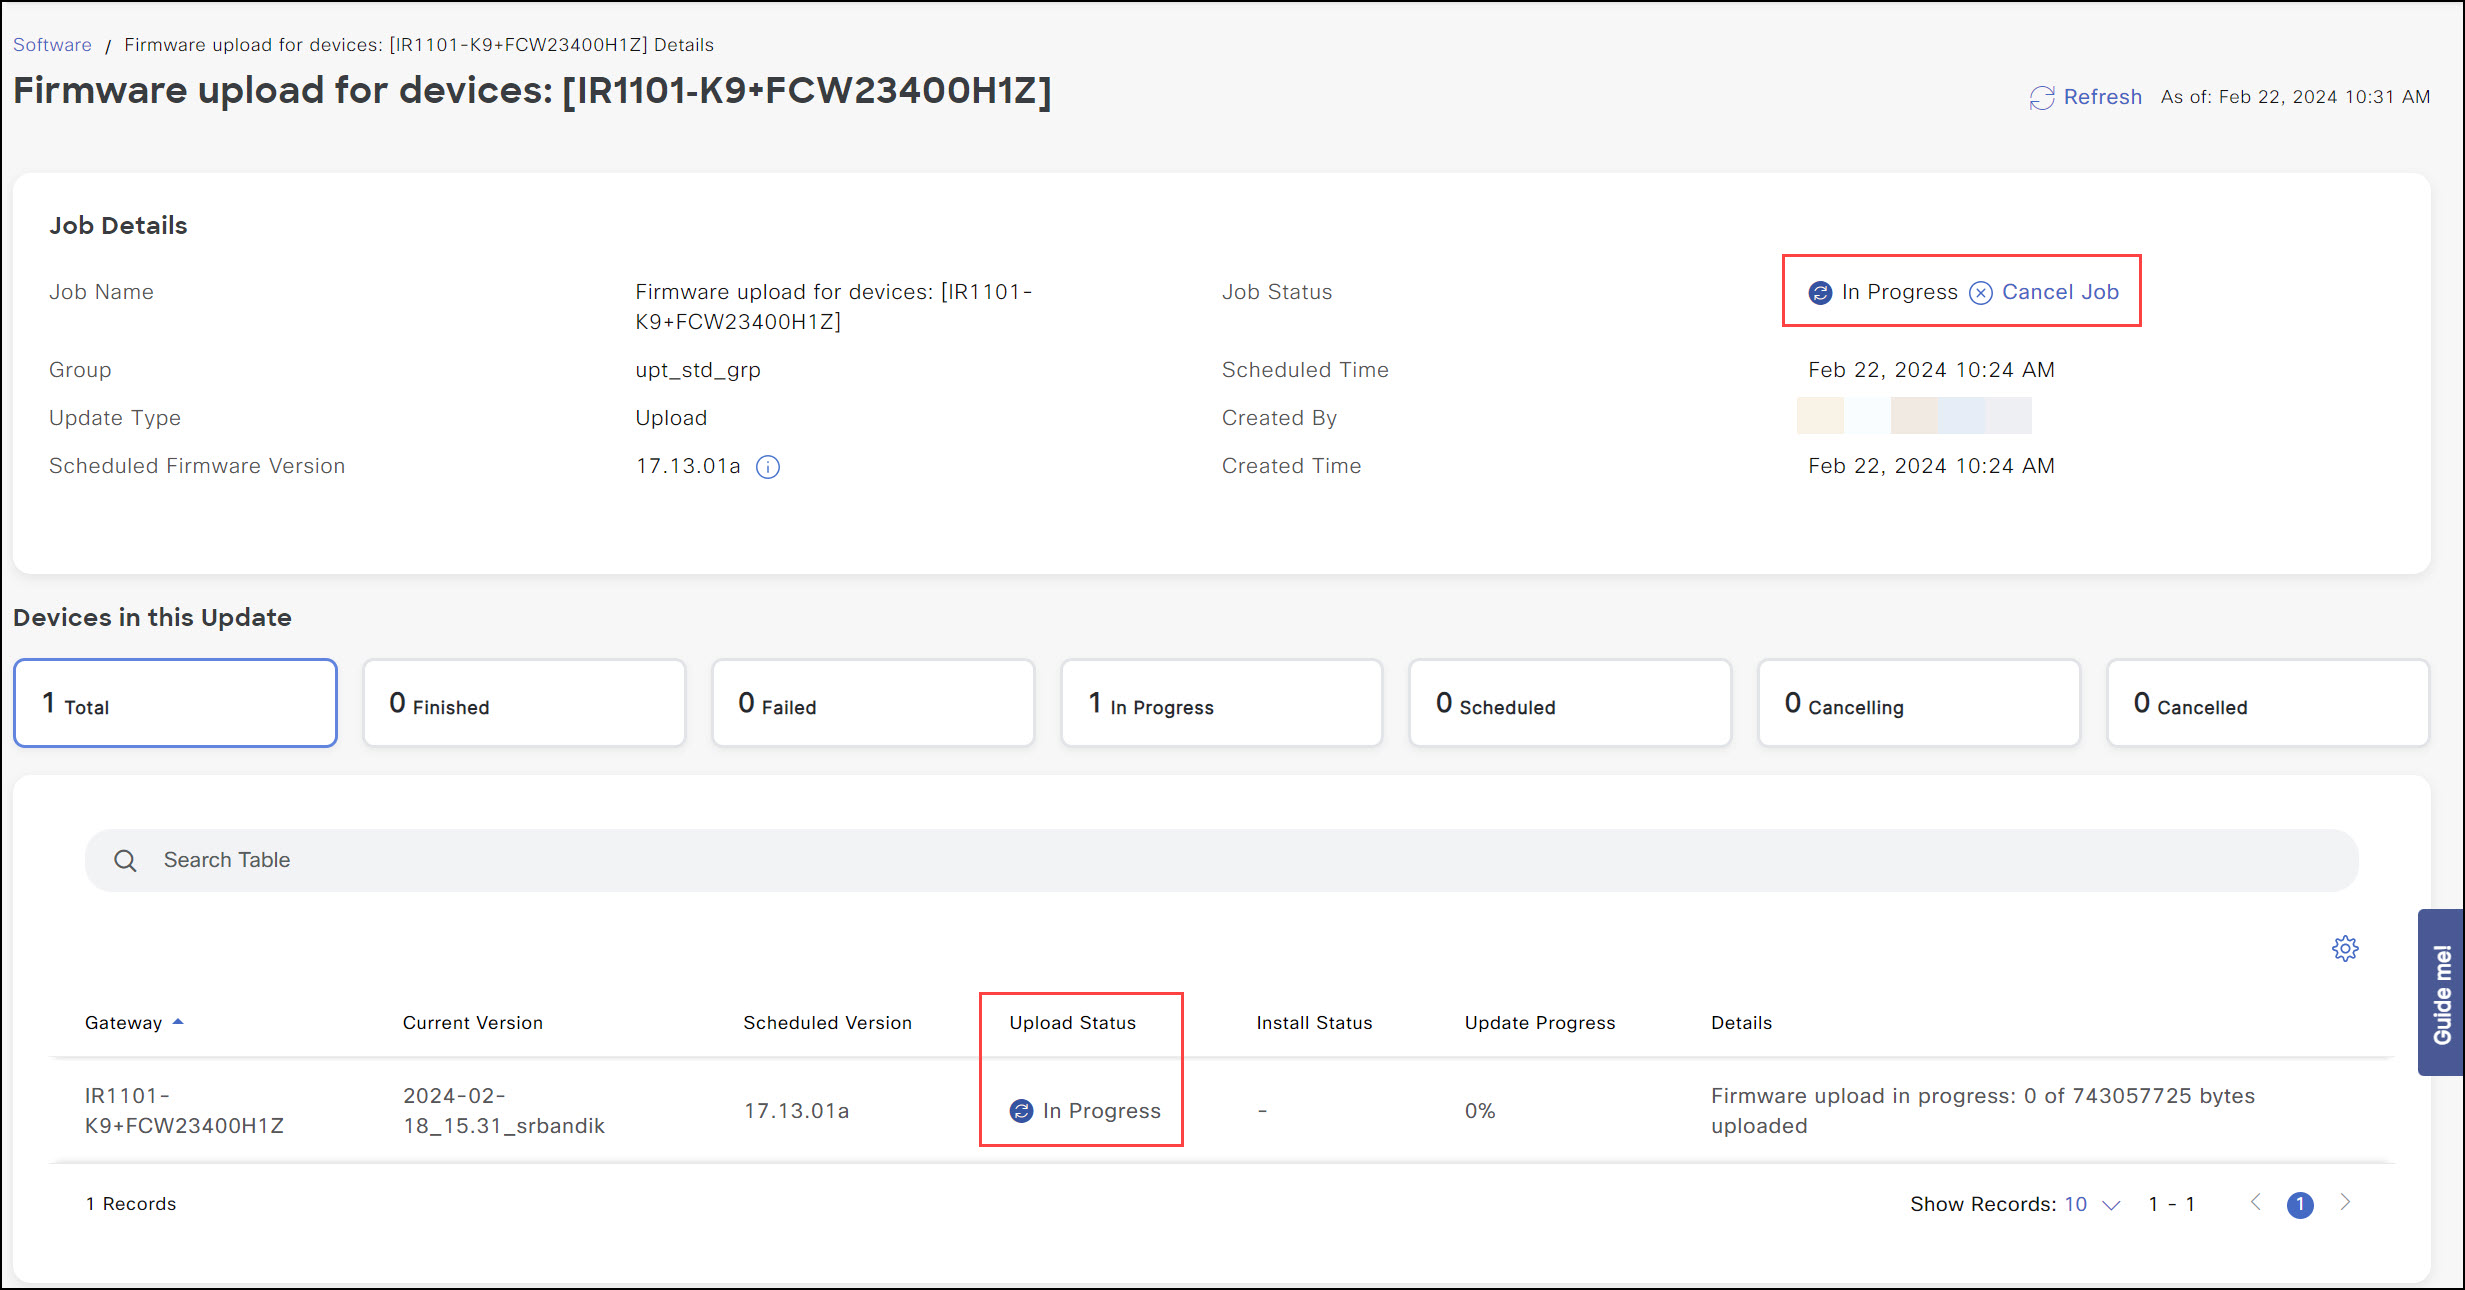
Job Status
After you click Confirm, the Job Status window opens. The following statuses are supported:
- Finished
- Failed
- In Progress
- Scheduled
- Cancelled
- Force Cancelled
To verify that the firmware command was executed on the device(s), click on the job in the Job Status page to see the update progress or check the Event Logs for the device. To check the Event Logs, click Inventory from the left panel > select the device from the list > click the Event Log tab and click Refresh.
If the device(s) are not UP, the firmware update or firmware download will fail. The devices must be UP and discovered.
Note: If you trigger another job, the previous job logs/error status information is replaced by the current request. Only the latest job status is available per device.
IMPORTANT: Once a device is onboarded and managed by IoT OD, use IoT OD for all firmware update operations on your devices.
Cancel the network device firmware update
Cancel Job
You can cancel the Scheduled or In-Progress firmware upgrades for all the devices managed by IoT OD at the group level or device level. Cancel Job stops the firmware download that is in progress.
- From the left pane, click Software. A list of the software updates with their respective job status displays.
- Click on the job name. A detailed update page displays.
- If the job status is Scheduled, then click Cancel Job. A warning pop-up opens. Click Confirm to proceed with the cancel.
- For IR devices/groups, if the job status is In-Progress, then click Cancel Job.
A warning pop-up opens. The pop-up also shows the number of IR devices that can be canceled. Click Confirm to proceed with the cancel.
The Upload/Install status changes to Cancelled for all those devices where the cancellation was successful.
On the top right, the job status is currently In Progress. Use the Cancel Job icon to stop sending the update firmware request to the group of devices.
If the Update Type is:
- Install, then the Cancel Job operation is not supported when Install is In-Progress.
- Upload, then the Cancel Job operation is supported only for IR devices.
- Upload and Install, then the Cancel Job operation is supported only for IR devices. The Cancel Job operation is not supported when Install is In-Progress.
Note: Only a system-defined number of devices are updated at one time. The rest of the devices in the group are scheduled for update. The firmware update for these devices can be canceled.
If the Upload only or Upload and Install upgrade type job is canceled, only a partial software file is available on the EDM-managed devices. This partial file will be used when you initiate the upgrade of the same image in the future. Also, the partial image file will be deleted if there is not enough space to install a separate image on the EDM-managed device.
Force Cancel
This enhancement to the firmware upload and installation processes allows you to Force Cancel a firmware job on IoT OD. Using this option does not guarantee that the firmware-related process is cancelled on the device. This option ensures that the process is forcefully terminated on the IoT OD only, to allow you to perform other operations on the device/group, without having to wait for the process to auto complete. Force Cancel option is available when the following criteria are met:
- Upload job: 5 minutes after you triggered a Cancel.
- Upload and Install job: After 3 hours from the job Start Time.
- Install job: After 3 hours from the job Start Time.
The Job Details window shows the Force Cancel Job option.
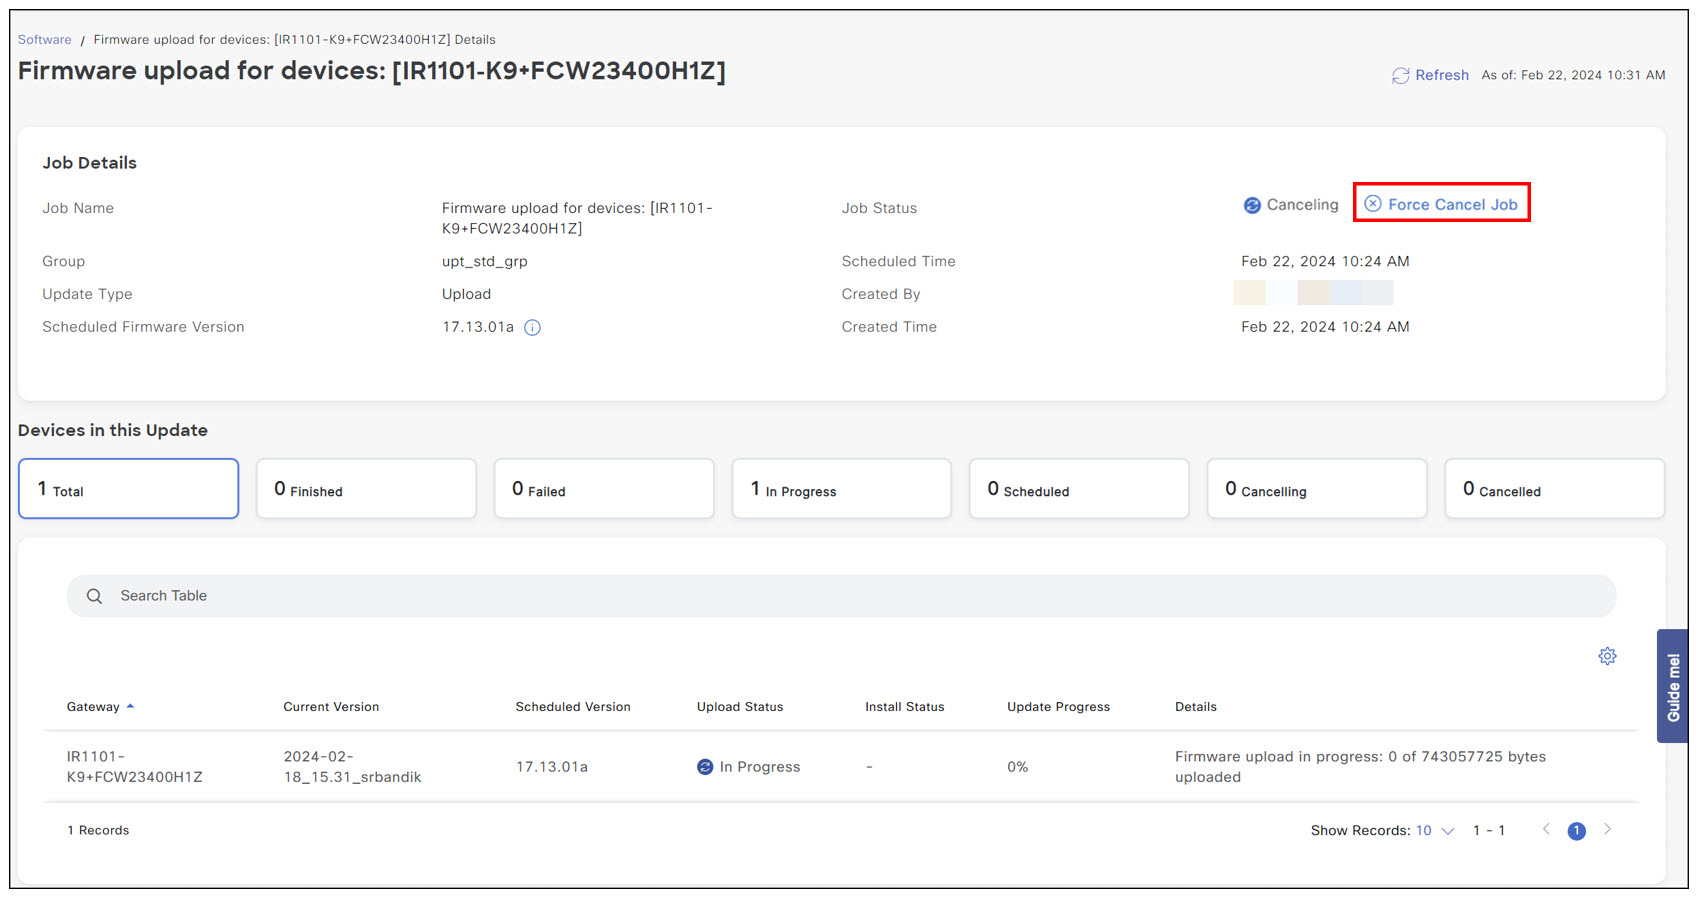
To Force Cancel a firmware job:
- Click Force Cancel Job. A Warning box opens.
- Click Confirm Force Cancel to proceed to force the job to cancel.
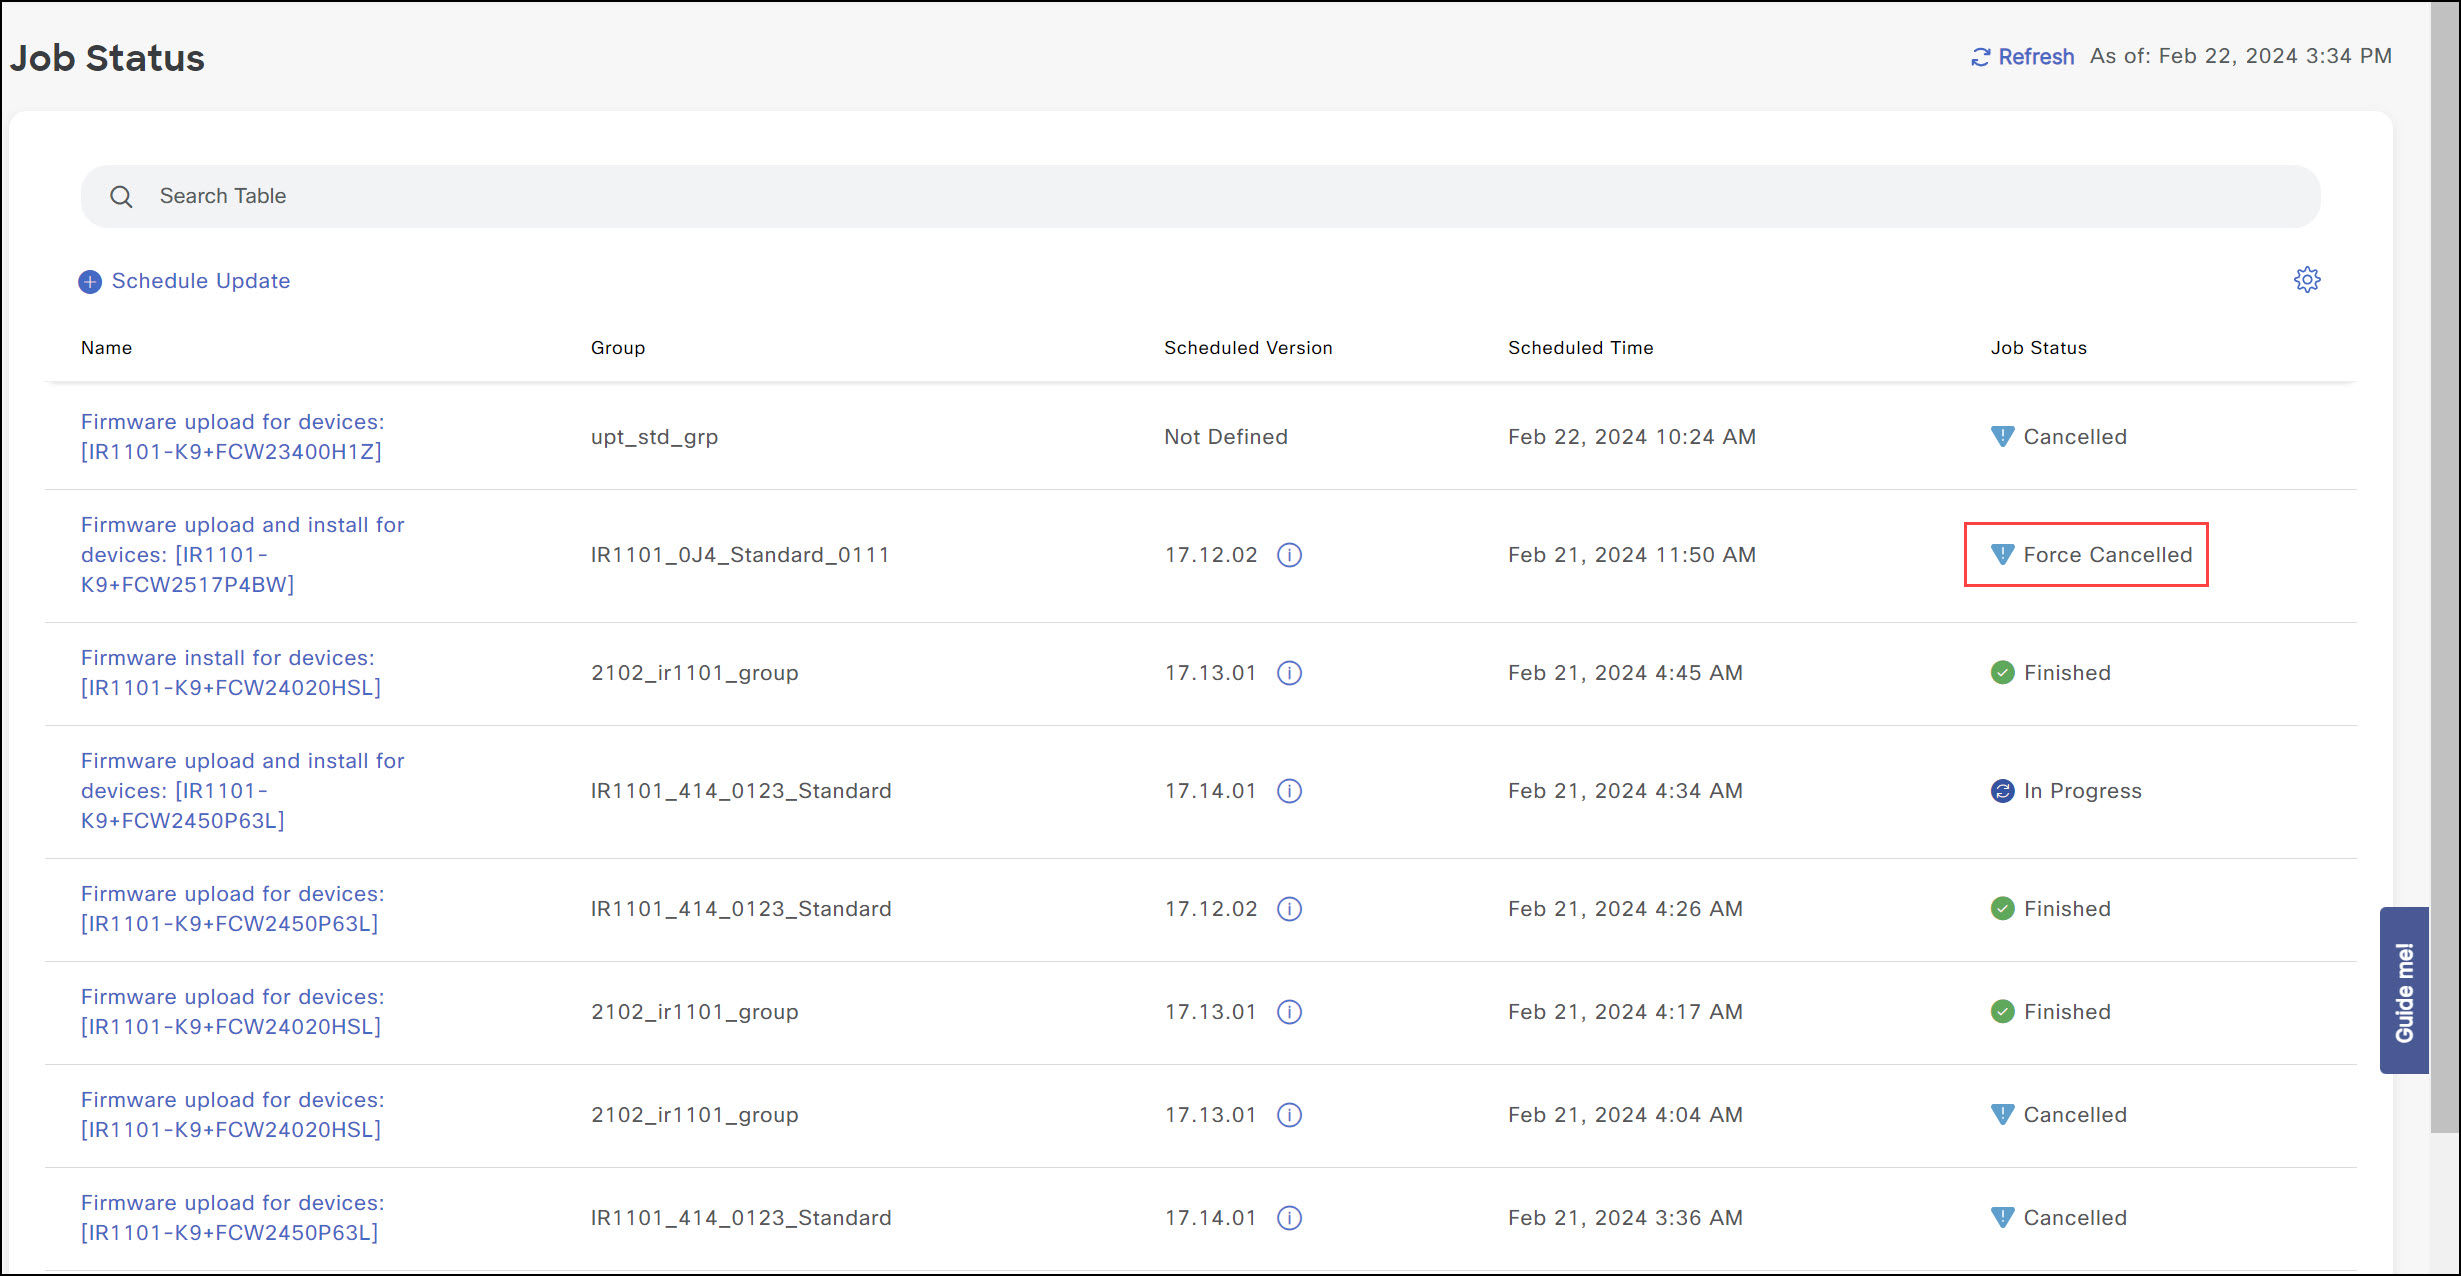
Once you confirm the Force Cancel operation, the firmware job and device statuses are marked as Force Cancelled in the Job Status screen.
Troubleshooting firmware updates
IMPORTANT
- If you are updating a single modem or cellular uplink, Cisco recommends that you have a backup uplink apart from the one that's being upgraded. If multiple modems or cellular uplinks are available, trigger an install job on one modem at a time.
- IoT OD does not support cellular firmware downgrades. Attempting to downgrade cellular firmware can cause the modem to malfunction. IoT OD will not download a file to the device if the firmware version is lower than the version running on the device. This error displays in Job detail page after scheduling the job.
Note:
- For all the scenarios tested by Cisco, there is no availability for some PIDs and non-US carriers and/or all the PIDs are already on the latest version. there is no availability of PIDs and non-US carriers and /or all the PIDs are already on the latest version.
- For each modem firmware that is uploaded for a carrier type, Cisco recommends performing a job on one device with a backup uplink. After a successful job, trigger a bulk operation.
- The most common issue is the possibility that the APN can be erased, once the firmware is installed. Even though the APN is set on IoT OD, this action can potentially cause issues, if a backup uplink is not available. We have seen the issue only in Jasper SIMs, as broadband APN does not work for jasper SIMs. Therefore, a backup uplink is strongly encouraged.
- For modems, IoT OD completes the majority of checks. You receive specific error messages when there is a mismatch.