Ethernet Settings
Alert: Cisco has made the end-of-life (EOL) announcement for the Cisco Edge Device Manager (EDM).
Note:
- The eCVD IR1101 differs from IR1800. The IR1101 allows you to manage four Fast Ethernet servers, the IR1800 allows you to manage up to four Gigabit Ethernet ports (GE 1-4).
- The Ethernet settings for IR800 routers is located in the Interface section. For information for configurating Ethernet connections, Interface
The Ethernet Settings section for IR1101 and IR1800 devices provides the following information:
IR1101
Note: A Fast Ethernet switch can transfer data packets at a rate of 10 Mbps.
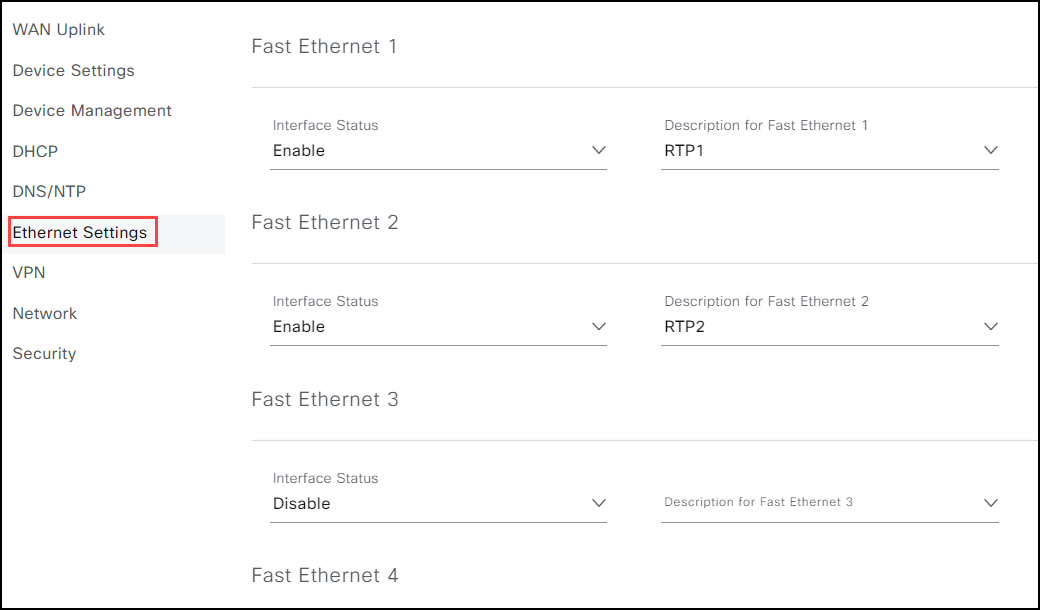
The eCVD IR1101 allows users to enable or disable each Fast Ethernet server in use (ports Fast Ethernet 1-Fast Ethernet 4).
Field Descriptions:
- Gigabit Ethernet ID: (Cannot be edited) Provides the Gigabit Ethernet interface number.
- Ethernet Status: A drop-down list used to select, enable or disable the interface number.
- Description: (Optional) Provides a reference for the interface number.
To configure Ethernet ports
- Select the Fast Ethernet interface (Fast Ethernet 1-4) you want to configure.
- Select the status of the port to be either enabled or disabled. By default, this option is disabled.
- (Optional) Enter a relevant short description of the port that can help identify it.
- Repeat steps 1-3 for every Fast Ethernet port to be used.
- Click Save. A success notice opens in the bottom right.
IR1101 Ethernet Settings screen

IR1800
Field Descriptions:
Gigabit Ethernet ID: (Cannot be edited) Provides the Gigabit Ethernet interface number. Ethernet Status: A drop-down list used to select, enable or disable the interface number. Description: (Optional) Provides a reference for the interface.
To configure Ethernet ports:
- Select the Gigabit Ethernet interface.
- Select the status of hte port to be either enabled or disabled. By default, this option is disabled.
- (Optional) Enter a relevant short description of the port that can help identify it.
- Repeat steps 1-3 for every Gigabit Ethernet port to be used.
- Click Save to save your settings. (Note: Clicking Save will save the existing settings and a "success" notice opens in the bottom right corner stating that the group template has been updated.)
Ethernet Settings screen
