Enable SEA on Your Network Devices Using CLIs
This feature simplifies the configuration of supported network devices and the installation of SEA agent on them. By following a guided configuration flow in the SEA User Interface and copying suggested CLI commands to the device, you can efficiently enable SEA. This is the recommended method for activating SEA on standalone (CLI-managed) network devices.
To watch a video tutorial, see Onboarding devices with CLI method.
Note: Previously, the network device onboarding and installing the SEA agent involved several steps: creating a device profile, adding the network device to the Application Manager service, configuring the device with CLI commands for the IoT Operations Dashboard connectivity, and then installing the SEA agent.
Prerequisites
- Network connectivity: Depending on the cluster in use, the IE device (SEA Gateway) must always have access to us.ciscoiot.com or eu.ciscoiot.com.
- Firewall configuration: If you use an external DNS server, configure your firewall rules to allow your SEA Gateway access to IoT OD and DNS. For more information, see firewall rules.
- For Cisco Catalyst 9300: To install apps, your device must have a valid Cisco DNA Network Advantage license enabled.
- SD Card requirement (IE3xx Platforms Only): Format or partition the SD card to create the required IOx partition in the card, if not already done. This action erases all data on the card and formats or partitions the card.
If the complete SD card is reserved for IOx, use the following command to format the SD card:
format sdflash: ext4! Example: IE-3400#format sdflash: ext4 Format operation may take a while. Continue? [confirm] Format operation will destroy all data in "sdflash:". Continue? [confirm] Format operation reloads, if partitions are there. Continue? [confirm] format completed with no errorsTo partition the SD card to have both an IOx partition and FAT32 partition, use the following command:
partition sdflash: iox
Supported Devices
- Cisco Catalyst 9300 Series switches
- Cisco Catalyst IE3400 Heavy Duty Series switches
- Cisco Catalyst IE3300 Rugged Series switches
- Cisco IE3500 Rugged Series switches (IE-3500-8T3S, IE-3500-8P3S, IE-3505-8T3S, and IE-3505-8P3S)
Add Network Devices to SEA Service
From the Services panel, choose Secure Equipment Access > System Management.
Under the Network Devices panel, click Add Network Device.
On the Add Network Device page, in the Network Device area, choose CLI Deployment from the Selection Method drop-down list. After you select CLI Deployments from the list, the following fields become available:
- Network Device Name
- Client ID
- Network Device Type
In the Network Device Name field, enter a name for the network device you want to add.
In the Client ID field, enter the serial number of the network device.
Use the following command on the console of your device to display the PID and the serial number:
Router# show license udiIn the Network Device Model drop-down list, select a model of the network device. For example, Catalyst 9300 Series routers.
Click Next. The Advanced Configuration tab appears, displaying the default settings for the agent installation. By default, the SEA agent is installed on the native VLAN using DHCP without a proxy.
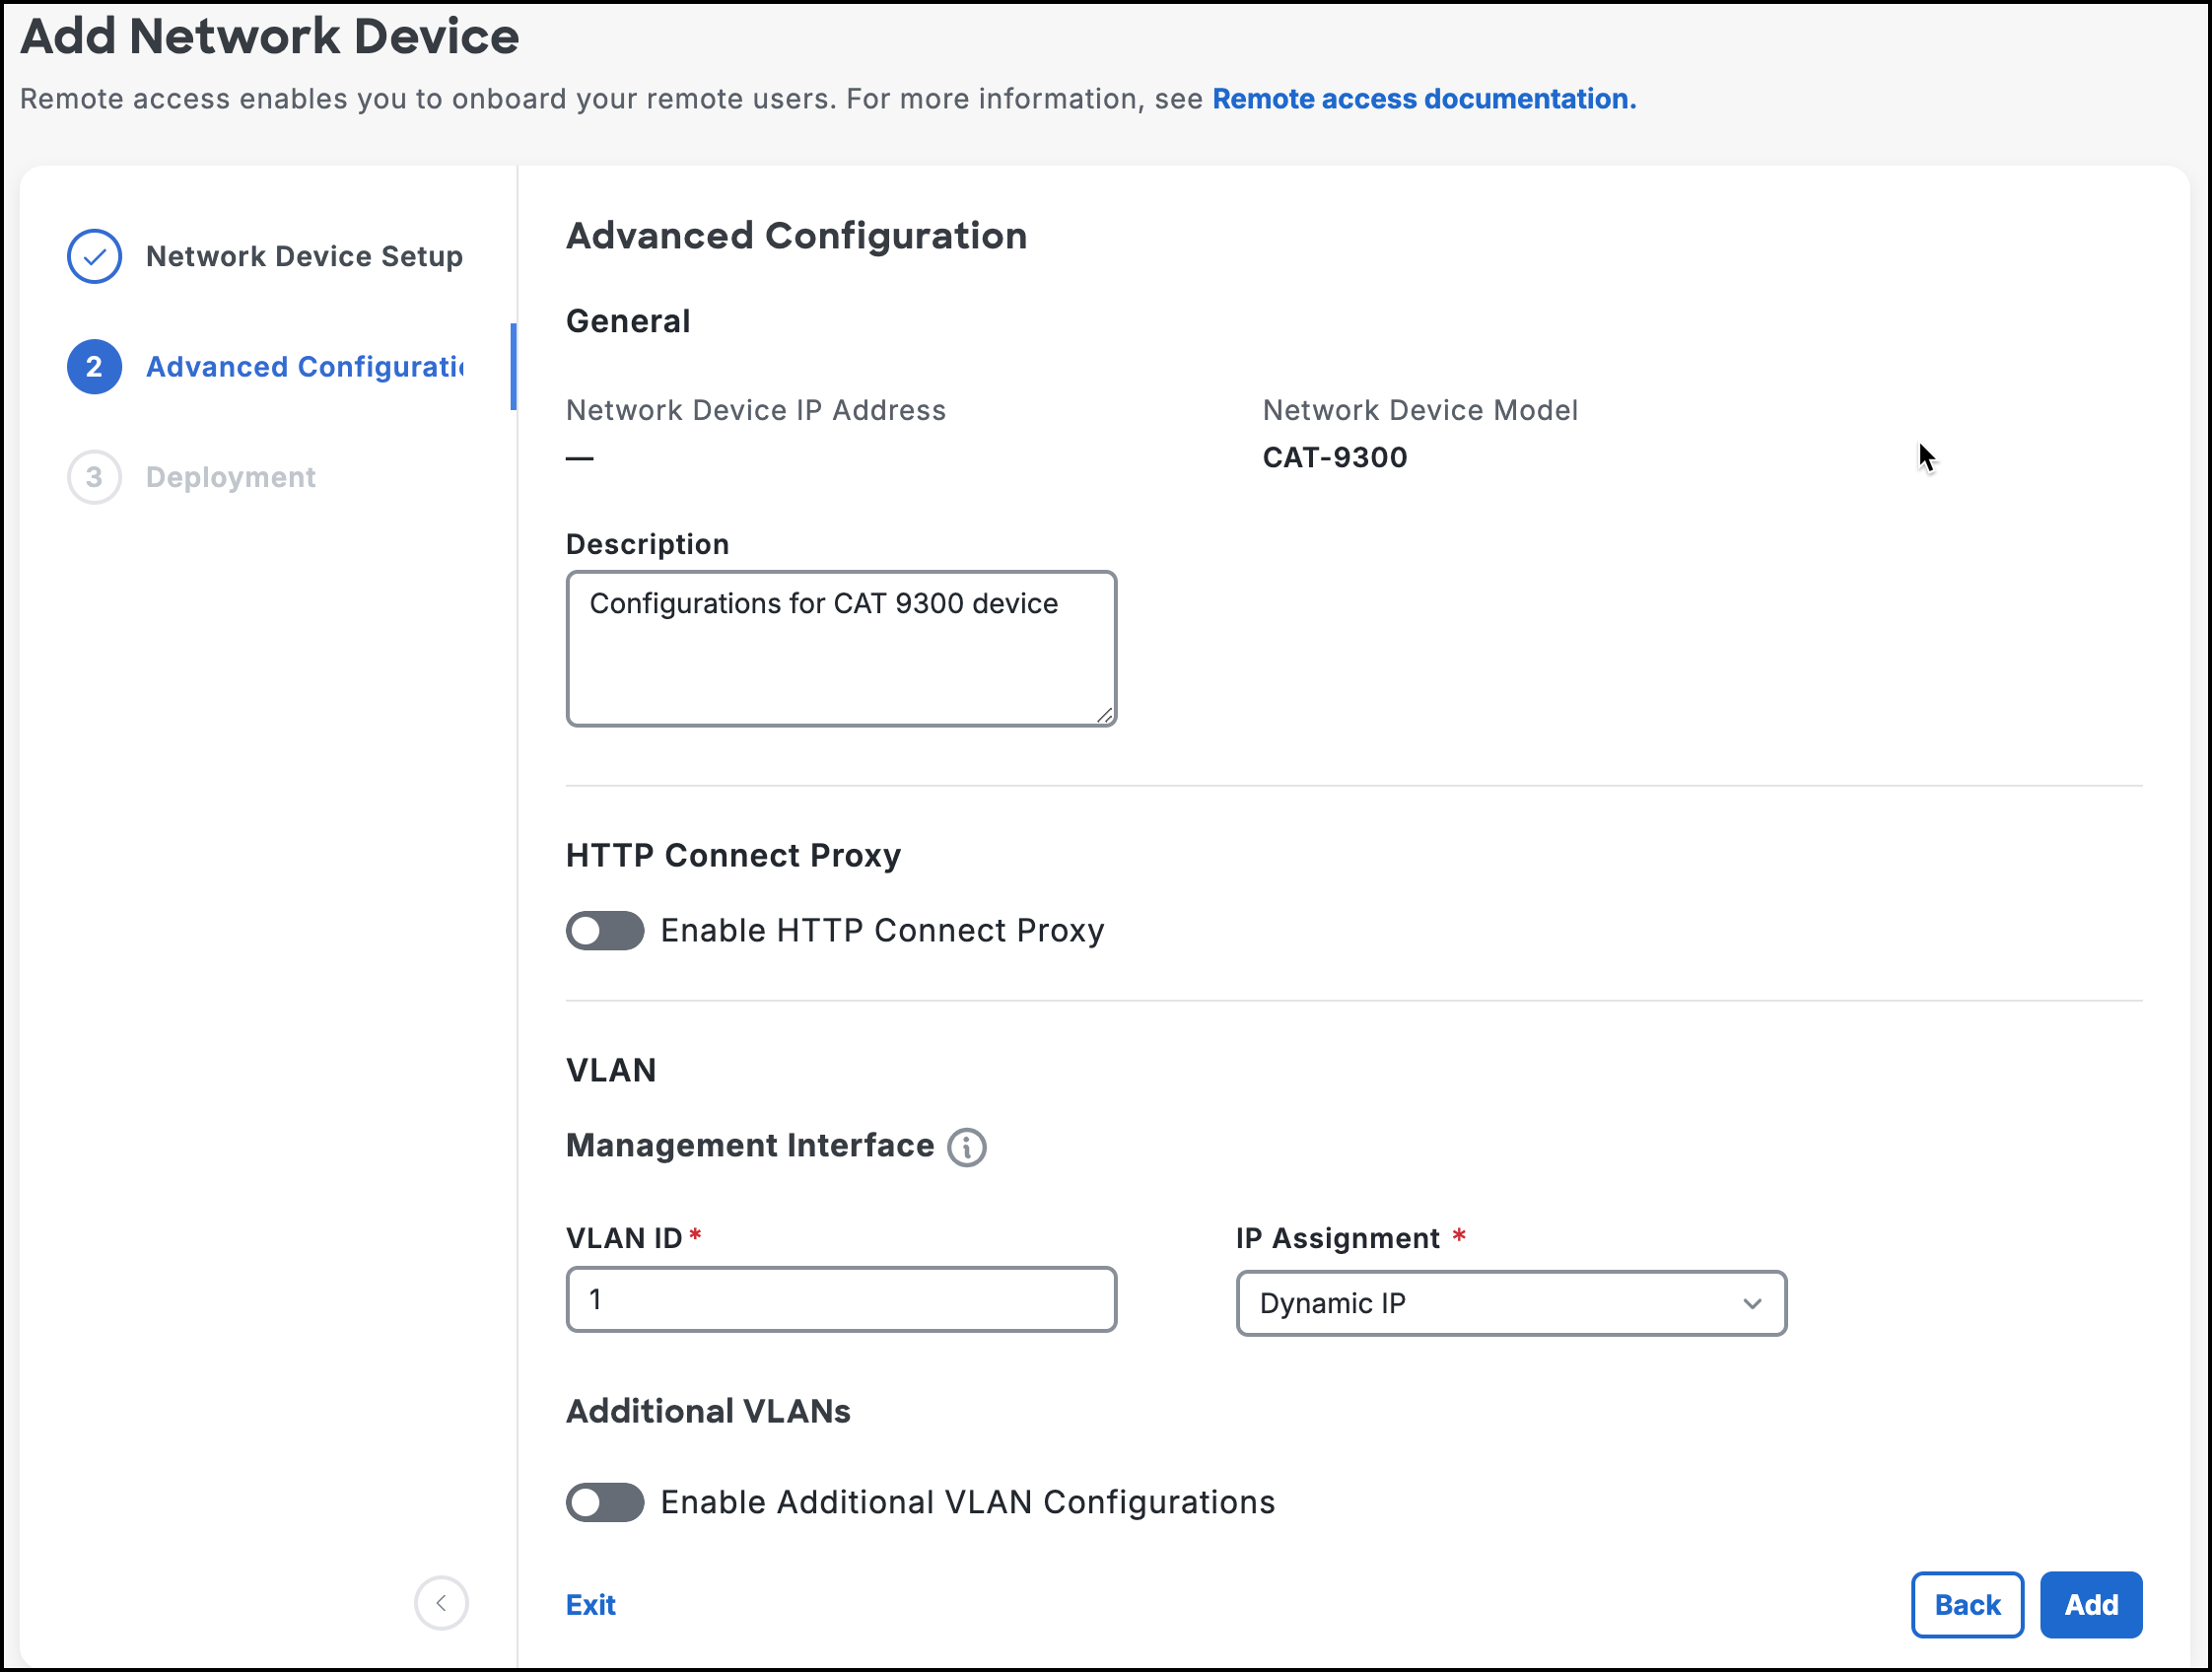
(Optional) To customize the settings, enter the required configuration details on the page.
Click Add. The CLI commands tailored to your device configuration are generated and displayed in the Recommended CLI Deployment Commands section of the Deployment tab.
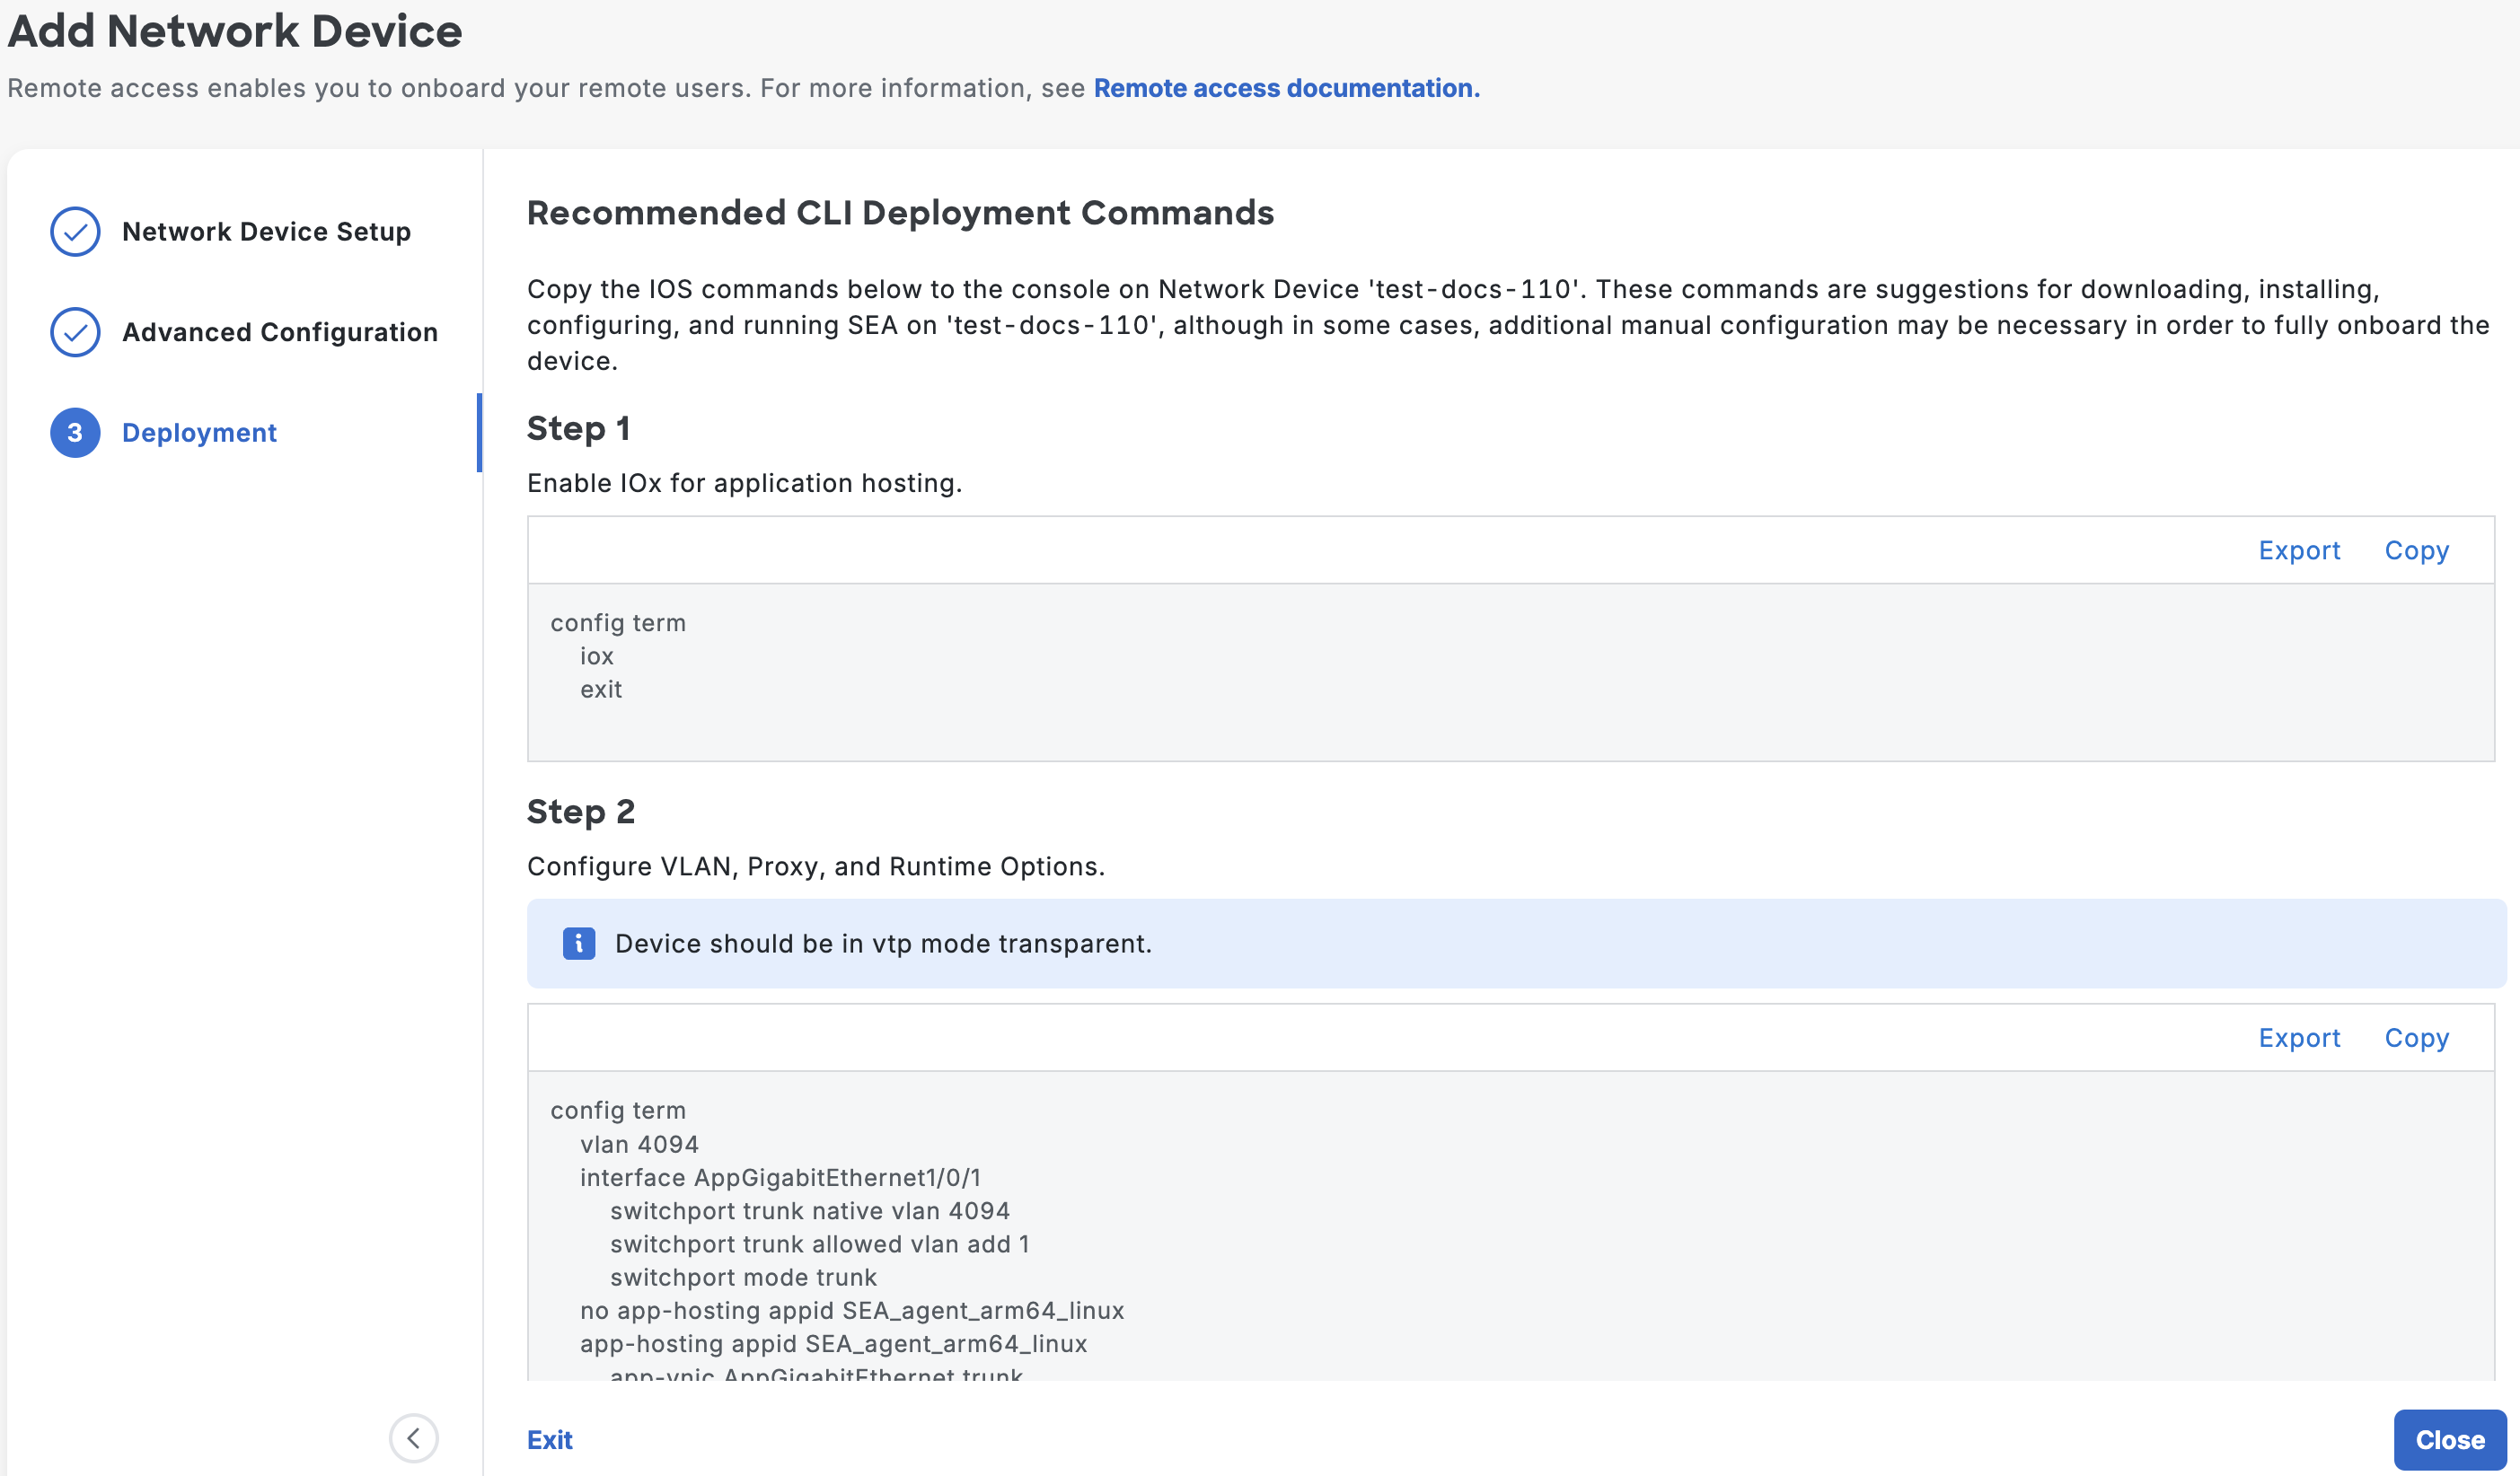
Copy the generated CLI commands from the dashboard and run them on the console of your device to:
a. Enable and configure IOx
b. Configure VLAN, proxy, and runtime options
c. Download and install the SEA agent
Note: Download the SEA Agent to your local device by clicking Download SEA Agent. Then, copy the package to the flash drive of your network device and use the command in Step 3 of Recommended CLI Deployment Commands to install it.
Click Close after running the commands.
After successfully running the commands, the status of the network device changes to active on the System Management page.
The CLI commands are automatically saved. You can run them at a later time also. Click View Deployment Commands under Deployment Details to view the commands.
SEA Agent Connectivity Modes
The SEA Agent Connectivity Mode is displayed under the Deployment Details section to help you manage the keys for connection between SEA agent and IoT Operations Dashboard. When you add a device for the first time, the mode will be Recovery Mode. This status remains active for 48 hours. During this time, when you install the SEA agent by running the CLI commands, a new key (rotated key) will be generated, and the agent connects to the IoT Operations Dashboard using the rotated key. Subsequently, the mode changes to Rotation Mode. If the agent is unable to connect to the IoT Operations Dashboard using the rotated key, you will be prompted to switch to Recovery Mode. Upon switching, the agent connects to the IoT Operations Dashboard using the recovery key.
Note: You can switch to Recovery Mode by clicking the three dots (...) next to the View Deployment Commands area under the Deployment Details section.
Edit Configuration Details
You can change the configuration settings available under the Network Device Details and Additional Configuration sections. Any changes to the settings will trigger the generation of new CLI commands. You must run these commands on the console.
Note: After enabling SEA on a Cisco Catalyst 9300 device using CLI with the HTTP Connect Proxy option, you can't disable this option by clicking Edit on the Additional Configuration page.
To edit the Network Device Details section, follow these steps:
- On the System Management page, under Network Device Details, click Edit. The Edit Network Device Details window opens.
- In the window, edit the Network Device Name and Network Device Description in the respective fields.
- Click Save.
To edit the Additional Configuration section, follow these steps:
- On the System Management page, under Additional Configuration, click View Details. The Additional Configuration window opens, displaying the current settings.
- In the window, click Edit. The Edit Additional Configuration page appears.
- Modify the settings as required, and click Save. Based on your input, the CLI commands are updated. You can find these commands under the CLI Restart Commands section to execute on the device's console.